8 Tips for any Photographer, with any Camera
For the start of 2016 I'm giving you 8 tips on how to take and make better images. To prove that this has nothing to do with how much fancy gear you have, all these tips can be applied to any camera, and all the example images were shot and edited using only my phone.
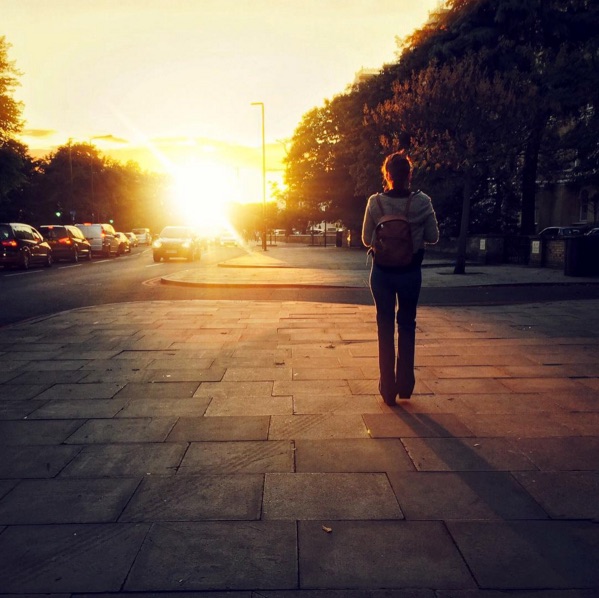
Tip 1: Teach yourself to recognise good light.
I’m putting this up front because I can’t emphasise it enough, and it’s something you can practice every minute of the day, with or without a camera. Photography means, ‘writing (graph) with light (photo)’. Any camera you own is only a light proof box which captures light coming in. Some are fancy, some are simple, but this is always the essence. The single biggest tip I can give you is ‘learn to recognise and appreciate good light', then capturing it becomes the easy part. Is the light coming in through the trees in a beautiful way? What is the colour of the light? Is it bouncing off a reflective surface and doing something interesting? Is it creating unique shadows? If you can learn to see good light you are halfway to becoming a good photographer.


Tip 2: Compose your shot.
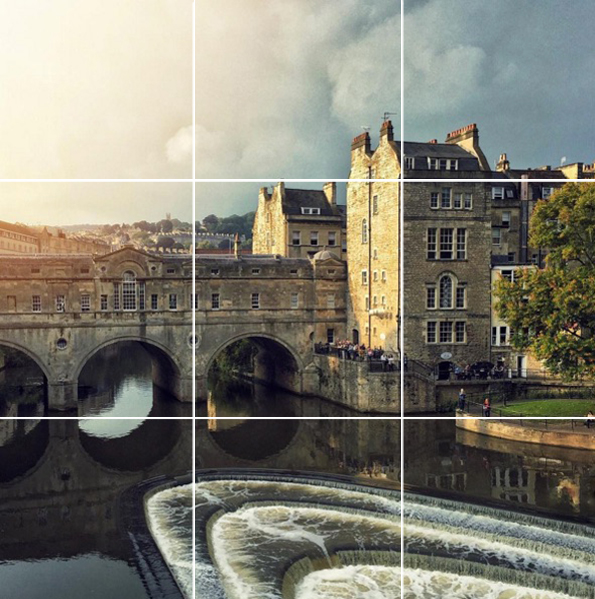
There are many schools of thought on how to compose a photograph, but a solid basic principle to start with is the good old ‘rule of thirds’. You want to imagine breaking your frame up into 9 blocks of equal size, and the easy way to do this is to mentally draw two vertical and two horizontal lines across the thirds of the frame. Now to use this pattern in your framing you either want to compose any interesting vertical or horizontal lines on these imaginary thirds, or you want to place any points of interest on one of the four intersections of these lines. It sounds complicated but the idea will click quite quickly if you give it a go, and it will serve to get you thinking about how shapes intersect and arrange within the frame. On top of this it will give you a more pleasing composition than just pointing your camera straight at a subject. The trick then is to learn this, and other techniques which get you thinking about arranging elements within the frame, and then learn when to break the rules. Here are a couple of examples of using the rule of thirds:

Tip 3: Content is king.
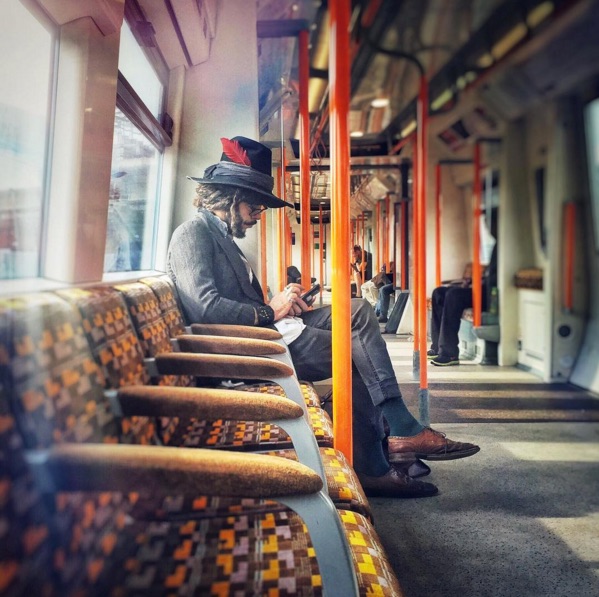
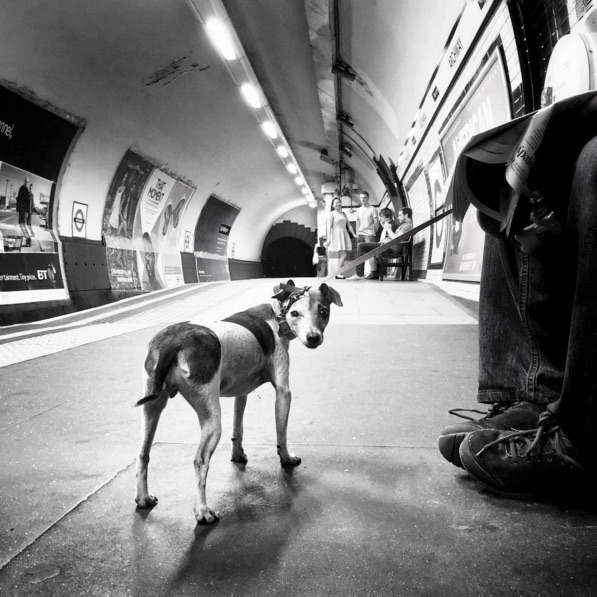
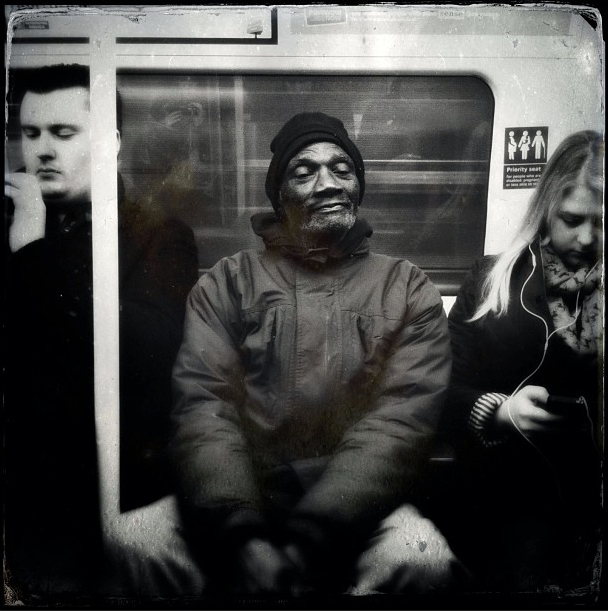
It’s almost a cliche at this point but it’s as true as ever. You have to ask yourself what you’re shooting. What is your subject? Is it interesting? Is it too obvious to say that shooting something engaging will make for an engaging photo? It may be redundant but if you think your shots are too boring, the problem may be this simple. Shoot something which tells a story, or freezes a moment in time. That day the kids were playing with that pile of leaves. That light setting over those hills. That guy on the street in that crazy hat. Remember that what you put in front of the lens will make the photograph, not the camera. You can’t blame the gear. Better cameras only make incremental differences to the quality of the capture, but it cannot make up for a boring subject. A boring scene shot on the best camera in the world is still only a boring photo, but a compelling scene shot on a mobile phone can win awards.
Tip 4: Don’t neglect your background.
You may be out shooting a particular person or thing, but your subject will only make up a portion of your frame. Ask yourself what you are filling the rest of the frame with. By rotating around your subject a bit you will totally change the background they are set against in the composition. How bright or dark is the background? What is the dominant colour of the background? Does it serve to separate them and highlight what’s going on, or does your subject get lost against the scene behind them? If your background isn’t working, notice it, and shift position. You have a subject, now move and frame them to place them in the scene.
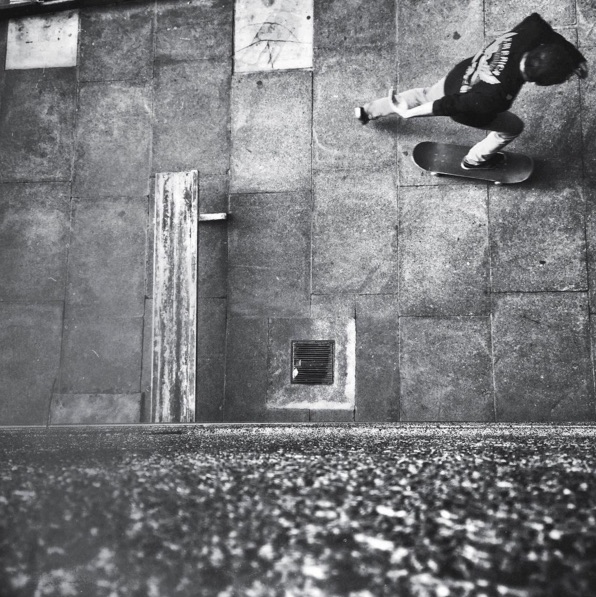
Tip 5: Look at something from a different angle.
We are used to viewing things from 5-6 feet off the ground but you may discover a unique shot if you can find a way to get above your subject, or shoot it from below somehow. Perhaps you can get right up close, or shoot it from an interesting angle. Remember to think outside the box and experiment with where you place the camera to give us a fresh vantage point on a familiar subject.
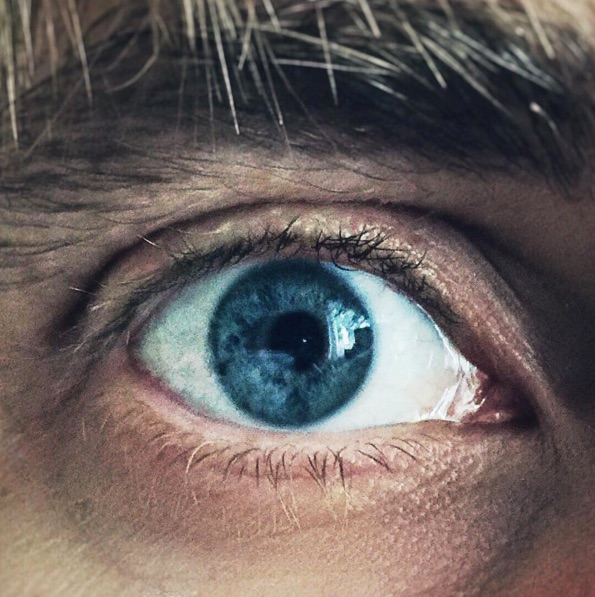
Tip 6: Catch the detail.
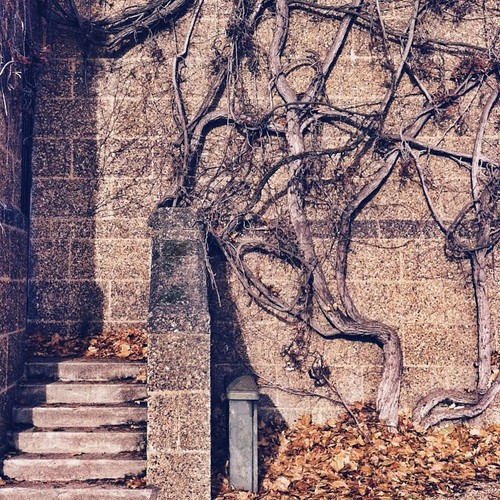
On top of shooting people and places, notice the little things. Keep your eye out for the small details we all walk past everyday. By getting in close with your camera, you could be giving us a glimpse into a world we never stop to notice. Think about textures in the concrete, patterns on the leaves, insects, shapes in bark. Most mobile phones today will allow you to get very close and maintain focus, with the added bonus that you will force the background out of focus, giving you that sexy blur for your shot which people associate with higher end cameras. Give it a go.

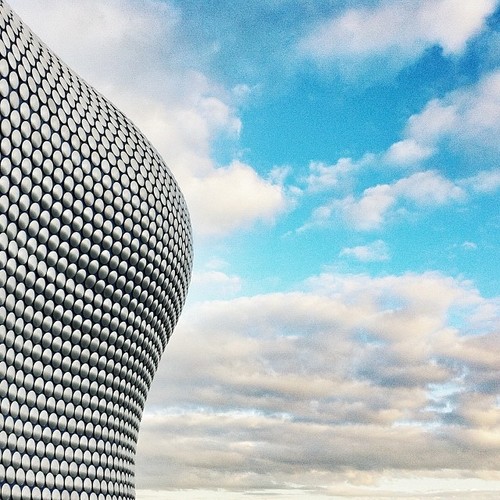
Tip 7: Look for lines.
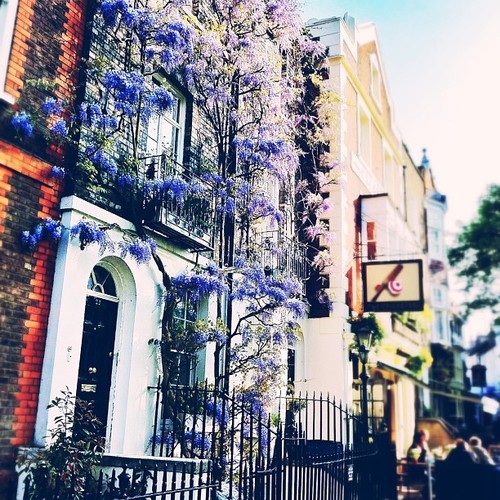
Everywhere we go we are faced with lines. Telegraphs poles. The horizon. Chem trails in the sky. Tree trunks. Roads. Think about how you can use these lines to point out your subject or create an interesting shape in the frame. Sometimes you can use these lines to literally point at your subject by placing them at the convergence of these lines within the frame. Sometimes you can use the lines to create a frame around the subject. Start to notice the lines around you, and use them to your advantage.


Tip 8: Wait for the decisive moment.
This is where all the tips above come together in a moment. Many times people will put the camera to their eye to take one picture. For example, Mom wants to snap a picture of her kids playing in a stream. She lifts the camera, clicks, and thinks ‘job done’. But what if you watch a little longer, adjust your position, look at what the light is doing, observe how your subjects are moving, and wait for the moment something magical happens? This is the difference between simply taking a picture or actually making a picture. Henri Cartier-Bresson, who is considered the father of street photography, coined the phrase ‘the decisive moment’ to express that confluence of events which make a good shot. He would camp out in a spot where he knew the light was good and the composition worked, and then wait for the magic to happen. Obviously we don’t all have the time to shoot like this, but maybe his attitude helps us take a small step away from a 'quick snap' mentality, towards actually creating a memorable image by staying with the moment and remaining aware of all the elements we’ve spoken about, to create a unforgettable photograph.

Best of luck.
Share what you come up with.
Happy light-writing in 2016!
(and if you enjoyed these shots, follow me on Instagram: @seantuck)
iPhoneography: Editing a Sunset with Apps
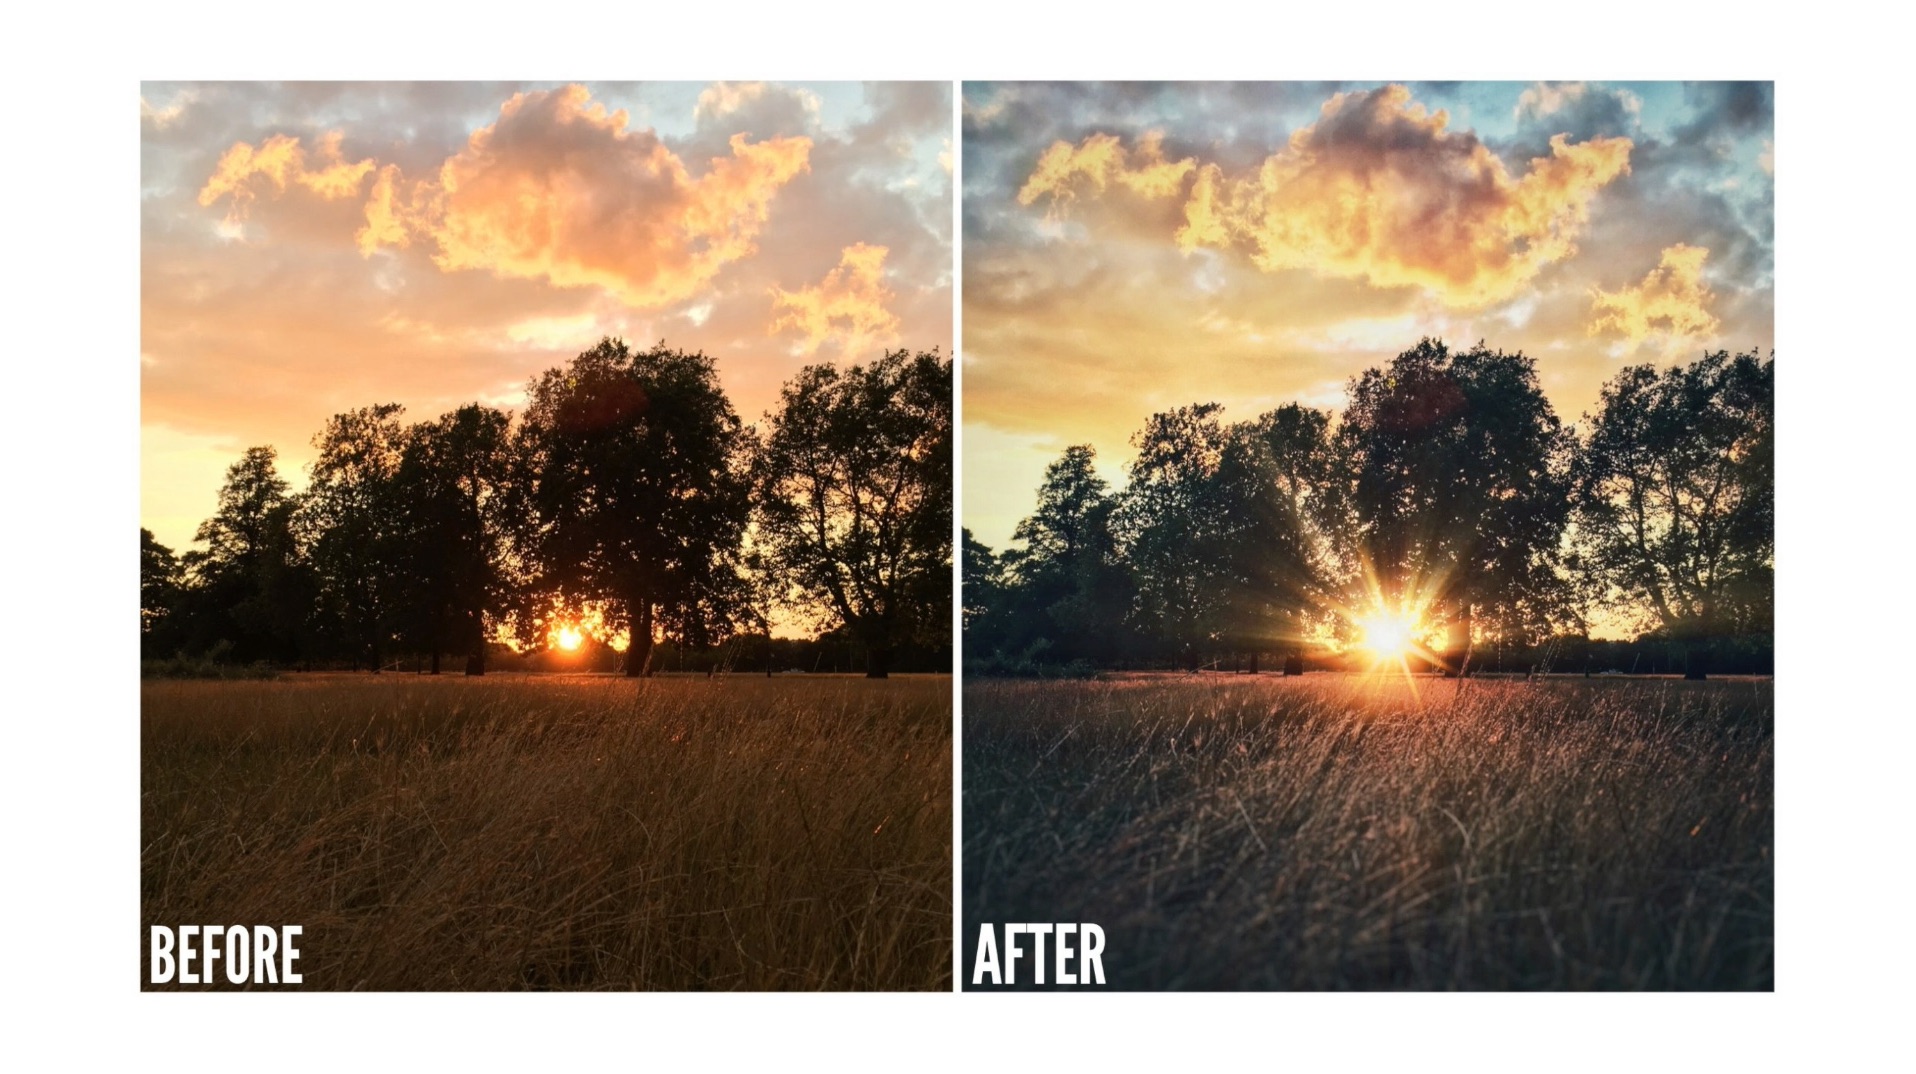

I head out for a walk every evening after the day's work to decompress. As part of this little routine I am setting myself the challenge of shooting, editing and posting something from my iPhone everyday.
A couple of people have recently asked me what sort of editing I do on the shots I post, so I created a video tutorial below. I'll keep this brief because the tutorial ended up being a little more verbose than I intended, but the following video should give you an overview of how to use the following apps: Snapseed, Rays, Lens Distortions and Darkroom (v.2).
My suggestion?
Get out there, shoot your own setting sun, grab a coffee, fire up this video, and edit along.
Thanks for watching.
I would love to see your shots and here about the apps you choose to use in the comments.
Happy app-ing.
My Most-Used Camera

No surprises: it's my phone.
I don't think I'm over stating it when I say that my phone has contributed more to building a photographic style than any other camera I've ever owned, and there are two big reasons for that.
Firstly, it gives me permission to shoot more 'carelessly'.
When I'm taking shots on my phone I'm not shooting for a client but just for the sheer joy of shooting, and if it doesn't come out that well I can always delete it; or post it anyway and just blame the short falls on the phone. I am giving myself the freedom to be less anal, which as a perfectionist I need, and It opens my eye to the ‘happy accident’, which isn't something I have the luxury to spend time experimenting with on a shoot. I also find that once I have tried out braver shots on my phone, and seen that they are working, I then have the confidence to incorporate those ideas into pro shoots.

I know many photographers will look down on the use of ‘automatic settings’ and the often ‘over edited’ finish of mobile phone images, but this isn’t meant to be ‘perfect photography’ in my view, but rather catching the moments we often miss trying to set up our DSLR’s and lighting, if we even brought them with that day. This isn't about planned shots with the best gear, it's reactive photography.
I think phone photography today is similar to the Lomography revolution of the early 80’s. People began picking up inexpensive, plastic film cameras with light leeks and crappy exposure because they were small, cheap and fun to shoot with. The idea was to shoot often, and ‘from the hip’, almost in antithesis to pro photography. In fact I think many of the top 10 rules of Lomography relate directly to iPhoneography. Check them out:
1. Take your camera everywhere you go
2. Use it any time – day and night
3. Lomography is not an interference in your life, but part of it
4. Try the shot from the hip
5. Approach the objects of your Lomographic desire as close as possible
6. Don't think
7. Be fast
8. You don't have to know beforehand what you captured on film
9. Afterwards either
10. Don't worry about any rules

The spirit seems the same to me. This is organic, reactive, even viral photography.
The second reason is that my phone is the camera which is always with me.
It's a way to live, photographically, in the now. My phone burns a hole in my pocket all day, every day, reminding me to keep my eyes open for the next shot, and knowing this in the back of my mind I am more conscious of my surroundings at all times. It means I am constantly training my eye, and I'm always on the lookout for an interesting scene, or light, or subject. This kind of photo-awareness stands me in good stead for the days I do pick up my DSLR’s to shoot more deliberately. I find I notice more, and have a whole host of new angles and creative ideas on tap.
It's no secret that the image quality isn't great on any mobile phone (no not even your 41 mega pixel Nokia). The dynamic range is wafer thin, depth of field is always as deep as the ocean unless your subject is pressed up against the lens, and overall the shots make the pixel peepers physically cringe. No one is suggesting that a mobile phone camera can compete with a pro camera for quality, but if I have the option to take a good photo on a bad camera, or take no photo at all, I would rather take the shot.

I suppose this comes down to the old battle between kit vs content. Which is more important?
I have this discussion with photographers regularly, and it often turns into a heated debate.
Don't get me wrong; gear helps. I can usually tell whether a shot has been taken with a point and shoot, a cropped sensored DSLR, a full frame DSLR, or even a Medium Format. But the fact still remains that a great camera in the hands of a bad photographer will be useless. It takes a talented photographer to see and capture the moment with good skill and composition. I for one, would rather look at an image shot by a great photographer on a bad camera, than an image shot by an amateur using the best gear in the world.
Photographers have gone on about it since Henri Cartier-Bresson was banging on about “The Decisive Moment” in 1952. If you point your camera at disinteresting things, even if you know your settings and rules of composition, you will have a disinteresting photograph. You have to become a student of ‘life’ and ‘light’ in order to catch the moments which matter, and which say something. We see mountains of photography everyday through our friends on Facebook, but much of it says nothing. Great photography shows you a moment, a look, a scene which surprises you with a response.

So I would say work on your 'eye' first, and there are few ways better to do that than shoot, shoot, shoot. Start getting your 10, 000 hours under your belt. Get out there and look for ‘the moment’ and use whatever you have on you to catch it. If you're not happy with it, delete it, but the mere act of shooting it will build photographic muscle reflex in learning both to see and capture.
And the tool to help you learn how to see, and which gives you permission to capture 'carelessly' and often, is likely sitting in your pocket right now.
For those who I know will be interested, I shoot on an iPhone 4 and my go-to editing apps are:
Snapseed and PicsPlay Pro for more controlled editing.
Camera+ but only really the amazing ‘Clarity’ function.
Facetune for basic retouching.
VSCO Cam to add some vintage film tones.
Mextures for light leaks and destressed effects.

Perfect B&W if I am going the Black and White route.
Big Lens occasionally to fake some depth of field.
Over Text + Photo to add text over the image.
Photosynth for panoramas.
Instagram, but only to post and rarely to edit.
PicFrame and Phoster for some fun presentation options.
If you want to take a look through my iPhoneography visit www.seantuckiphone.tumblr.com or follow me on Instagram: @seantuck.


Wells Blog
Duis mollis, est non commodo luctus, nisi erat porttitor ligula, eget lacinia odio sem nec elit. Maecenas faucibus mollis interdum. Nulla vitae elit libero, a pharetra augue.