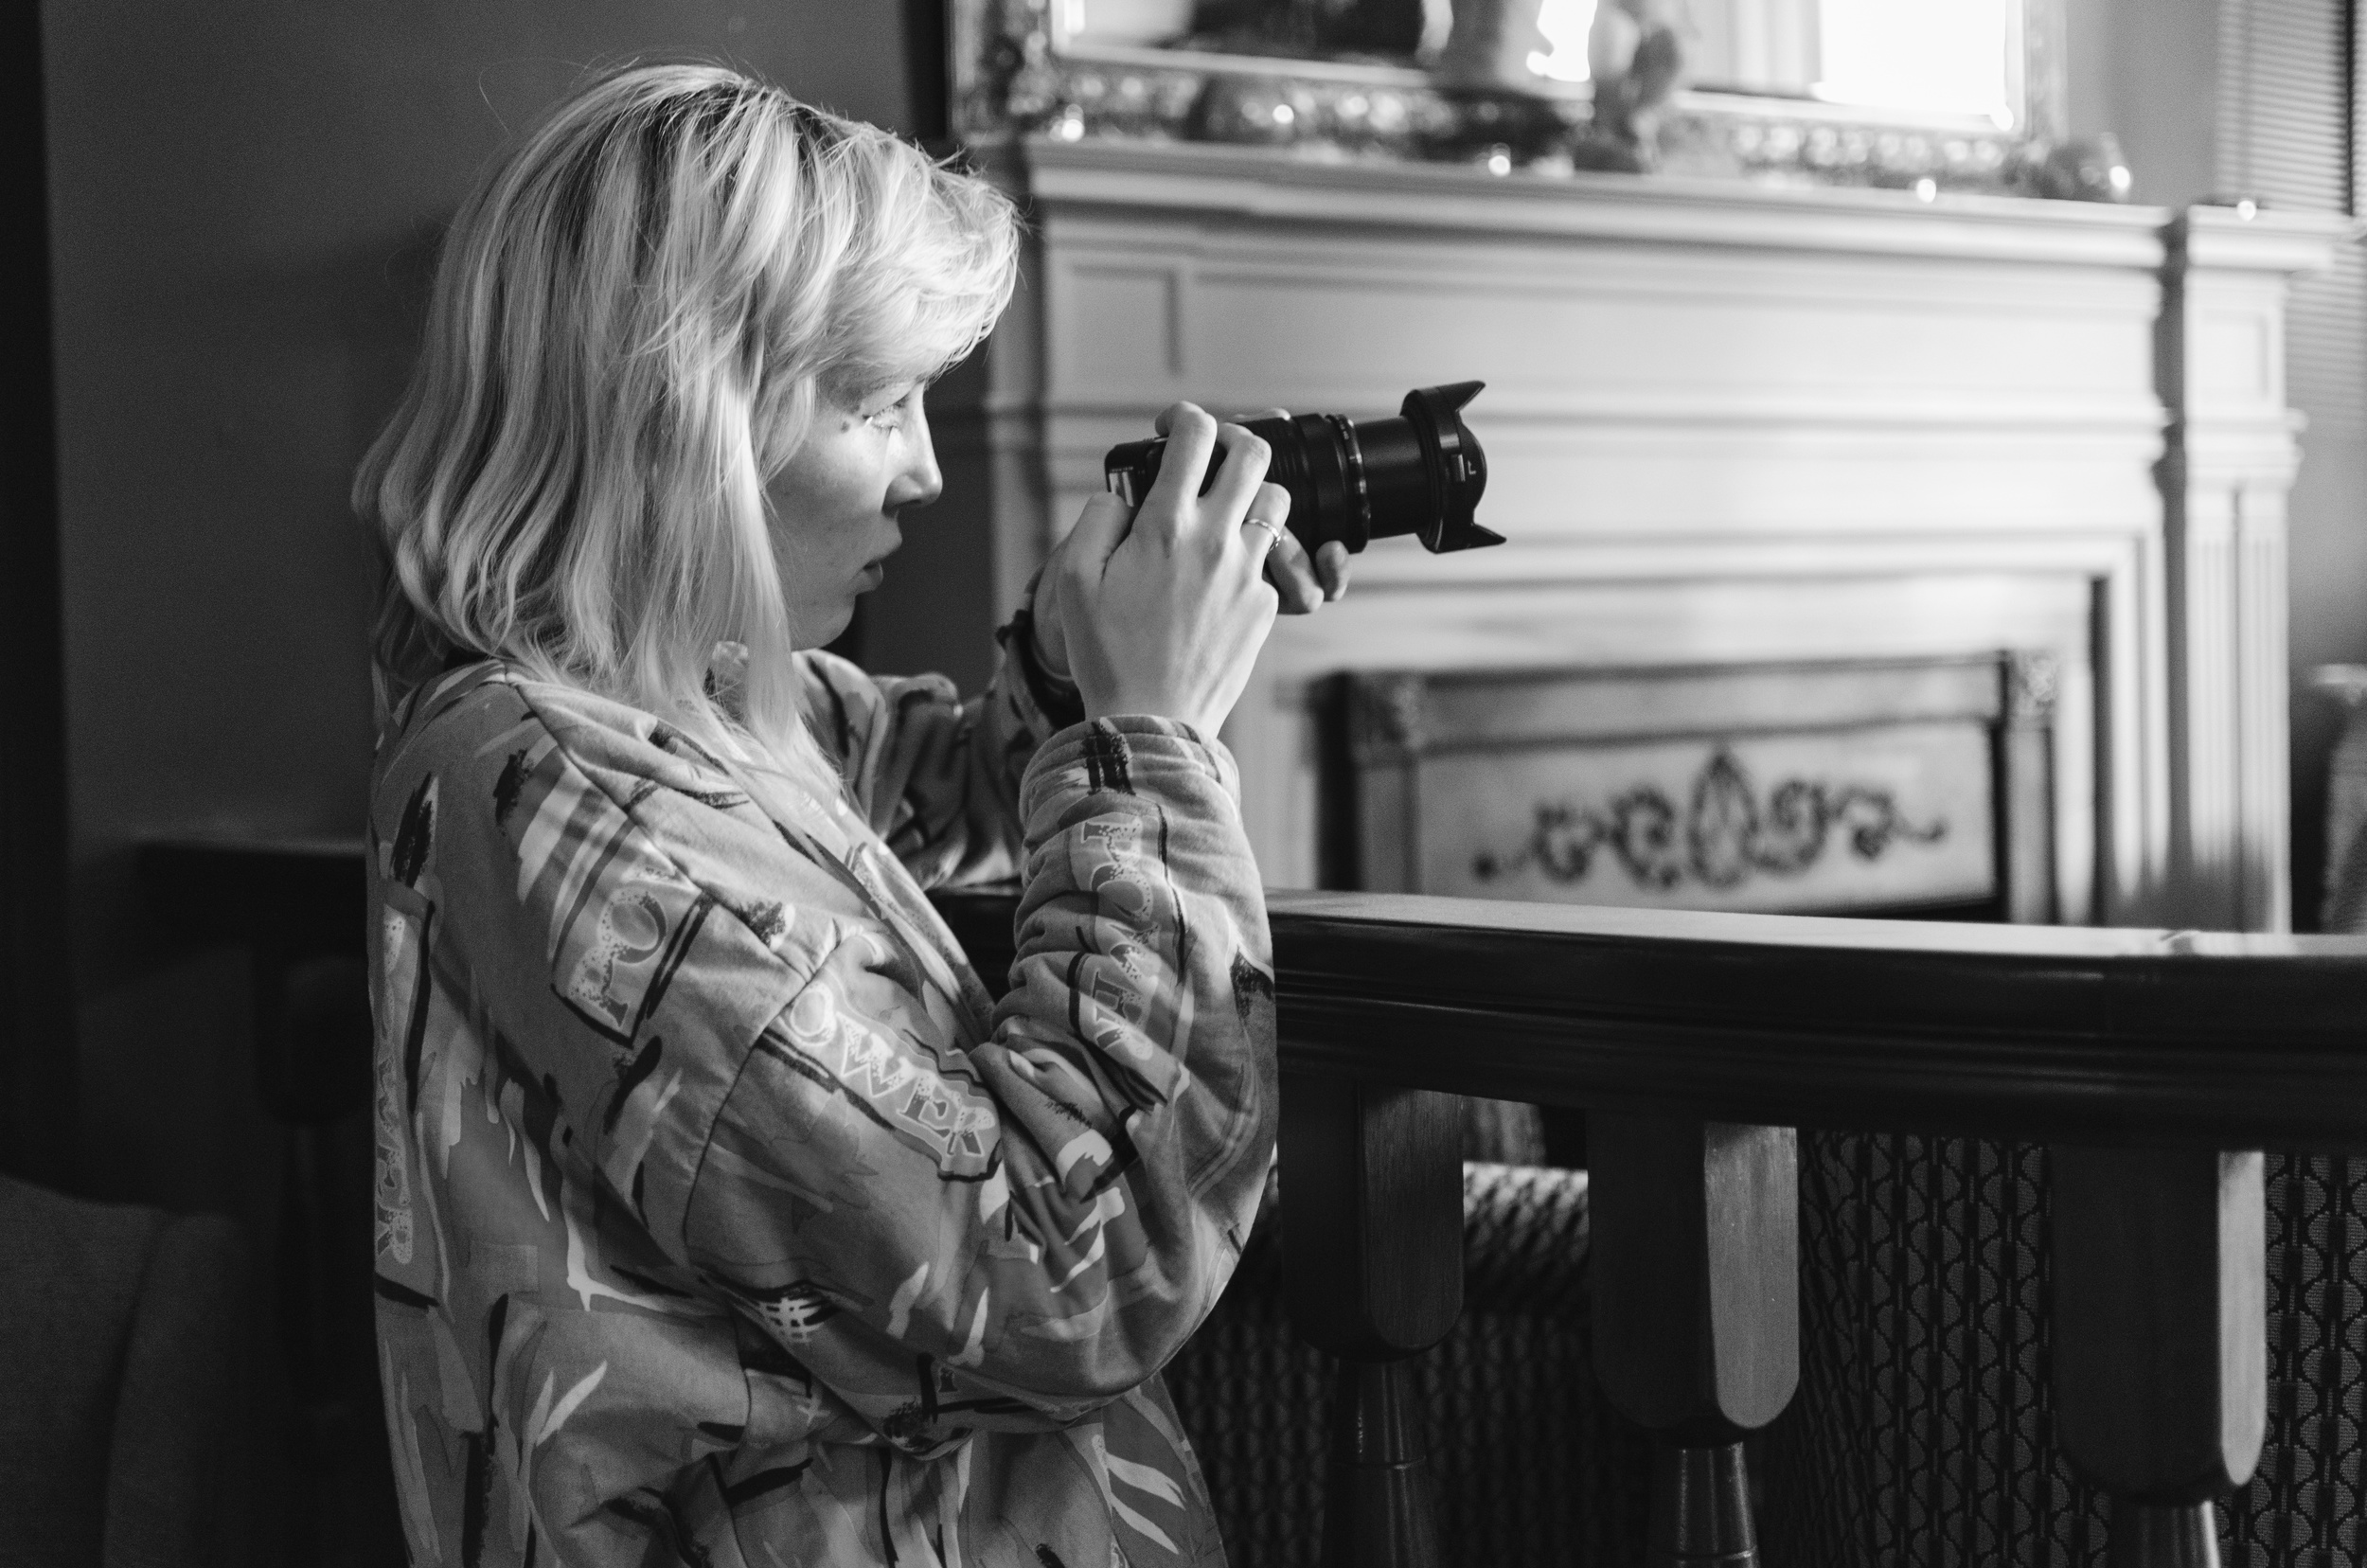
Advice on Printing your Images
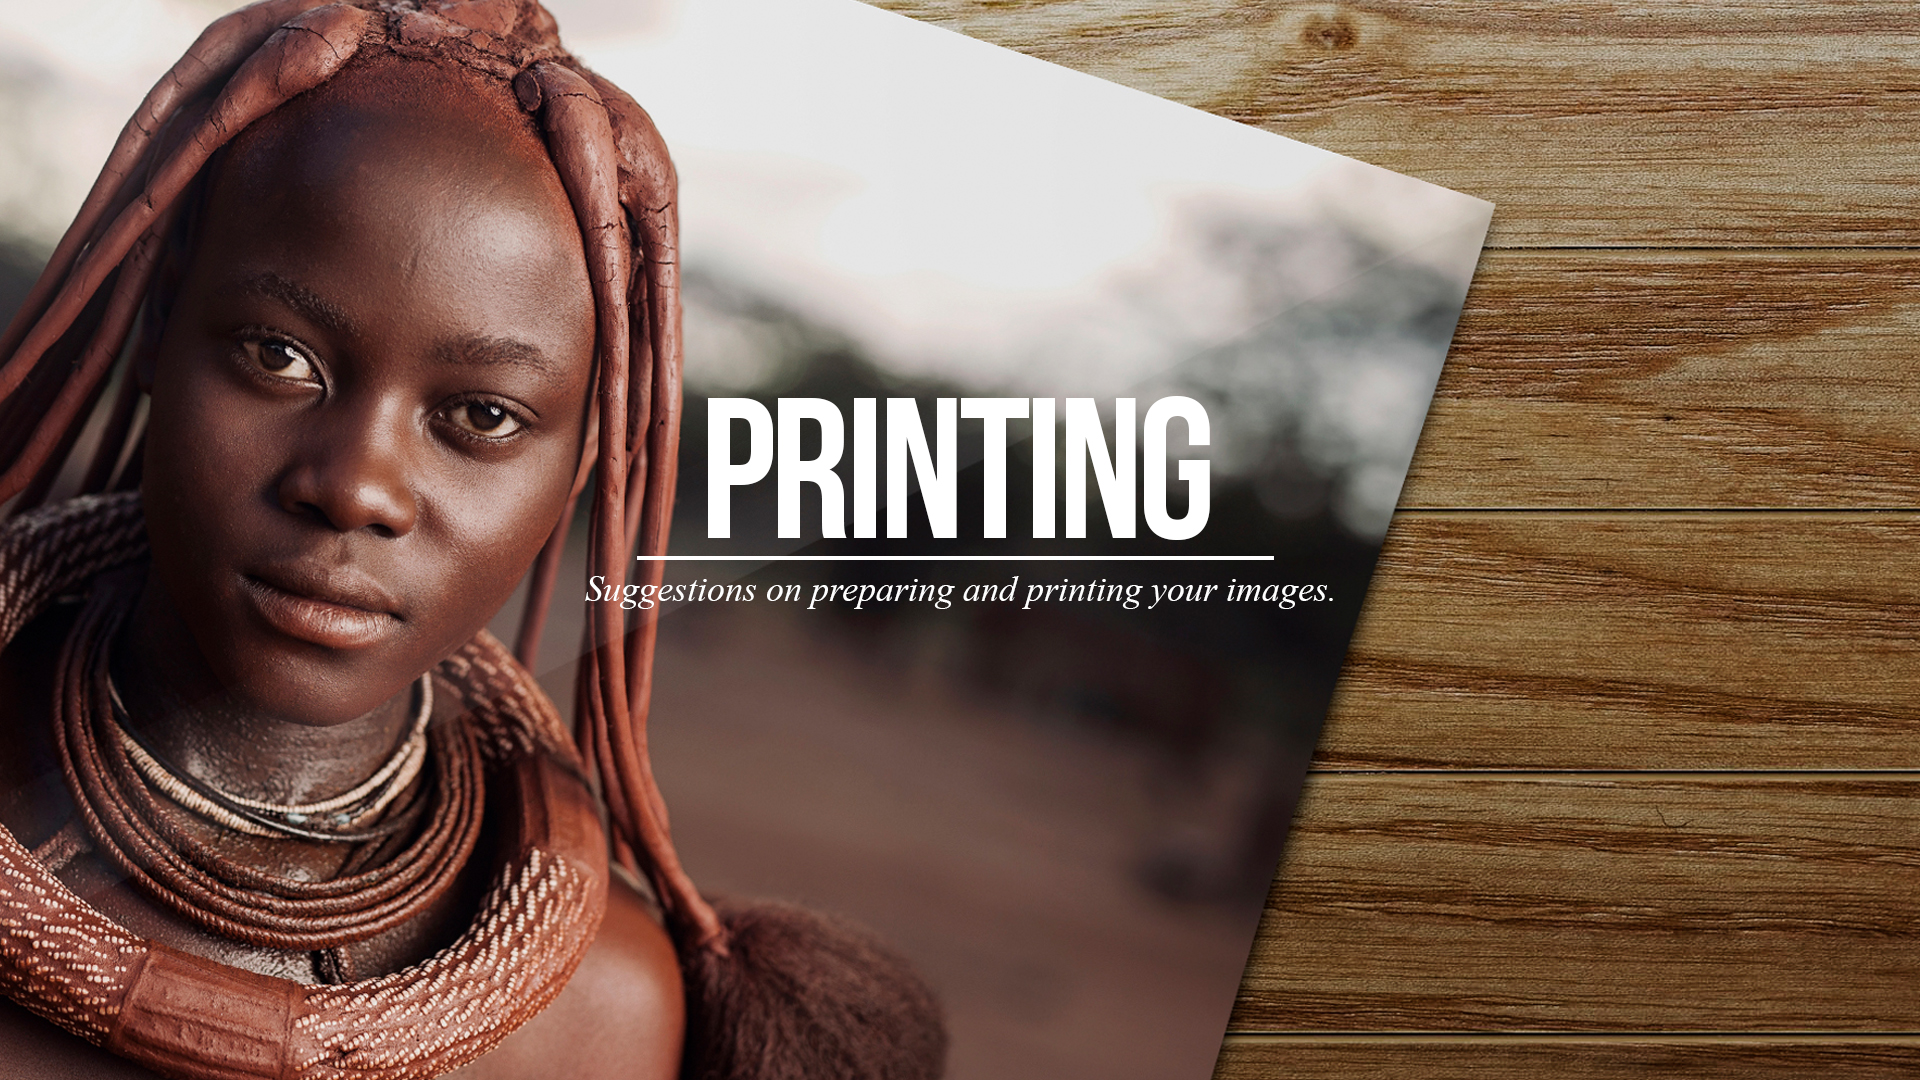
I have never professionally printed any of my images before, which, having been a professional photographer for many years now, seems like a ridiculous fact.
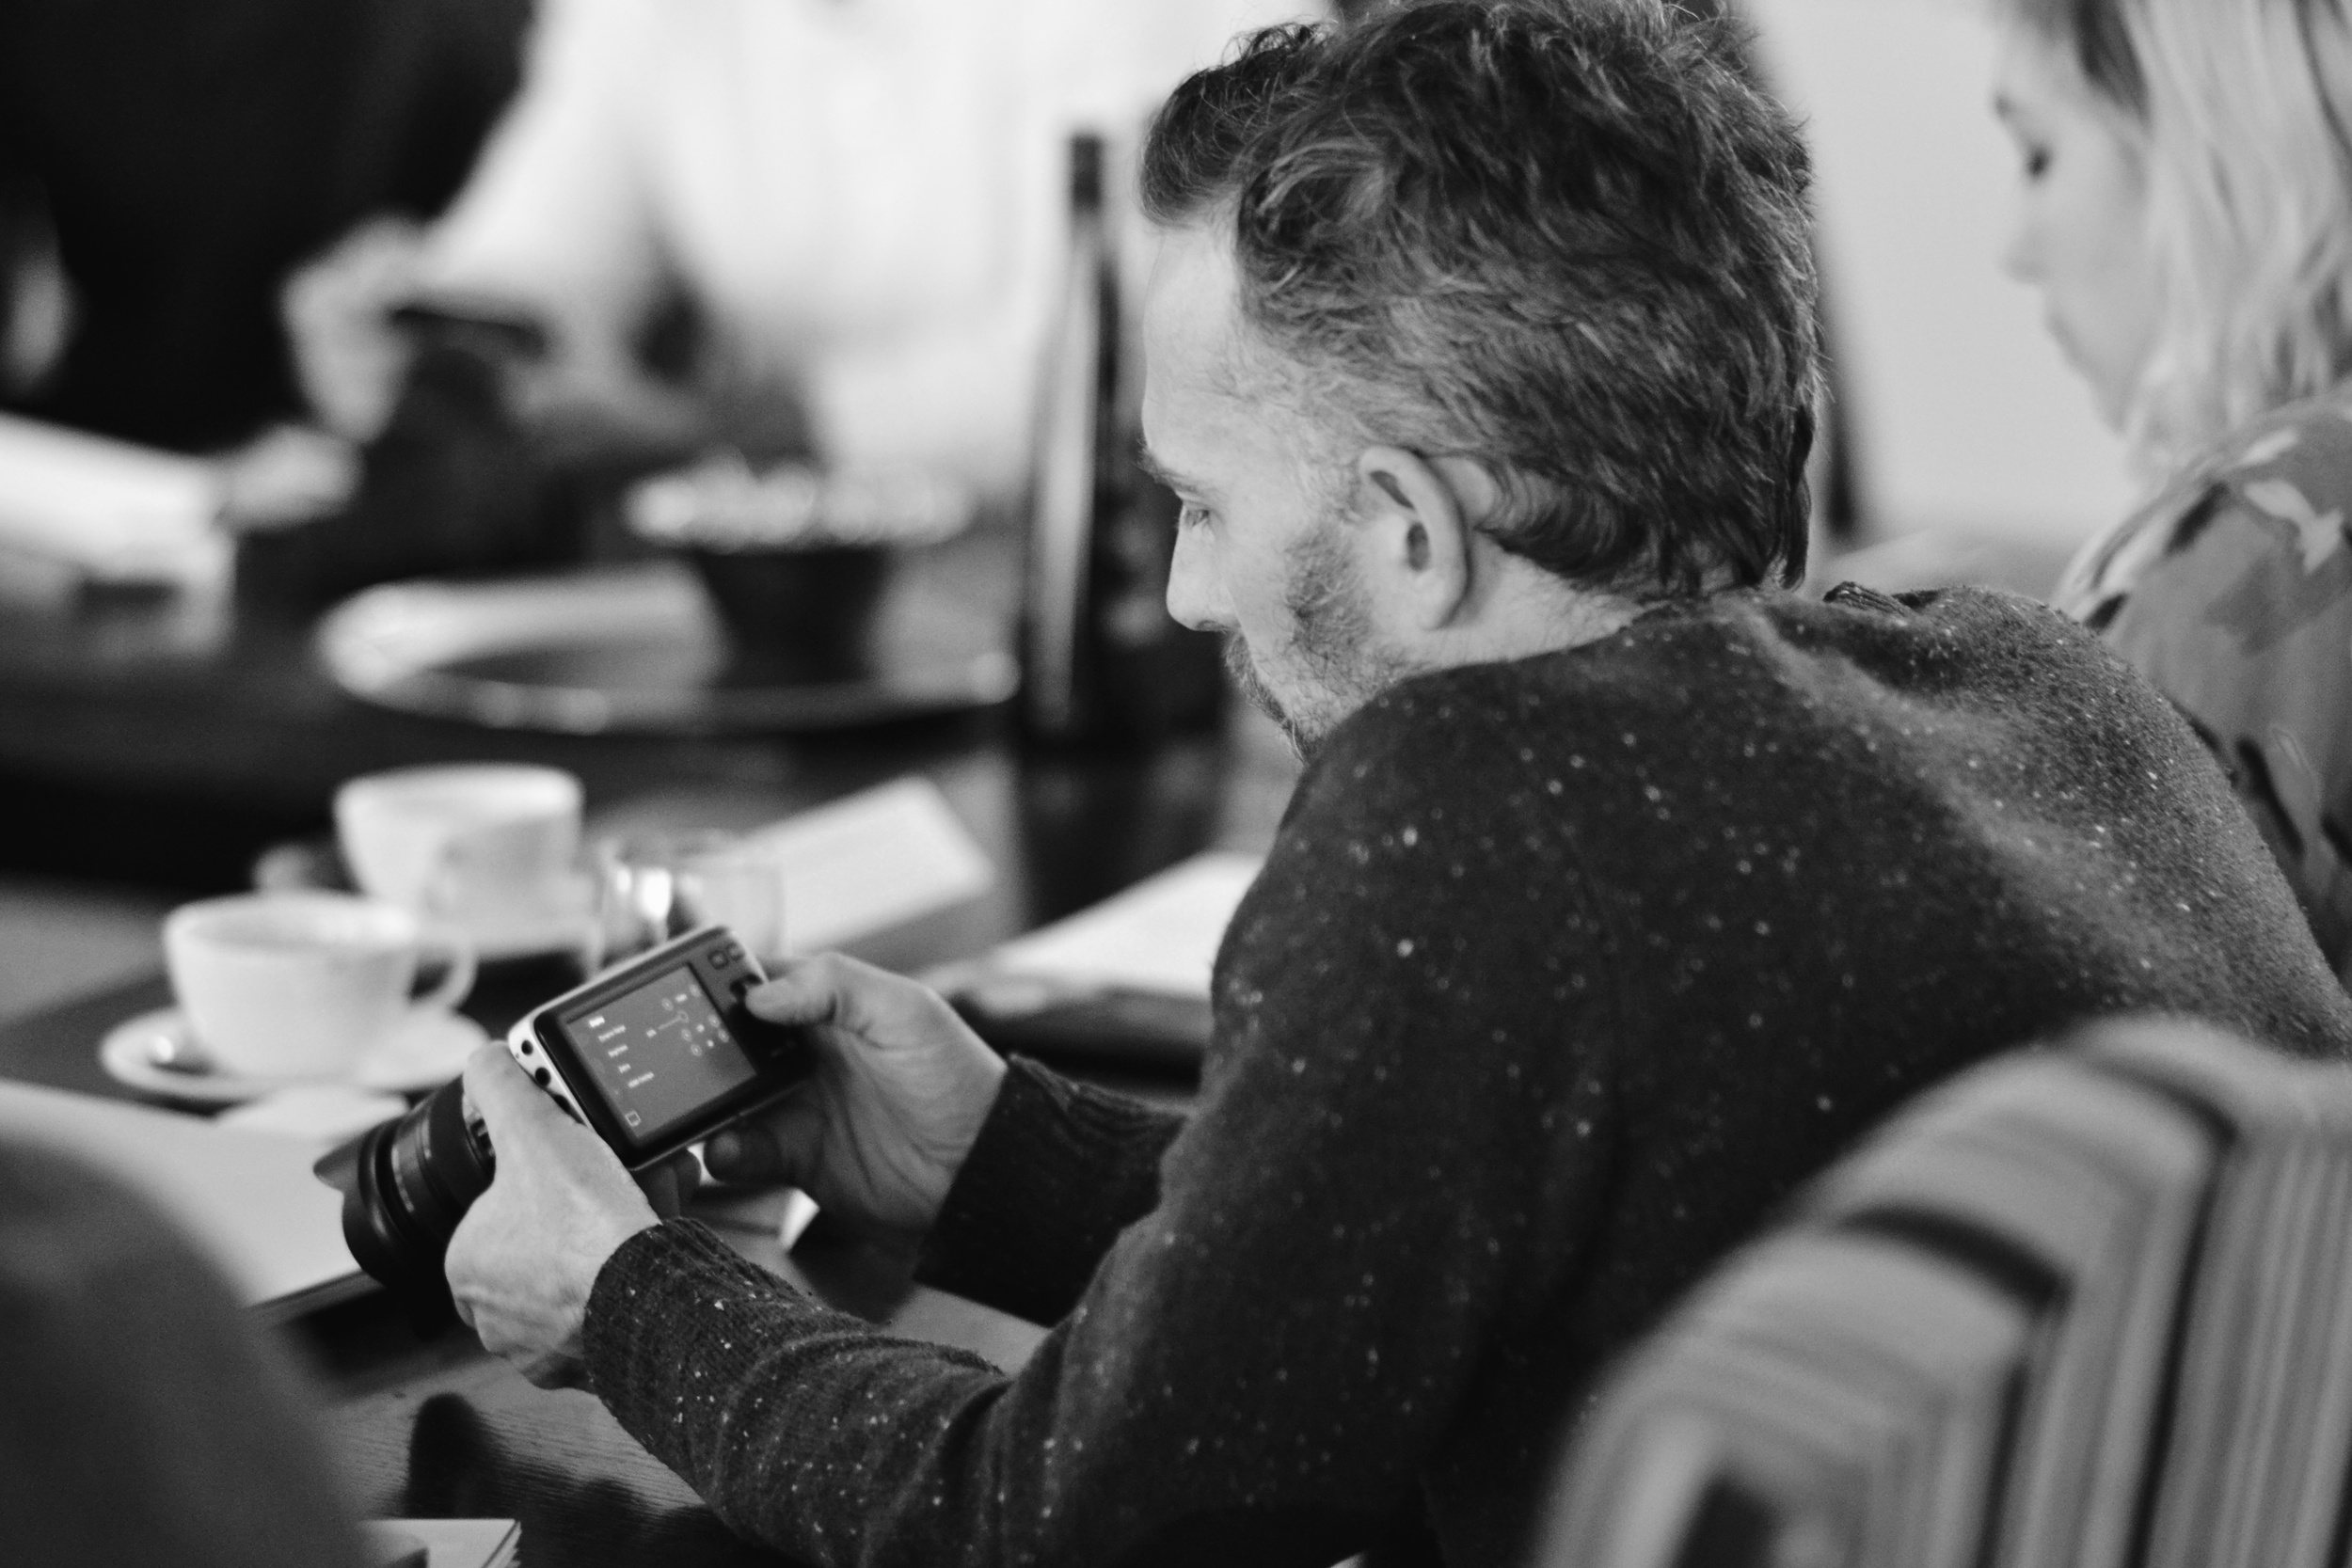
To remedy this I decided to take 3 images from my recent shoot with the Himba Tribe, down to Genesis Imaging in London, and get them professionally printed. Mark Foxwell, their creative director, kindly gave me some time to share advice to camera for print virgins like myself.
I hope this video challenges you to get out and print one of your favourites.
Very special thanks to Mark and Gabrielle at Genesis Imaging: http://genesisimaging.co.uk/
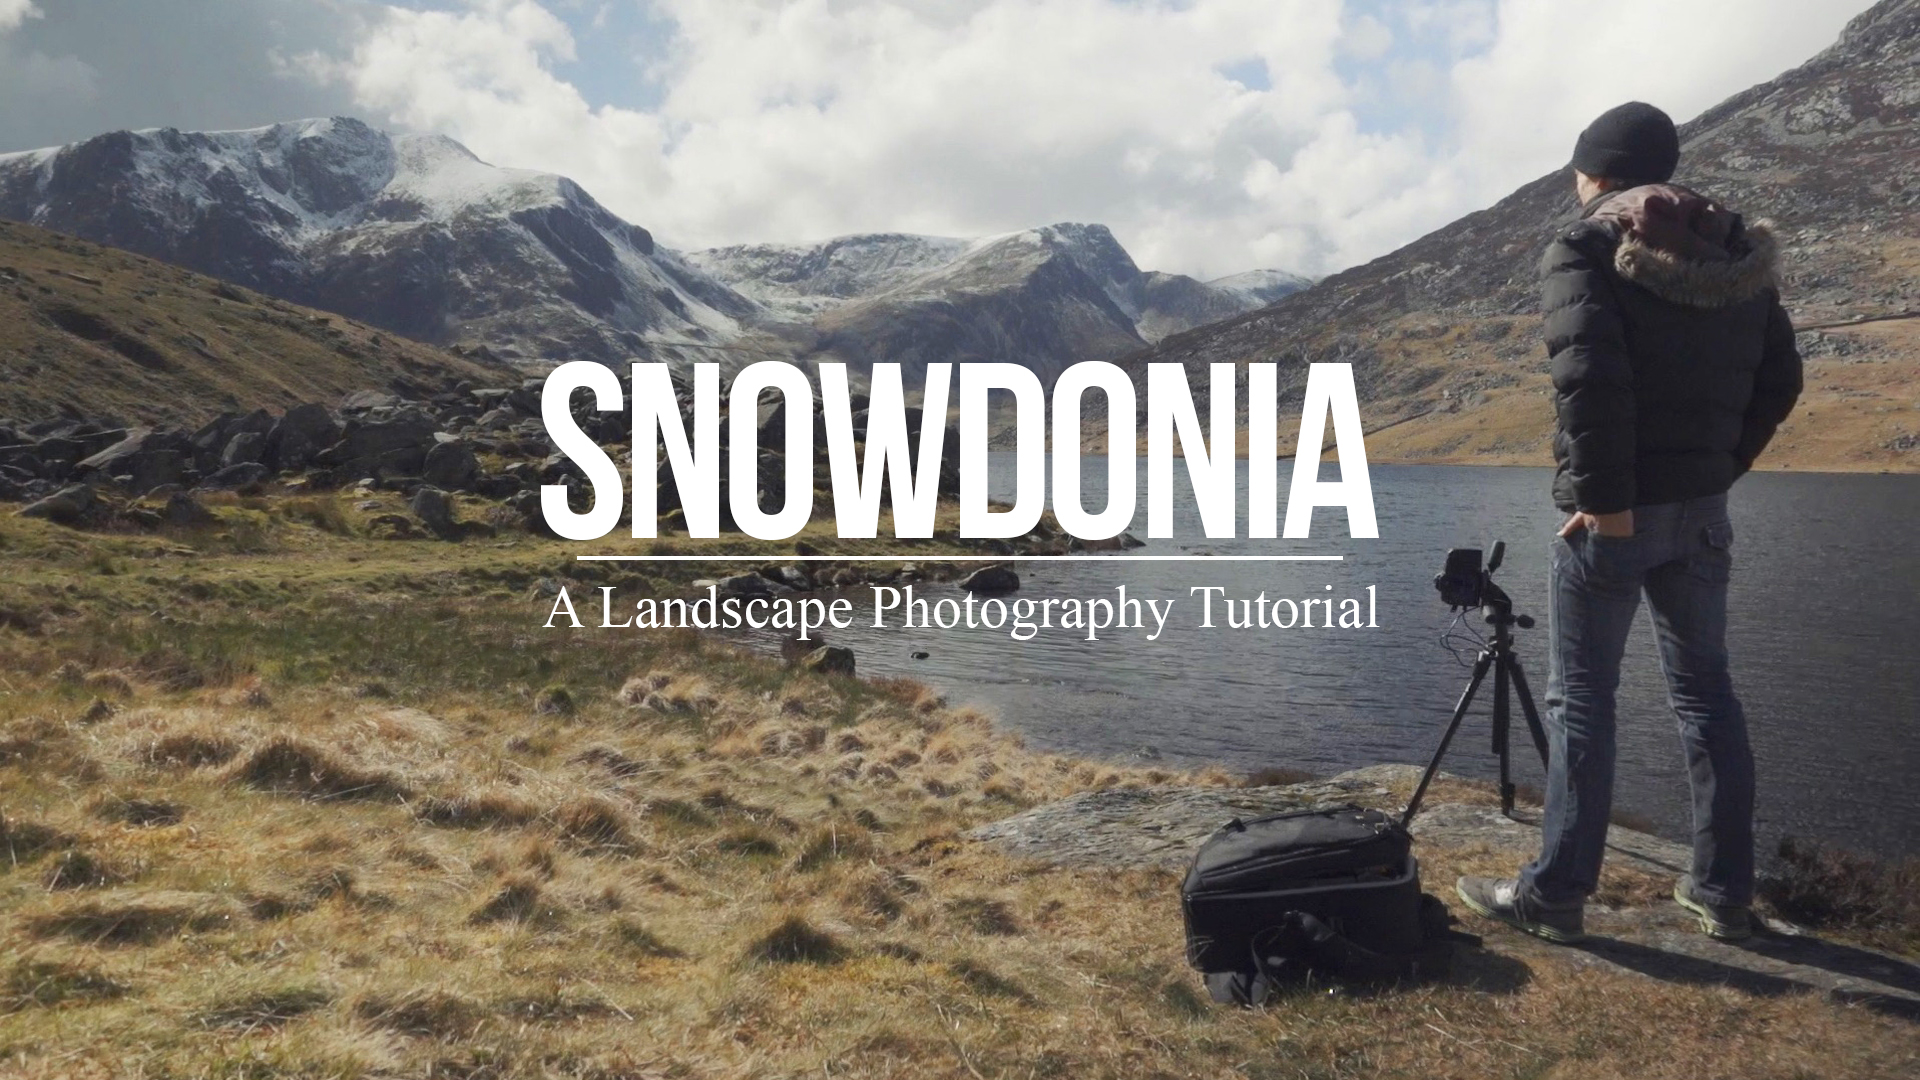
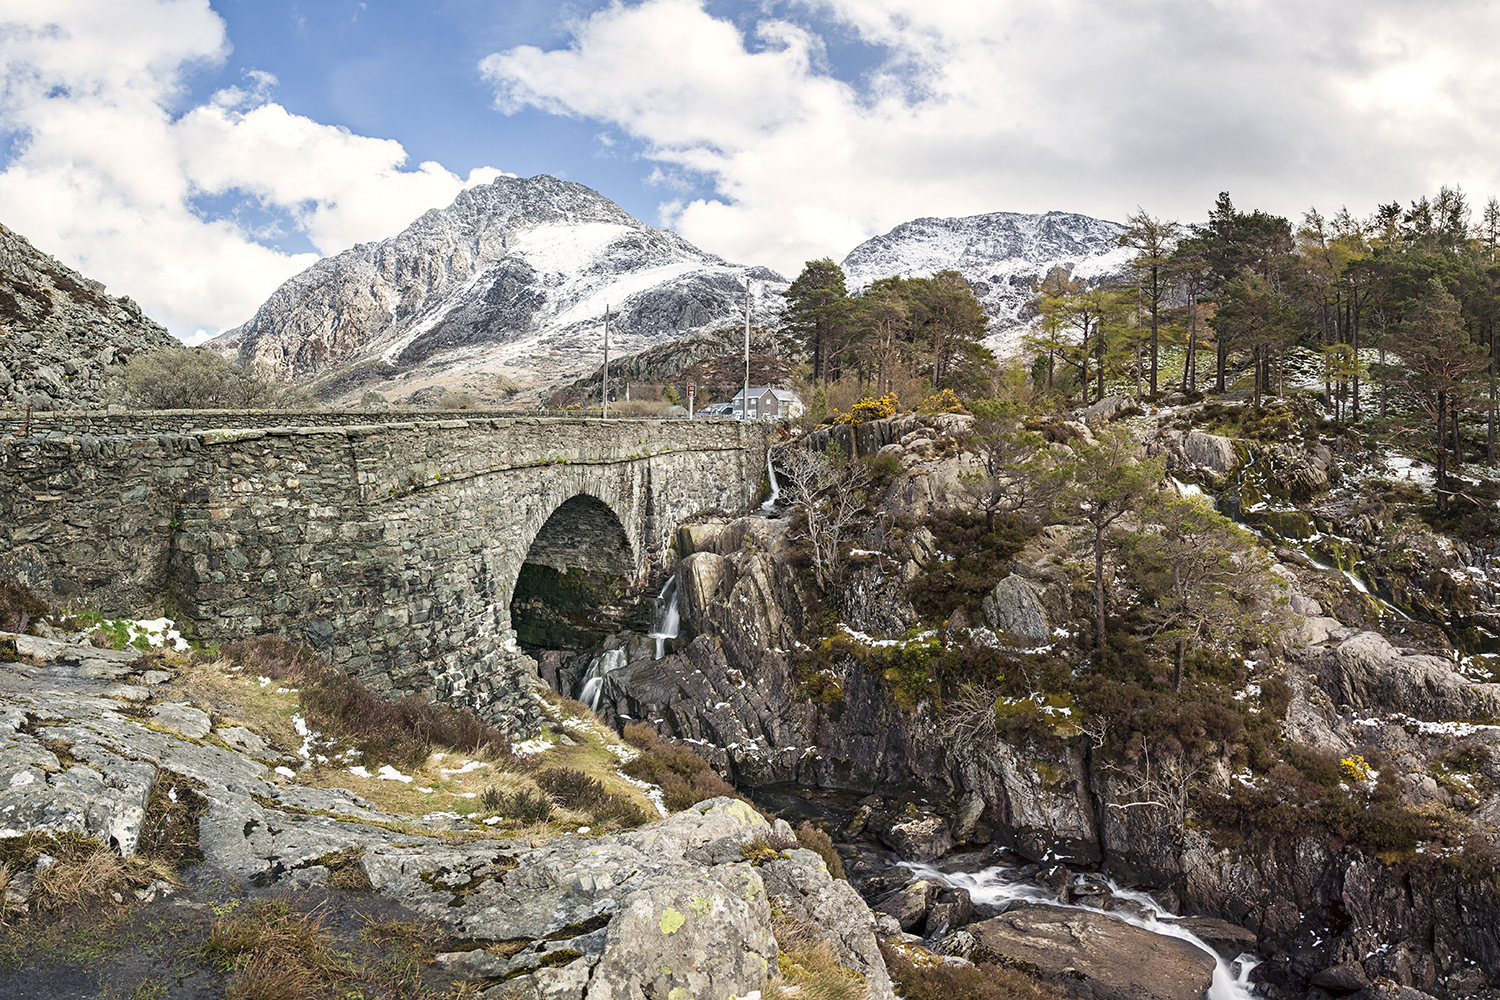
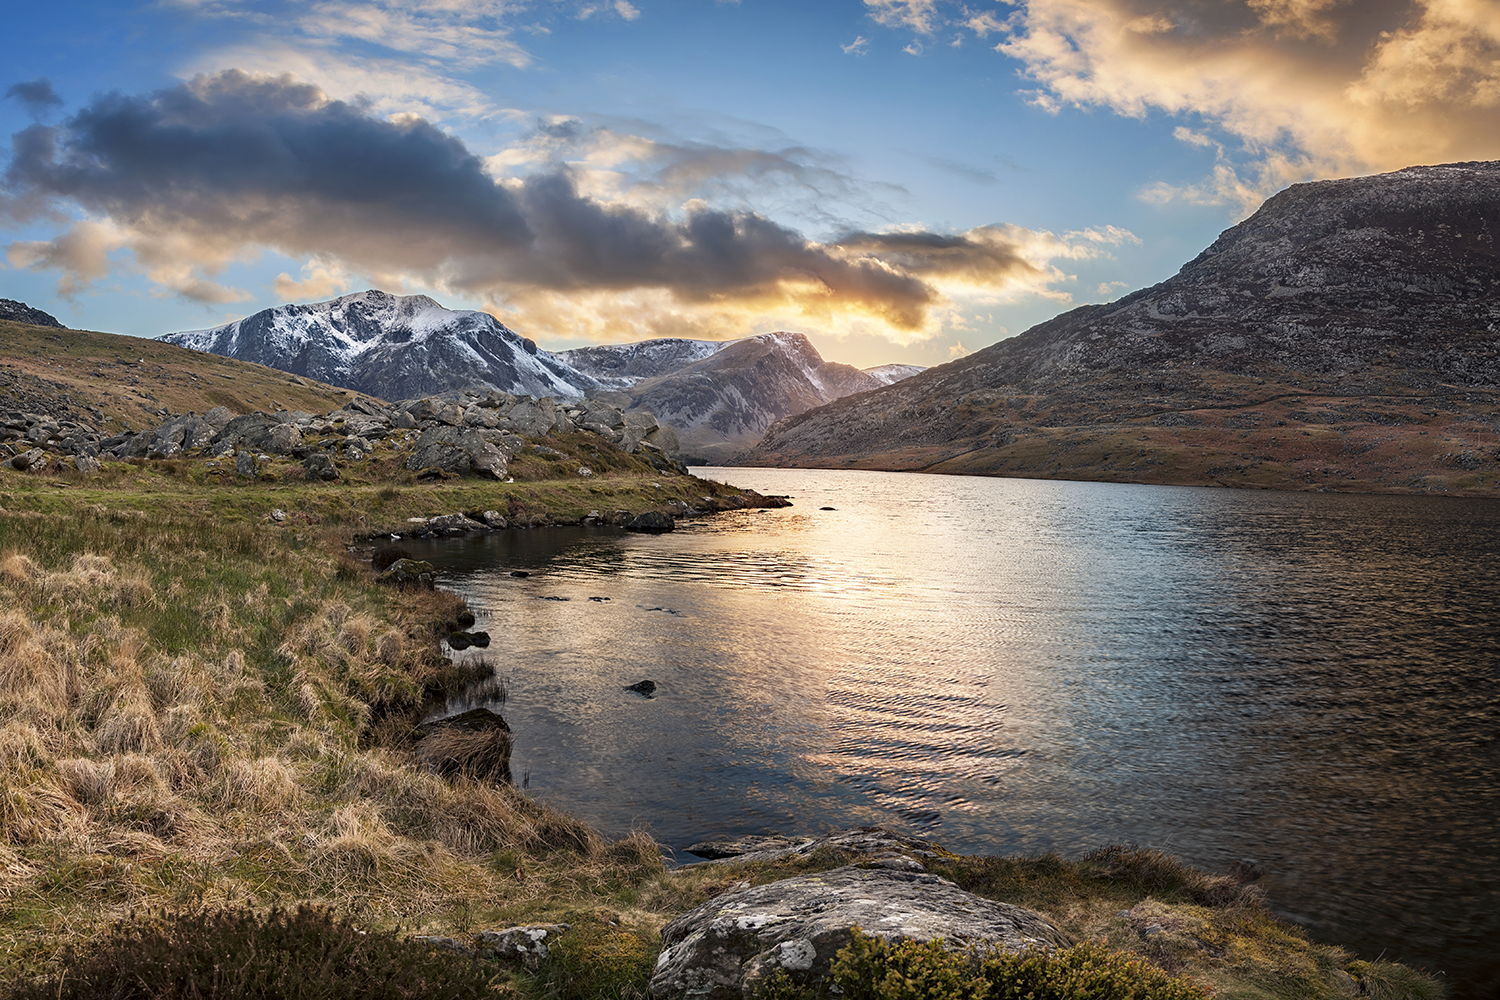
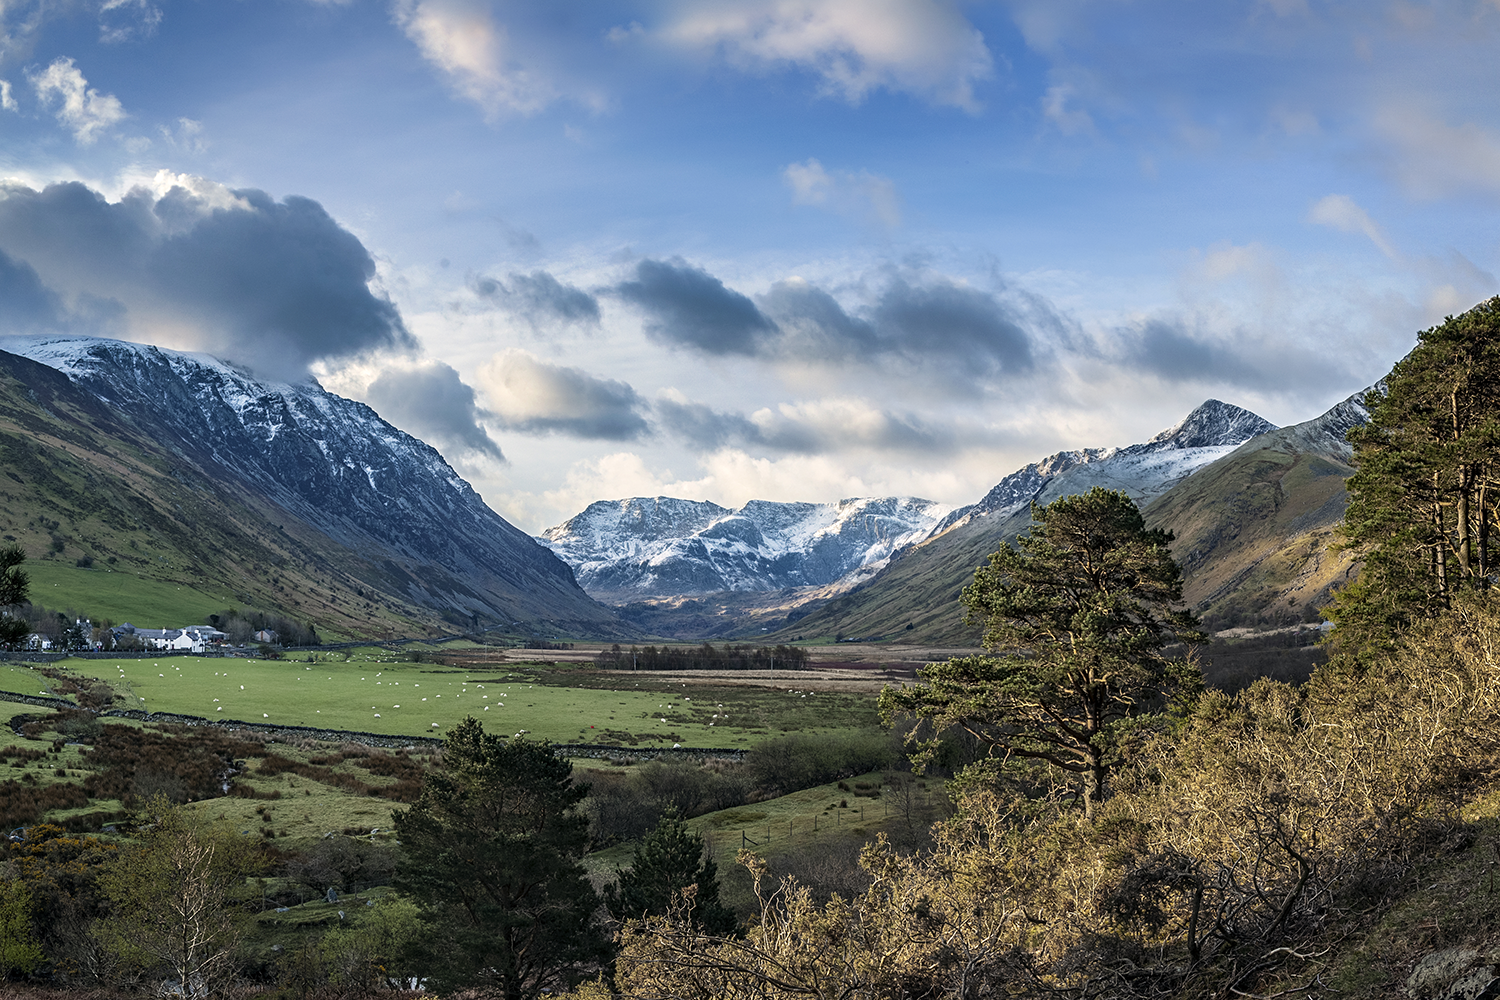
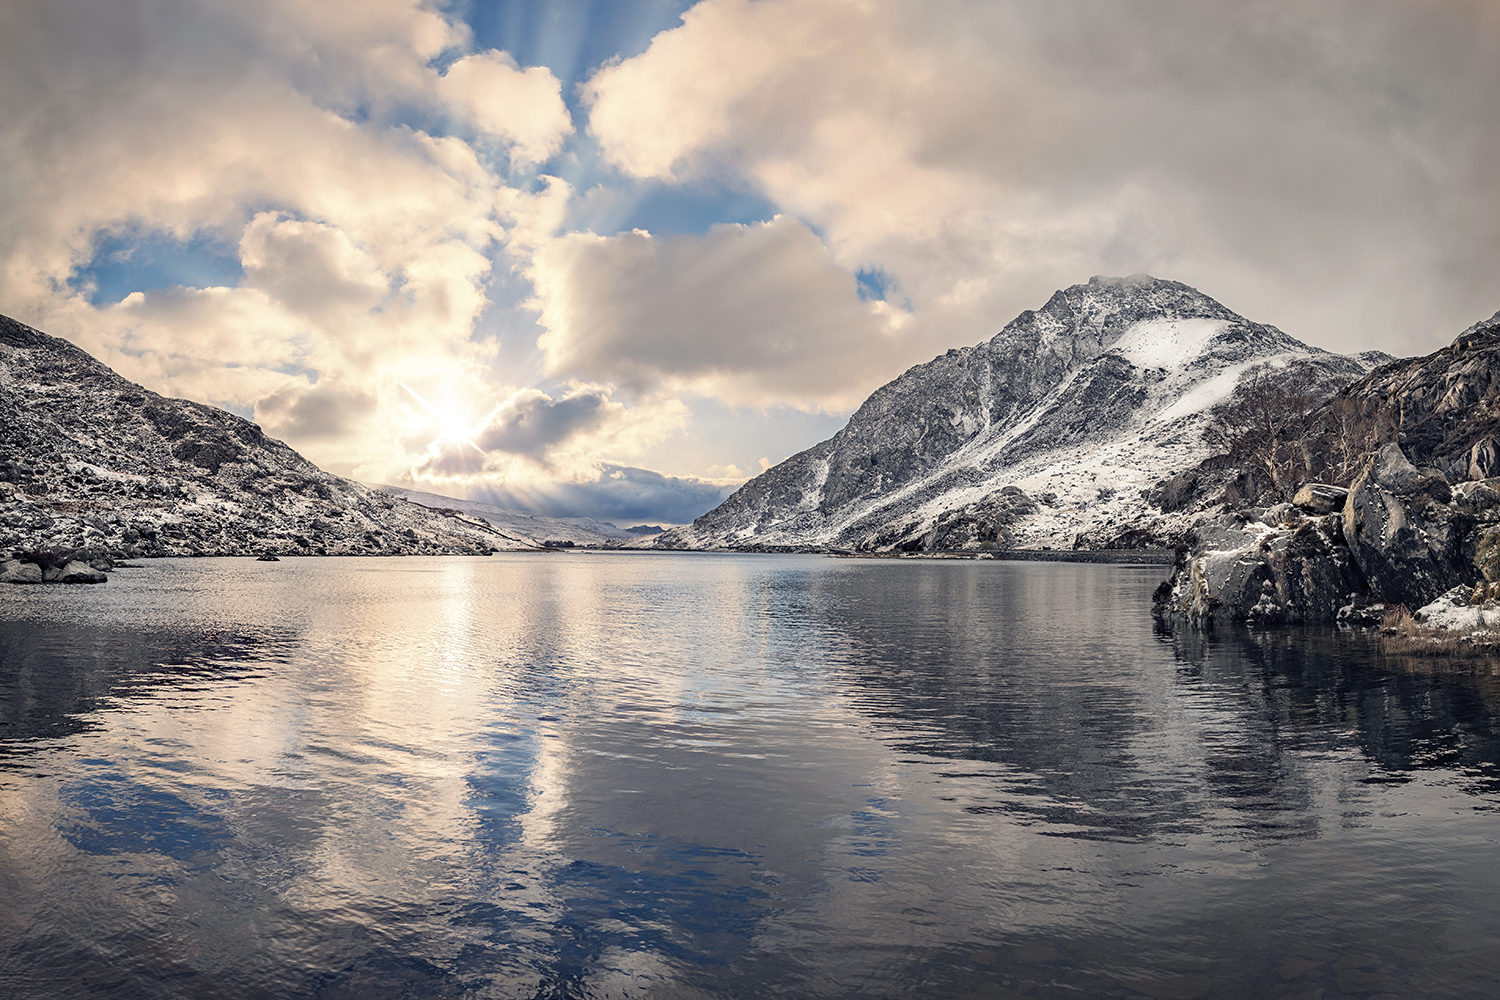
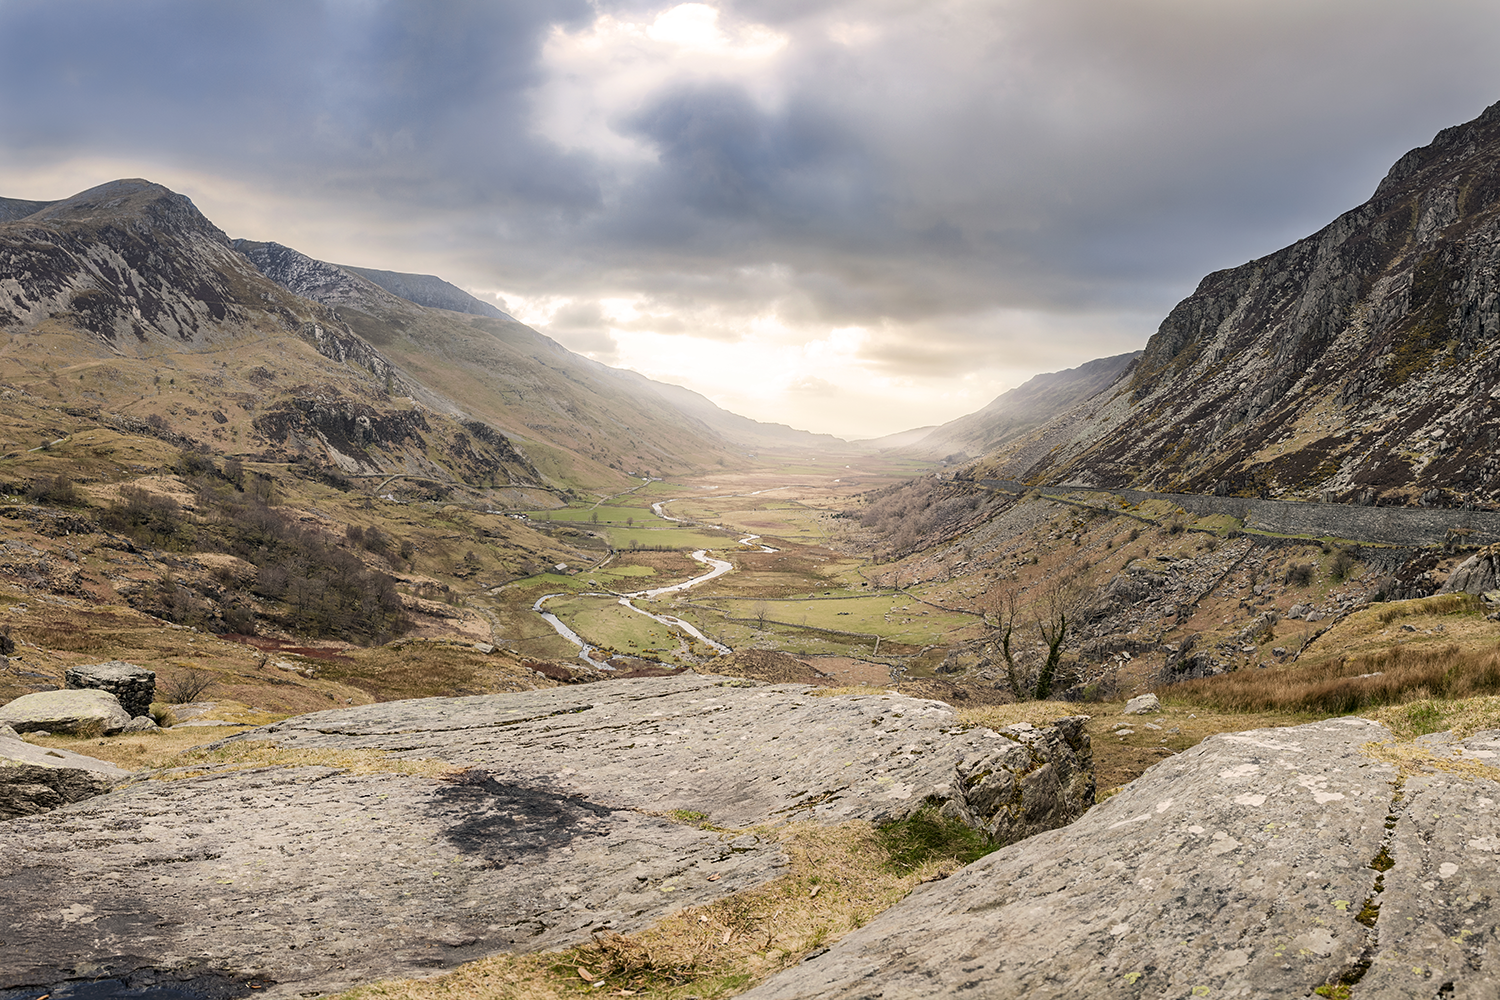
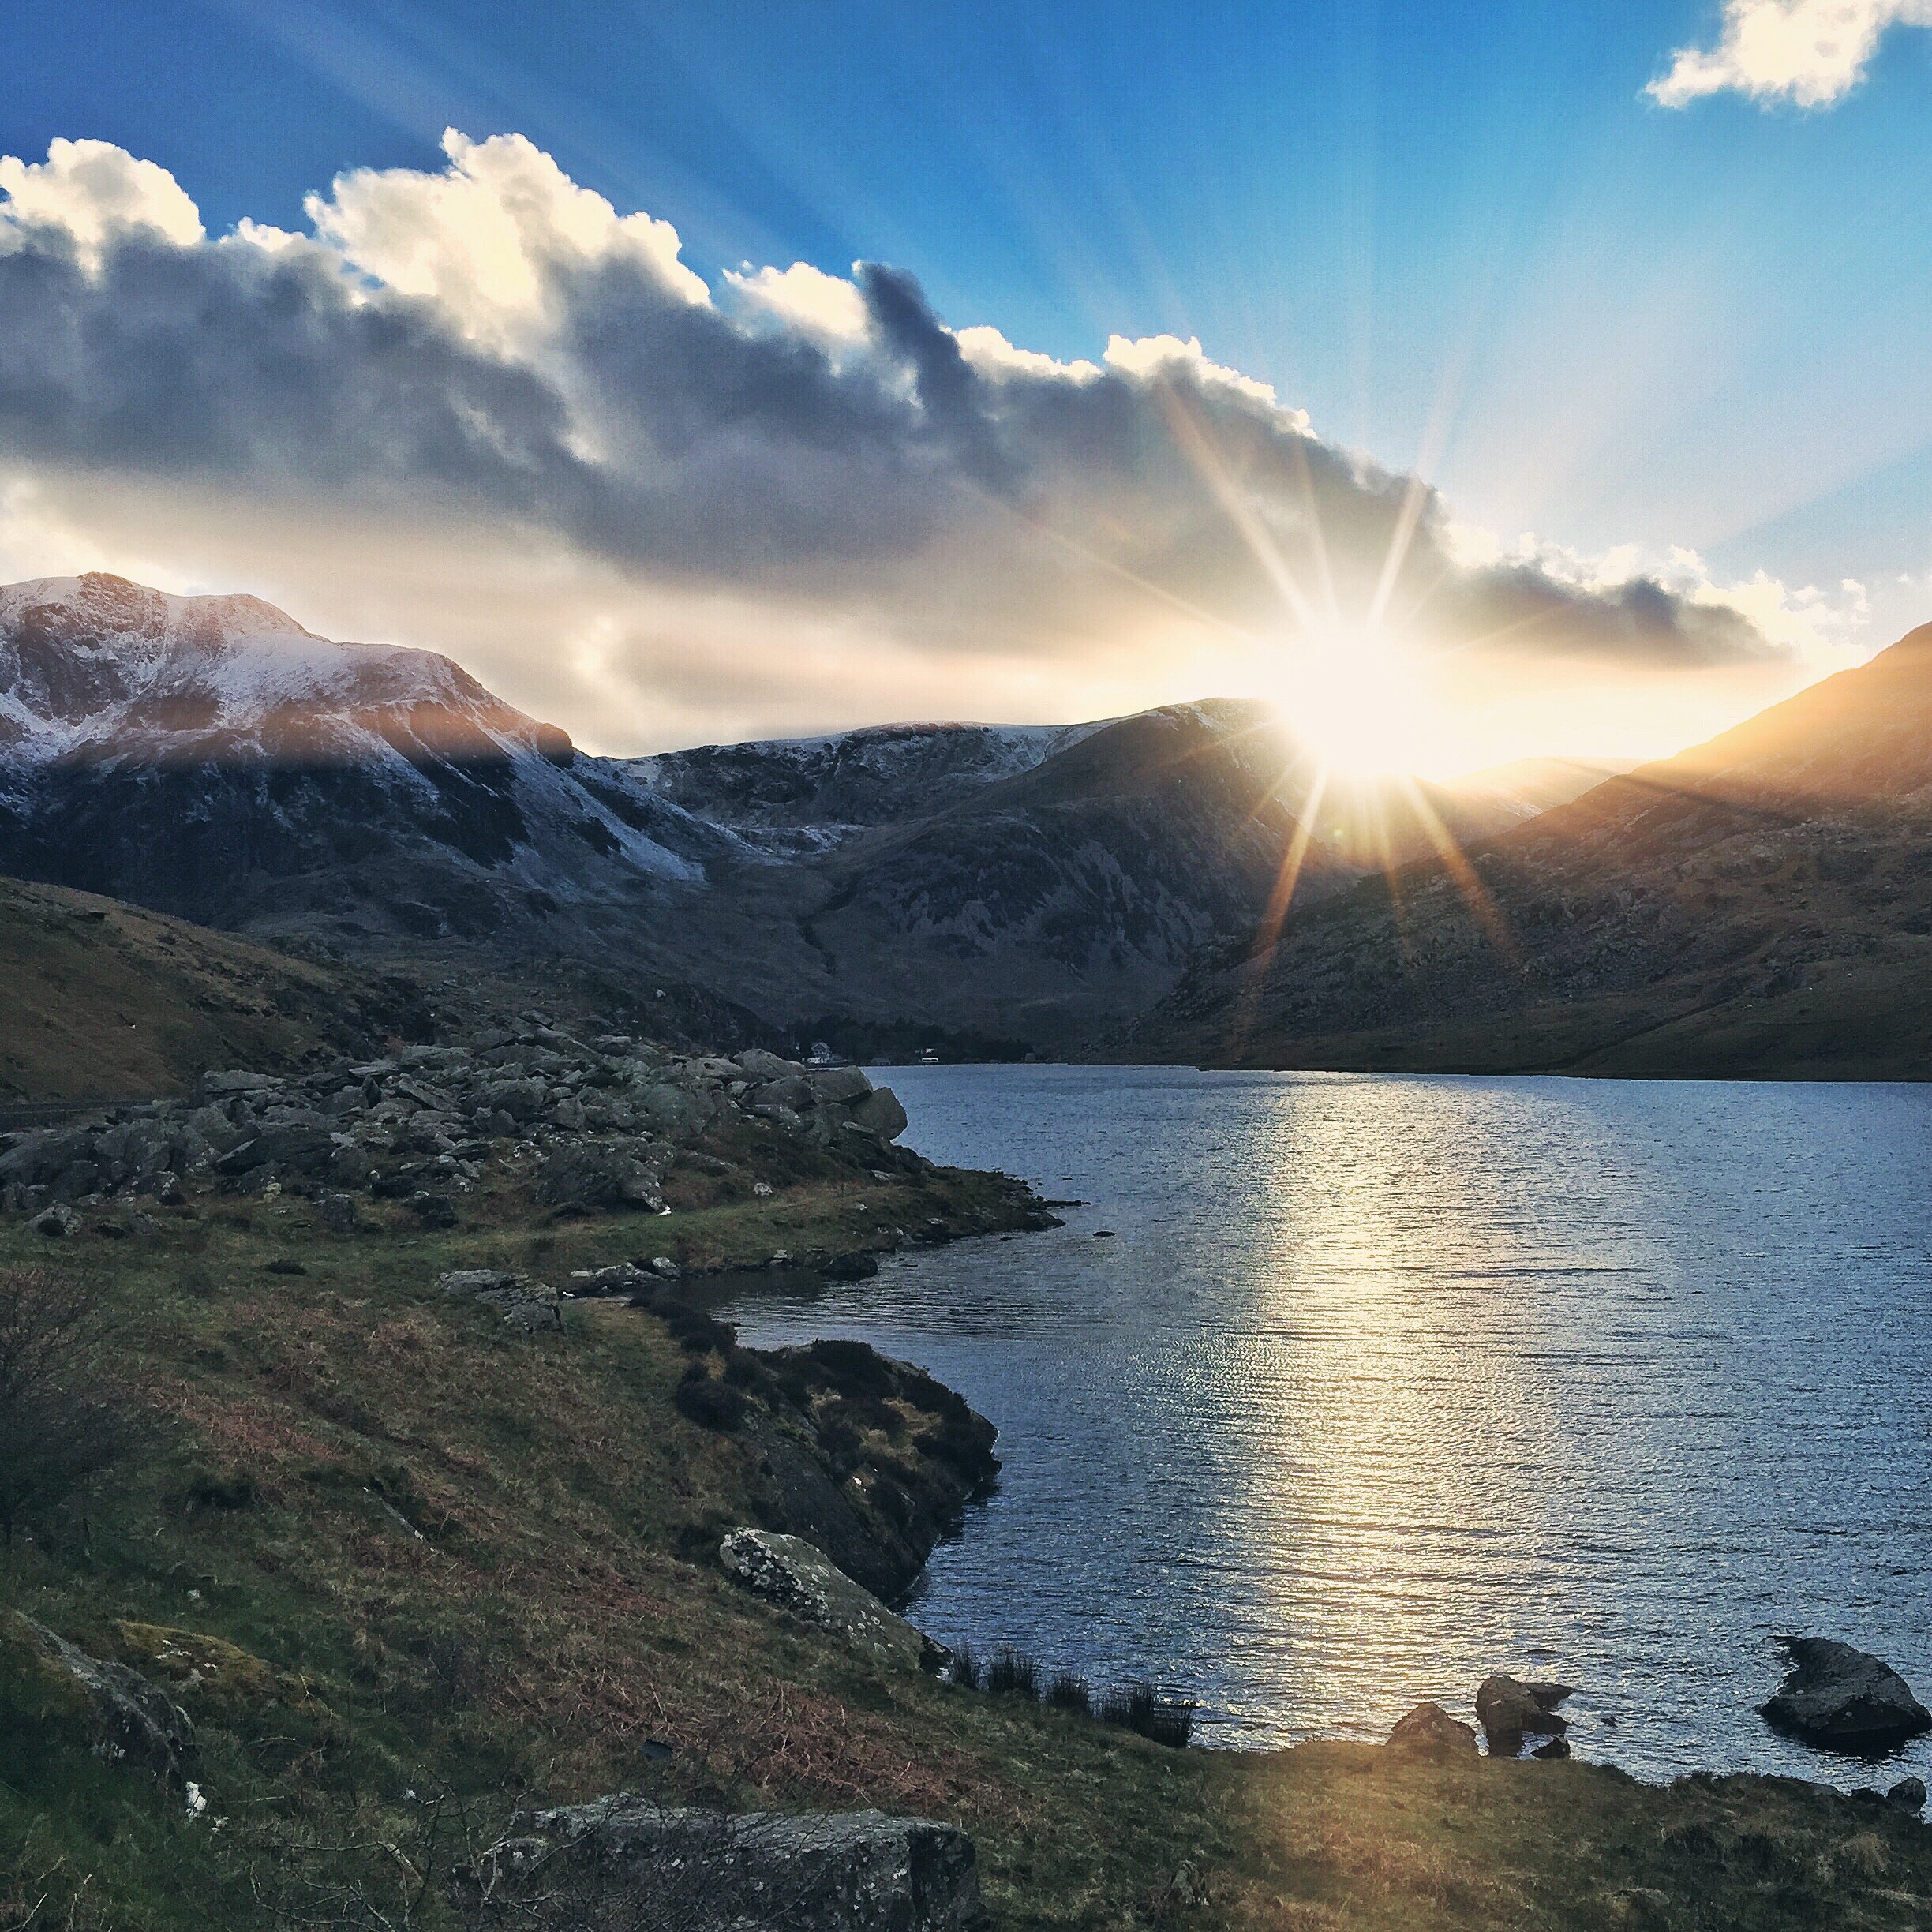
Editing Landscapes (HDR and Panoramas in LR and PS)

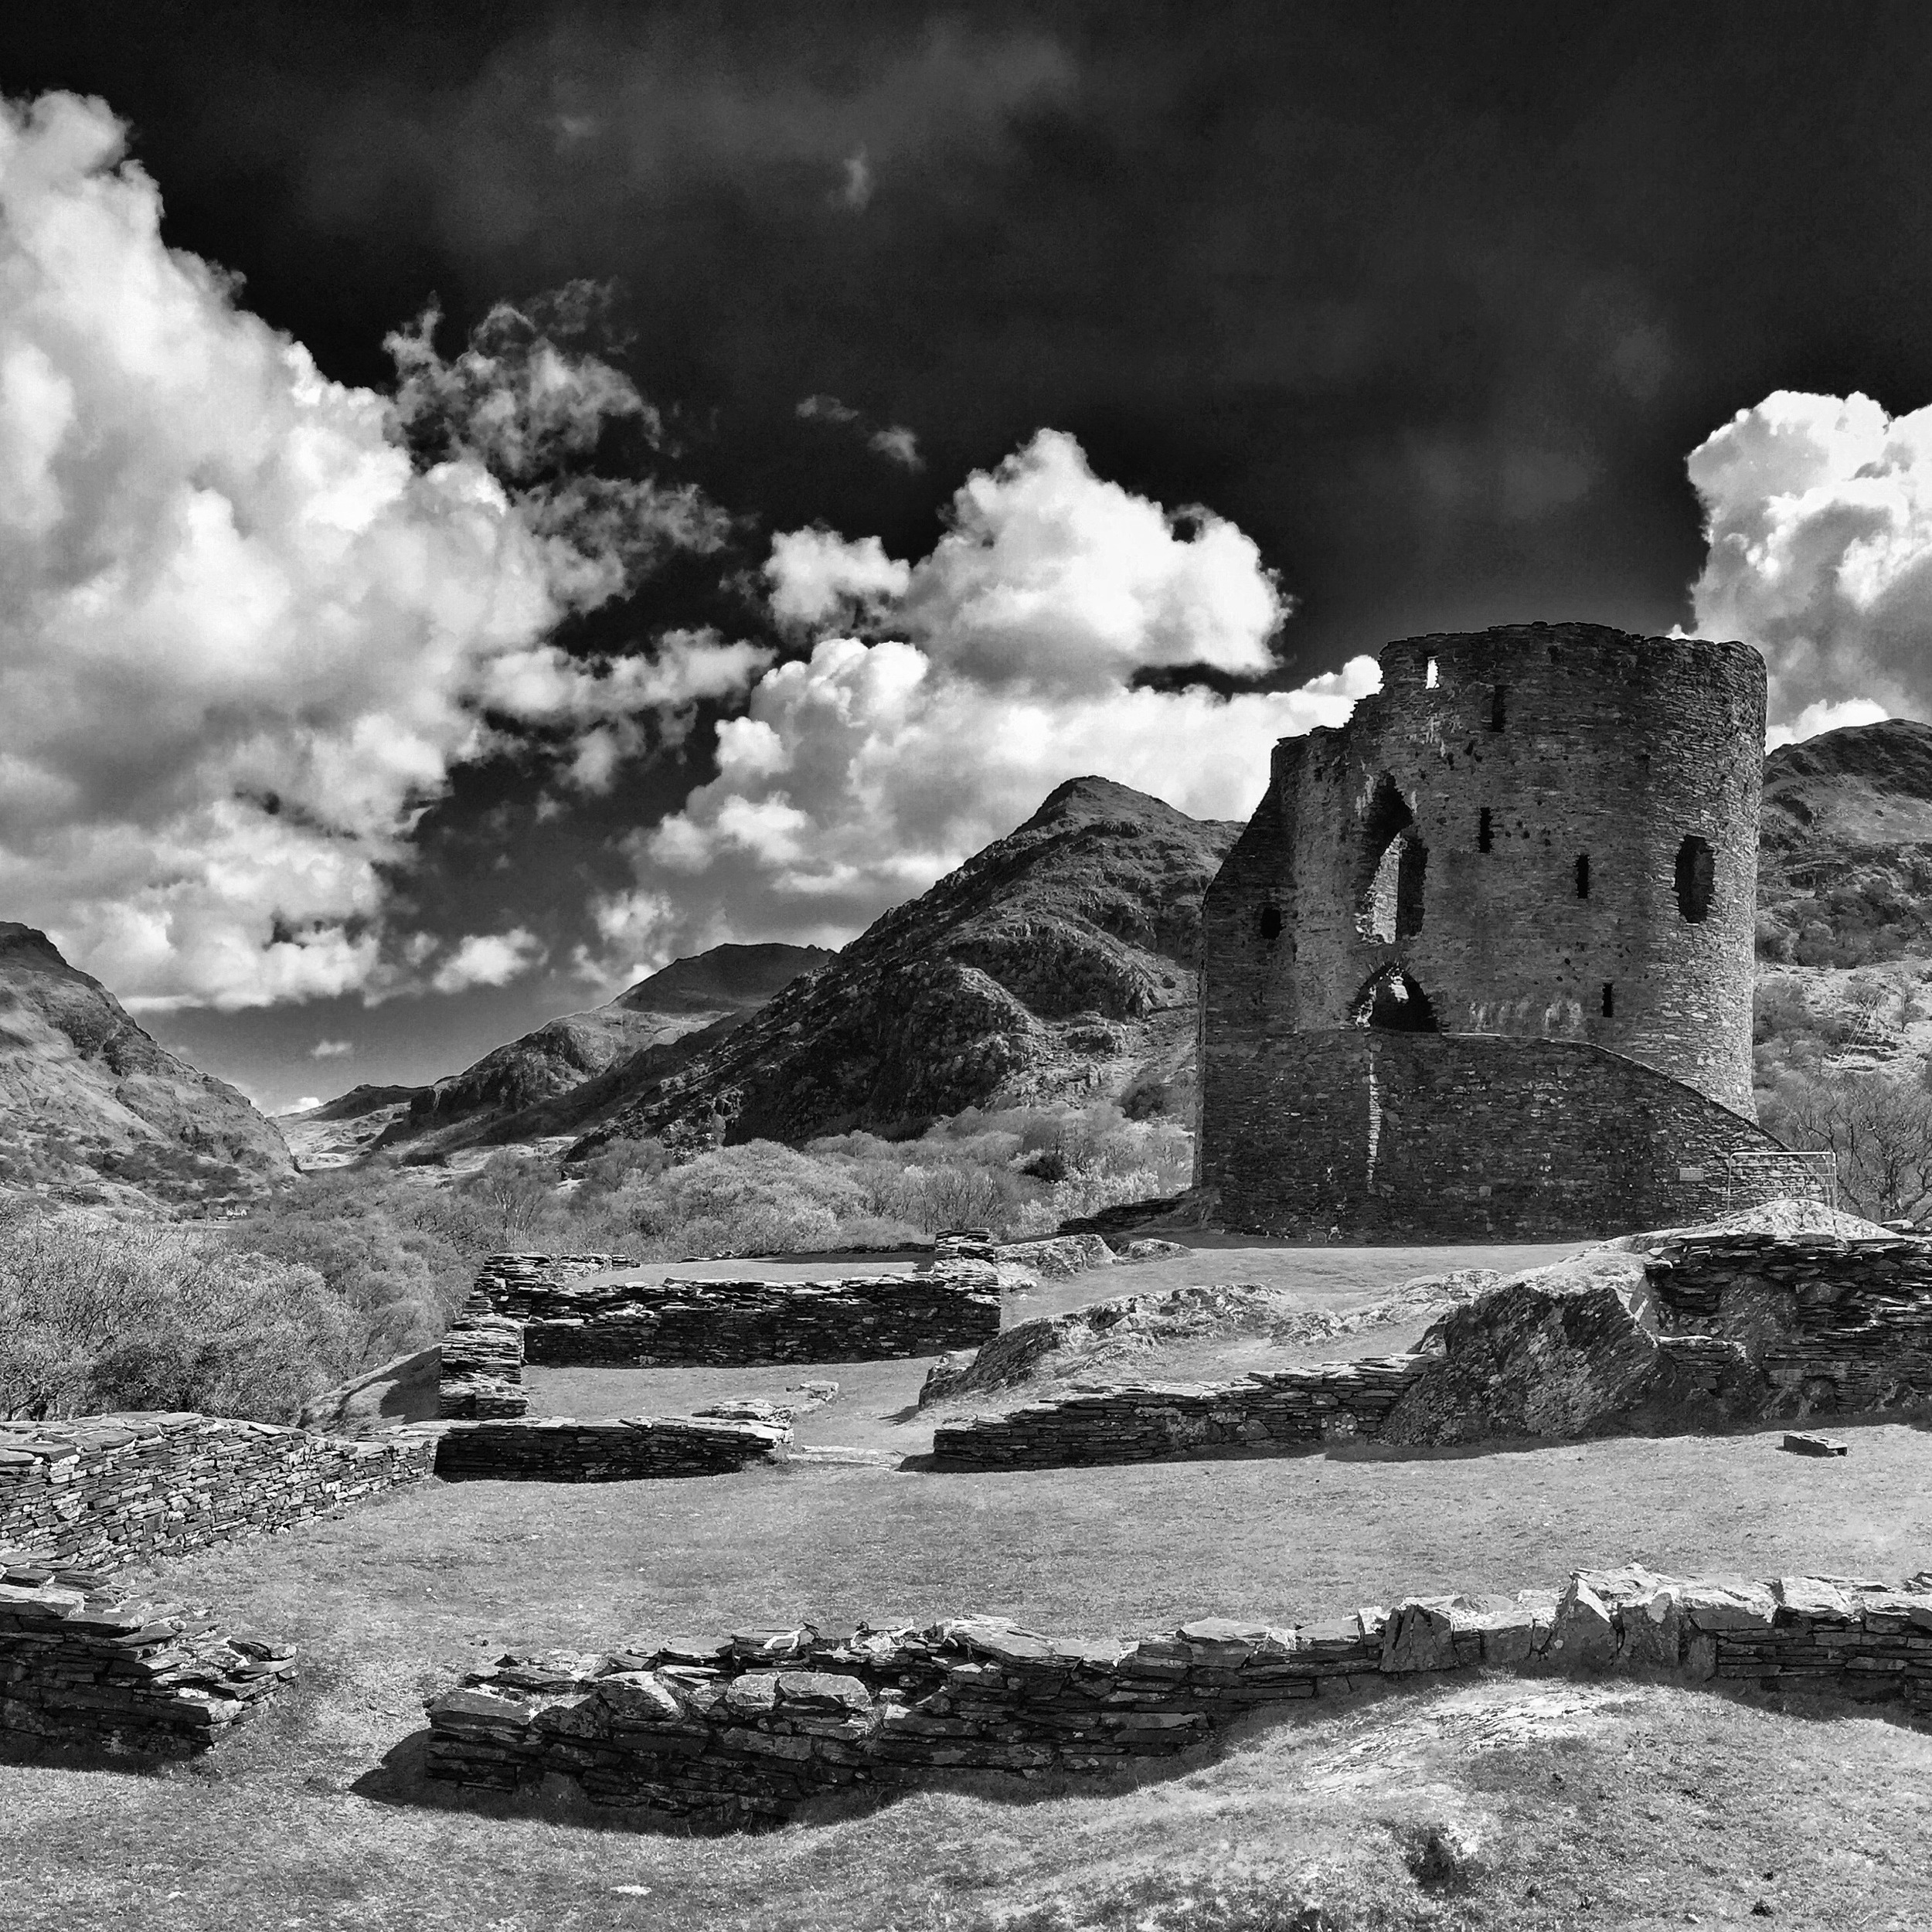
Following my Snowdonia trip last year, quite a few of you asked for a tutorial showing how I edited the shots, so this... is that.
In this tutorial I'll show you how to combine the bracketed exposures in Lightroom to give you your HDR image, as well as showing you how to stitch multiple shots together for your panorama.
Then I'll run you through some Photoshop techniques from cloning, to sharpening, dodge and burn through to colour work.
I hope these tips help you in your own editing:
...and here's the final image:

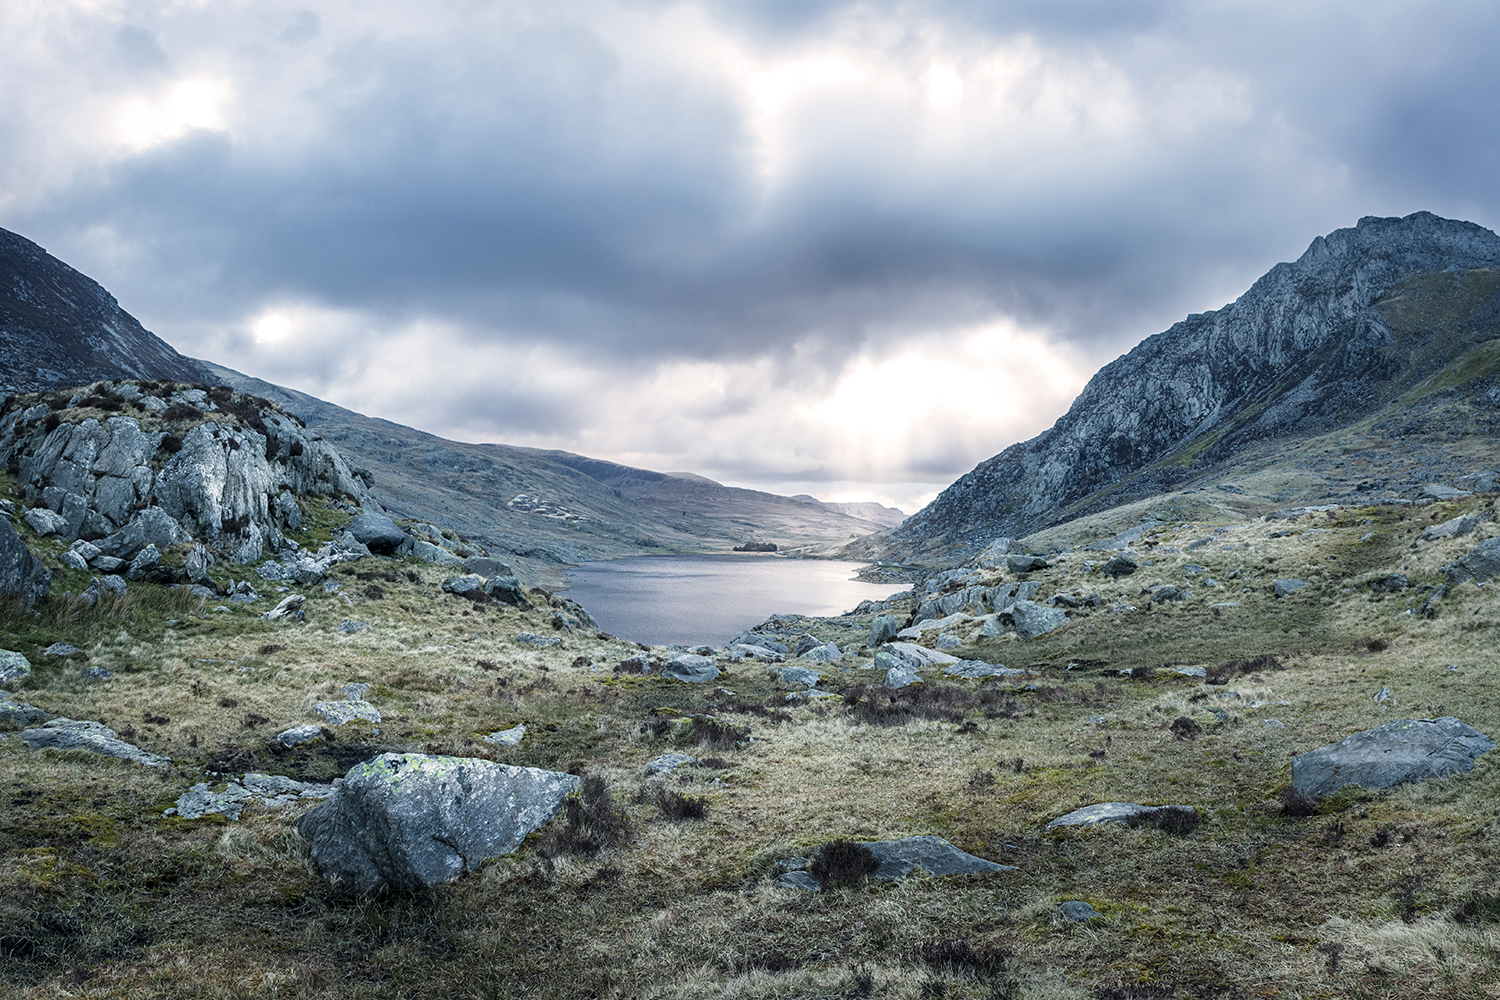
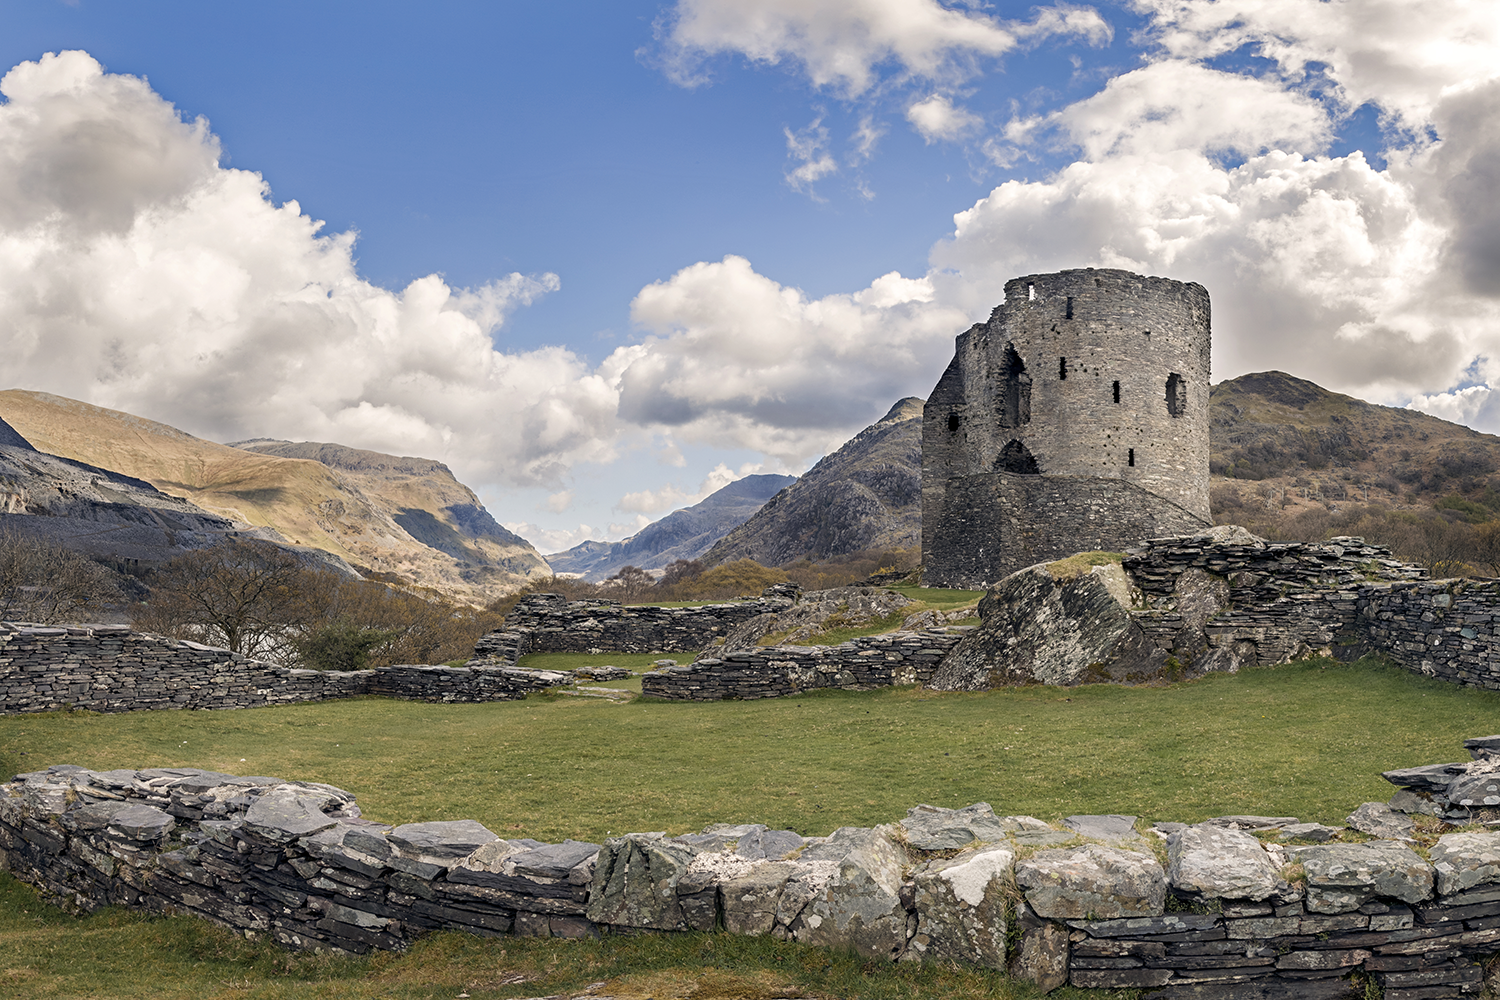
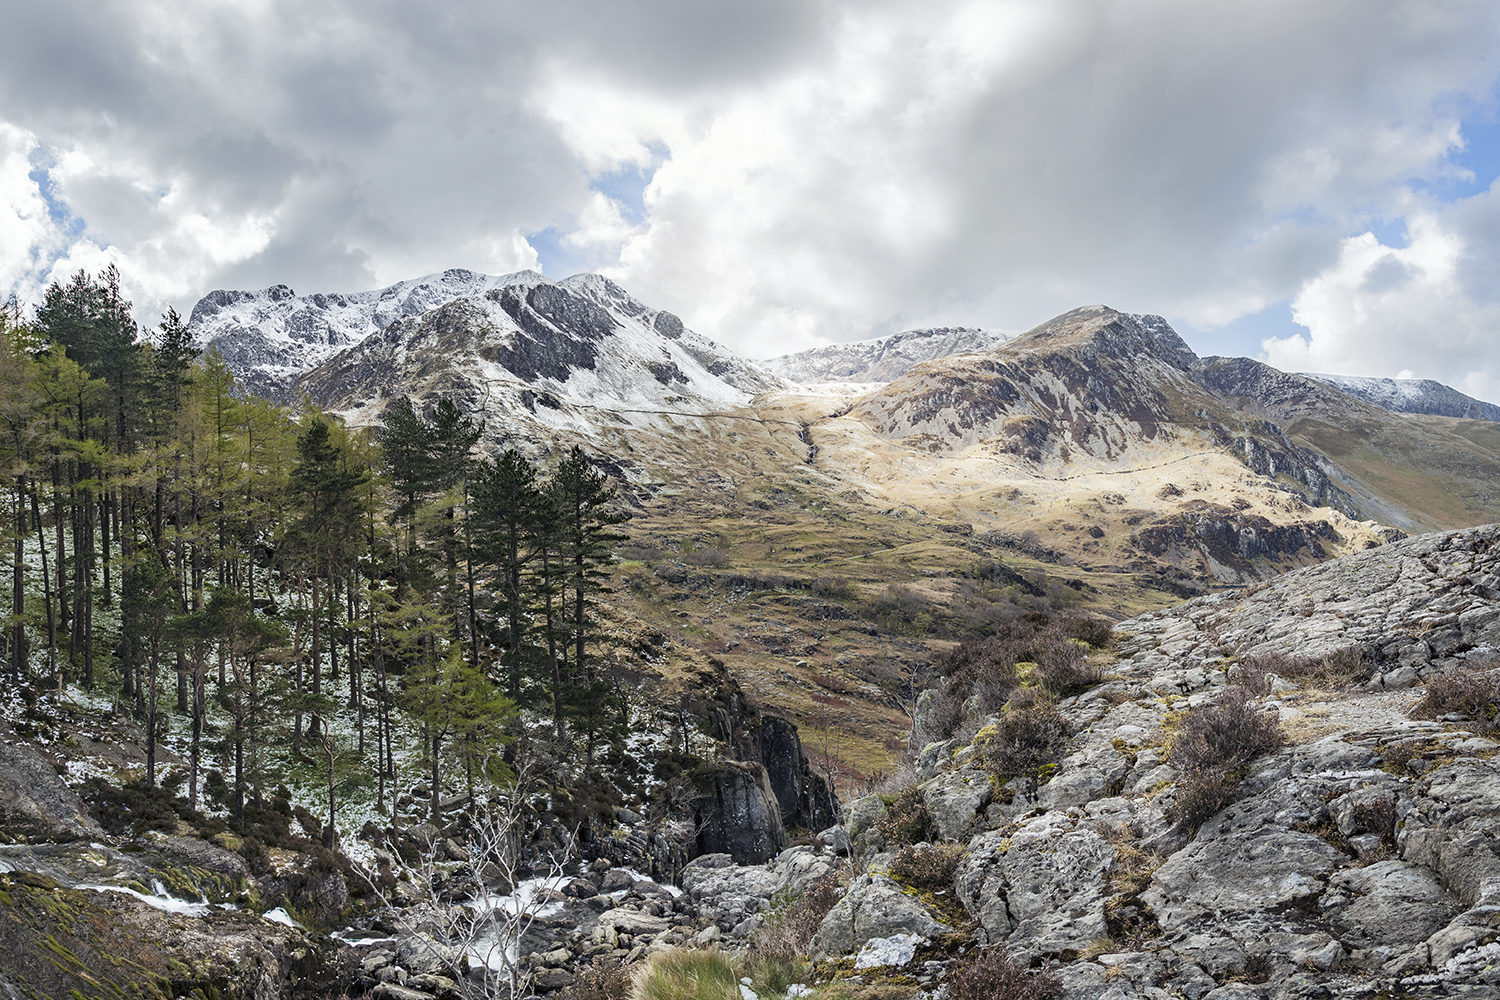
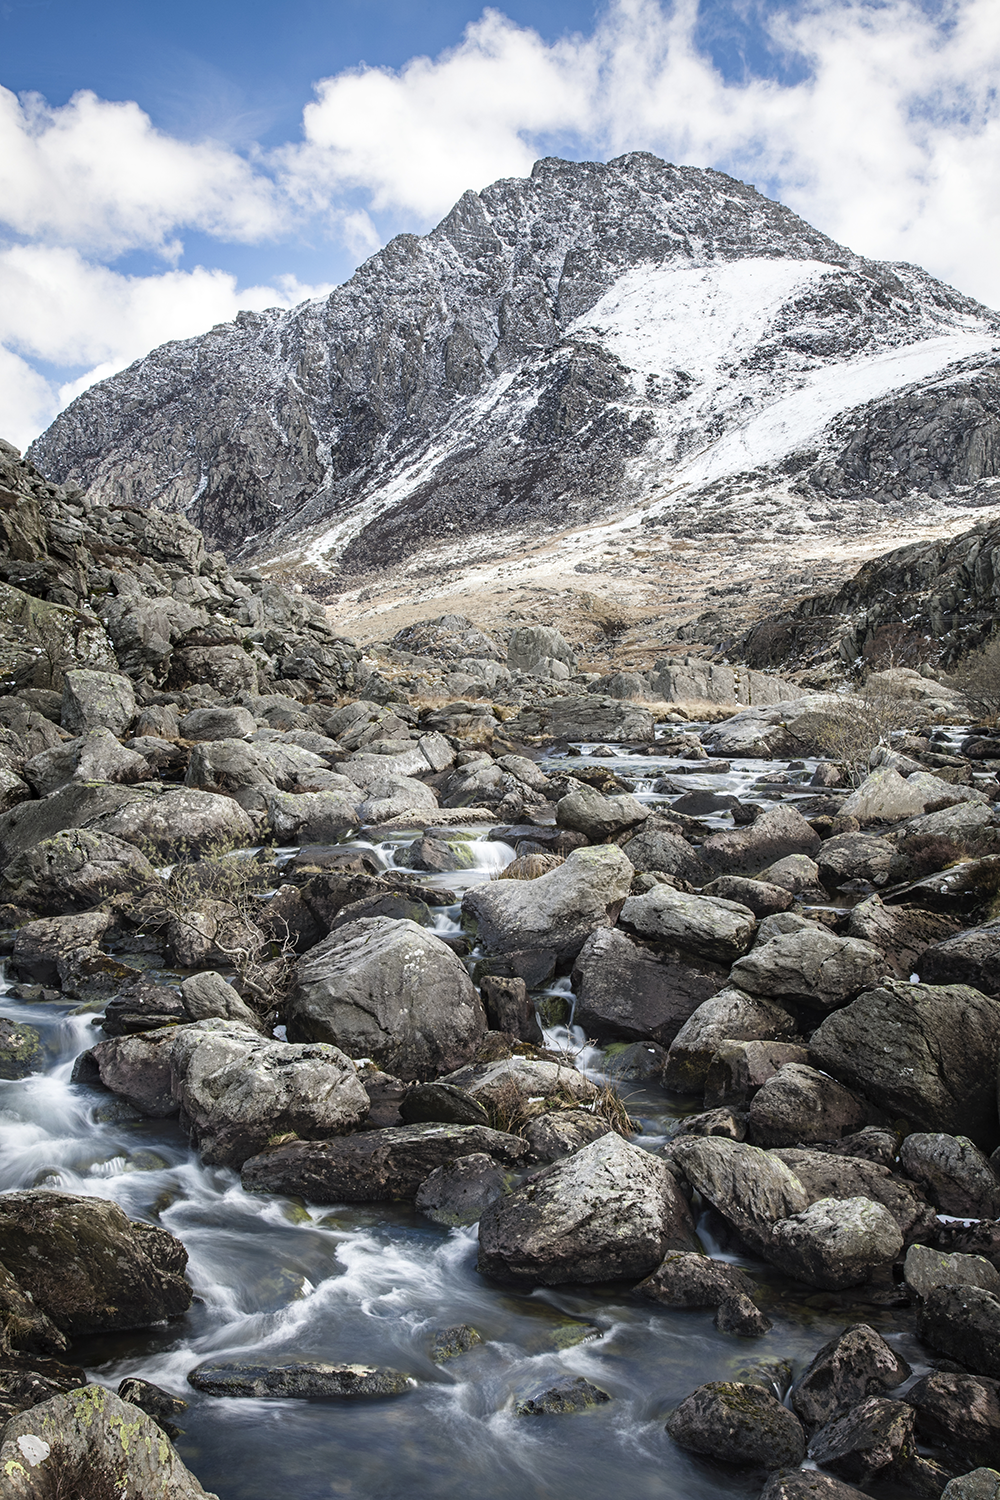
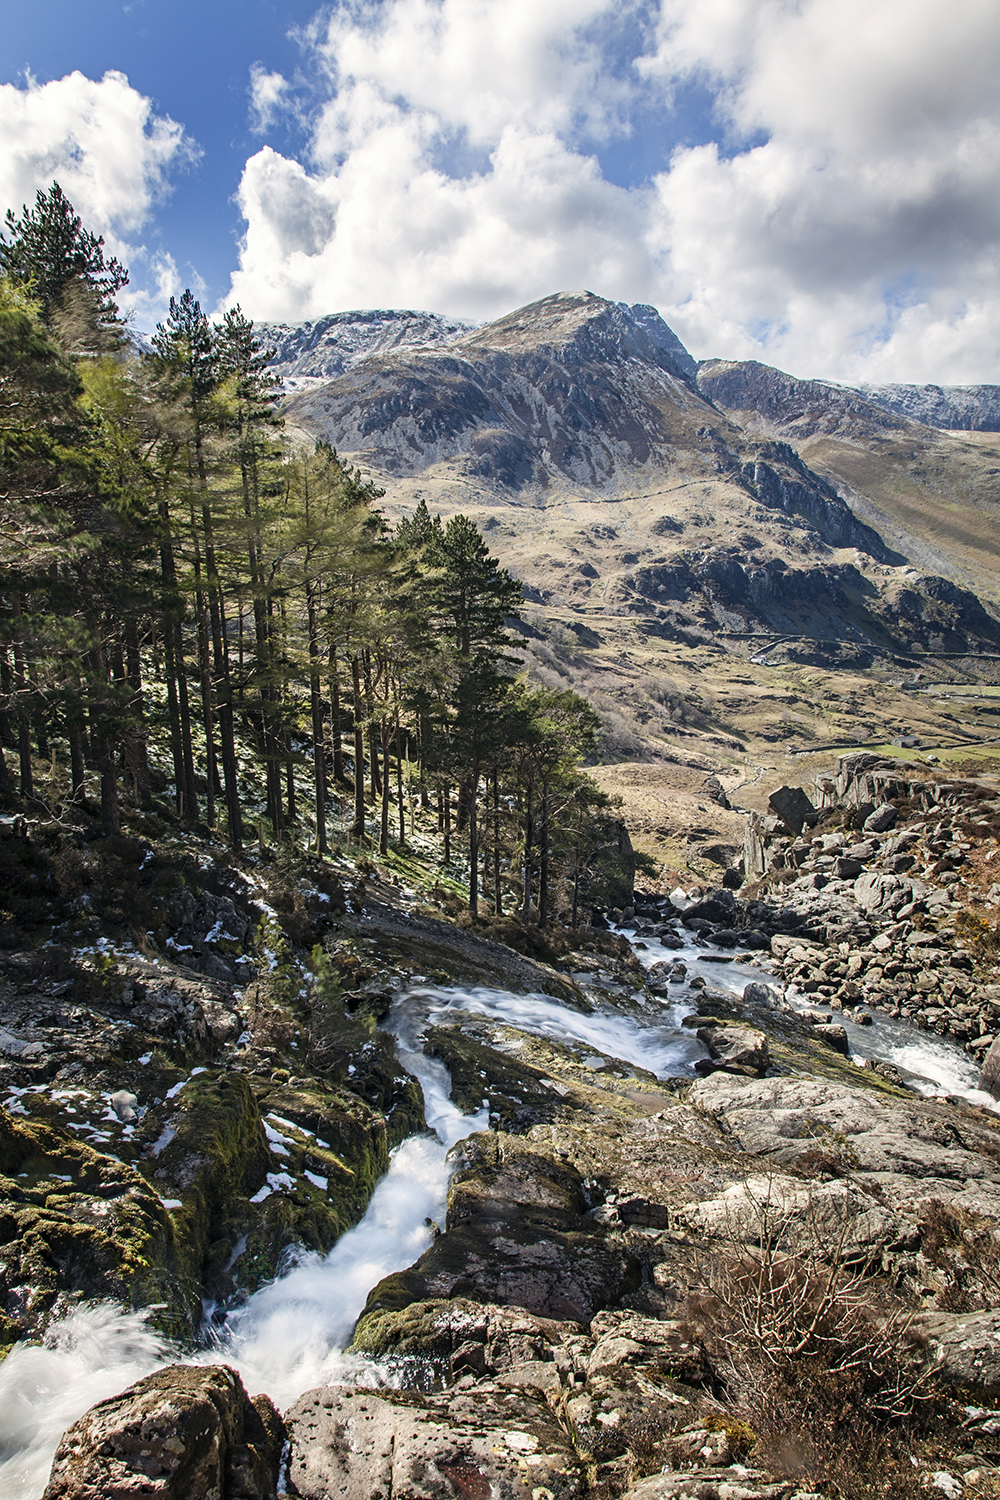
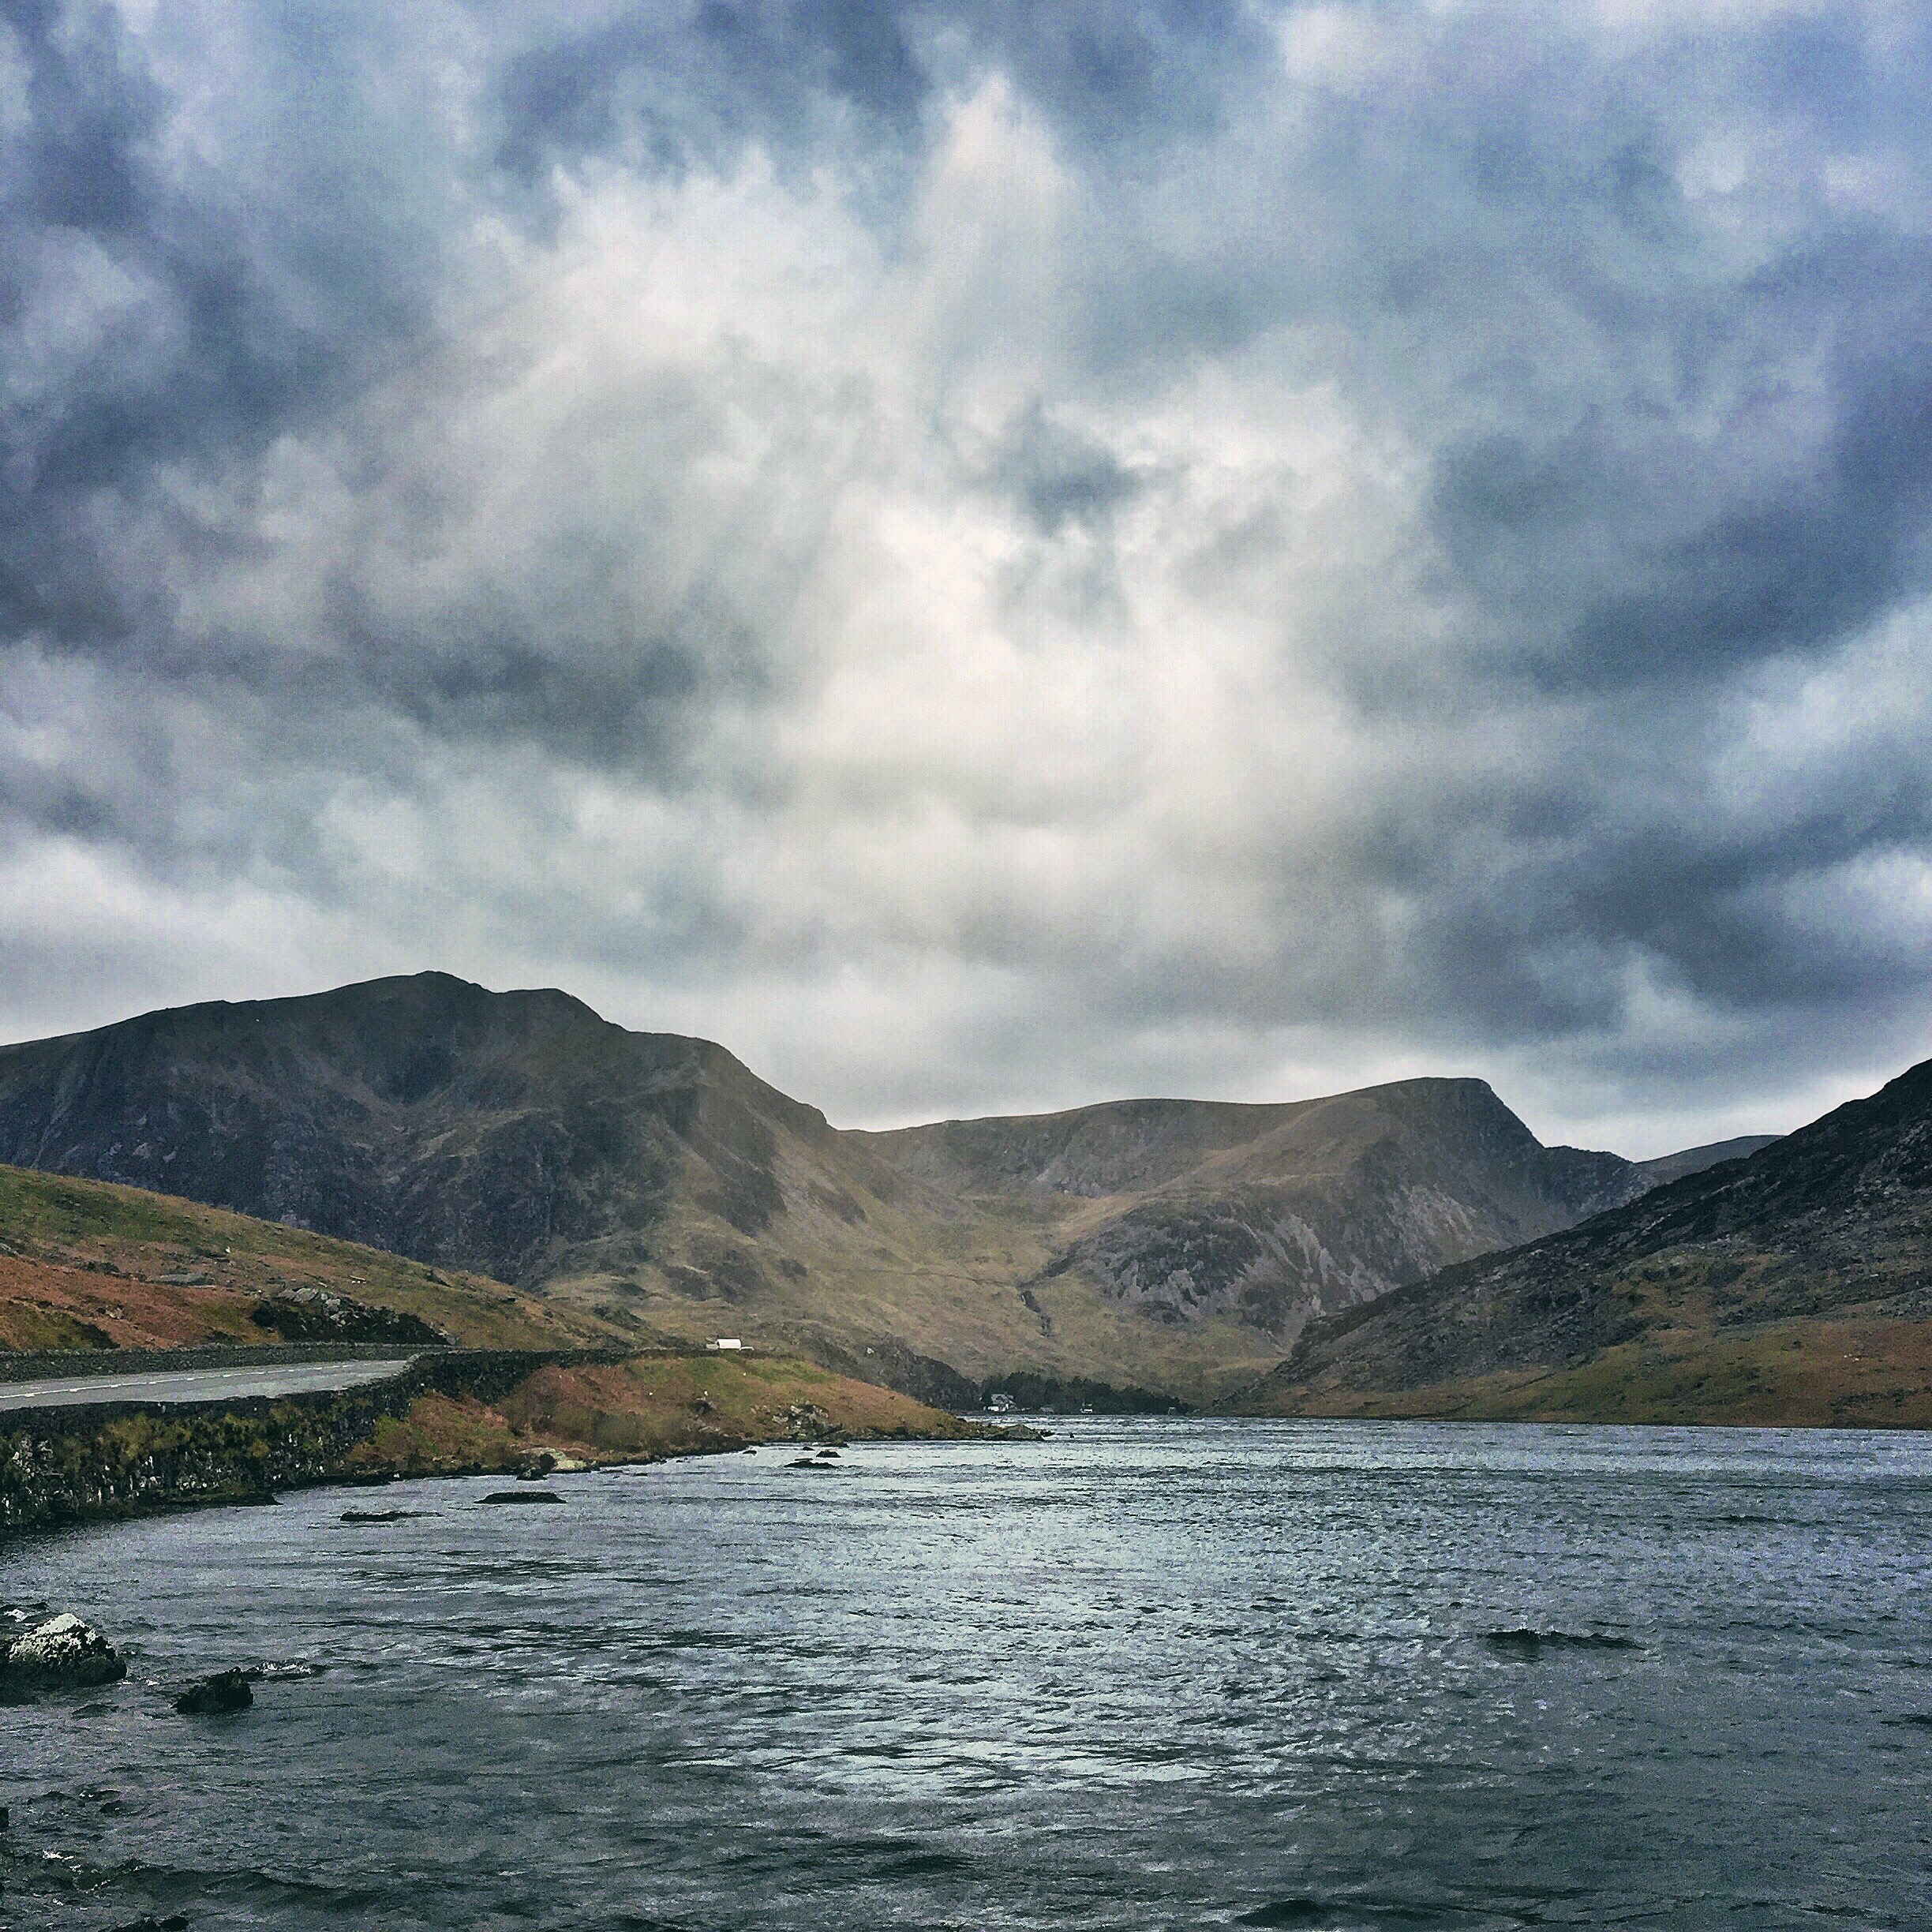
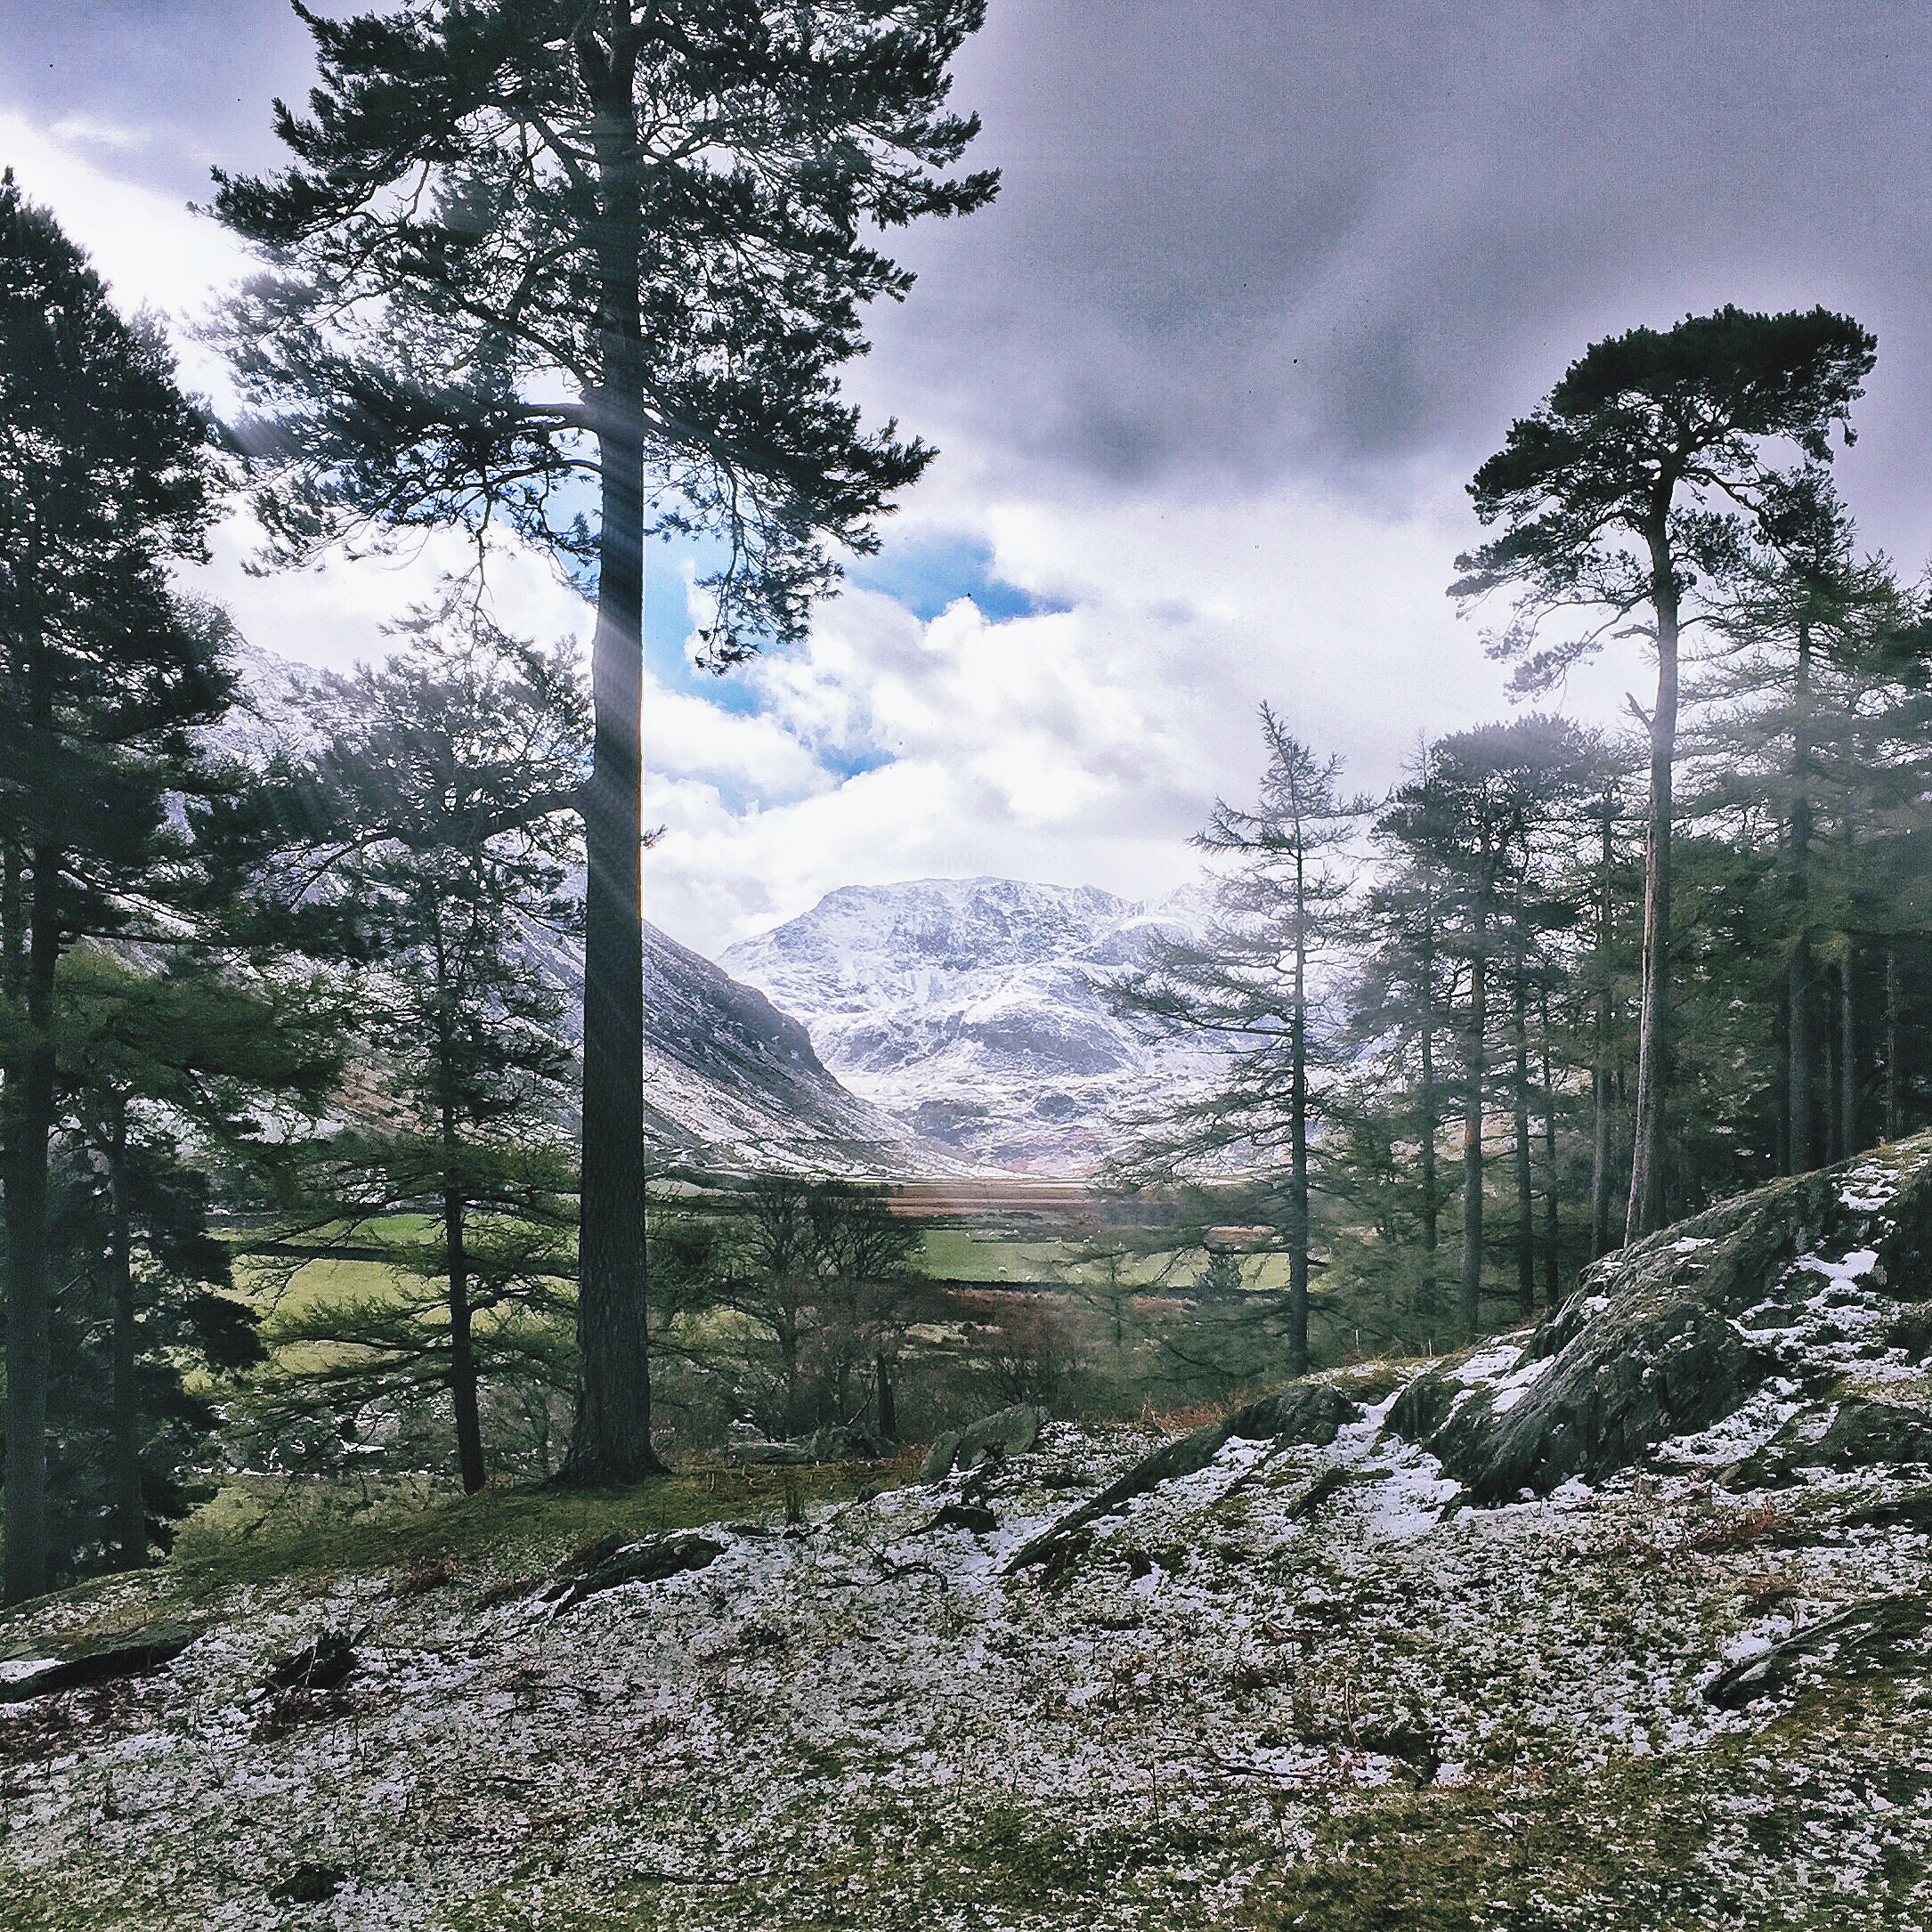
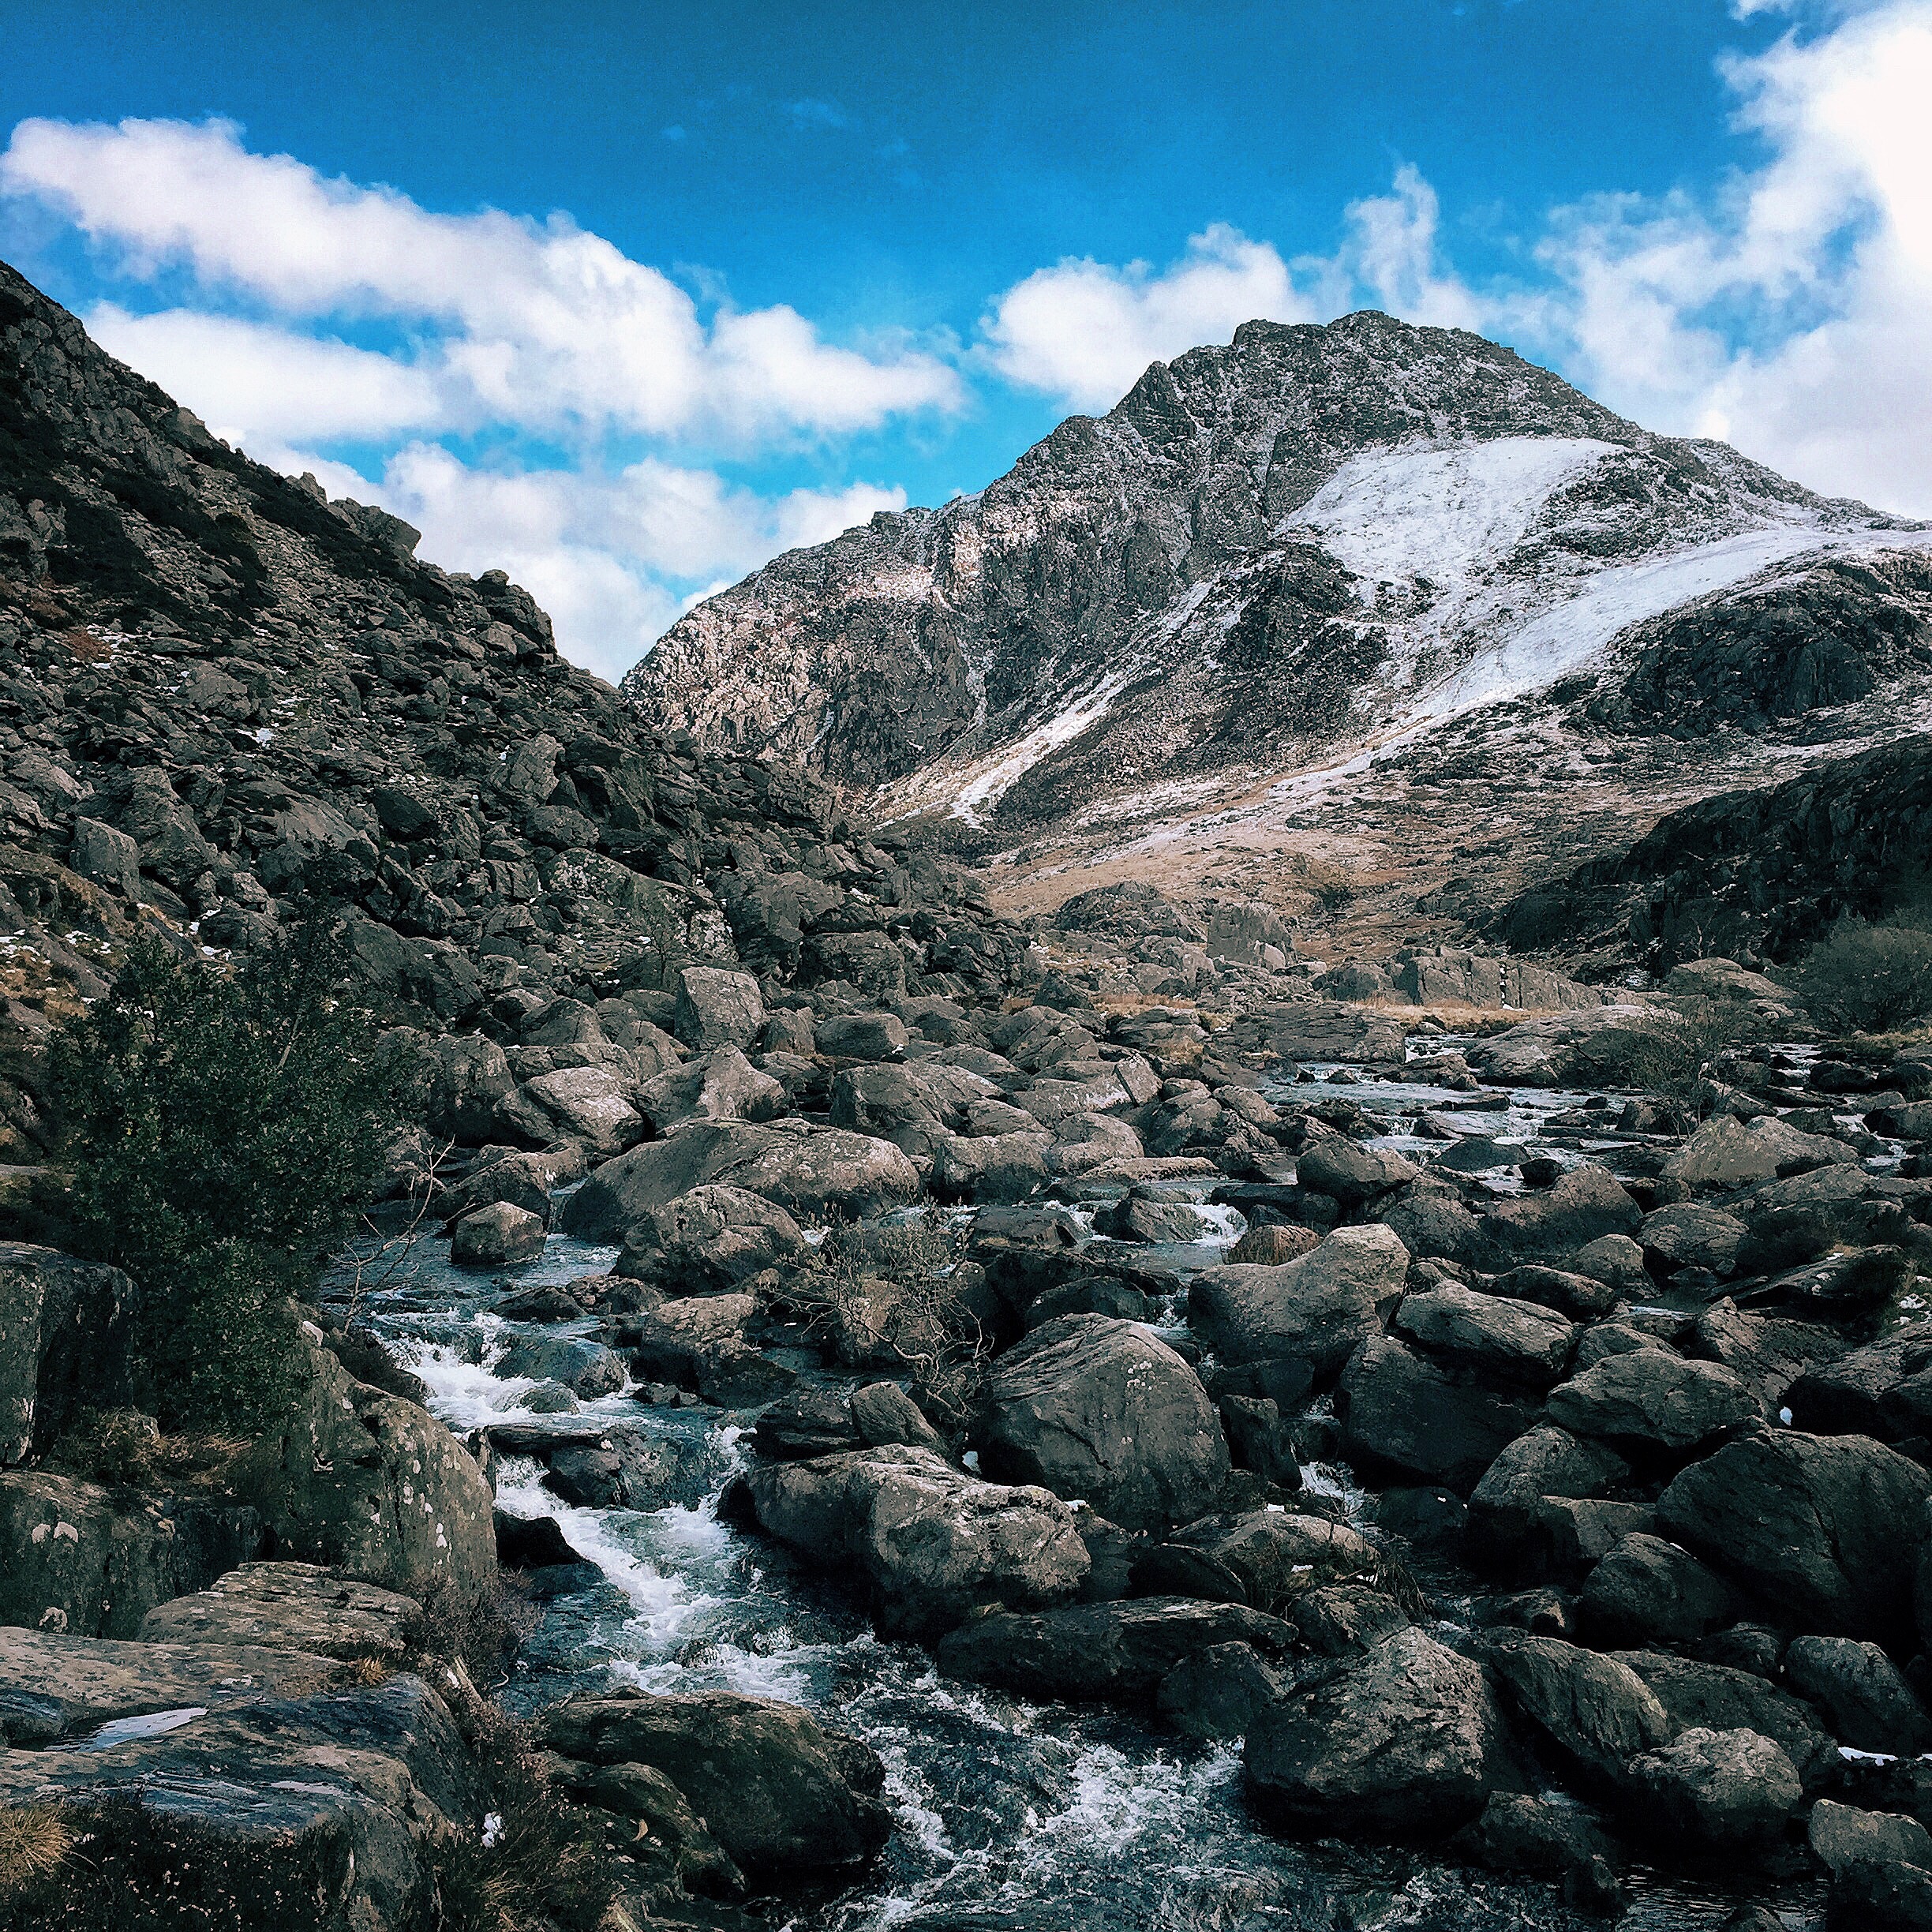
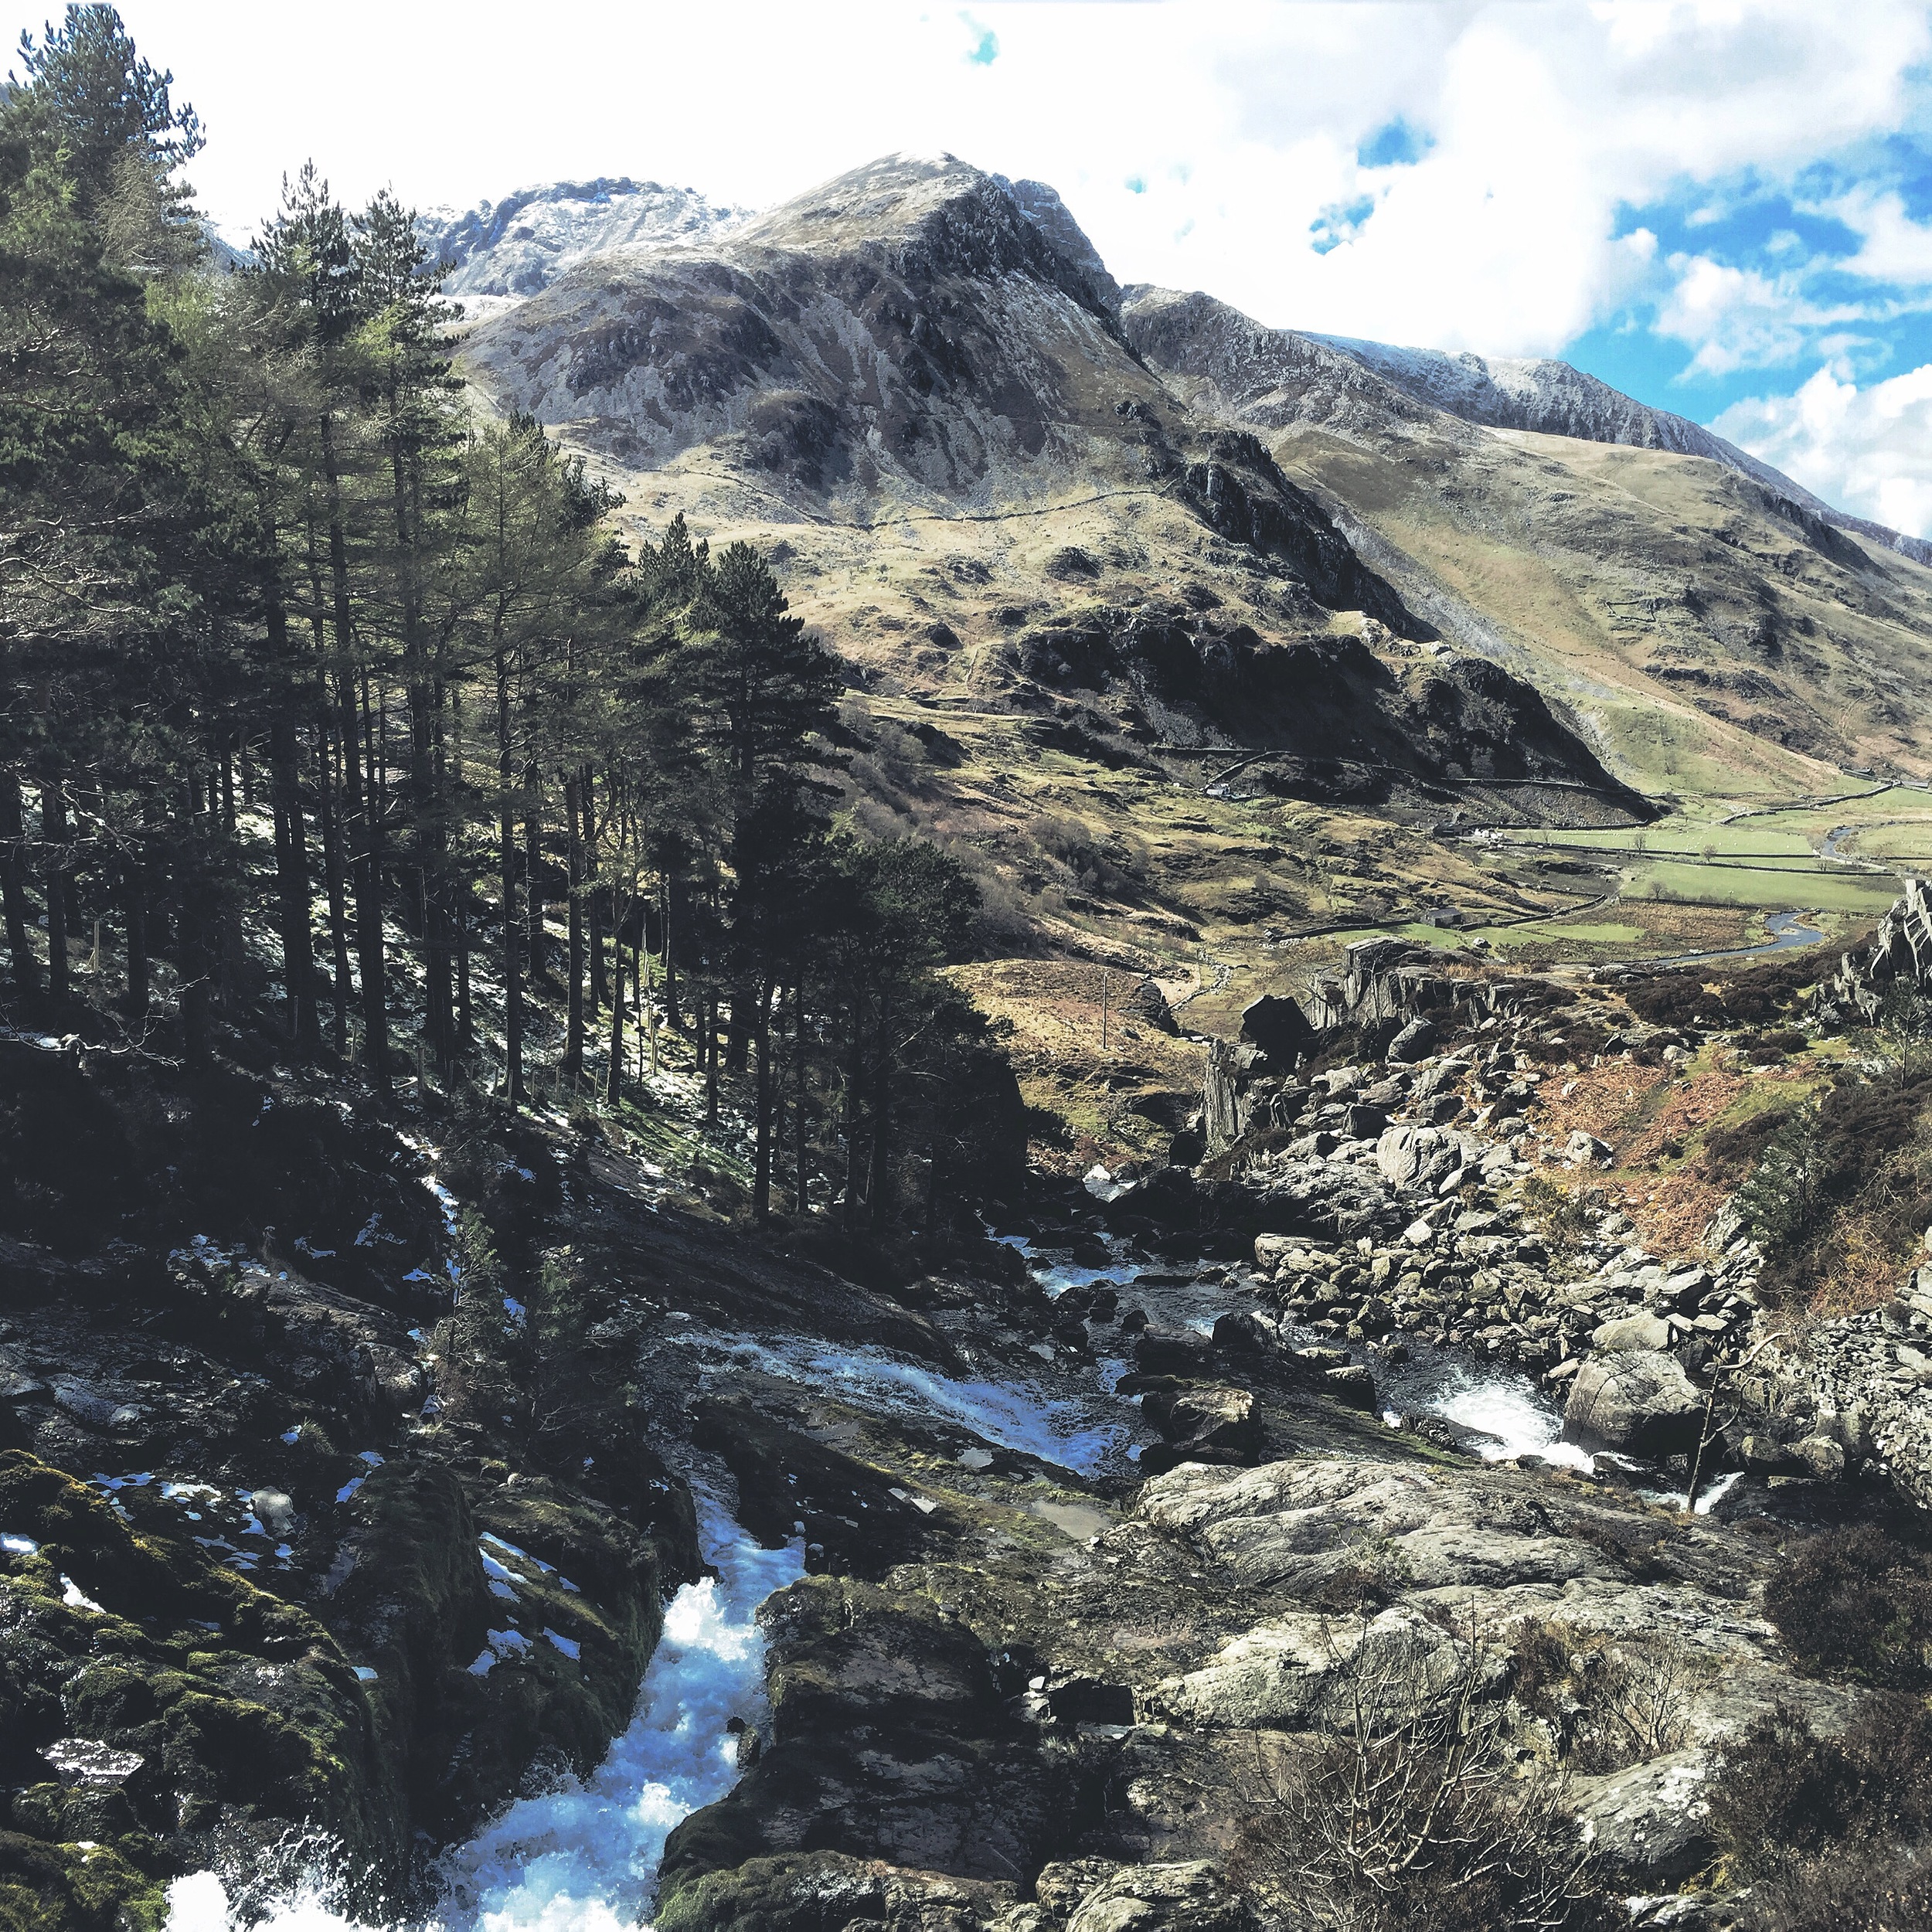
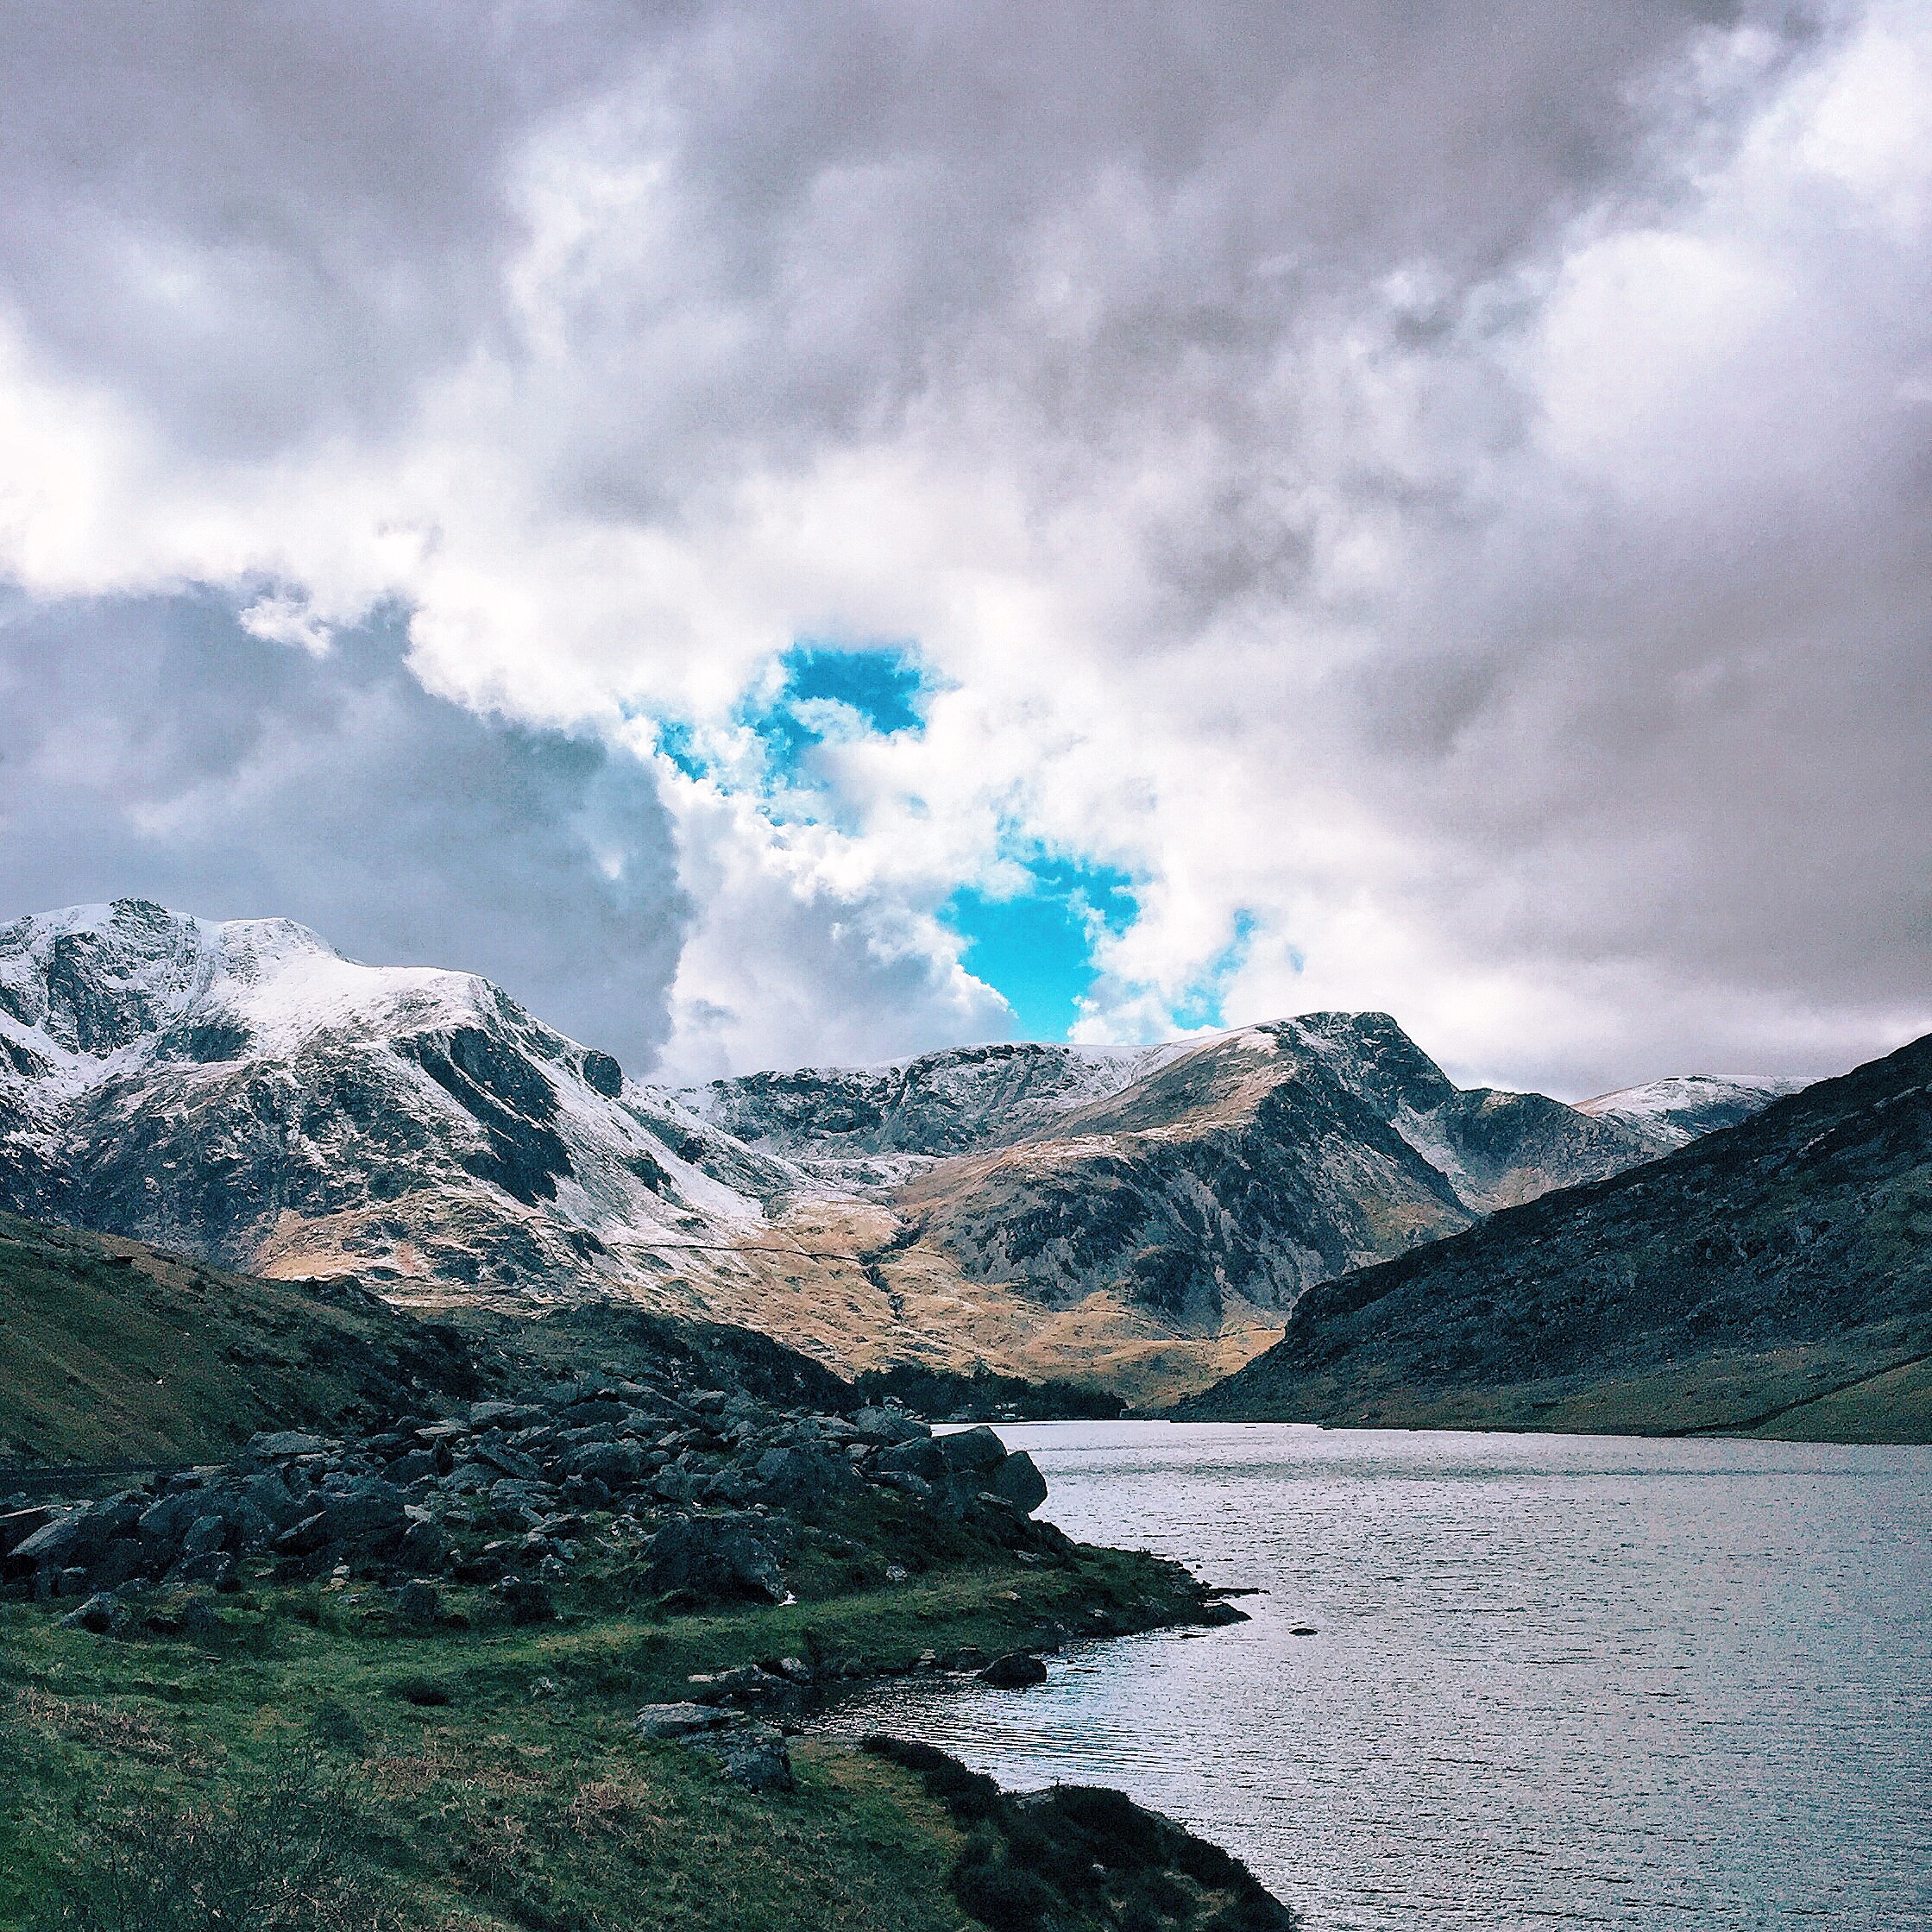
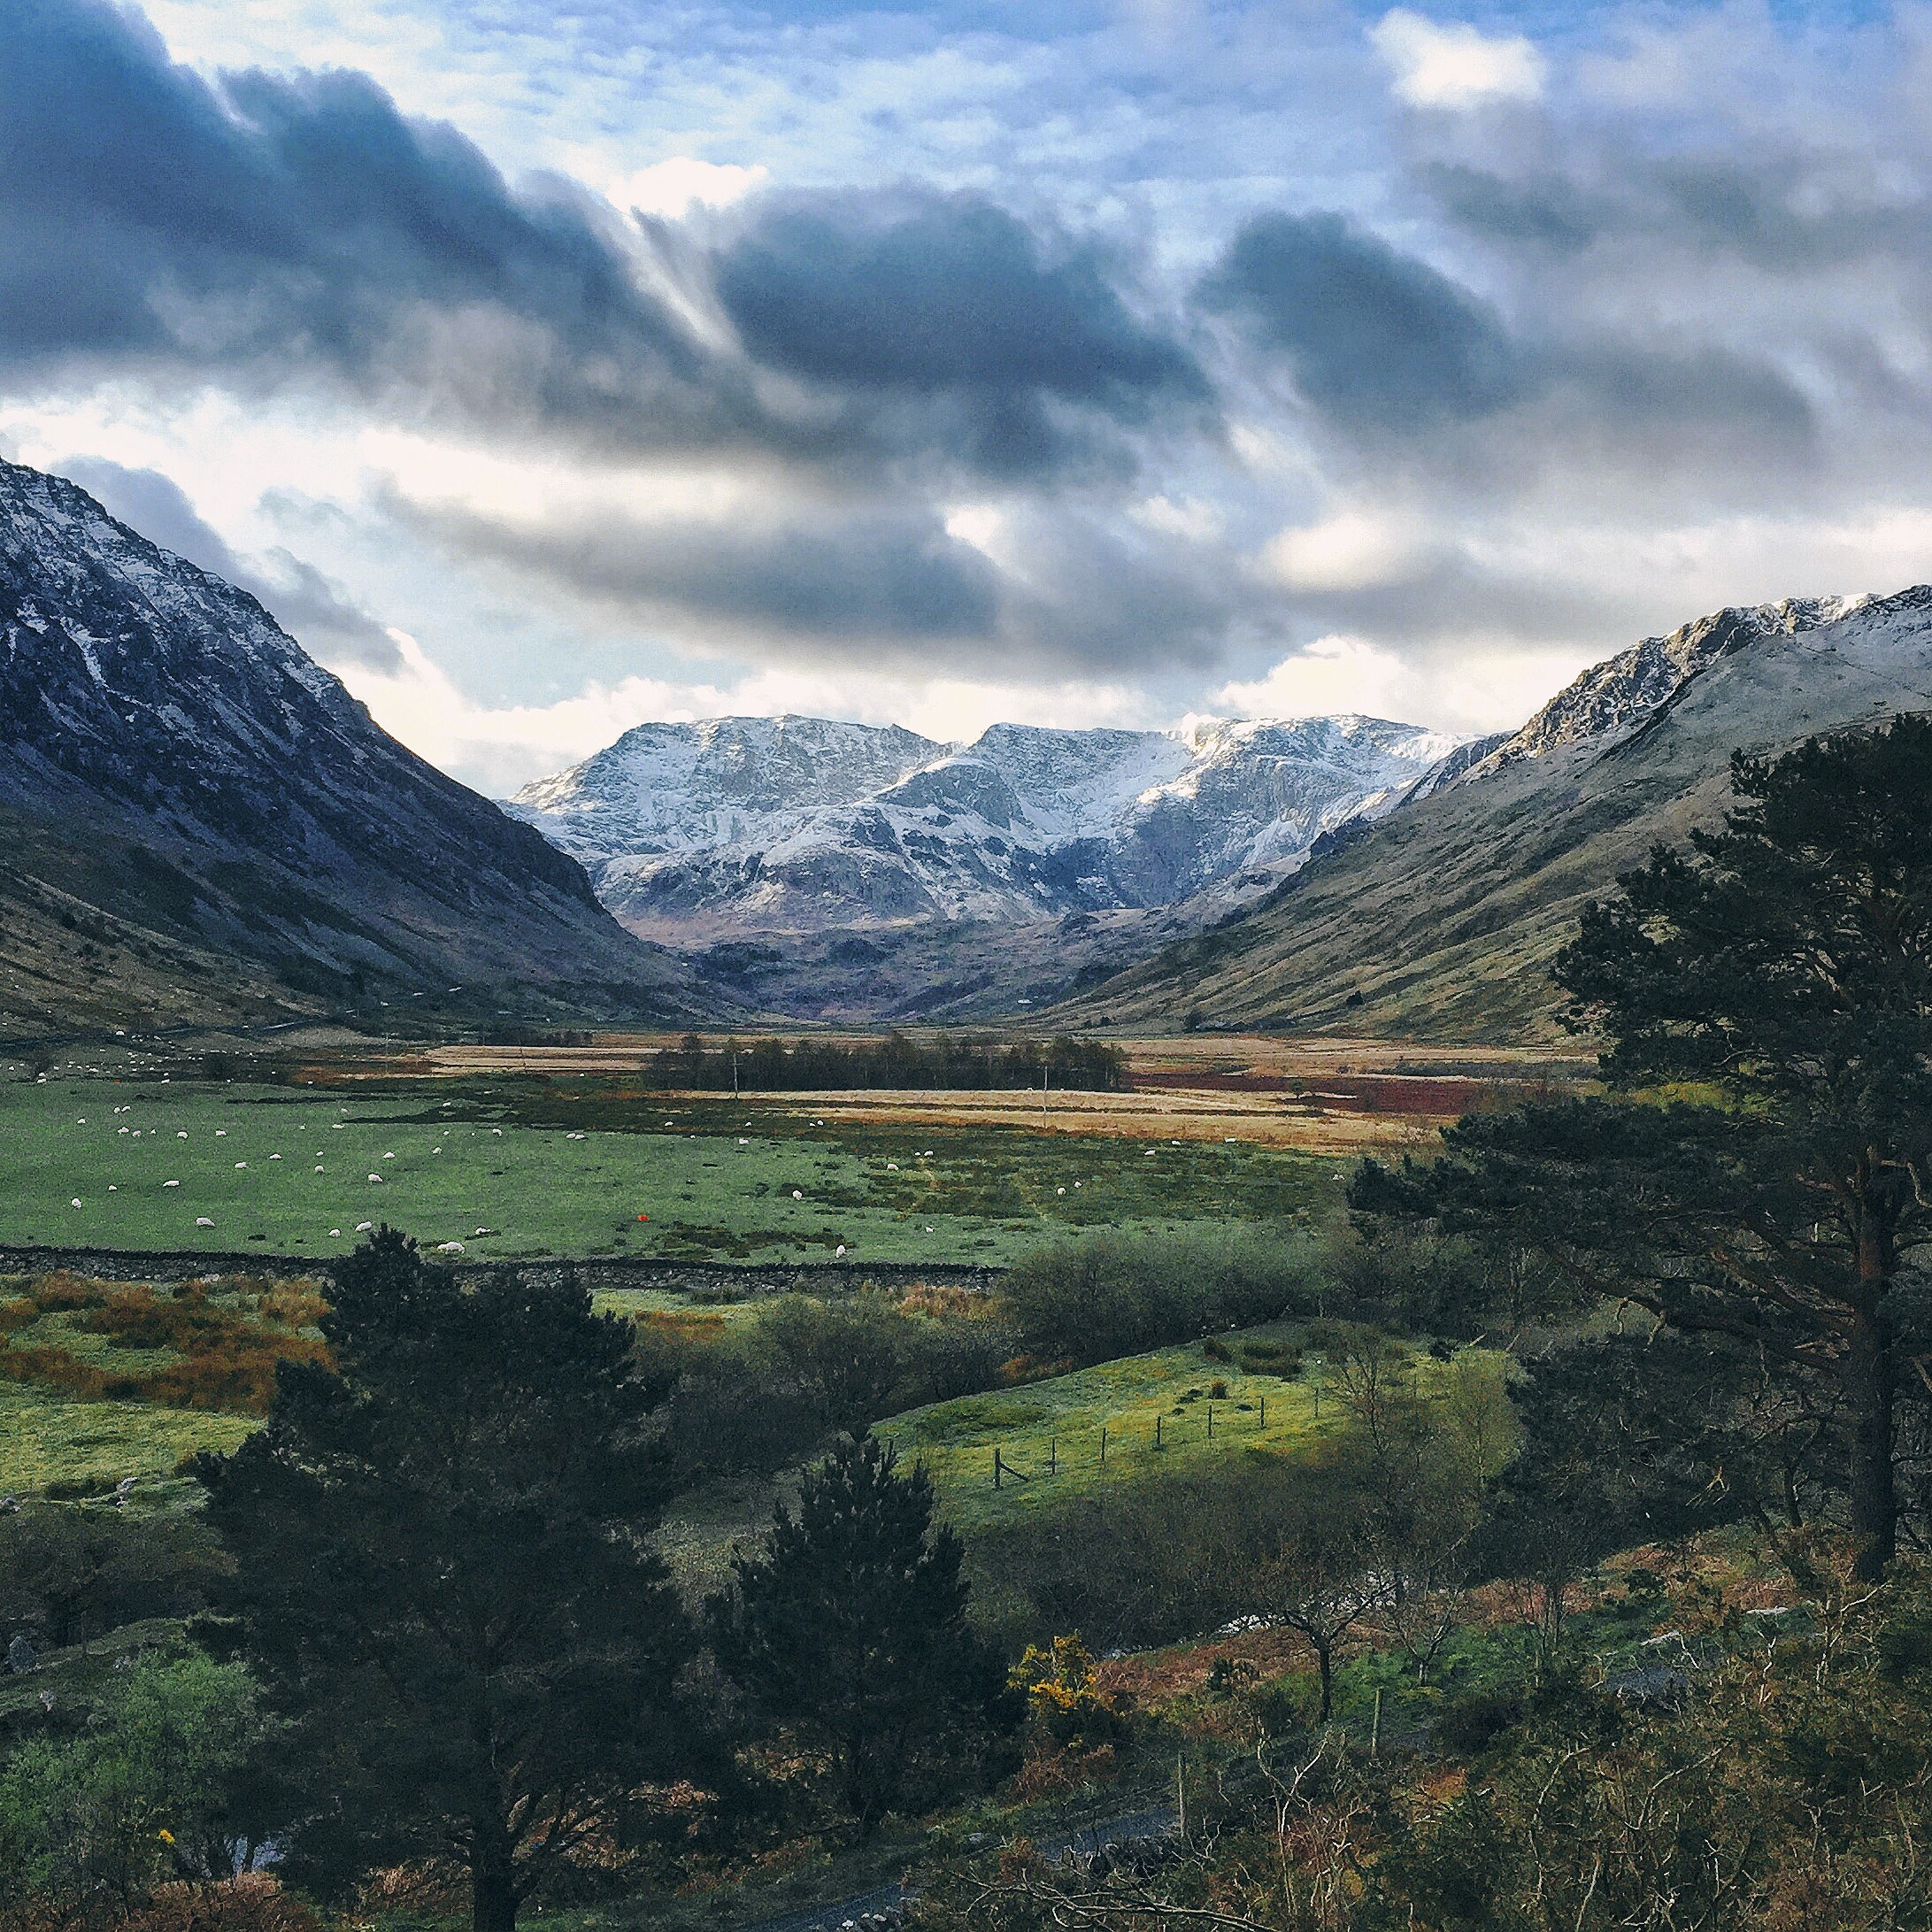
Learning to risk again: A Landscape Photography Trip
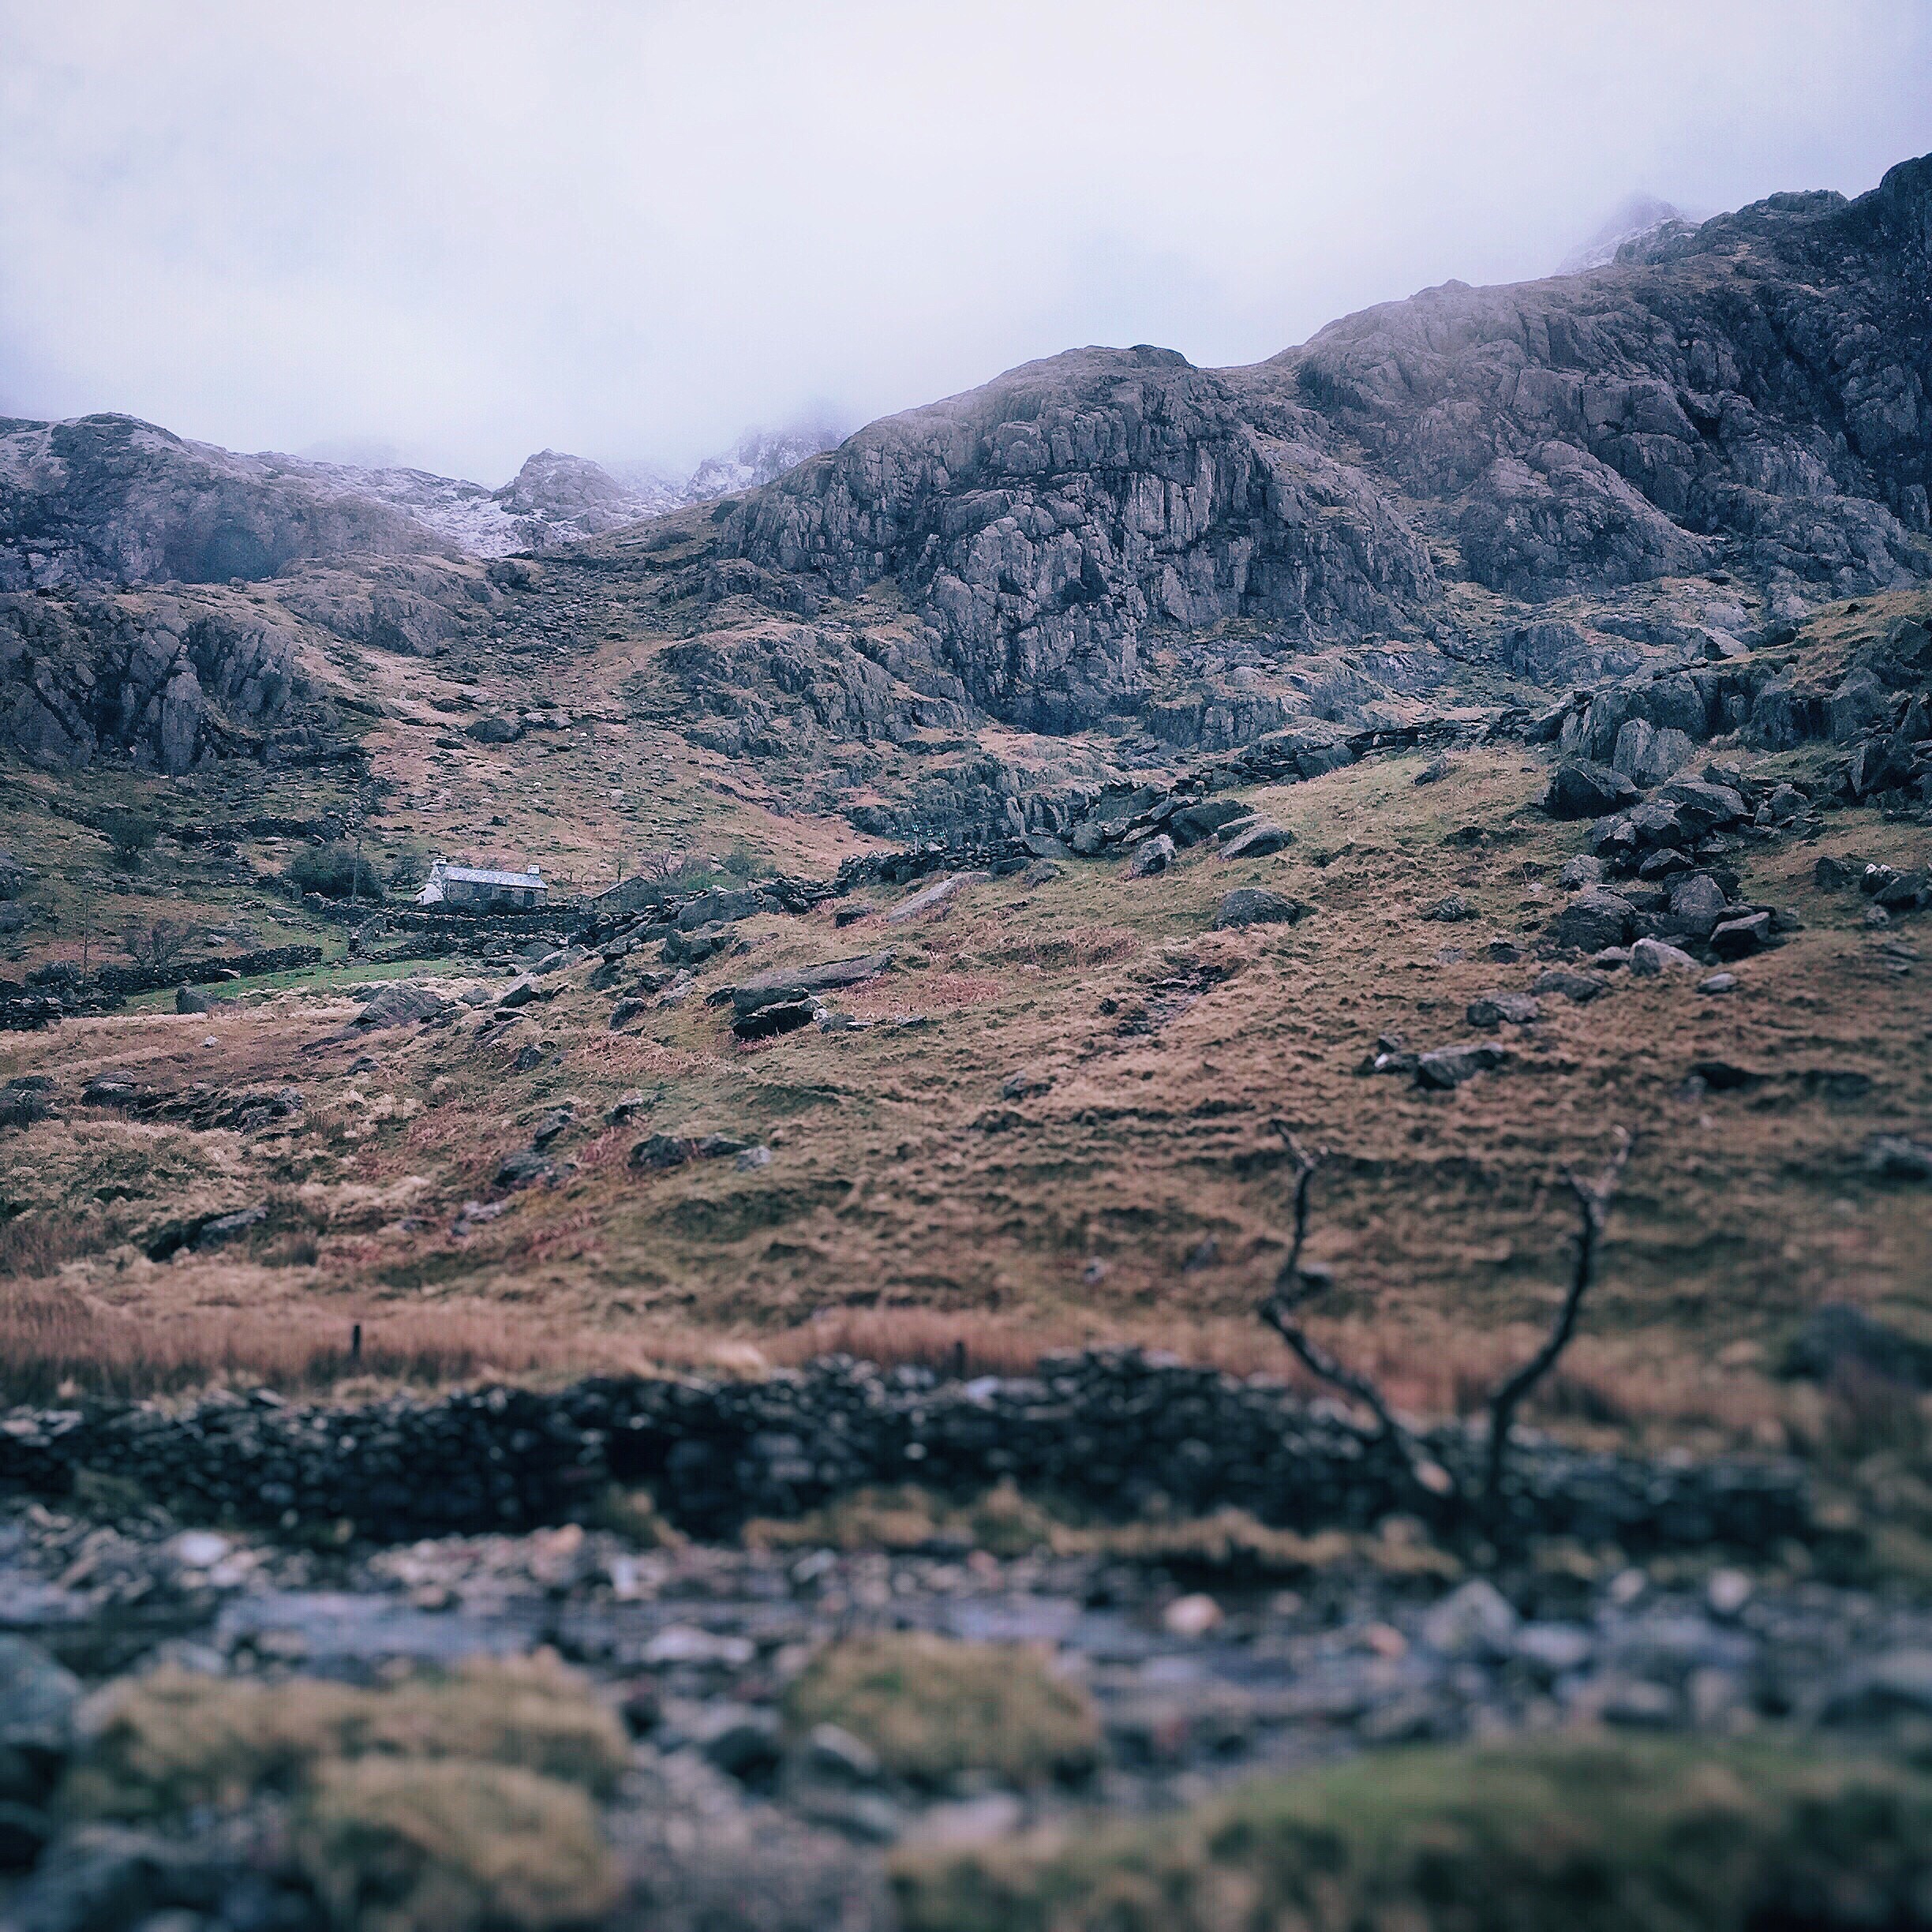
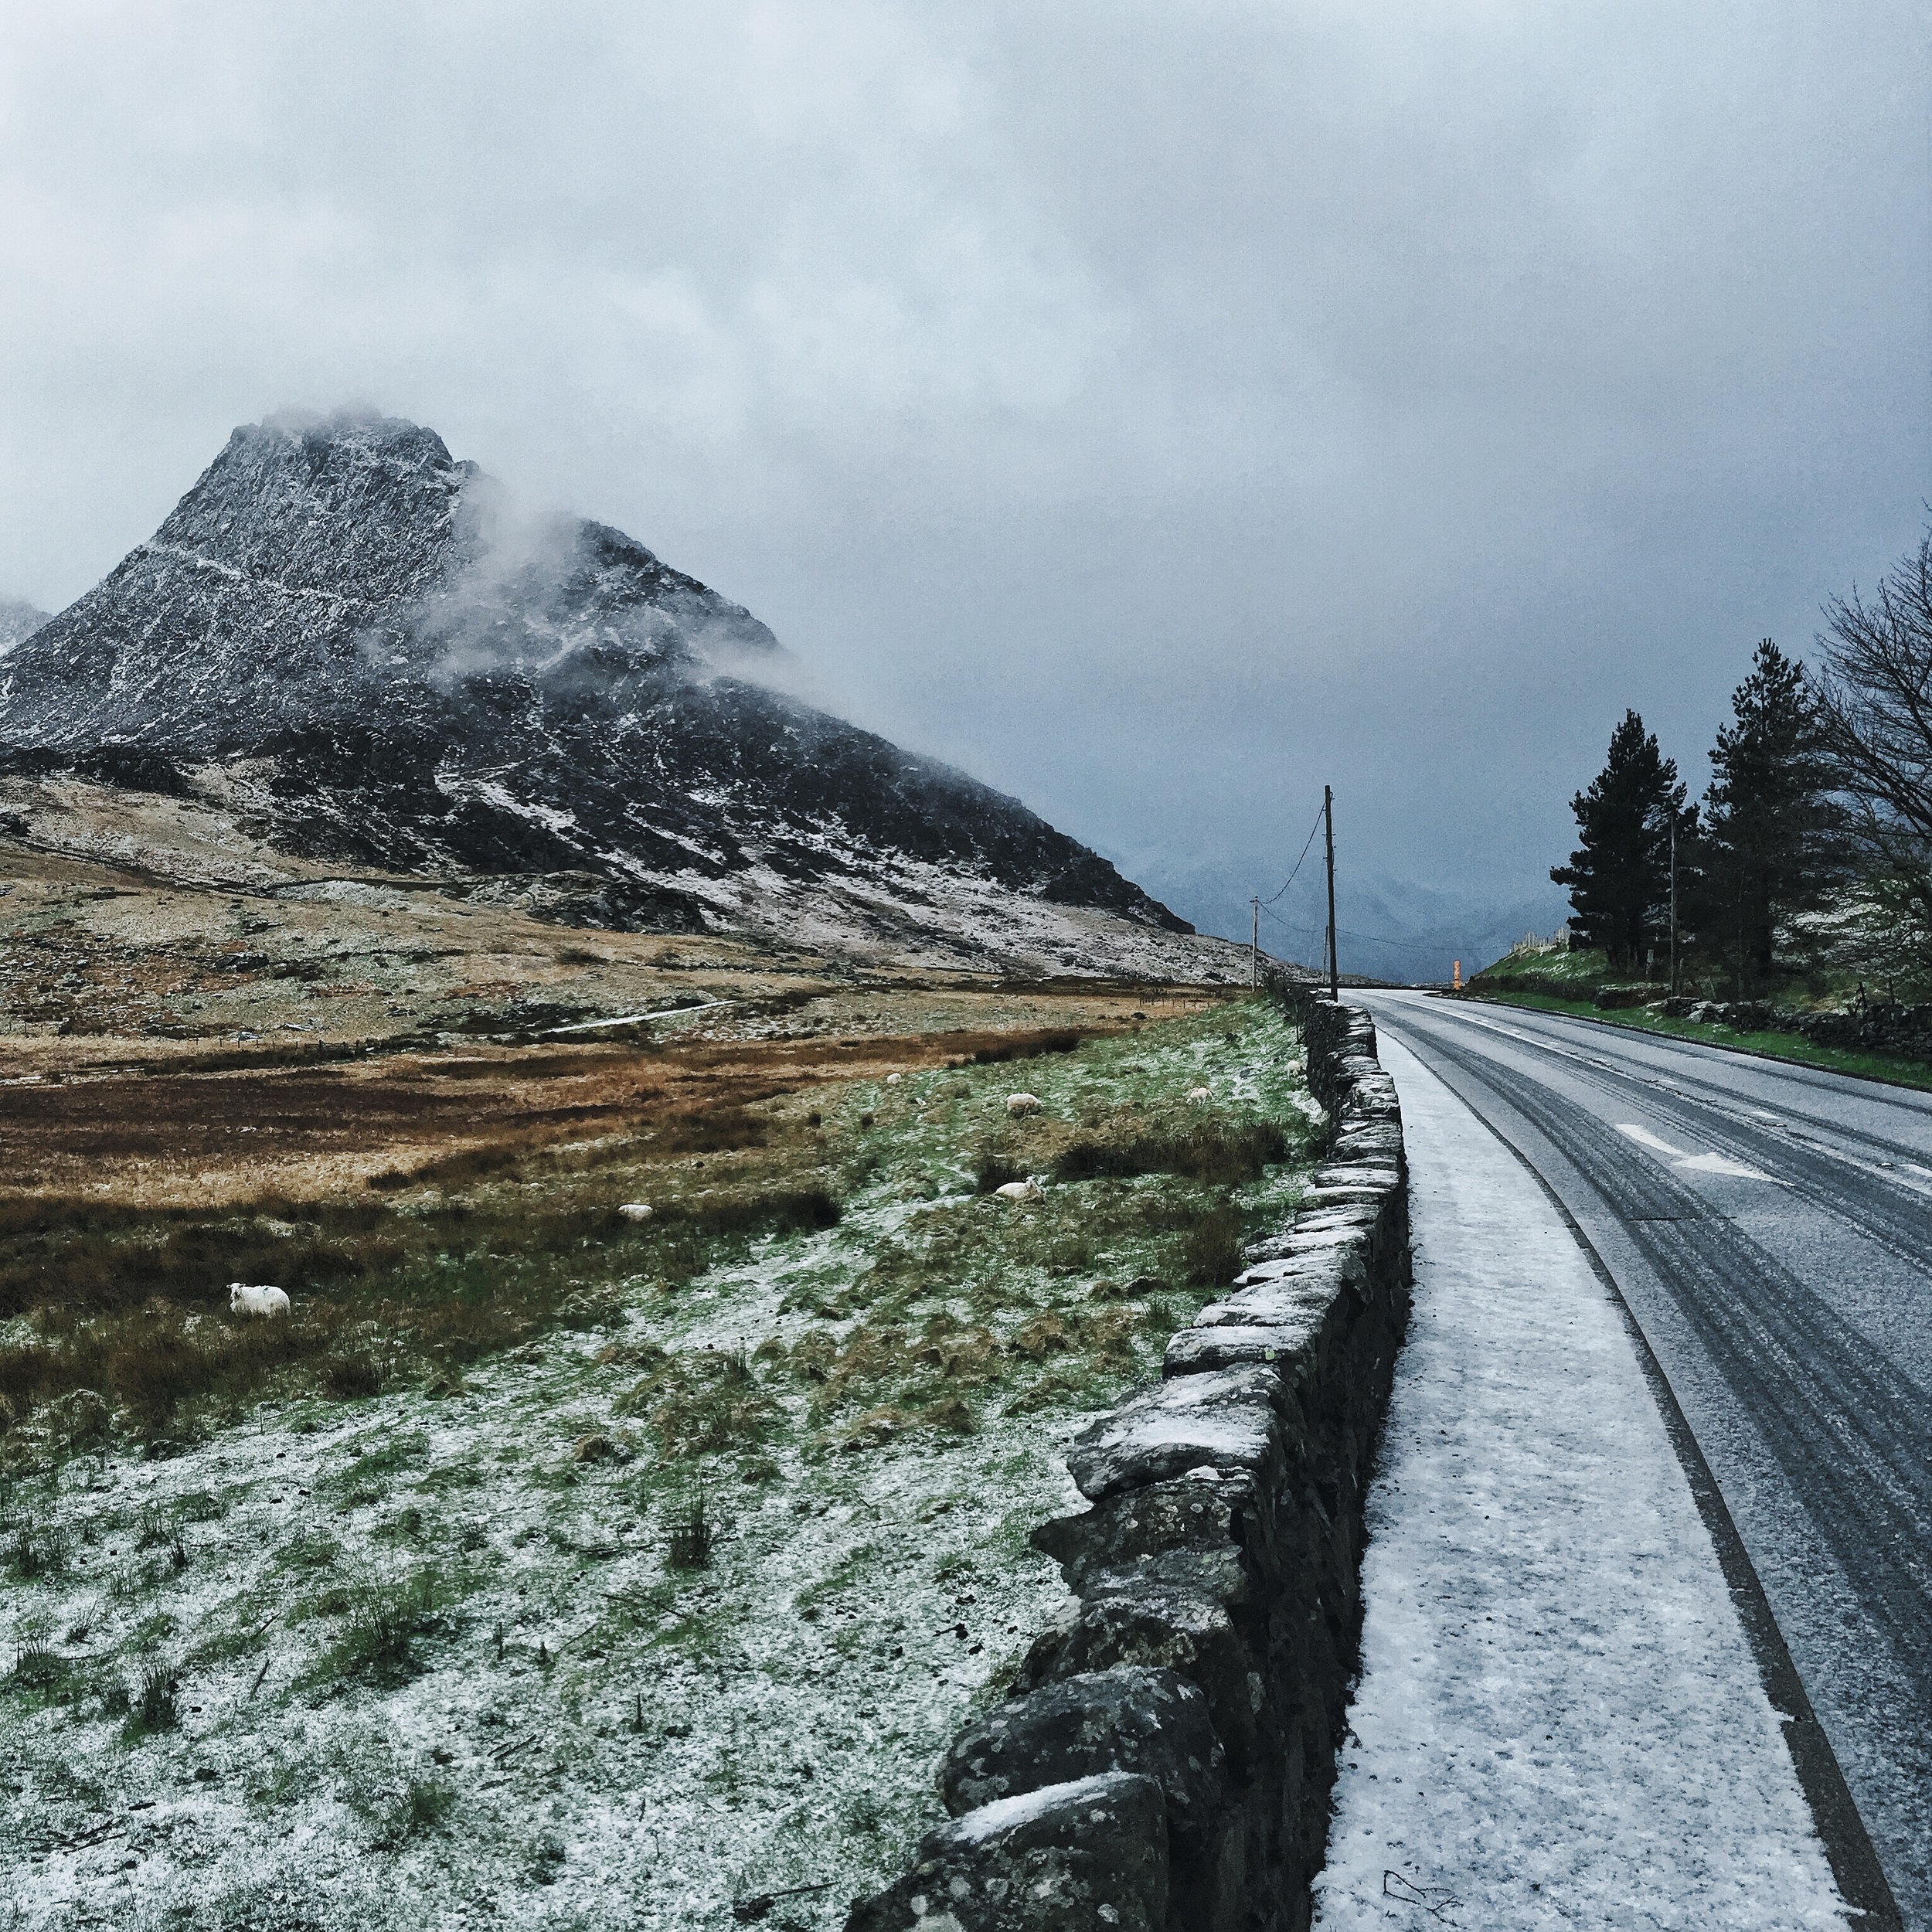
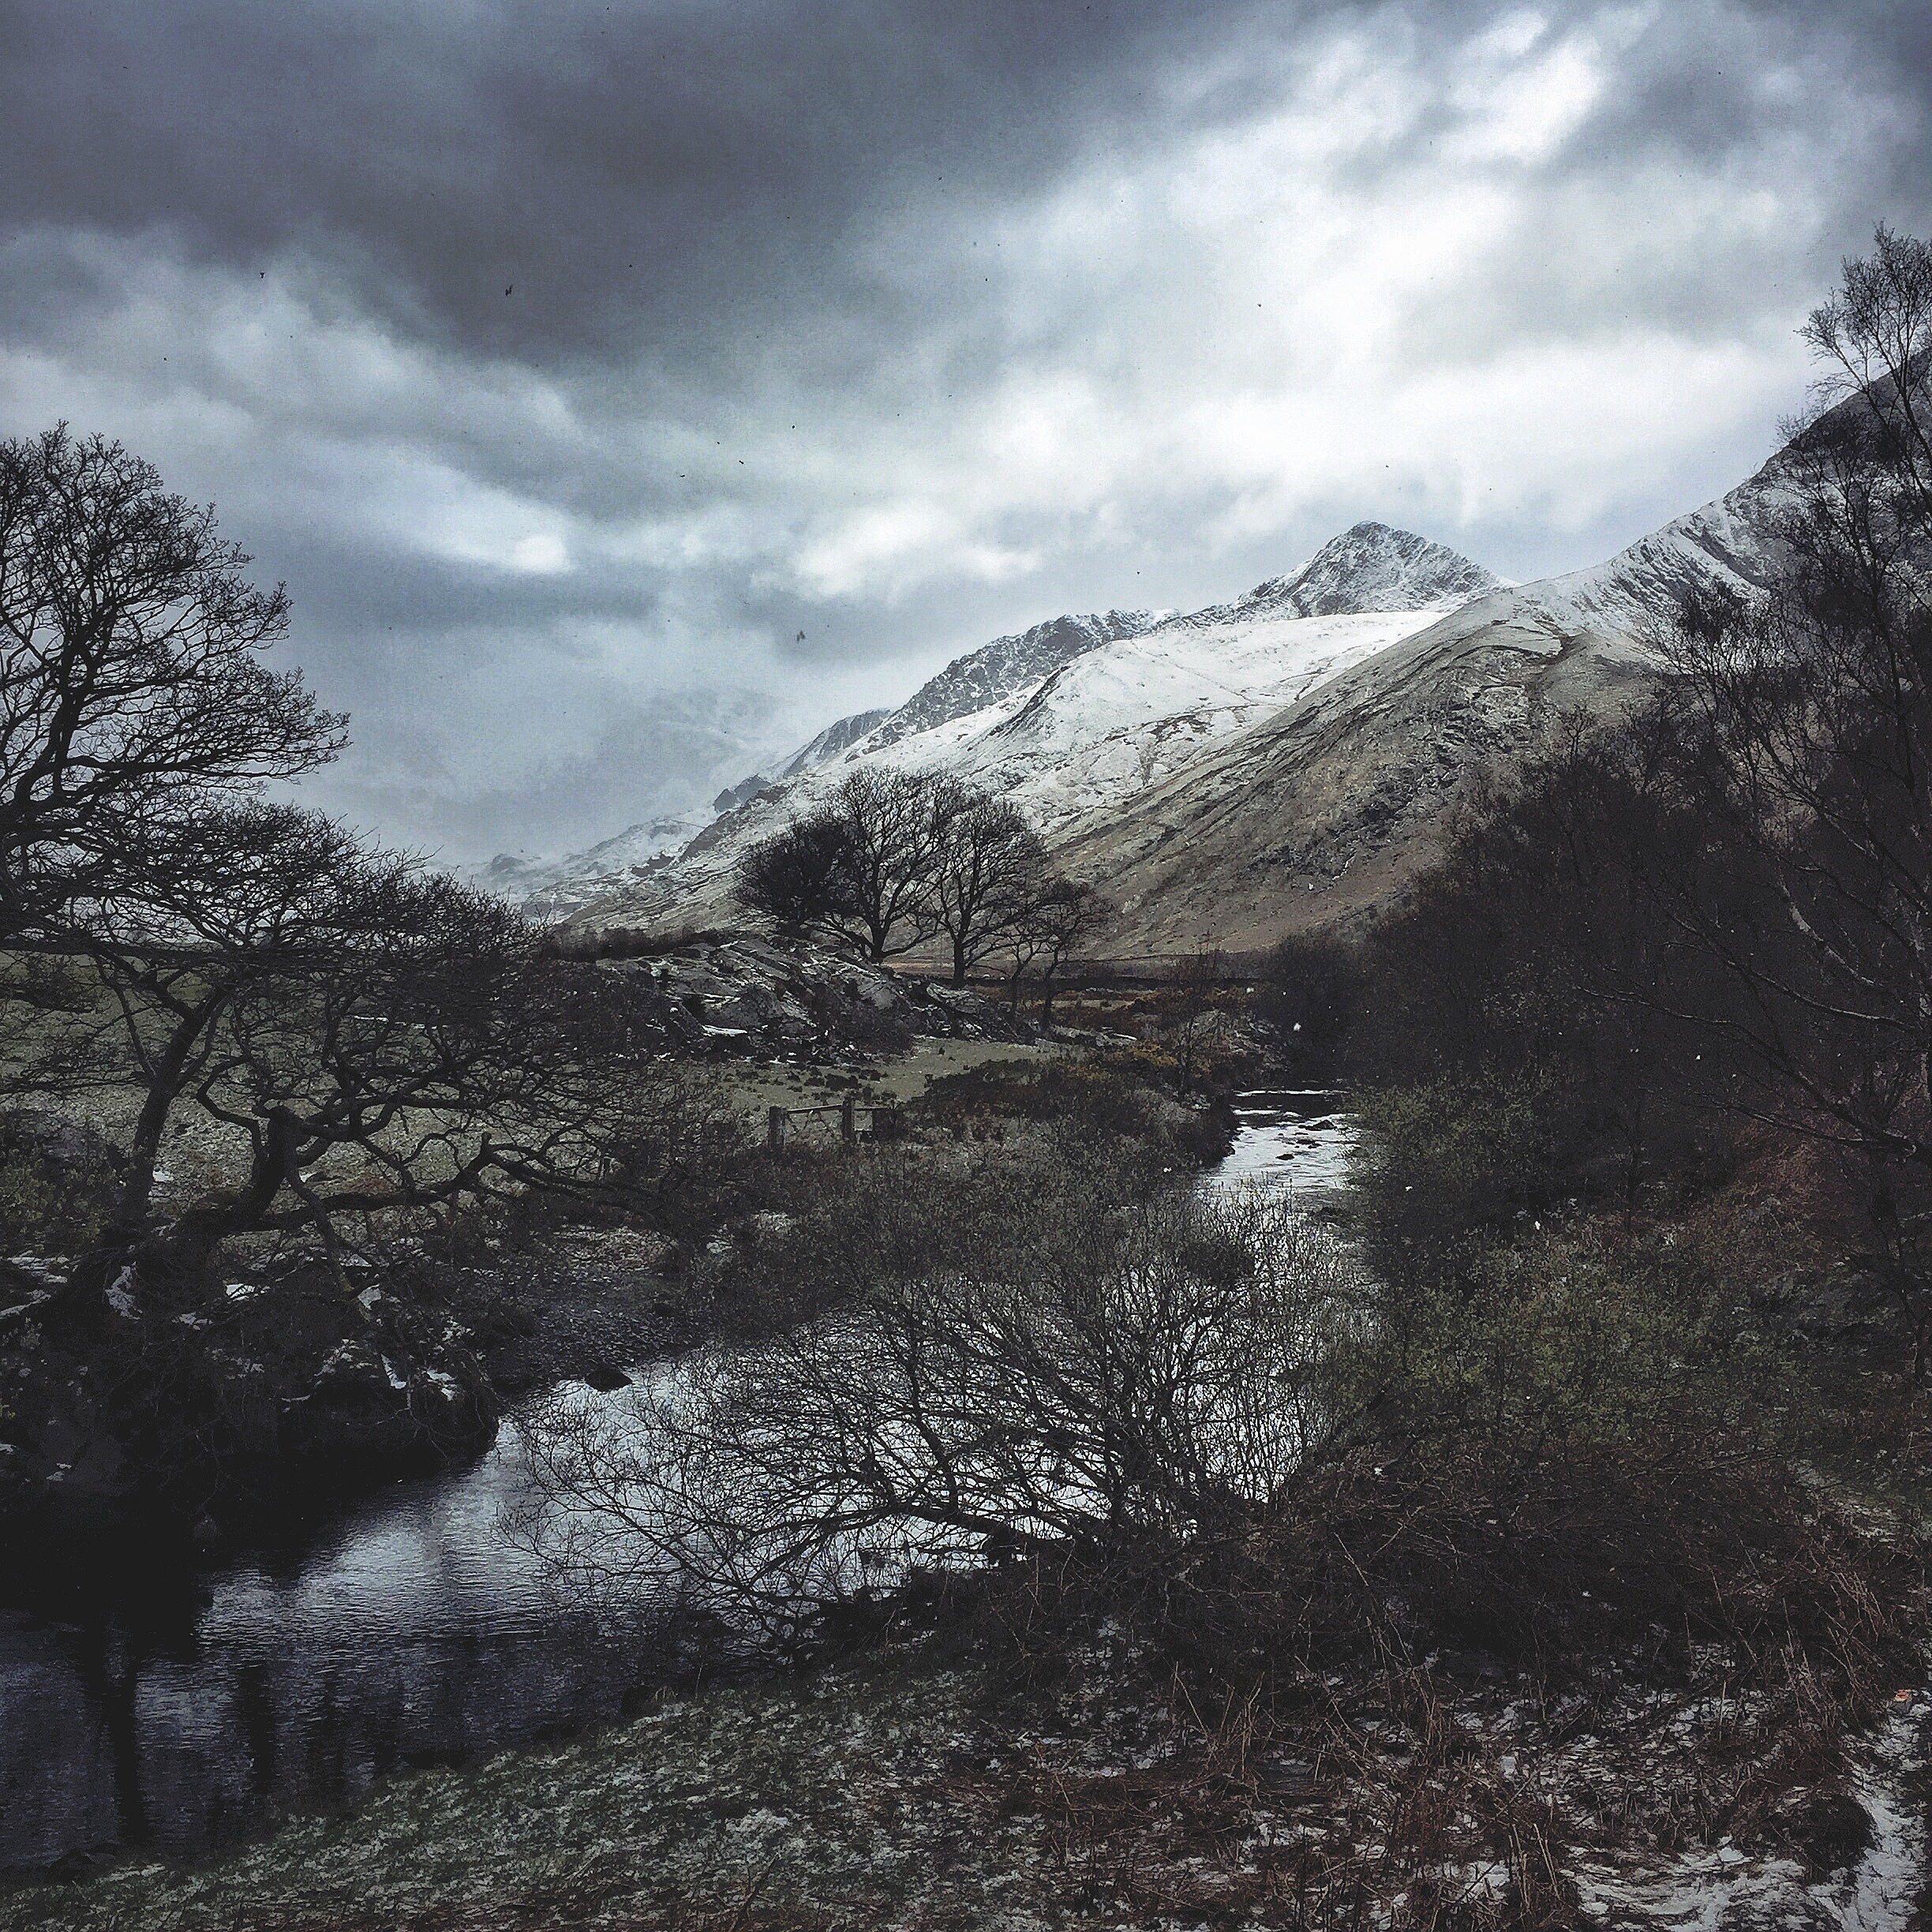
Last week I packed my bags and headed off for a few days to Snowdonia in Wales. The idea was to just leave and shoot something completely different, outside my comfort zone, to keep photography fresh for myself and take it out of the daily grind. There was no guarantee the trip wouldn't be a waste as I'm not a professional landscape photographer by any means, but I think the best creativity will always come out when you are taking risks.
When I got home I edited together this little road trip movie / photography tutorial from the journey with some of the things I learnt, so I'll shut up now and let the video speak for itself:)
I hope you enjoy:
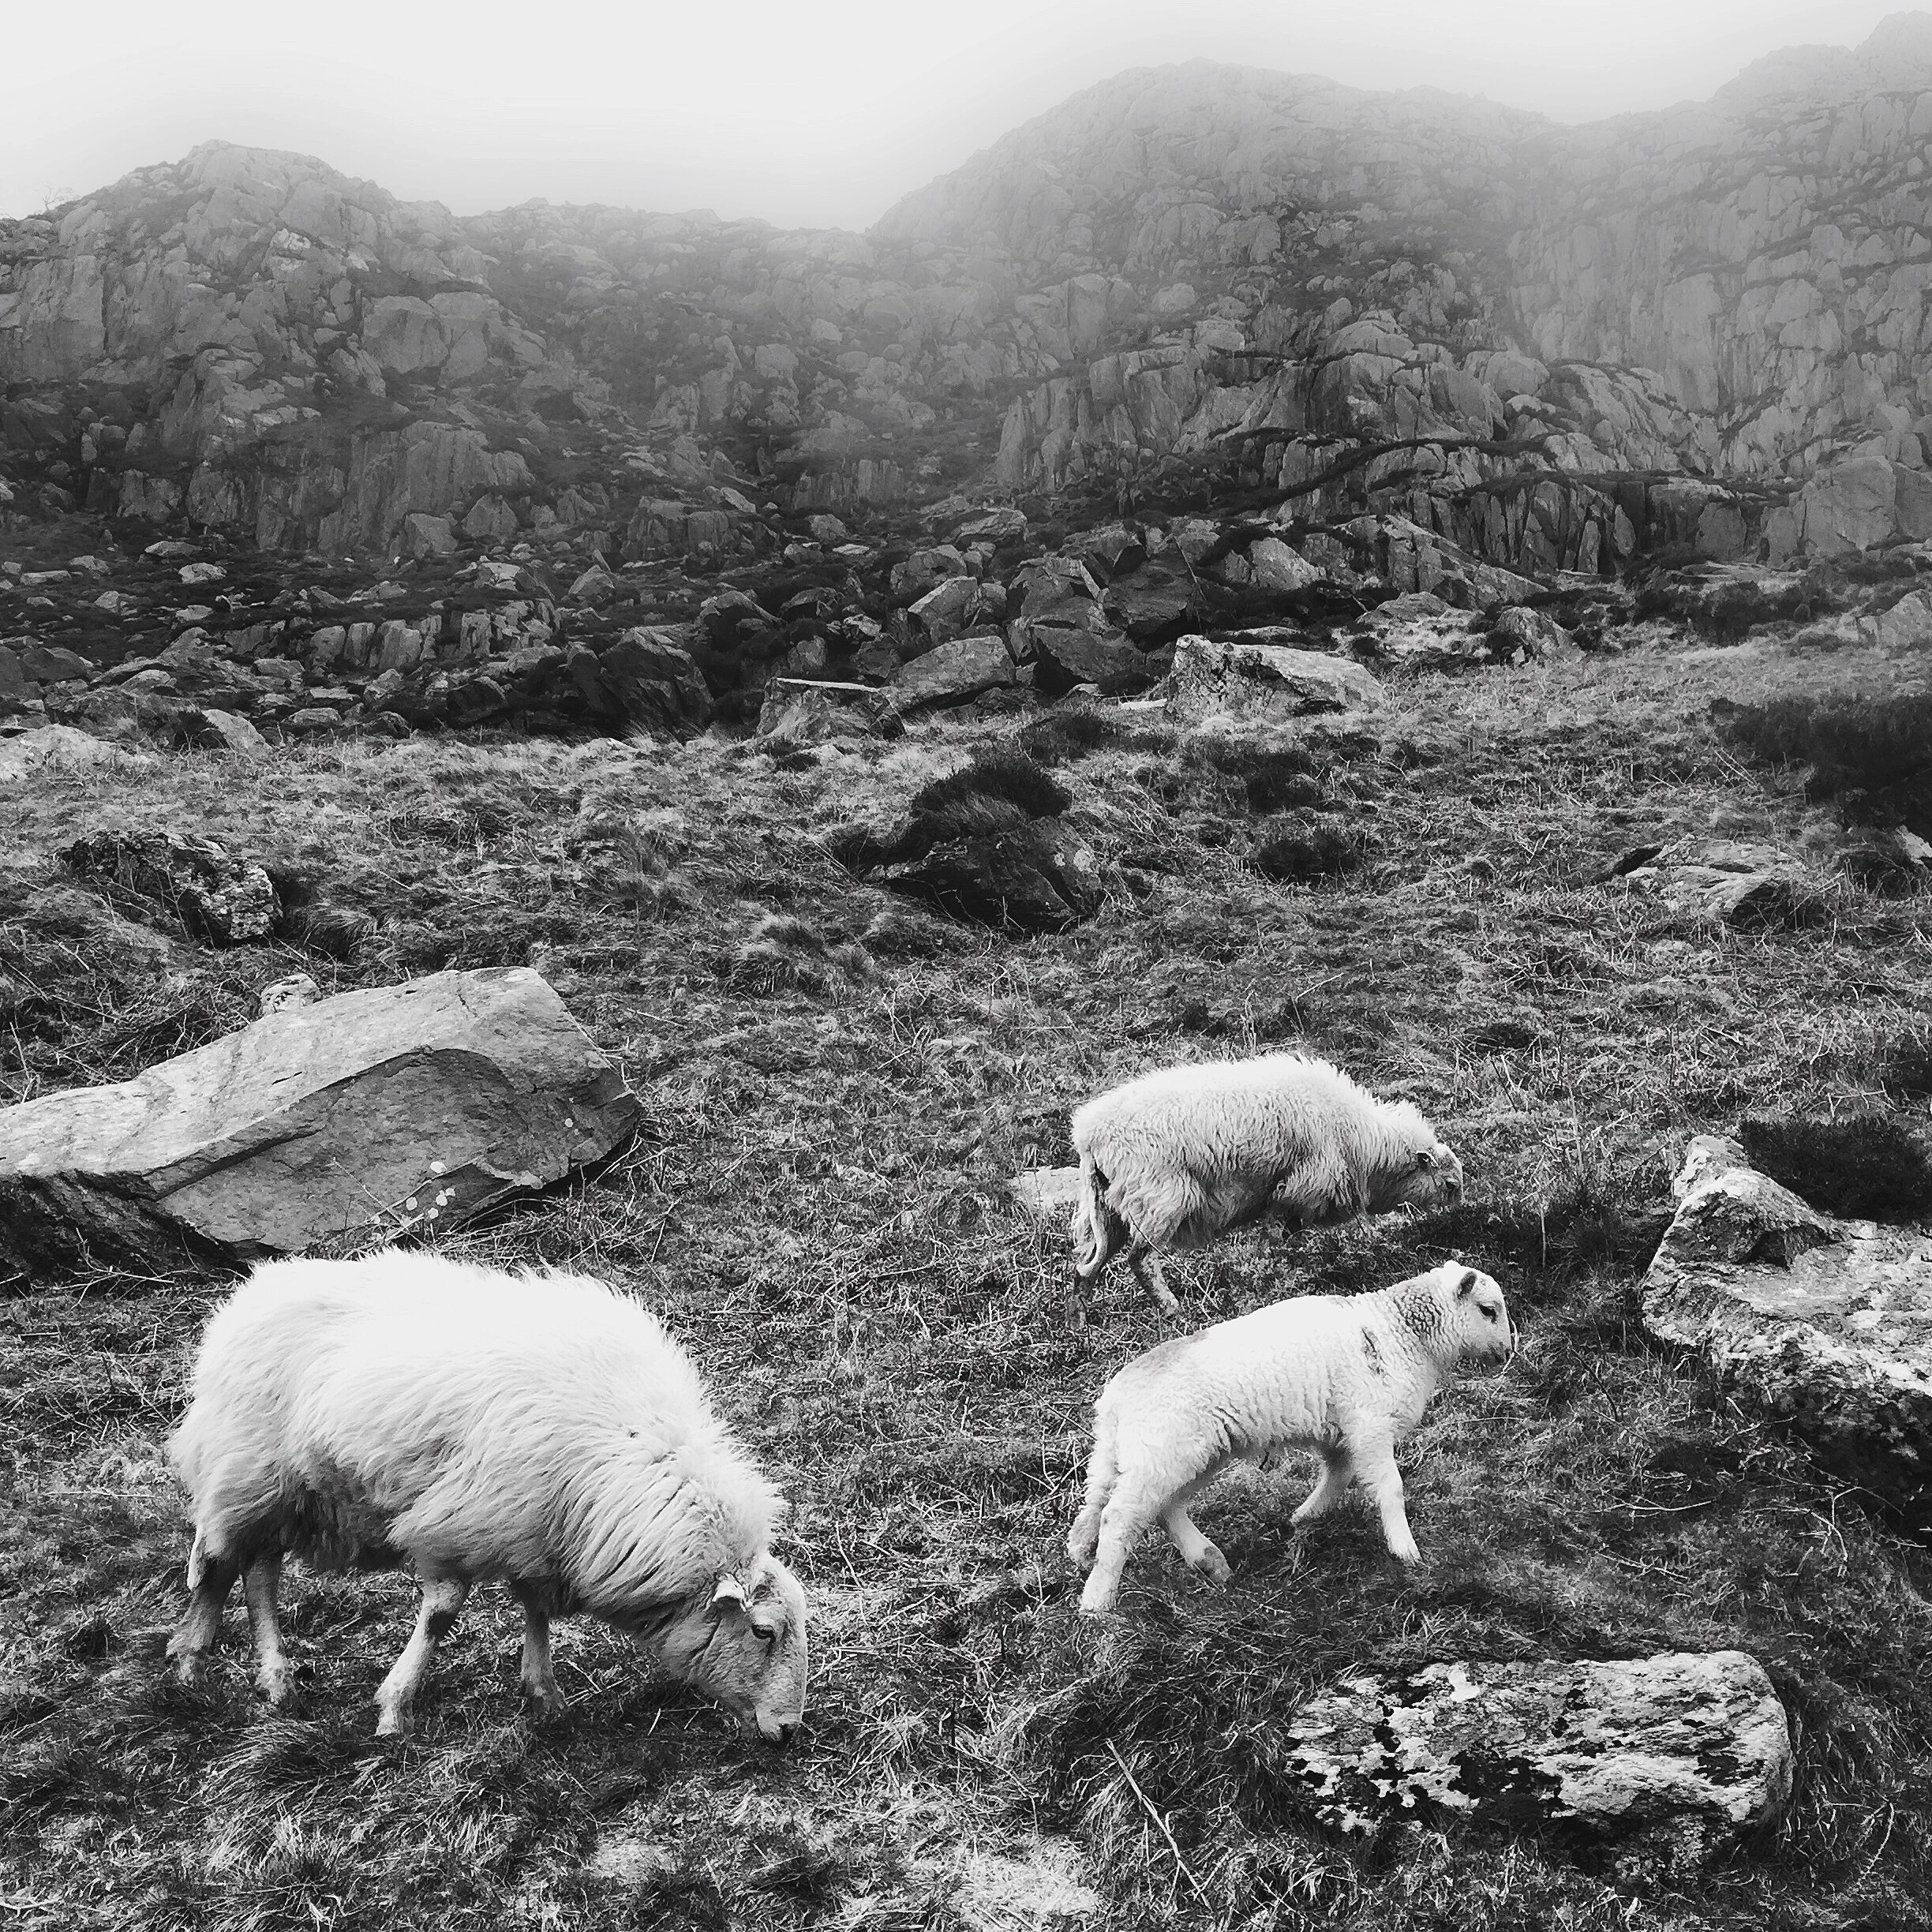
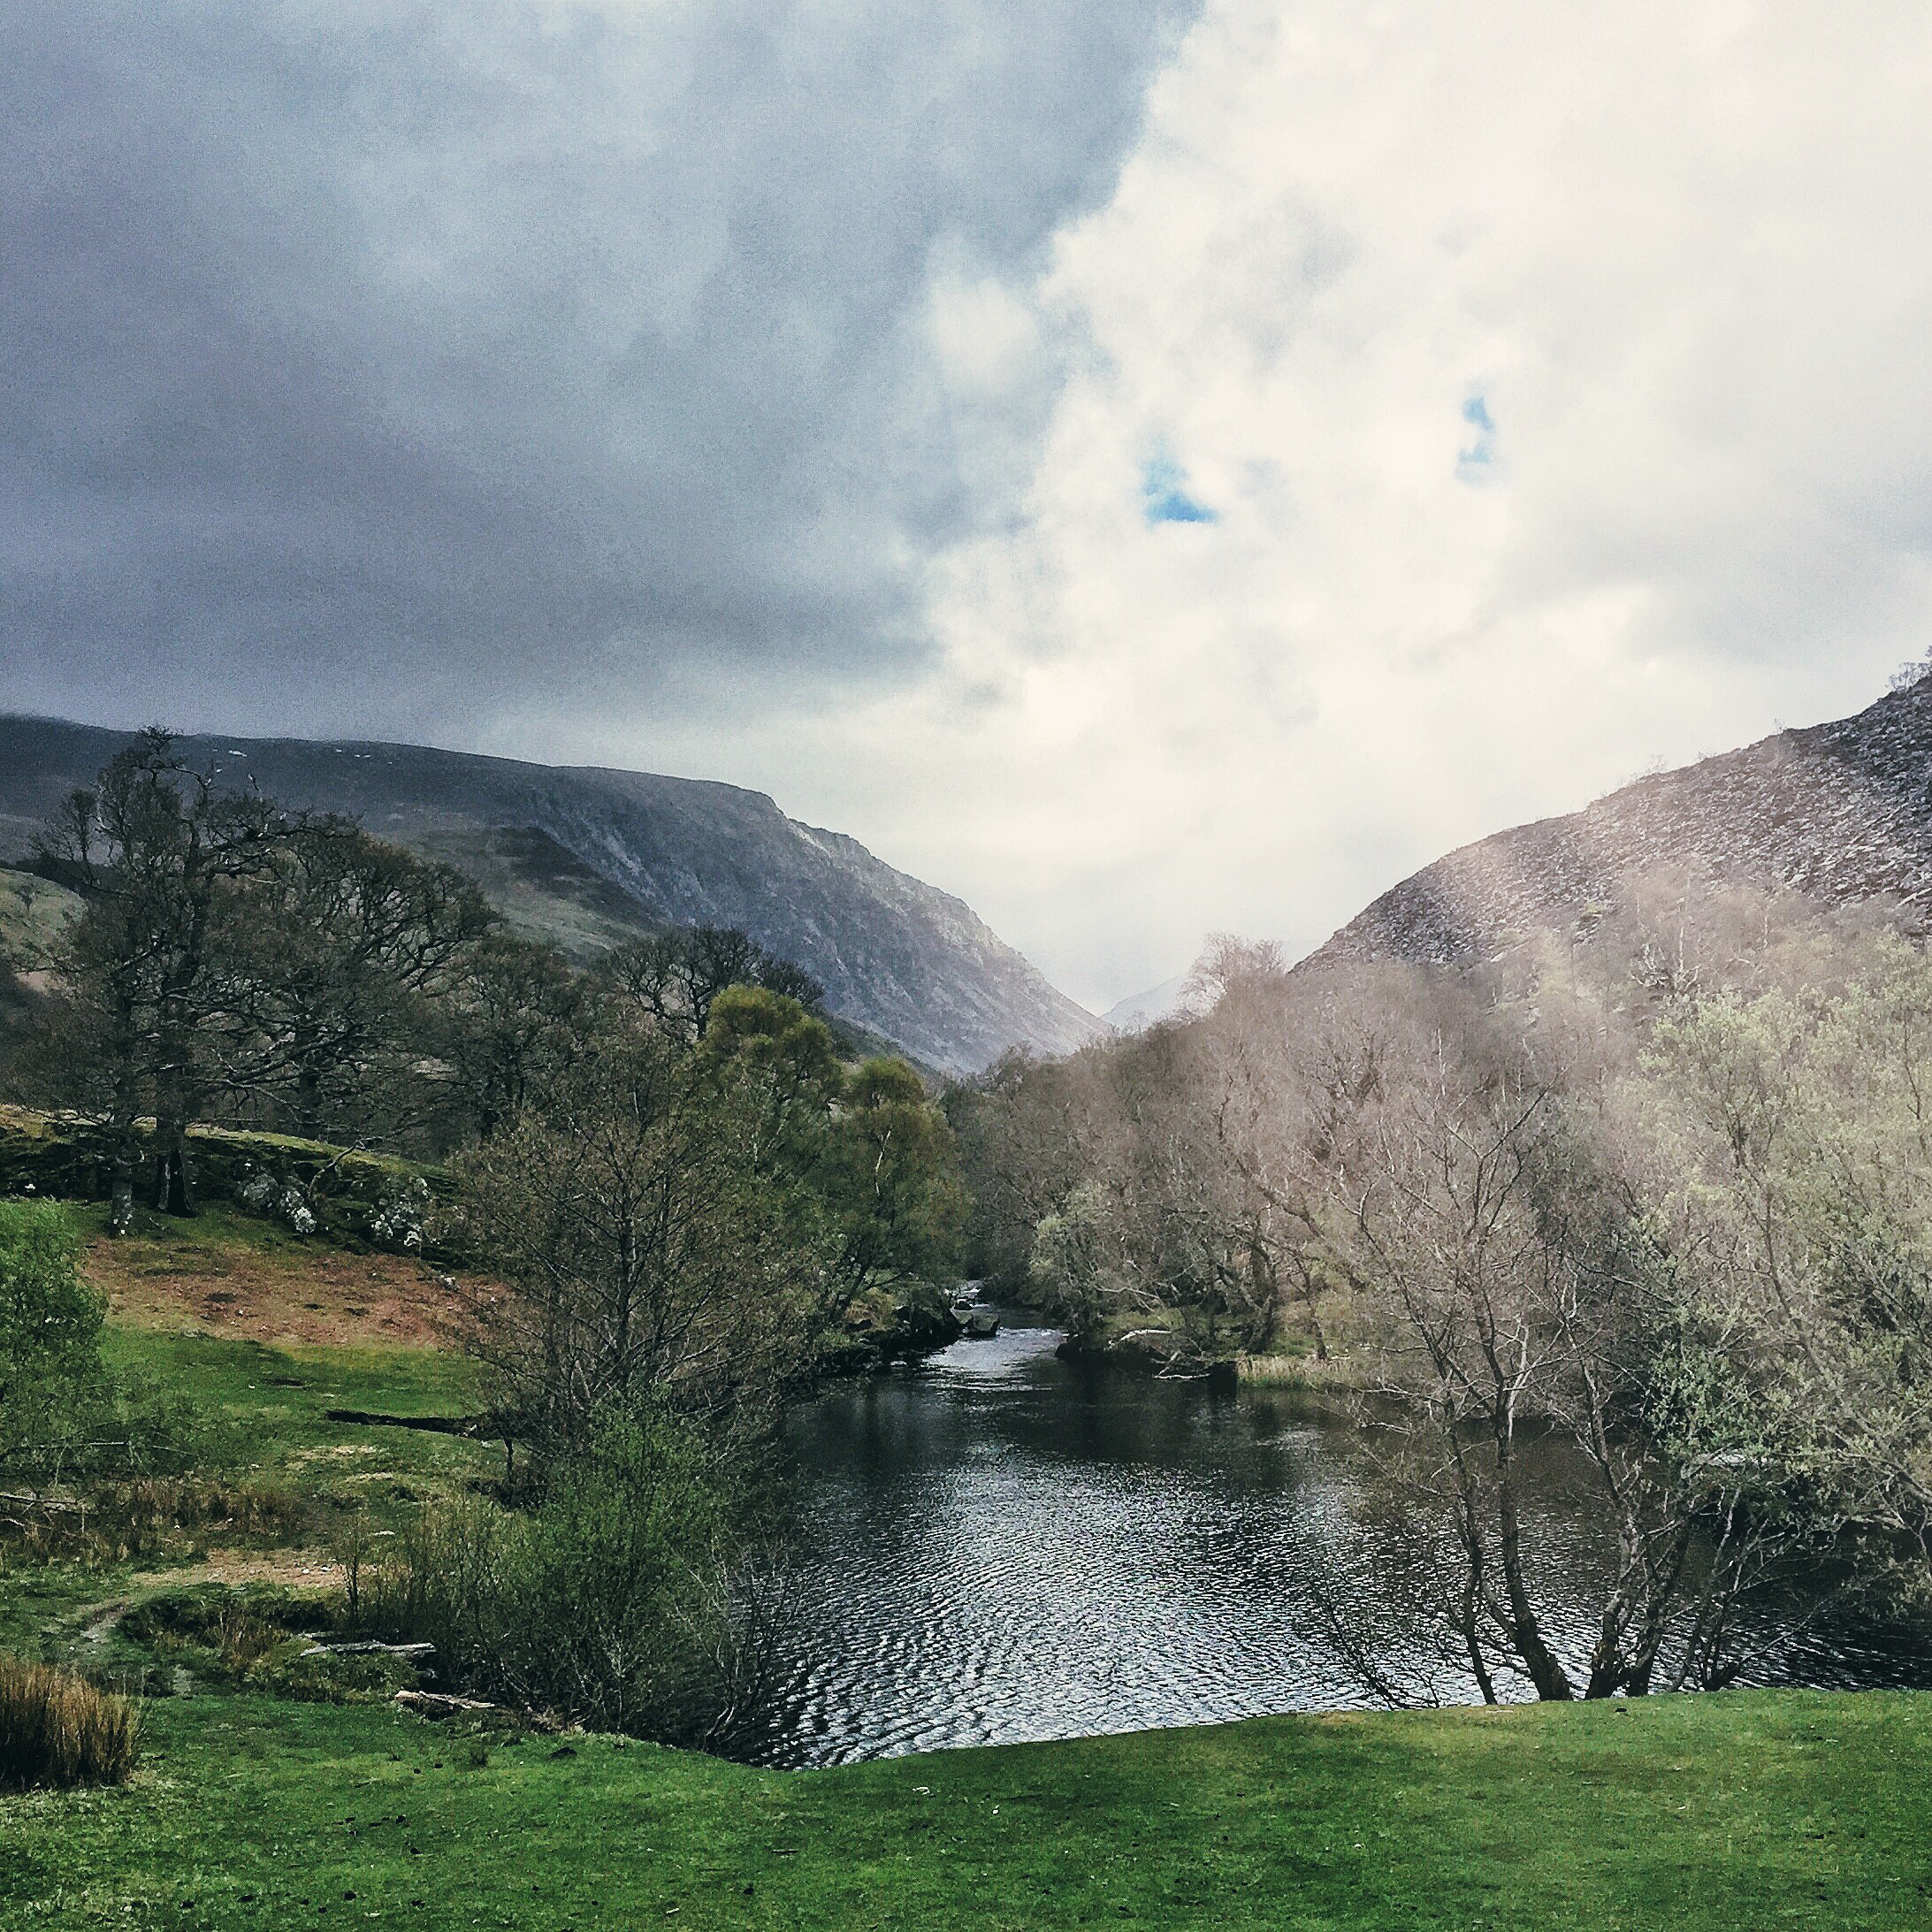
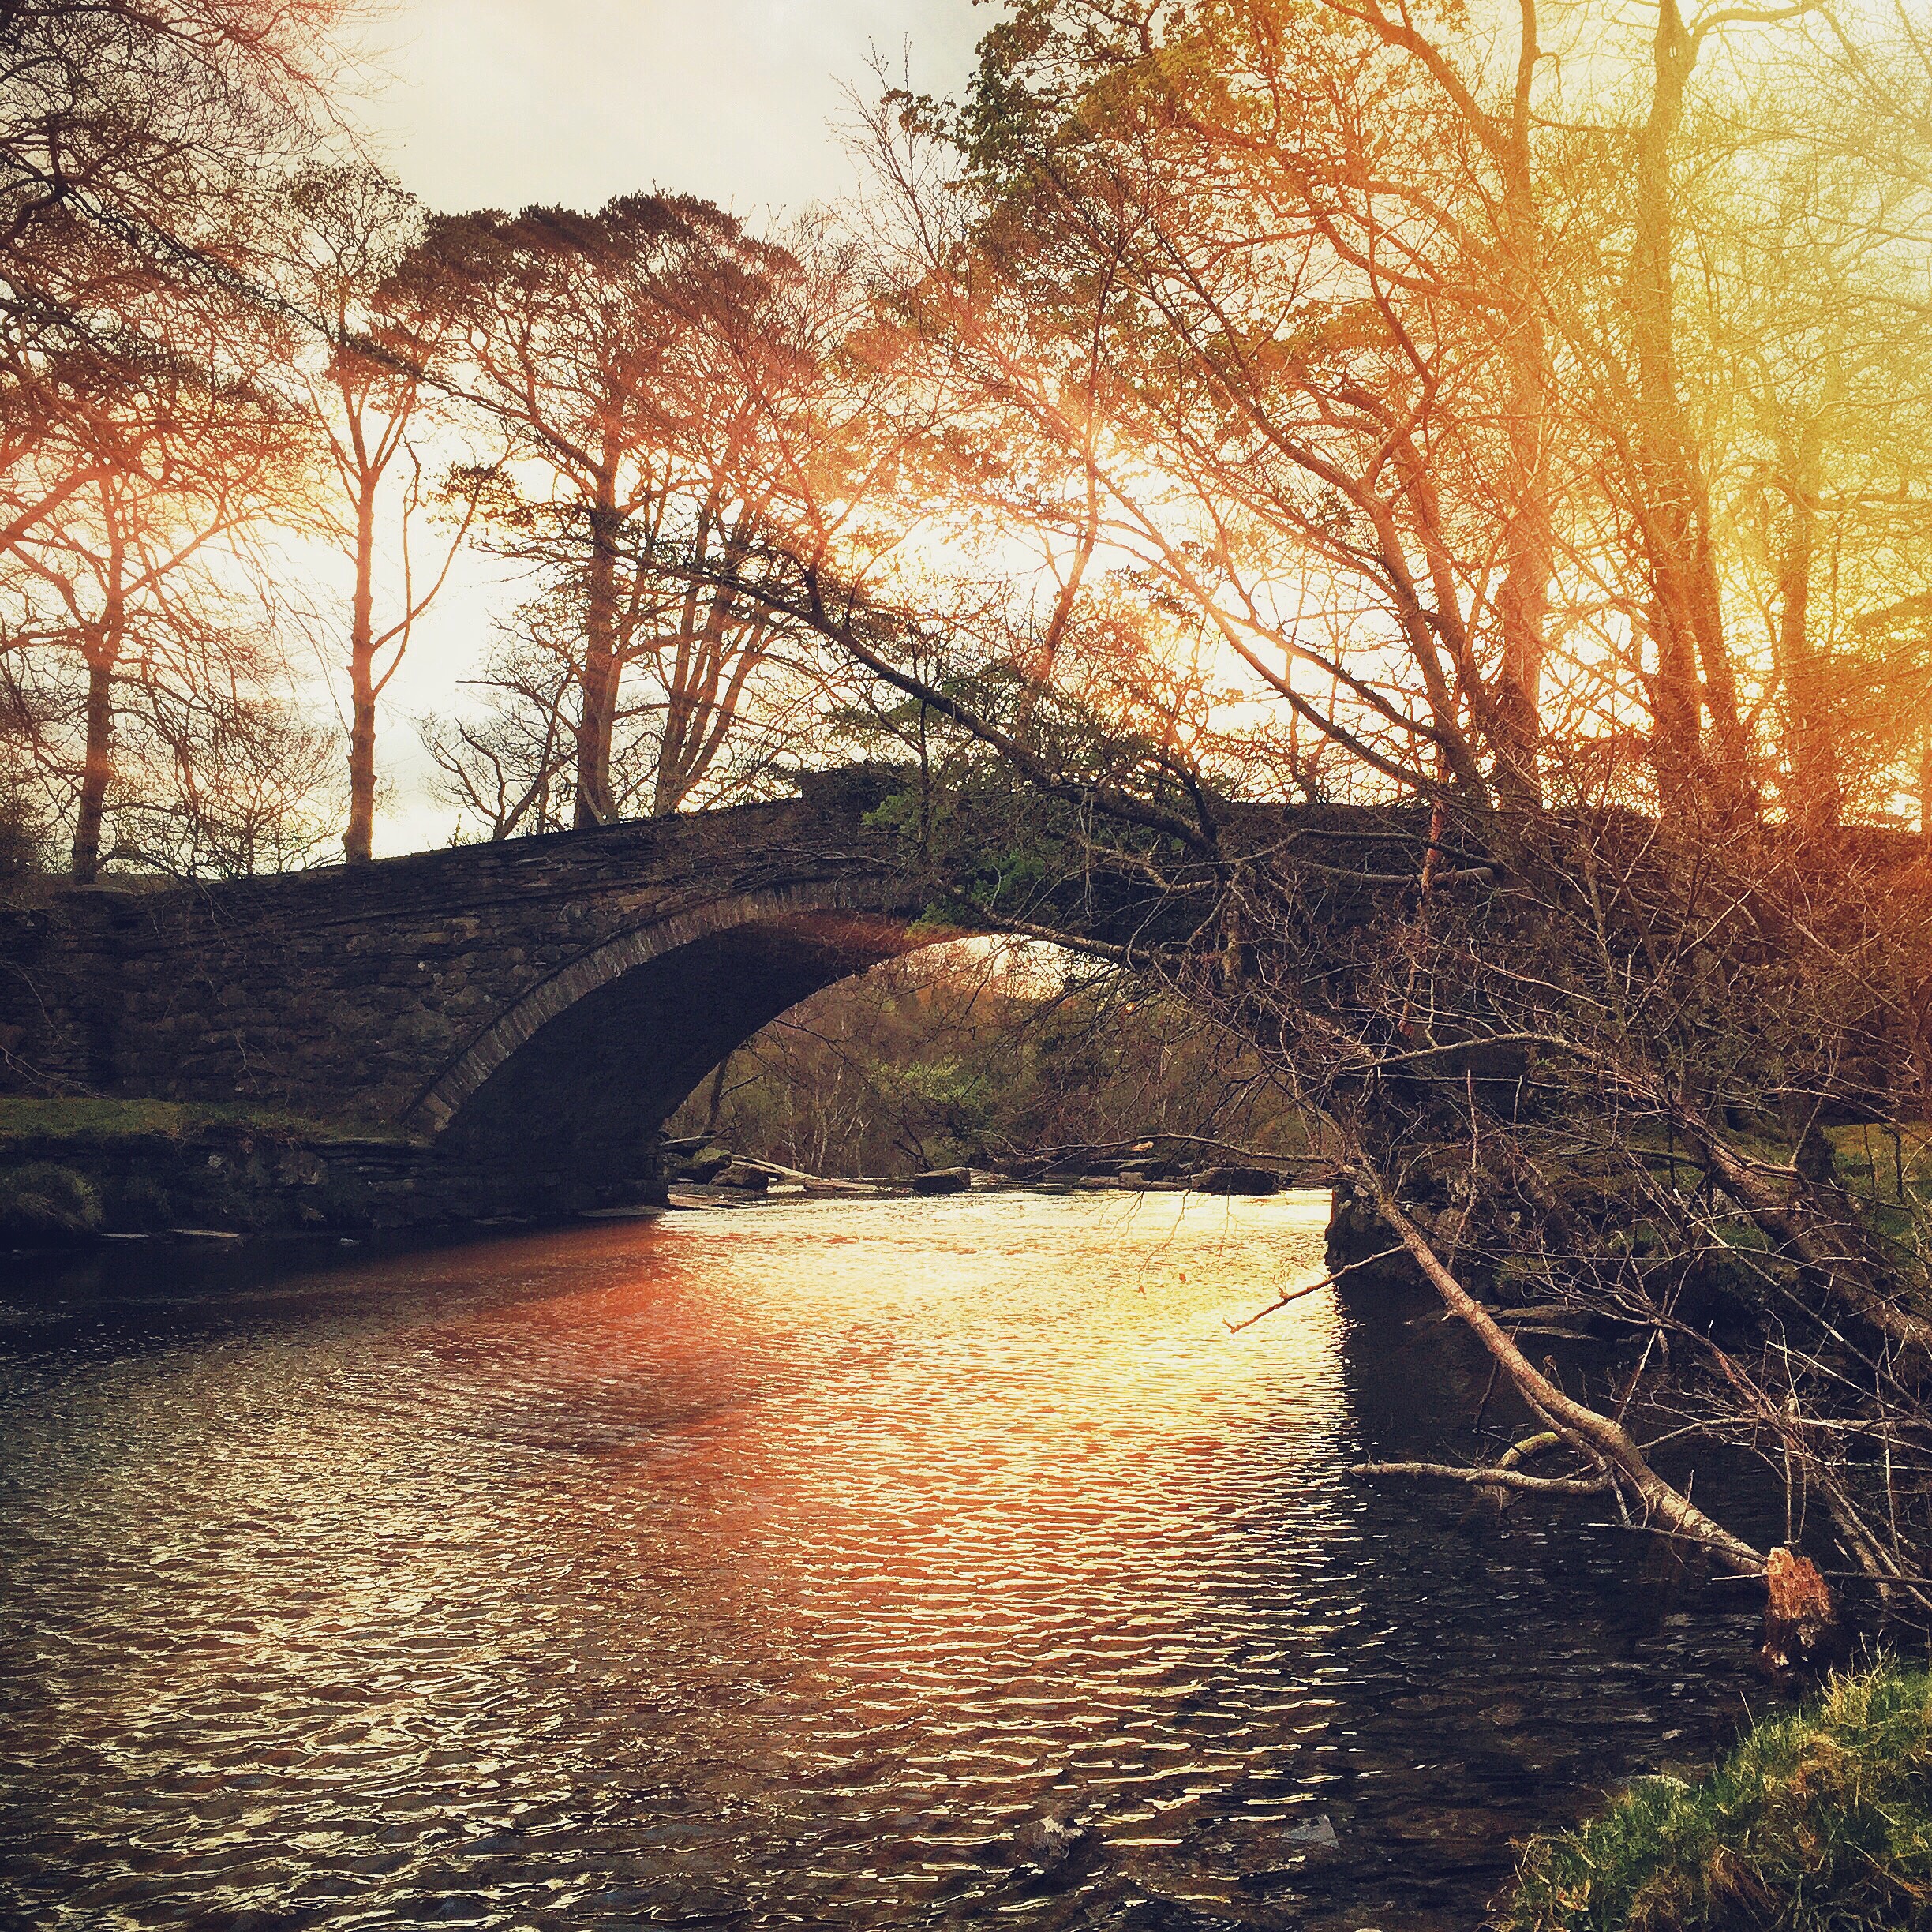
Here's a gallery of some of images I ended up with:

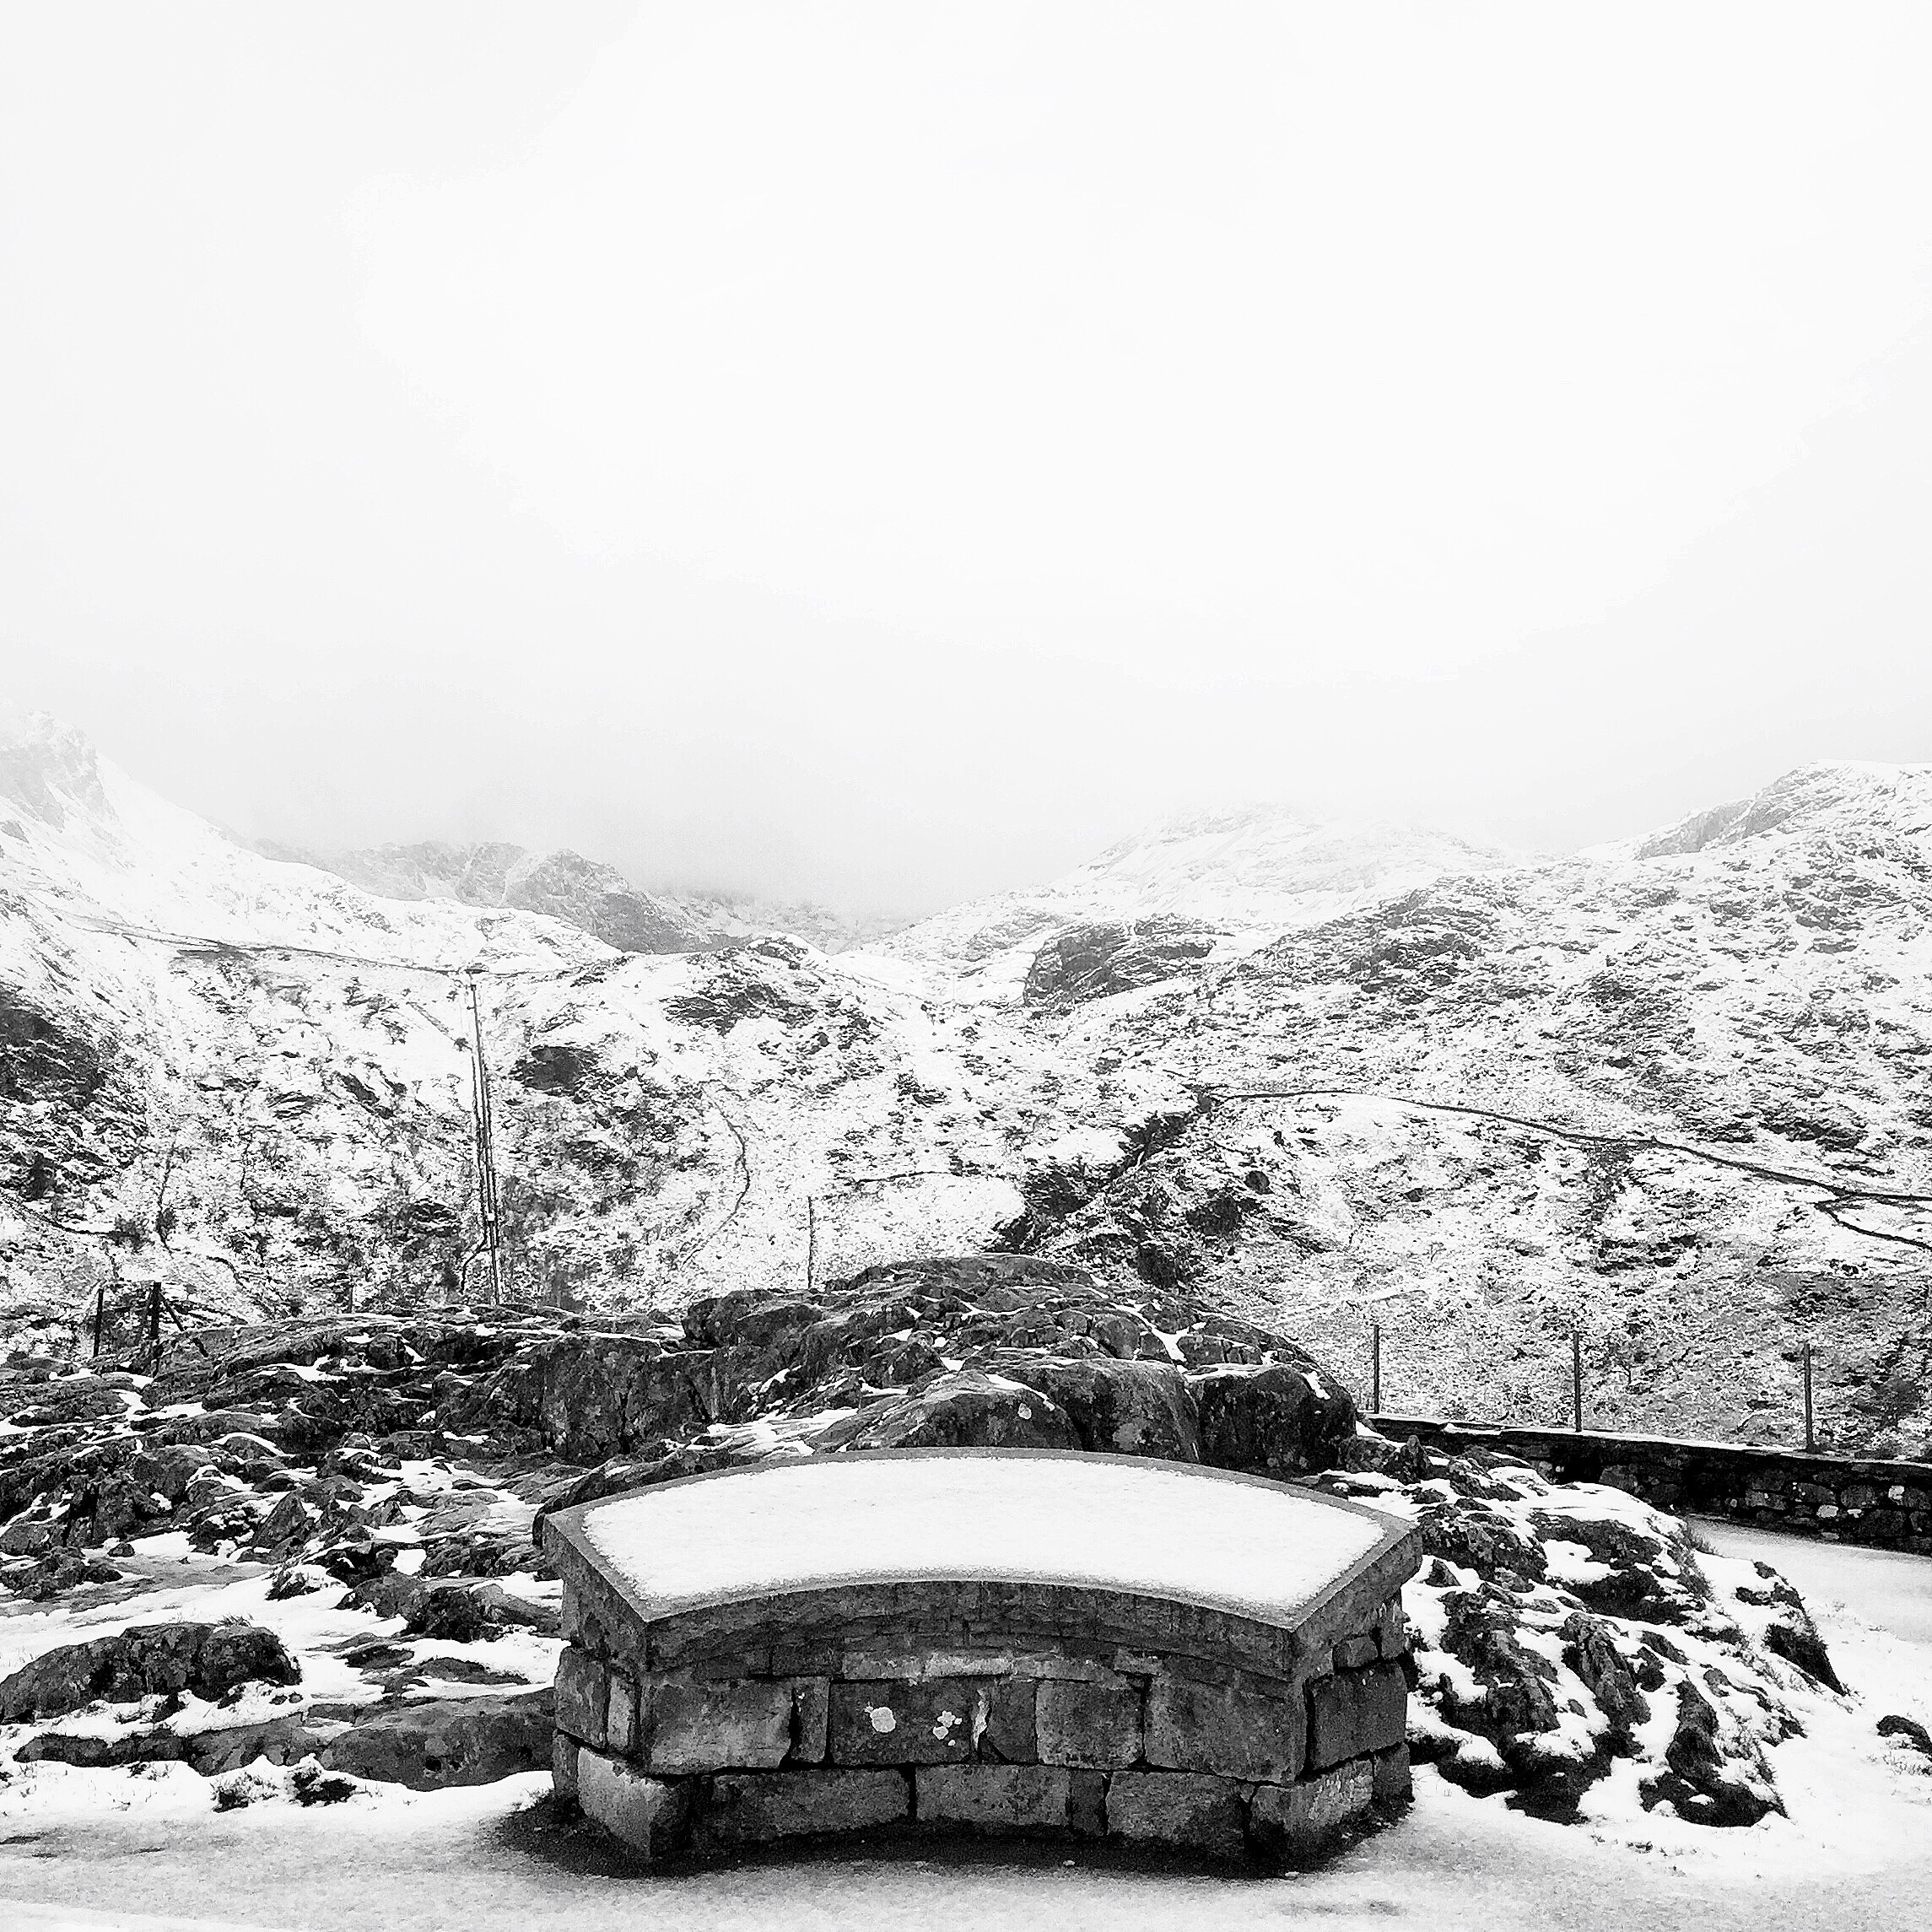
...and this is a selection of images I shot and edited on the iPhone 6 Plus while I was running around up there (editing apps used were Snapseed, Darkroom, Lens Distortions, Rays and Instagram):
Your turn.
Take Control and Shoot in Manual Mode (A beginners guide)
I've recently begun a photography Meetup group here in London, teaching people how to take better images. We had our first get together a fortnight back and one of the biggest questions I was asked is how to move from shooting auto, to shooting manual, and this is the right question to ask.
Don't get me wrong, it does take a little bit to get your head around, but so did learning how to change gears while driving. Now you never think about it. It's second nature.
So why would you want to learn to shoot in manual mode?
Well shooting manual allows you to make the decisions, not your camera. Ever wondered why when you are shooting in a dark room your images are blurry? Because you are letting your camera choose your settings. Are you getting very grainy images in some shots? That's your camera making decisions for you. Do you want to learn how to shoot stars at night, or light trails from cars streaking down a freeway? Then you have to take back creative control.
So let me see if I can break this down simply for you.
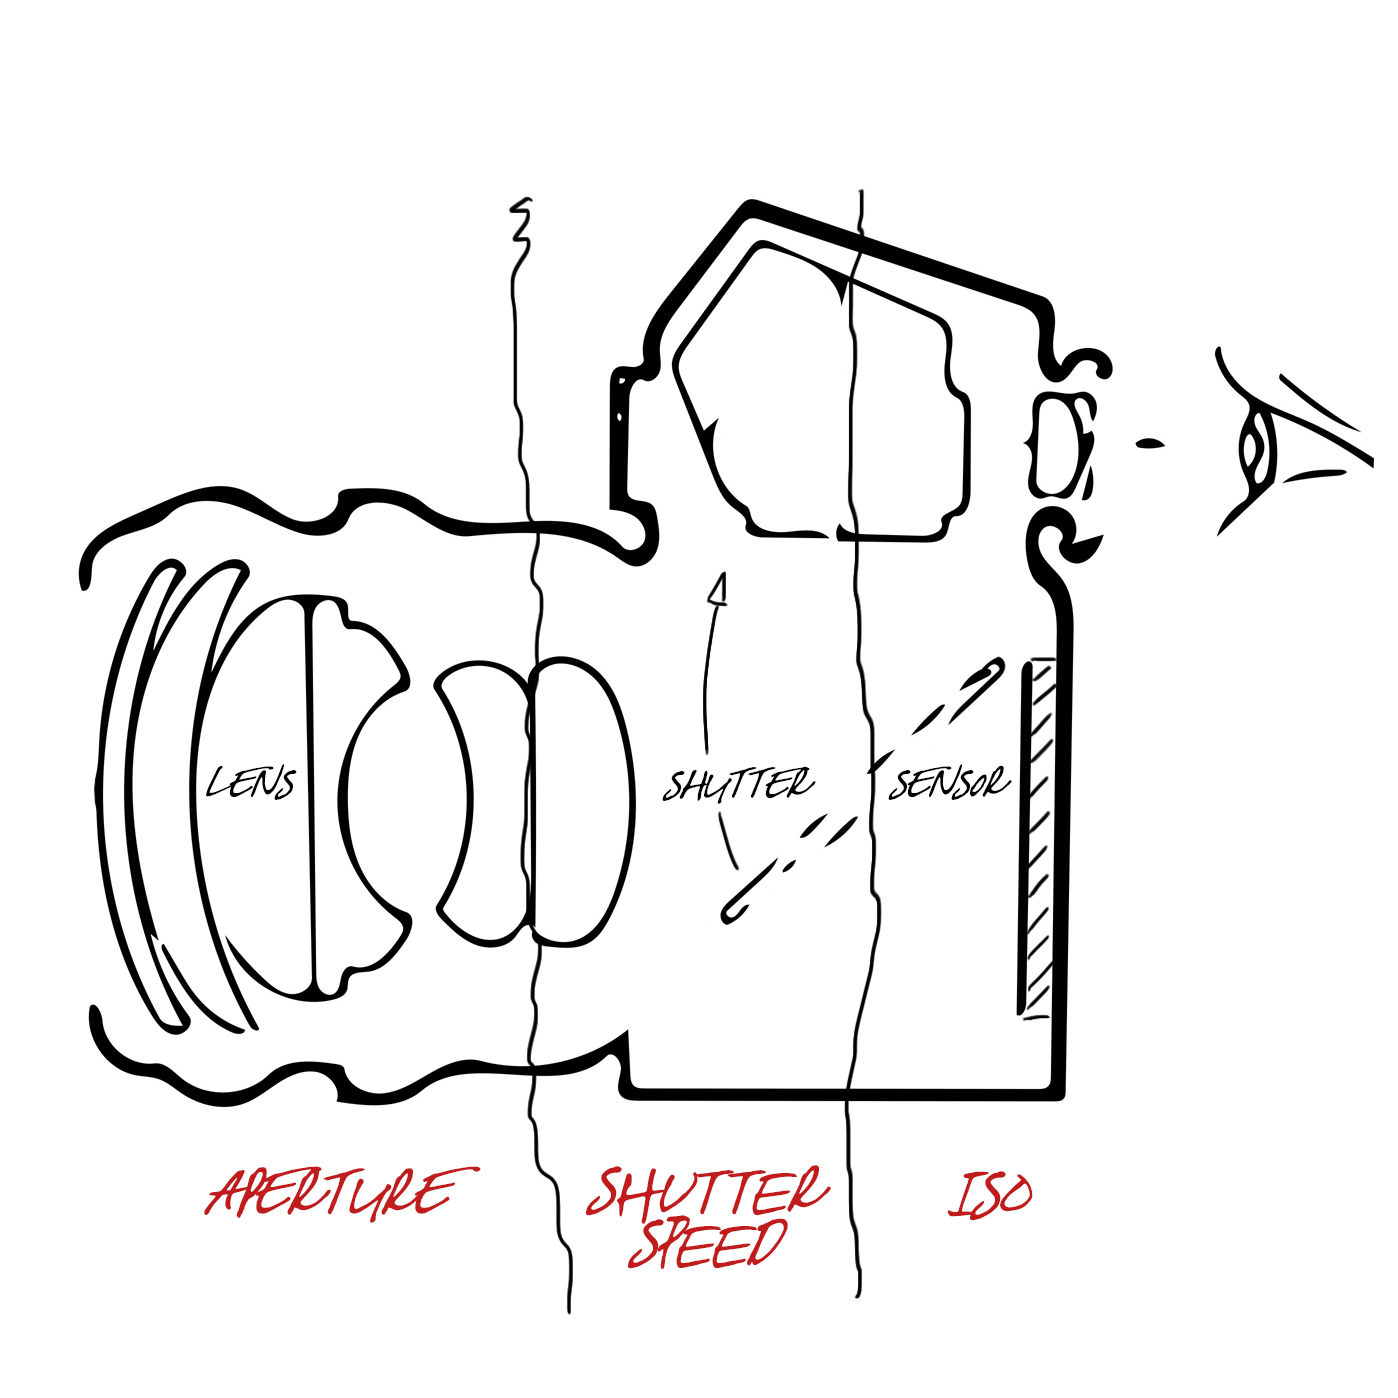
The first thing you need to understand is how a basic camera records light.
There are 3 elements which go in to determining how much light is recorded in any exposure you make:
APERTURE: This relates to the size of the hole which opens up in your lens to let light in. Normally Aperture is denoted as an F-number and describes how wide the lens is opening up to let light in. F22 is a fairly small aperture in your lens and won't let a lot of light in, where as a good quality lens may open up to F1.2 which will be a very wide aperture and lets a lot of light in.
SHUTTER SPEED: This relates to the length of time which the shutter opens within the body of the camera to expose the film or the sensor to the light coming in through the lens aperture. When you hear that click after pressing the shutter button, that is the sound of your shutter opening and closing to allow light to hit your sensor so it can capture an image. Shutter speed is given in increments of time from 1/8000 of a second being a very fast shutter which doesn't let a lot of light through, to 30 seconds which would expose the sensor to light for a long period of time.
ISO: This relates to you camera sensor, or your film stock. In the old days of shooting film people understood this well. If you knew you would be shooting on a bright sunny day you would buy less sensitive film, namely 100 speed. If you were going to be shooting in a low light situation you would buy 1600 speed film because it was very sensitive and captured more light coming in. The digital age has kept these numbers and we now talk about setting the sensitivity of our sensor for different lighting situations as our ISO number. The common ISO range is from 100 to 6400 in most modern cameras and the important thing to remember is that the higher your ISO number, the more sensitive your sensor is to light coming in.
Here is a diagram explaining these 3 elements within the camera:
Still with me?
Good.
This brings us to the Exposure Triangle:
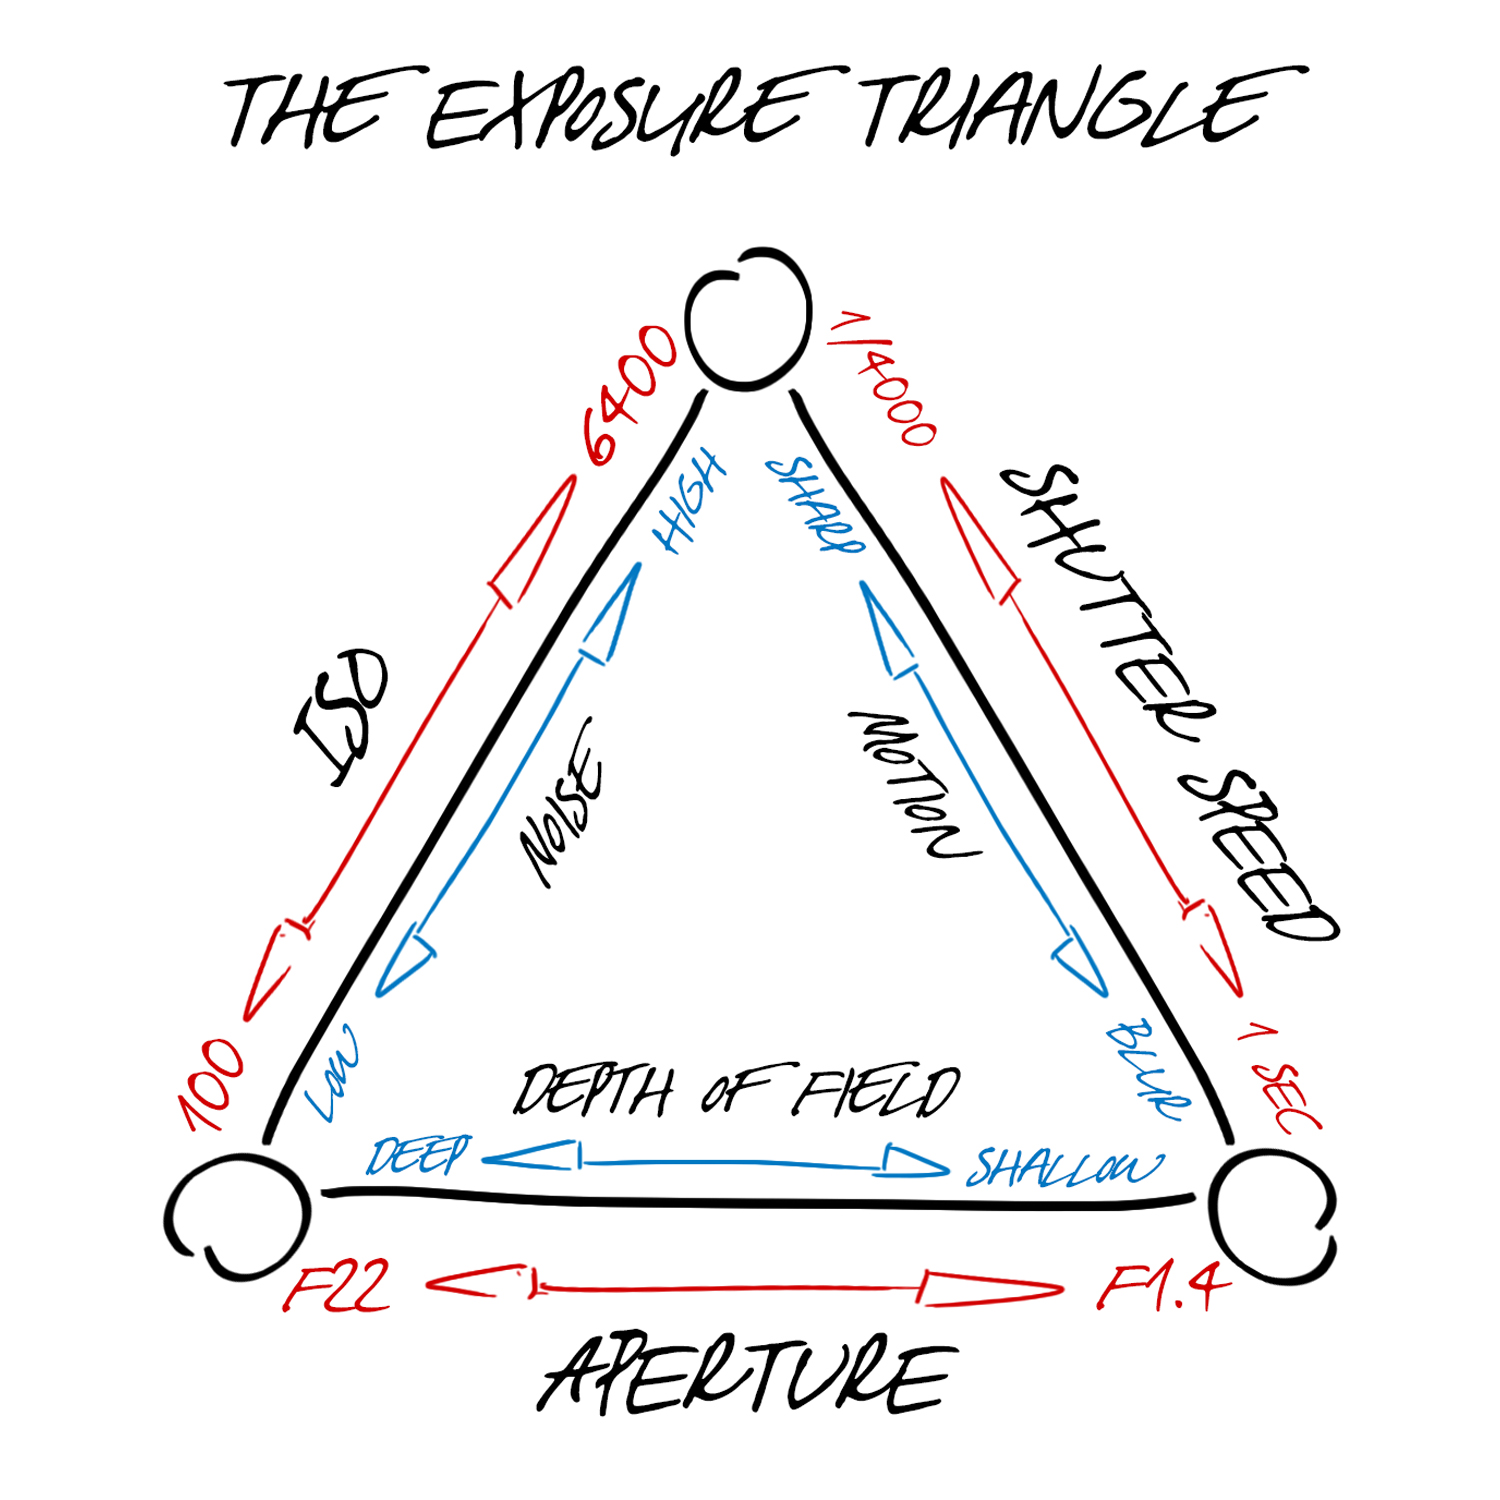
To take complete control of your camera by shooting in manual mode, you are going to be balancing the amount of light captured using the 3 elements we've been talking about: Aperture, Shutter Speed and ISO.
To do this well you need to know what effect each one has on the image you take:
APERTURE EFFECTS DEPTH OF FIELD: When you open up your aperture you are obviously letting in more light, but as a trade off you also create a more shallow depth of field. Depth of field describes how much of your shot is in focus.
A deep depth of field means that both the foreground and the far distance will all be in focus. This is used by landscape photographers who want the whole scene they are shooting to be sharp, so they may choose to capture a vista at f16 for example.
Conversely a shallow depth of field means that there is only a thin slice of focus. Ever wondered how photographers achieve nice blurry backgrounds in their portraits whilst keeping their subject sharp? They are opening their aperture up and shooting at f1.4 or similar. Obviously shooting like this you need to be very sure of your focus point as it's easy to have your subject out of focus.

Here is a fun shot I took of my wife recently on a 50mm lens, opening the aperture right up to f1.4 so I could just focus in on the eyes and let everything else fall out of focus. This is using a shallow depth of field:
SHUTTER SPEED EFFECTS THE APPEARANCE OF MOTION: When you speed up your shutter to block out light it also has the effect of freezing motion within the frame.
A fast shutter of 1/4000 of a second for example would be ideal for a sports photographer who wants to capture an athlete running at high speed and freeze the action in the frame while maintaining sharp detail.
On the other hand maybe you want to slow your shutter right down and create blur. For example, photographers who want to shoot light trails, or be creative with motion blur when shooting dancers will shoot at slower shutter speeds. It's important to make sure that you are shooting from a tripod when doing this or you will also capture your hands shaking holding the camera.
(This answers a very common question people have about getting blurry photos. What is happening is that in auto your camera is choosing to slow down your shutter speed in low light and so it's picking up the shake of your hands and creating a blurry image. The rule of thumb is that your shutter speed fraction should never be slower than the focal length of your lens. In other words if you are shooting with a 50mm lens, then you can't shoot slower than 1/50 of a second or you risk motion blur. If you are on a 200mm telephoto lens, which as you know is harder to hold steady, then you can't shoot slower than 1/200 of a second.)
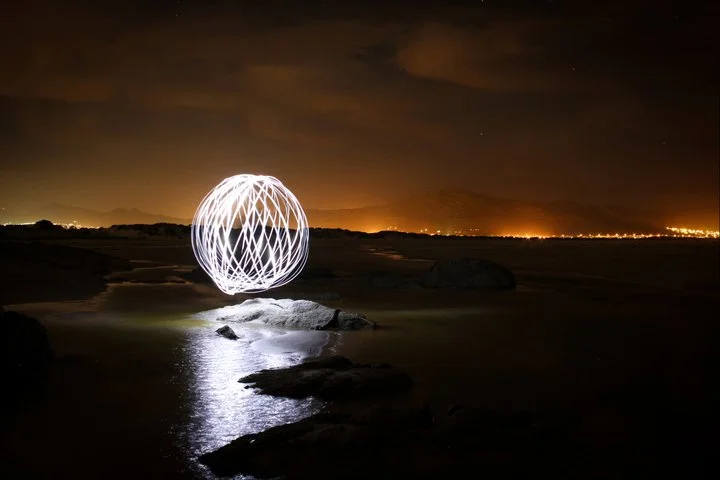
Here is a shot I took with a shutter speed of 30 seconds from a tripod with my friend Lennit swinging a single LED light around on a string:
ISO EFFECTS THE AMOUNT OF NOISE IN YOUR IMAGE: When you increase your ISO number to make your sensor more sensitive, you introduce noise or grain into your image. Different cameras are effected in different ways, and better cameras can be pushed further, but for this one you just need to remember that if you are pushing your camera to ISO 3200 to be able to shoot in a darker setting it will introduce noise, so be aware.
And that's it.
Those are the pieces to the 'manual mode' puzzle.
Now it's just learning to balance them to get the results you want in your images and the exposure you choose to create the look.
If you are going to open up your Aperture to get a shallow depth of field you will probably need to drop your ISO right down and speed up your shutter to compensate for the light coming in.
If you are going to speed up your shutter to freeze some action you will probably have to up your ISO and perhaps open your Aperture to get enough light in.
If you are getting too much grain in your image you will probably need to lower your ISO and try opening your Aperture right up, and slowing down your shutter speed a bit.
It's all a balancing act. Make your creative choices and then balance the elements to get the exposure you want.
Let me leave you with some scenarios and settings to solidify all this in your mind:
A portrait photographer wanting shallow depth of field:
- Aperture: f1.8
- Shutter Speed: 1/100
- ISO: 100
A landscape photographer wanting a deep depth of field shooting on a tripod in the evening:
- Aperture: f16
- Shutter Speed: 1/4
- ISO: 400
A sports photographer wanting to freeze the action in a well lit stadium:
- Aperture: f2.8
- Shutter Speed: 1/8000
- ISO: 200
An events photographer shooting a live band in a dimly lit venue:
- Aperture: f.2
- Shutter Speed: 1/100
- ISO: 1600
I hope that all makes sense, and that this info gives you enough courage to get out there and take control of your camera, and of your creativity.
Best of luck.
iPhoneography: Editing a Sunset with Apps
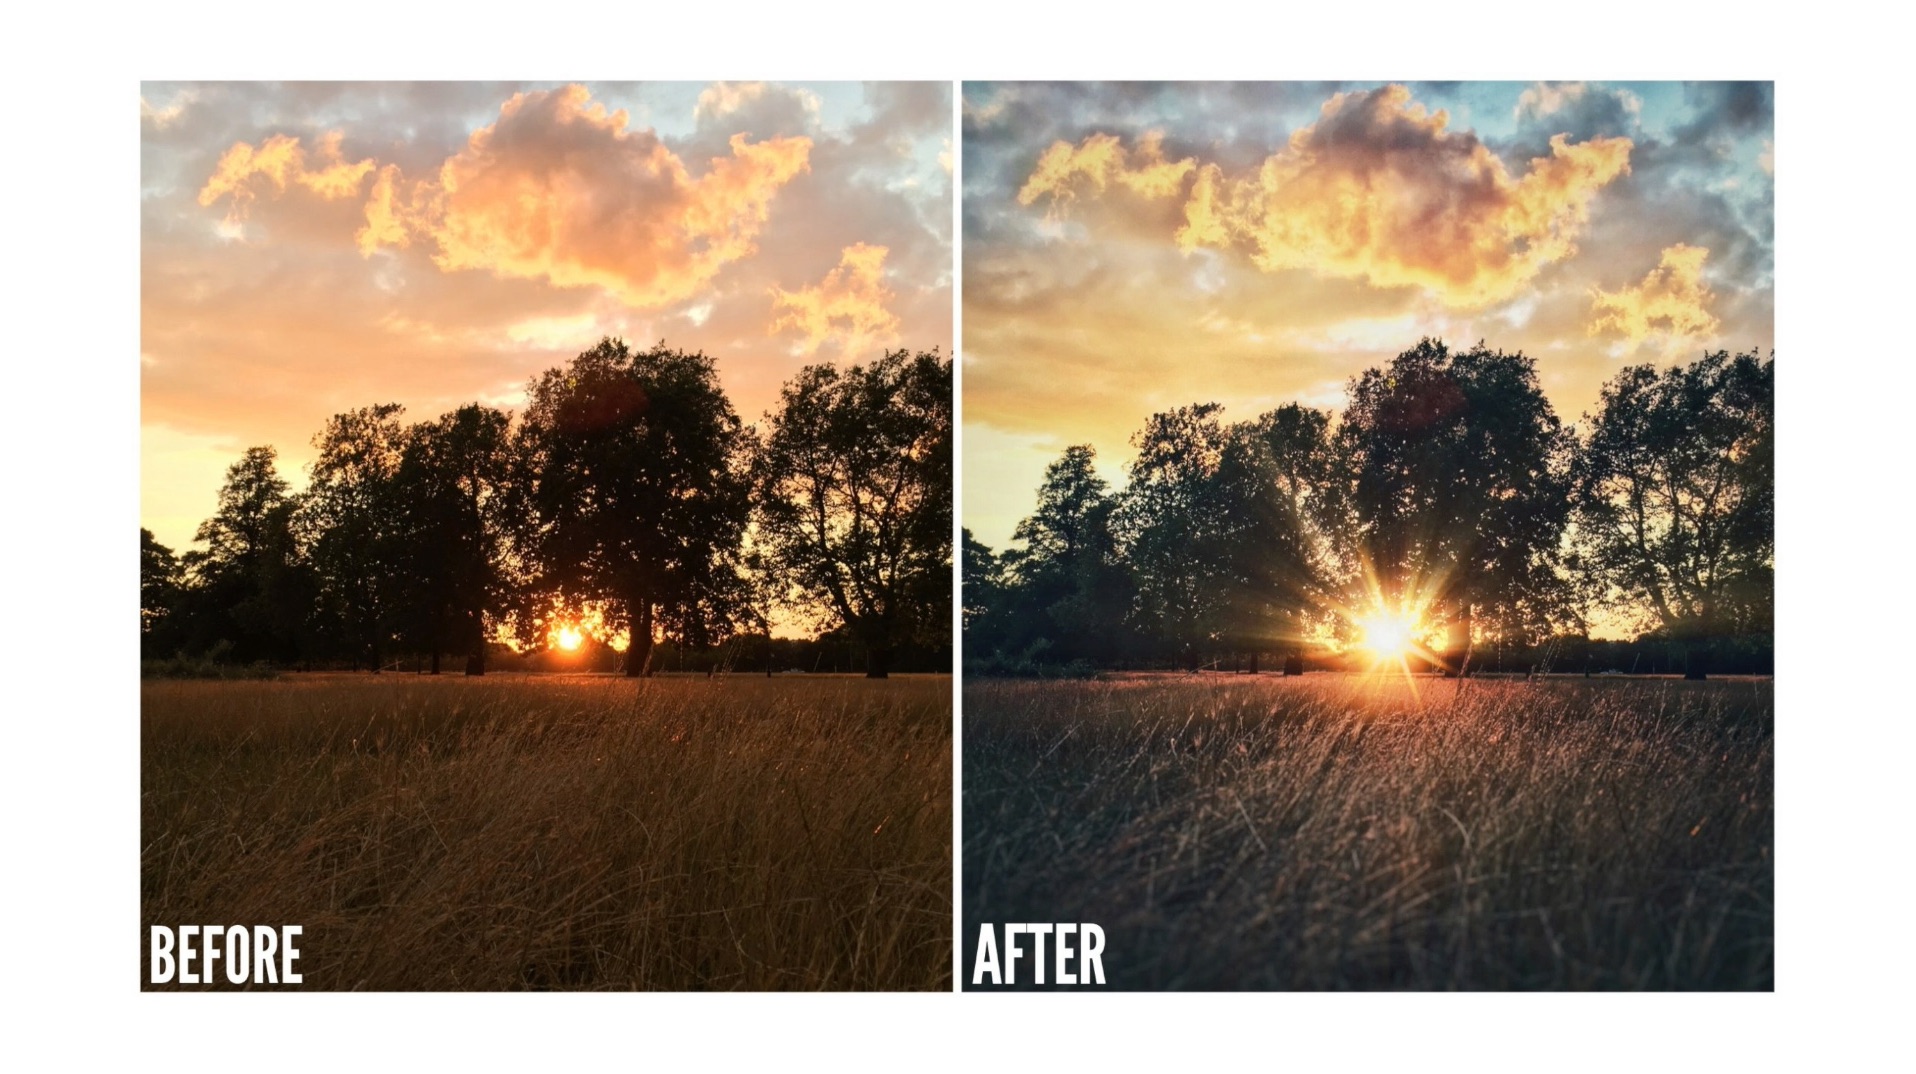

I head out for a walk every evening after the day's work to decompress. As part of this little routine I am setting myself the challenge of shooting, editing and posting something from my iPhone everyday.
A couple of people have recently asked me what sort of editing I do on the shots I post, so I created a video tutorial below. I'll keep this brief because the tutorial ended up being a little more verbose than I intended, but the following video should give you an overview of how to use the following apps: Snapseed, Rays, Lens Distortions and Darkroom (v.2).
My suggestion?
Get out there, shoot your own setting sun, grab a coffee, fire up this video, and edit along.
Thanks for watching.
I would love to see your shots and here about the apps you choose to use in the comments.
Happy app-ing.
A Post on Post
I often have people say, when taking a look at my pricing for headshots and portraits, 'I wish I could charge £150 for an hour's work'.
One hour?
Sure the session itself will last in the region of an hour, but in some ways that's only where the work begins. If it was as simple as pointing a camera at someone and clicking the shutter to create a professional portrait, a lot more people would be professional photographers. There are a load of decisions and skills which go into producing a high end shot; from camera setup, to lighting decisions, background and setting considerations, coaching poses and expressions, and finally post production.
That's what I want to focus on here because it's always the most time consuming element, and often goes unseen.
An edit will typically take me around an hour per image, sometimes more. I can often take an image through up to 4 separate programs to finish it, depending on what I'm trying to accomplish, and the work I do here is as important to creating the look which defines my style as any other stage.
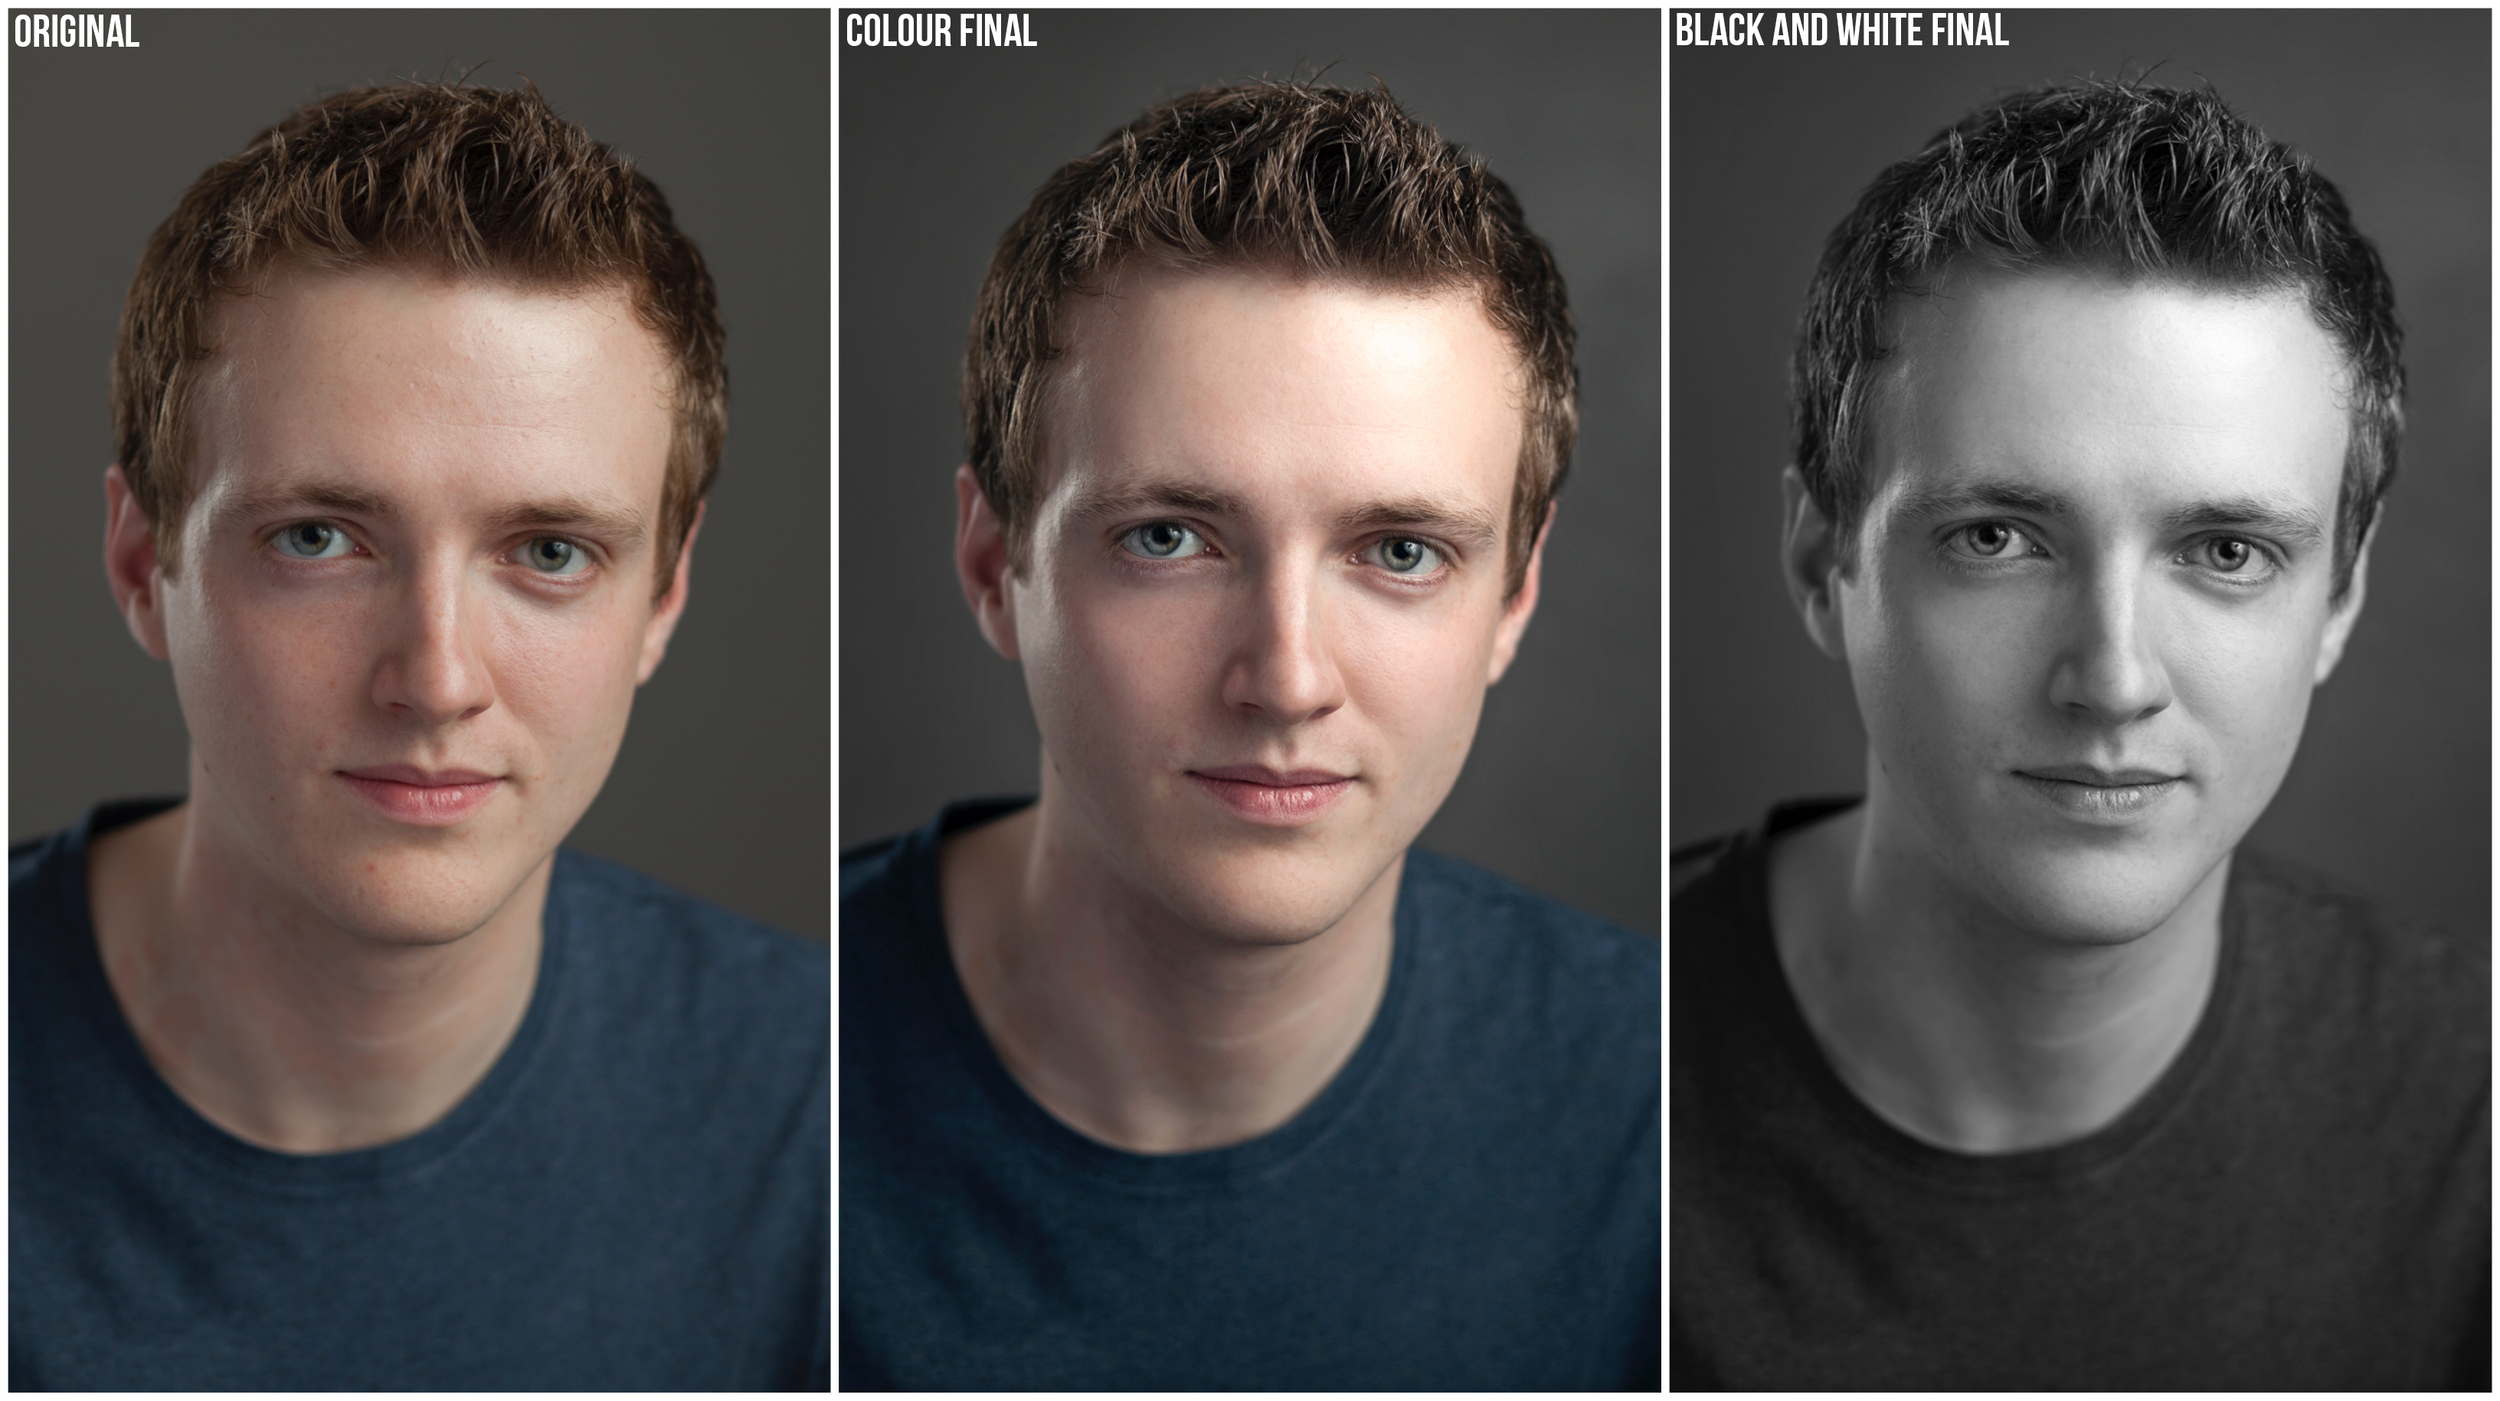
Let's take this most recent headshot shoot with RADA student, Finn as an example:
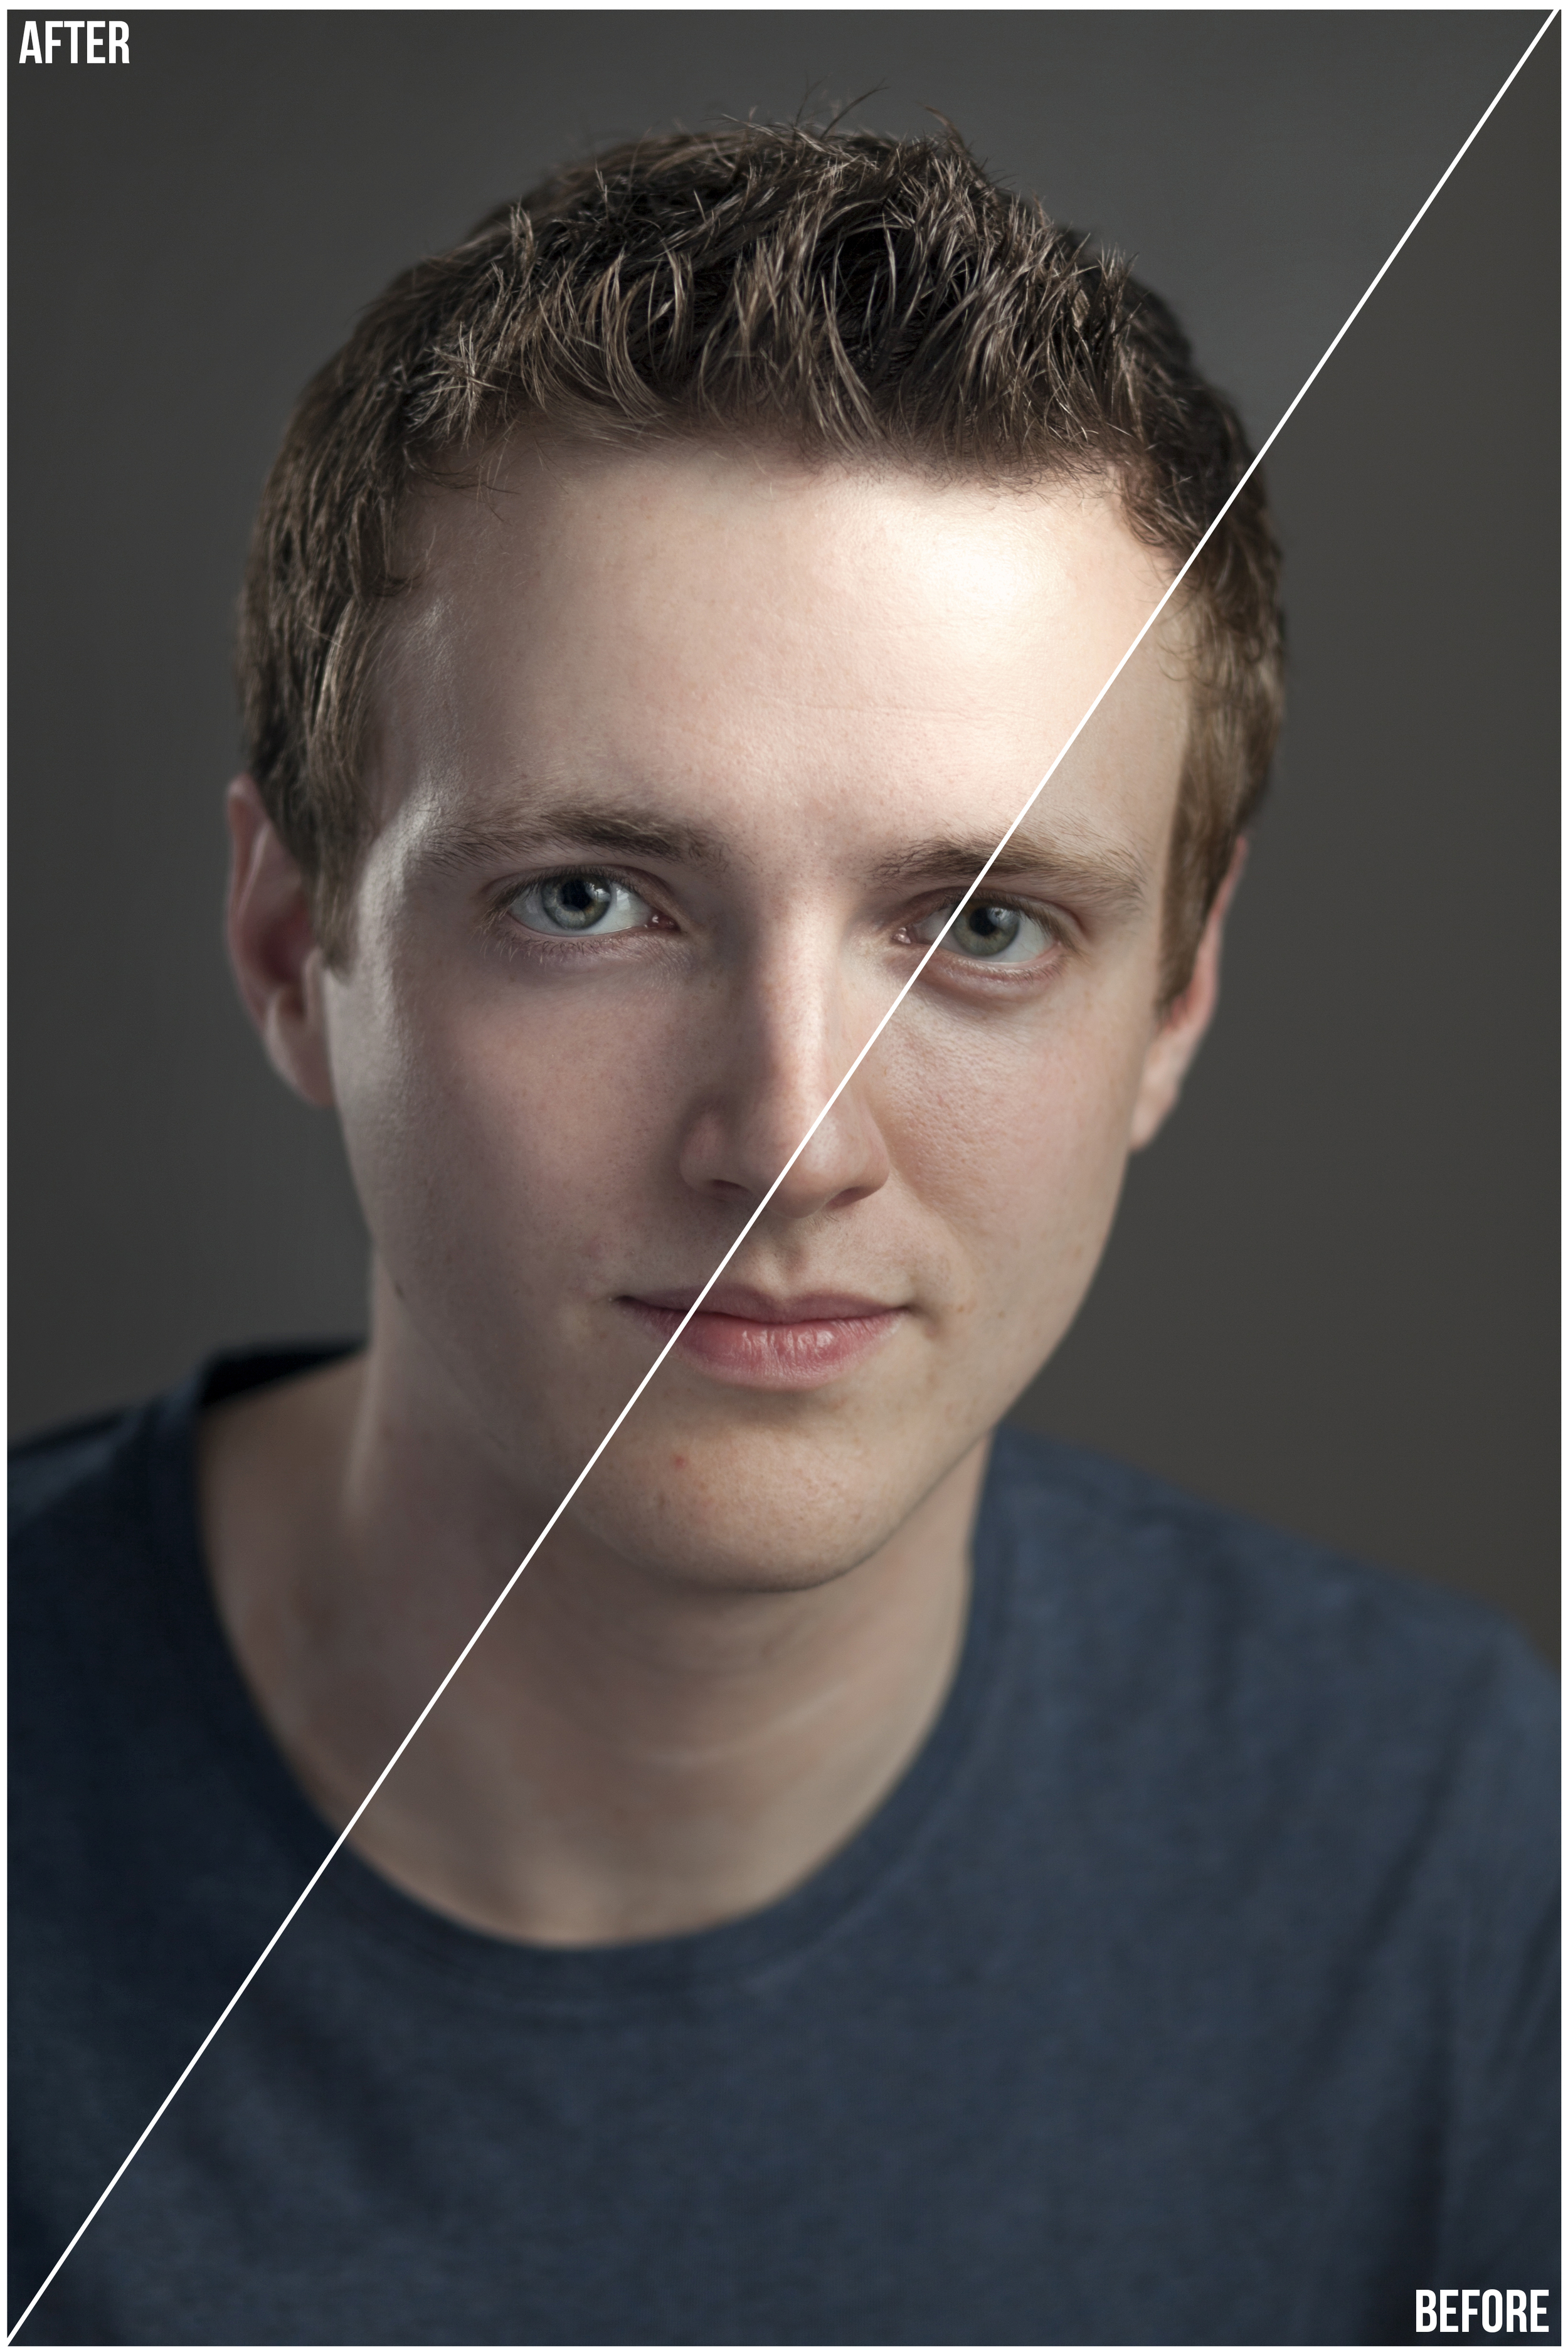
After importing the 200-300 images into Lightroom I will go to work selecting the best, and shortlisting the final 5. I will then work on white balance, exposure, shadow and highlight detail, clarity, vibrance and lens corrections so that I can export hi res images with good dynamic range. These will make clean canvases for the detailed work to follow in Photoshop. Here is a time-lapse of a typical edit in Photoshop to give you an idea of the behind-the-scenes work which goes into creating a professional portrait:
Coming out of Photoshop I should have 2 final versions to hand over; a Colour and a Black and White:
That means of course, taking in to account that I provide 5 retouches, each in Colour and BW versions, that you are actually paying for 6 hours minimum (1 for the shoot and 5 for the editing). This doesn't factor in the fact that shoots often run over time, edits can take longer, equipment set up and pack down takes a mo on it's own, and organising the shoot takes it's own time; but let's ignore that and say that actually I am now charging you £150 / 6 hours = £25 per hour.
This assumes of course that you were only paying me for time, but as many photographers have pointed out on many blogs over the last few years we have to cover costs like insurance, gear purchases and repairs, website hosting, taxes, internet, software, and the list goes on.
I don't tell you this to complain, but I hope this gives you a better idea of the hard work and skill which goes into creating the portraits or headshots you're parting with your hard earned cash to obtain. The session you are involved in is only really the tip of the iceberg.
I usually end up telling people who ask the question which started this post, that I'm very proud of the work I do to produce these images, and I stand by my pricing as I believe they are worth every penny.
Having peeked behind the curtain, I hope you now do too.
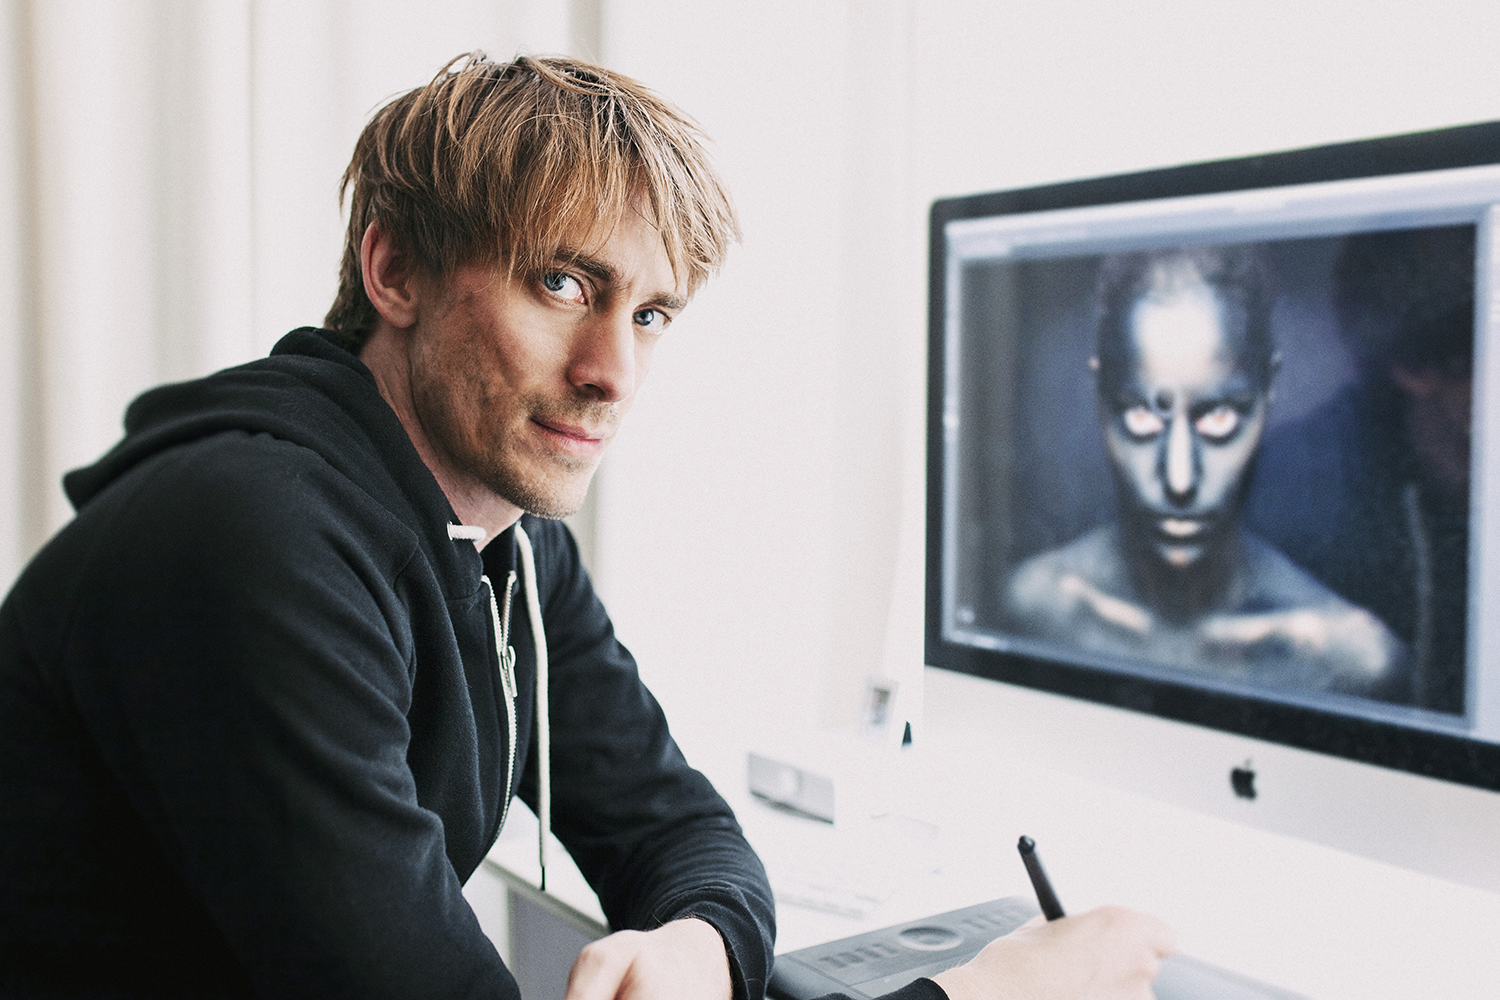
My run-and-gun video bag

So this is the bag I take with me everyday:
It's from a company called f-stop and this is one of their new Millar range. My philosophy with the gear I carry around daily is that I should be able to cover anything which comes up in whatever moment I come across, without having to carry a back-breaking amount of gear. I don't carry a DSRL with me because, to be brutally honest, my iPhone 6 Plus does a good enough job in capturing stills while I walk around, and I love the immediacy of being able to edit on the phone and post online on the go. Will this mean I will come across situations where I wish I had some decent glass on me to shoot stills? Sure. But my iPhone will cover most daily situations.
What it won't cover is video. The biggest reason for this, is that I only have the 16GB iPhone and I'm always running out of space, so video is not an option.
So back to the bag.
This is what's inside:
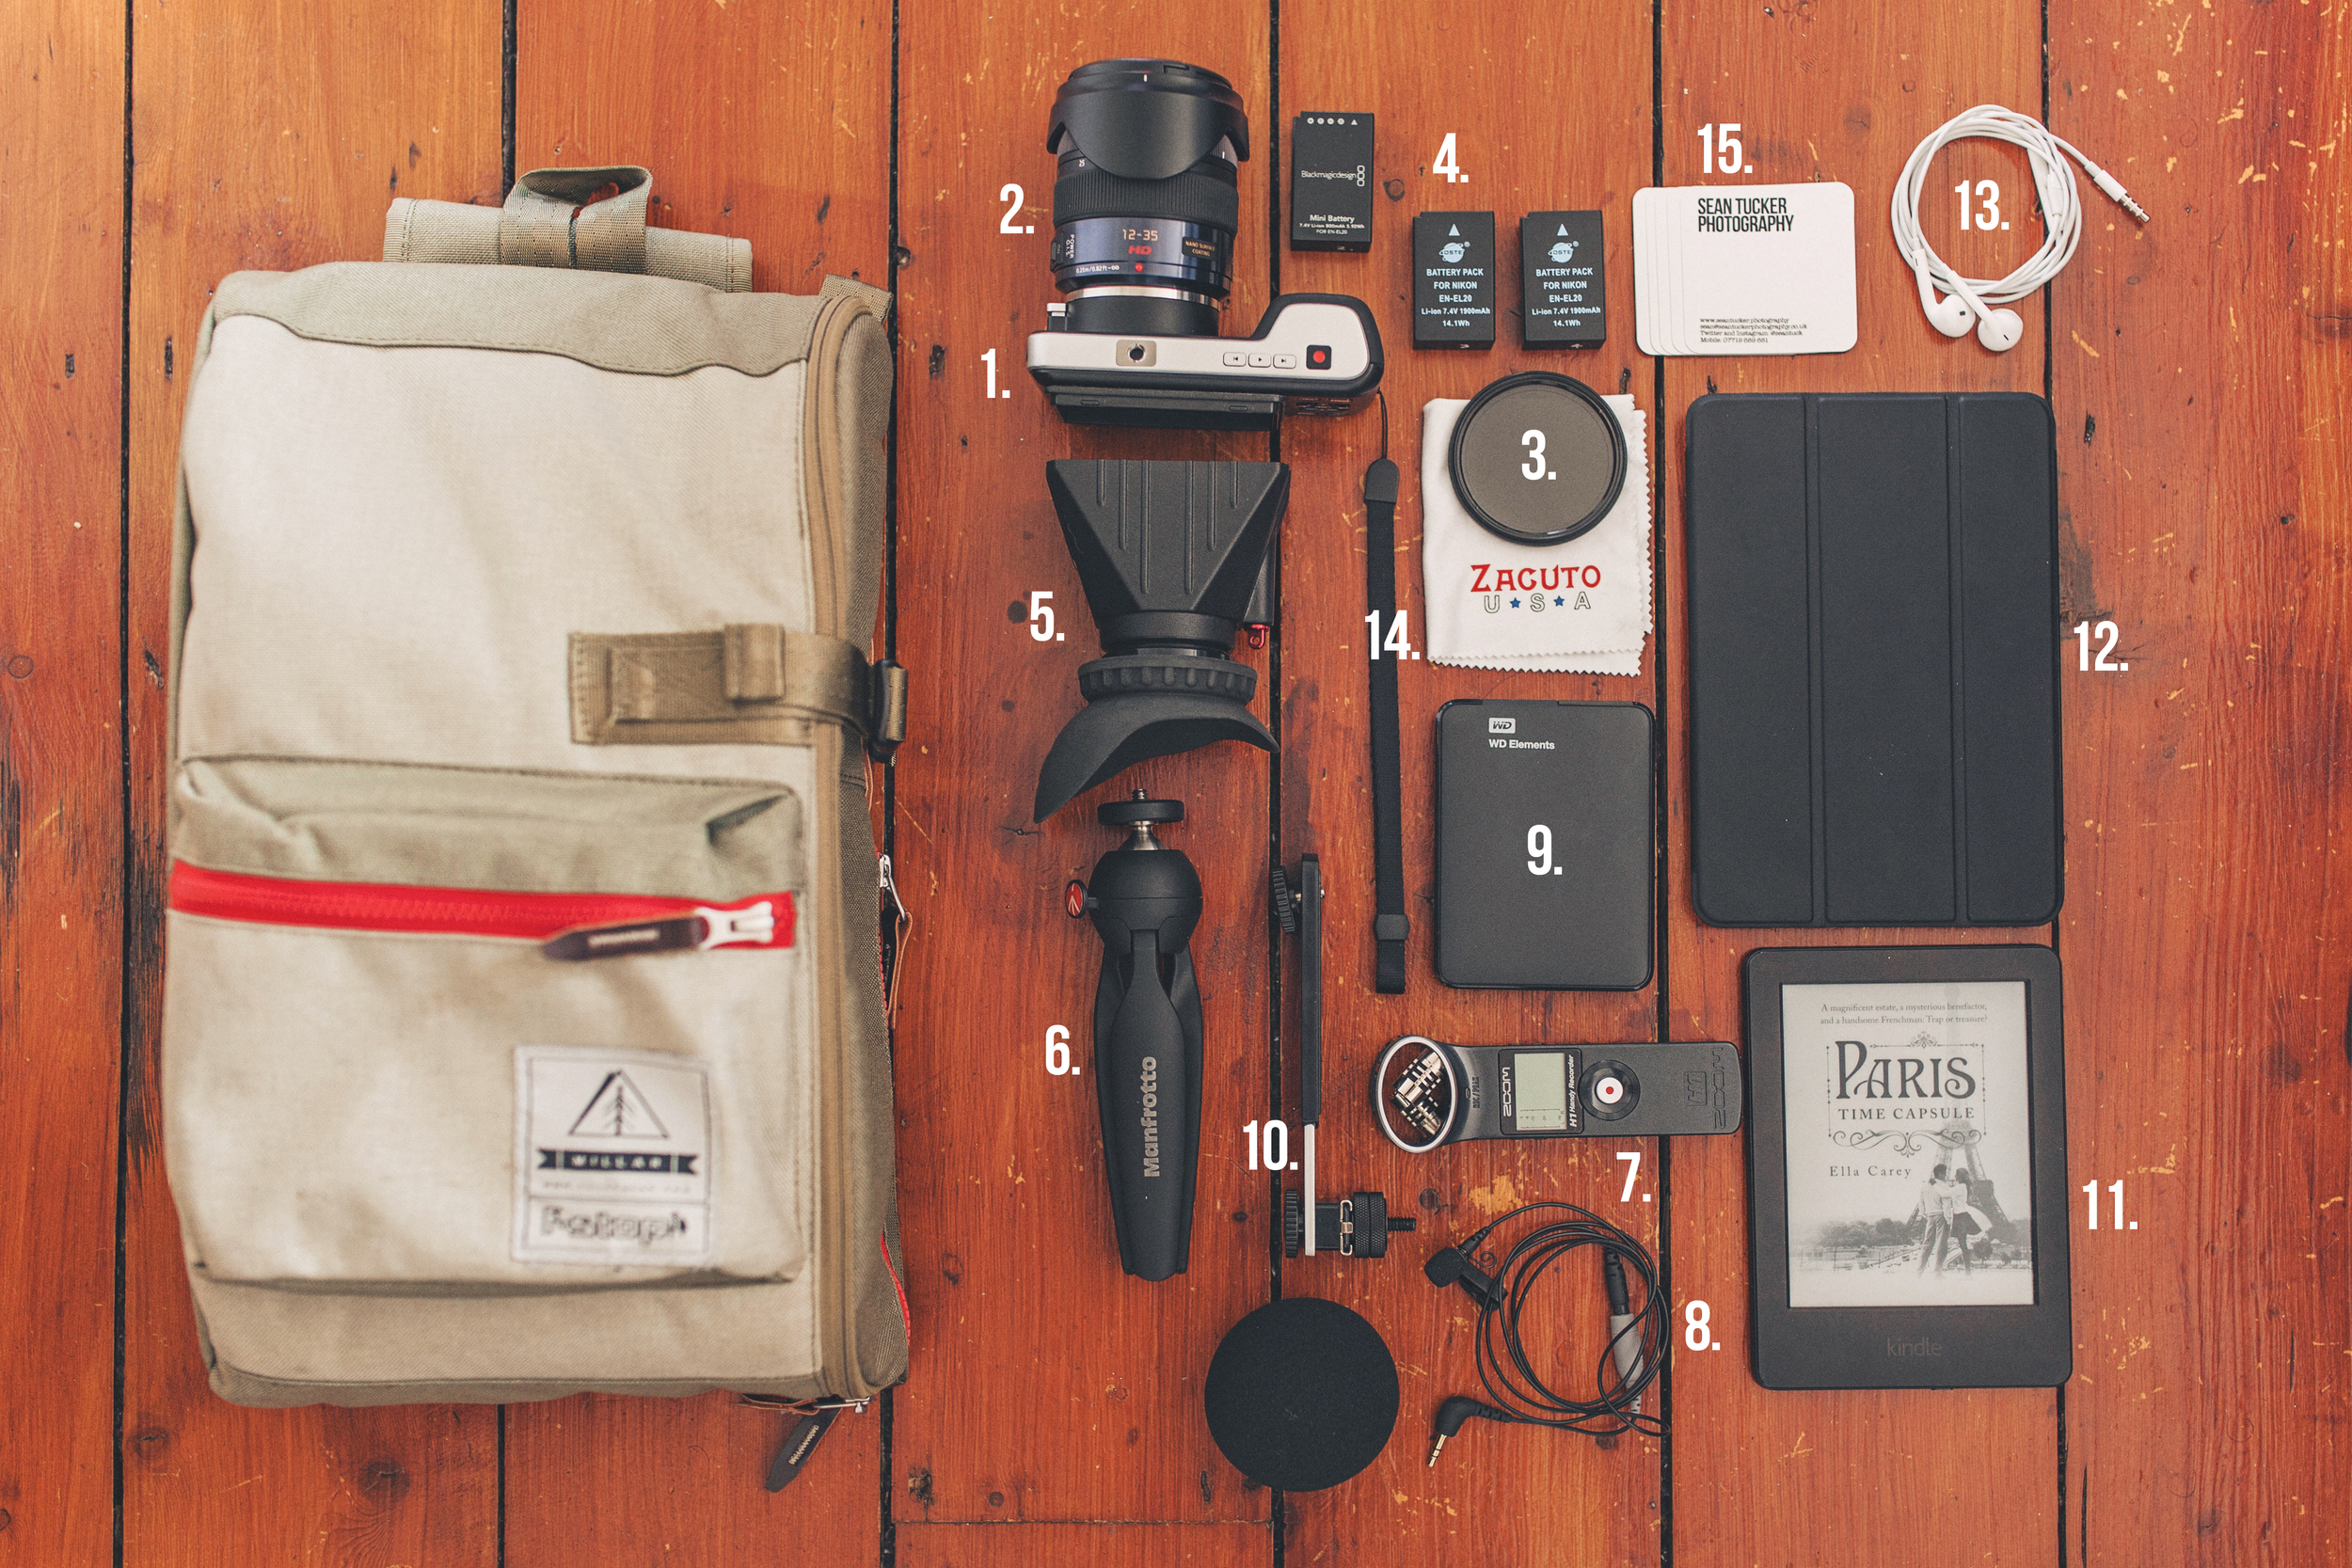
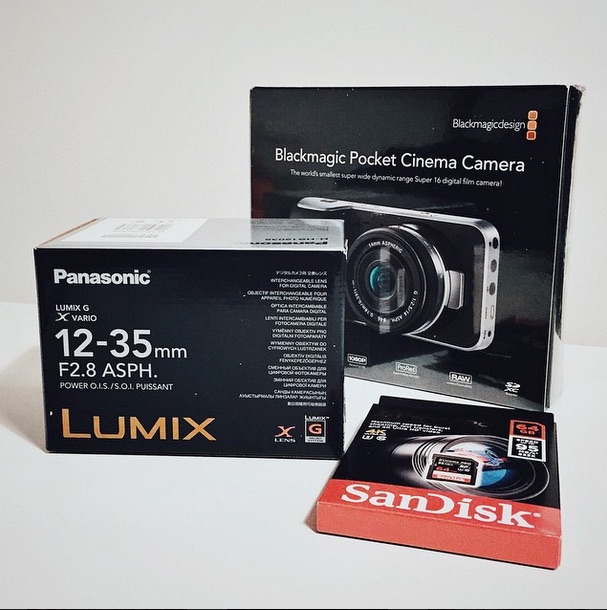
- The Black Magic Pocket Cinema Camera (with 64GB Sandisk Extreme Pro)
- Lumix 12-35mm f2.8
- Variable ND Filter (to control light and keep the aperture down)
- Extra batteries (EN-EL20's)
- Zacuto Z-Finder for BMPCC
- Manfrotto PIXI Tripod (which also doubles as a grip handle)
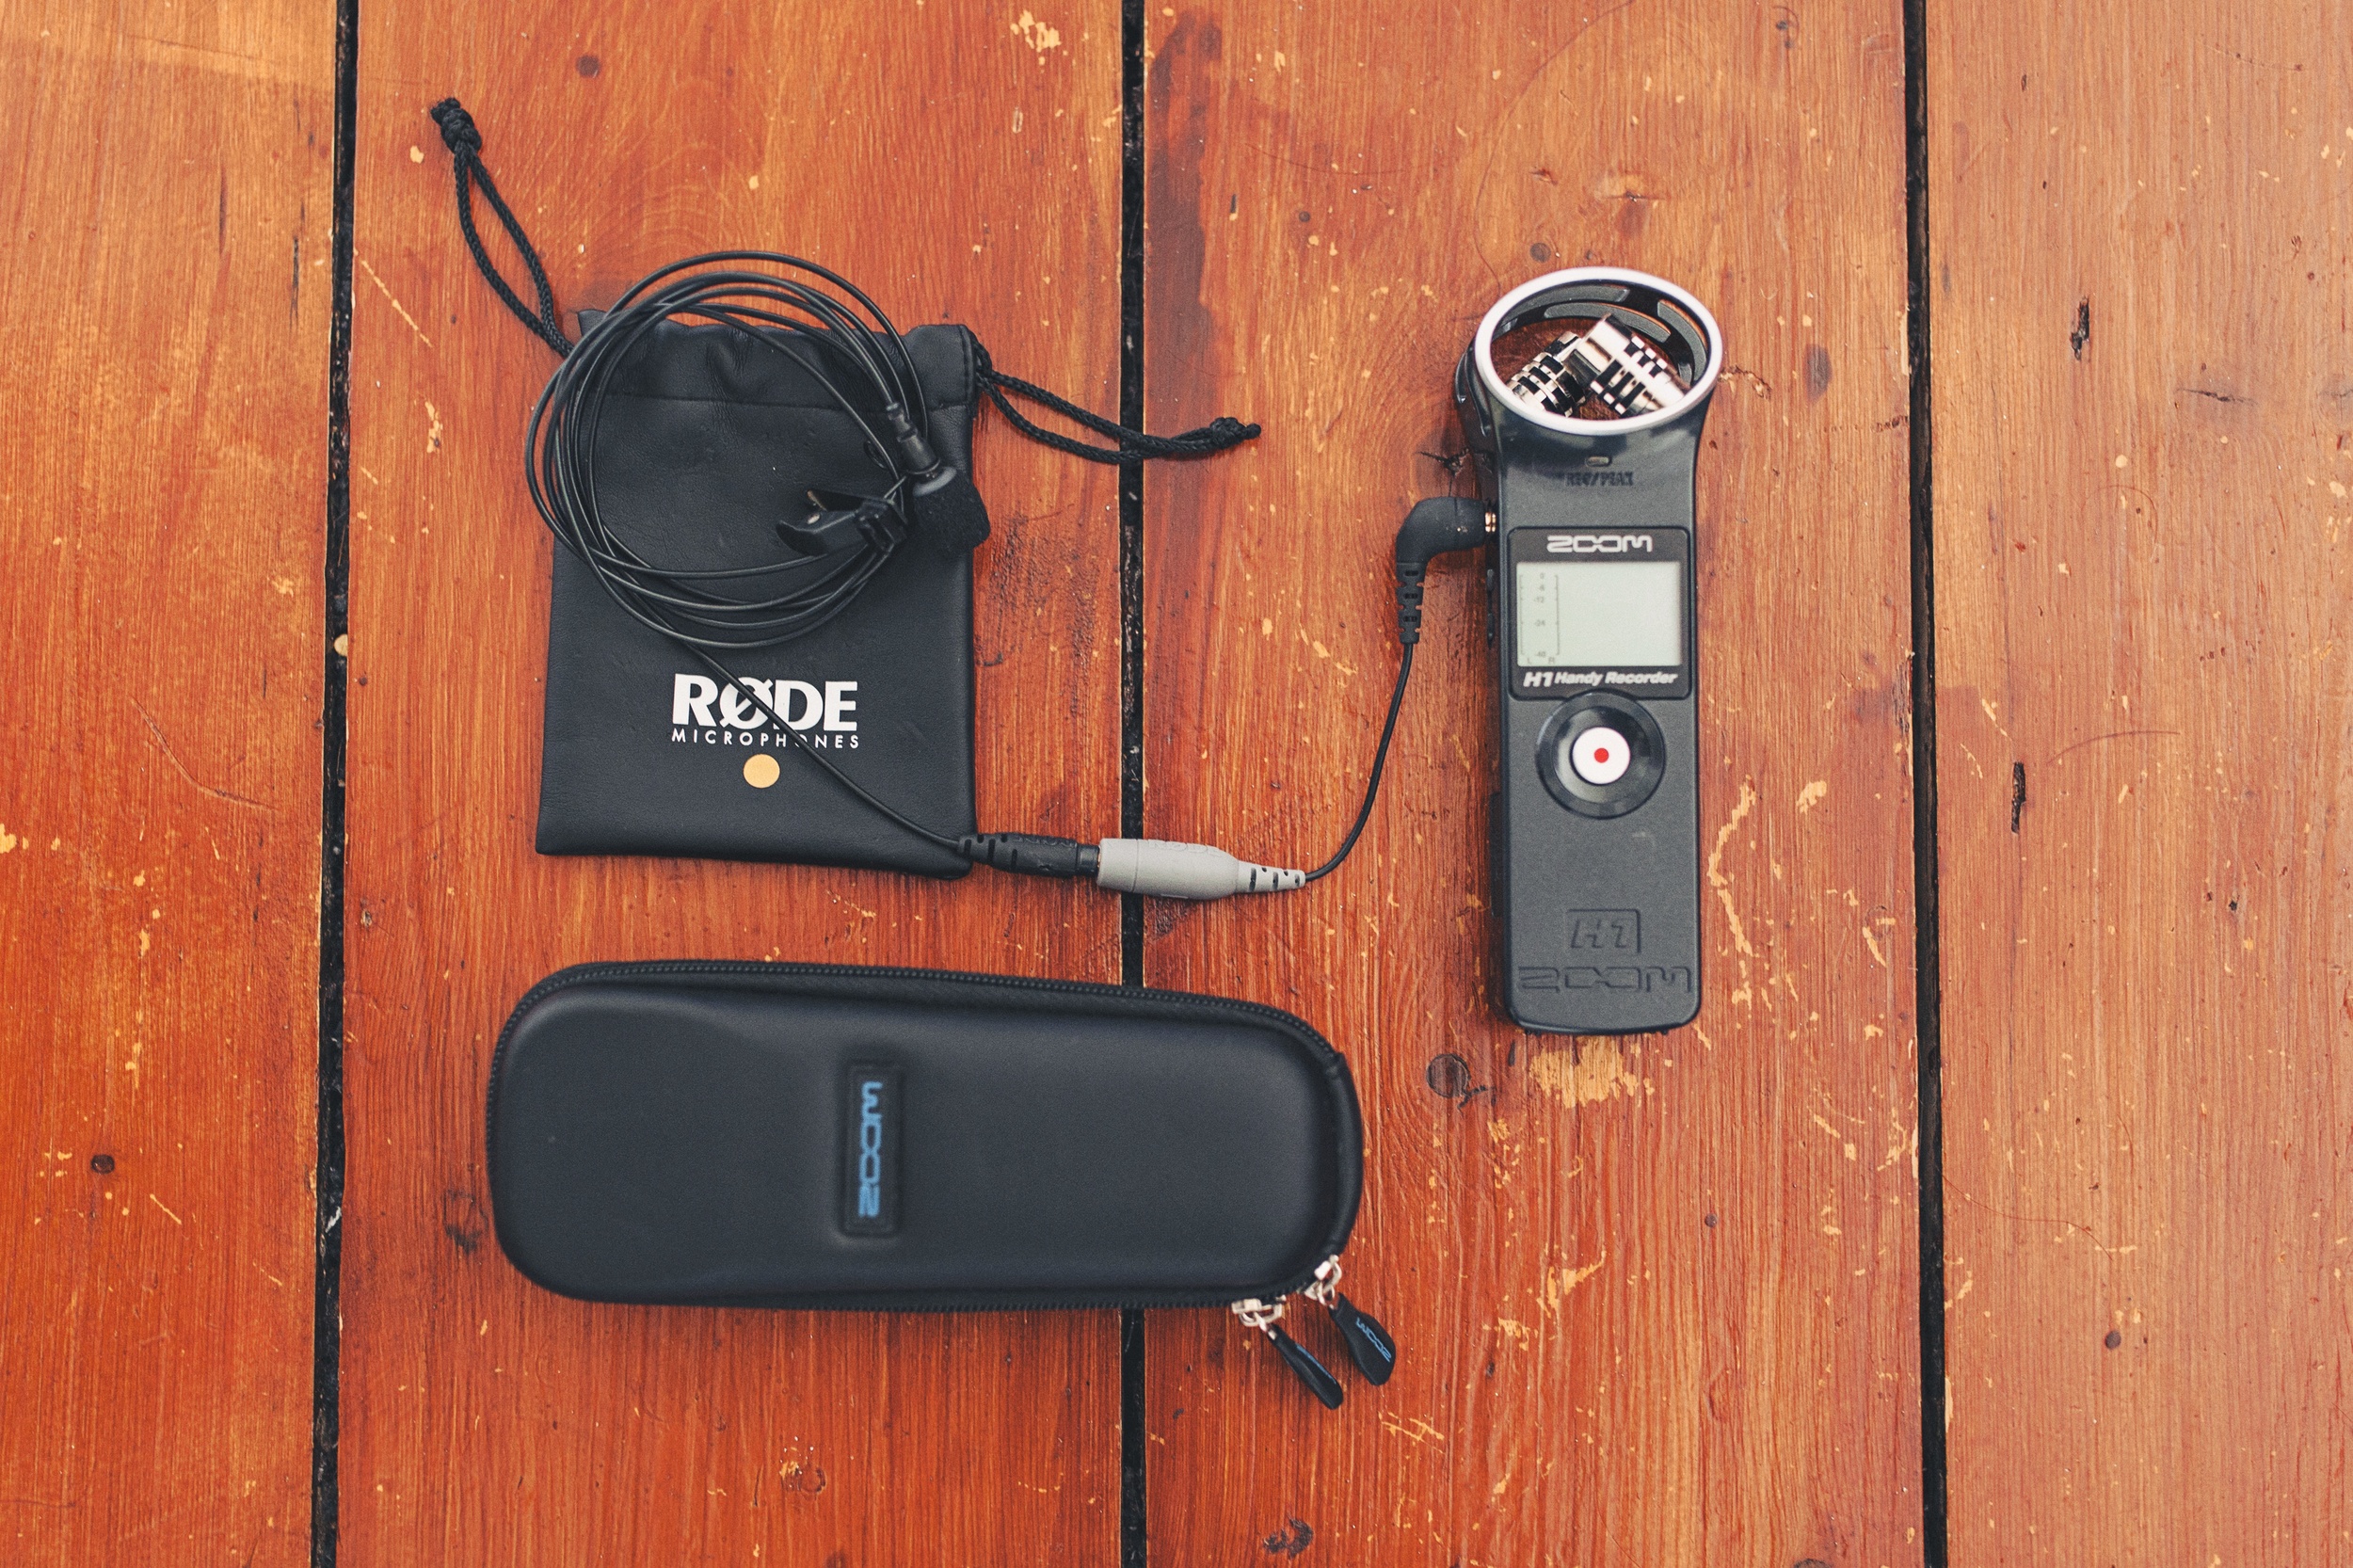
- Zoom H1 Audio Recorder (with pop filter)
- Rode Smart Lav (with Rode SC3 adapter)
- 1TB External Hard Drive
- Cold shoe adapter for mounting the Zoom off camera
- Kindle
- iPad
- Headphones
- Soft cloth
- Business cards
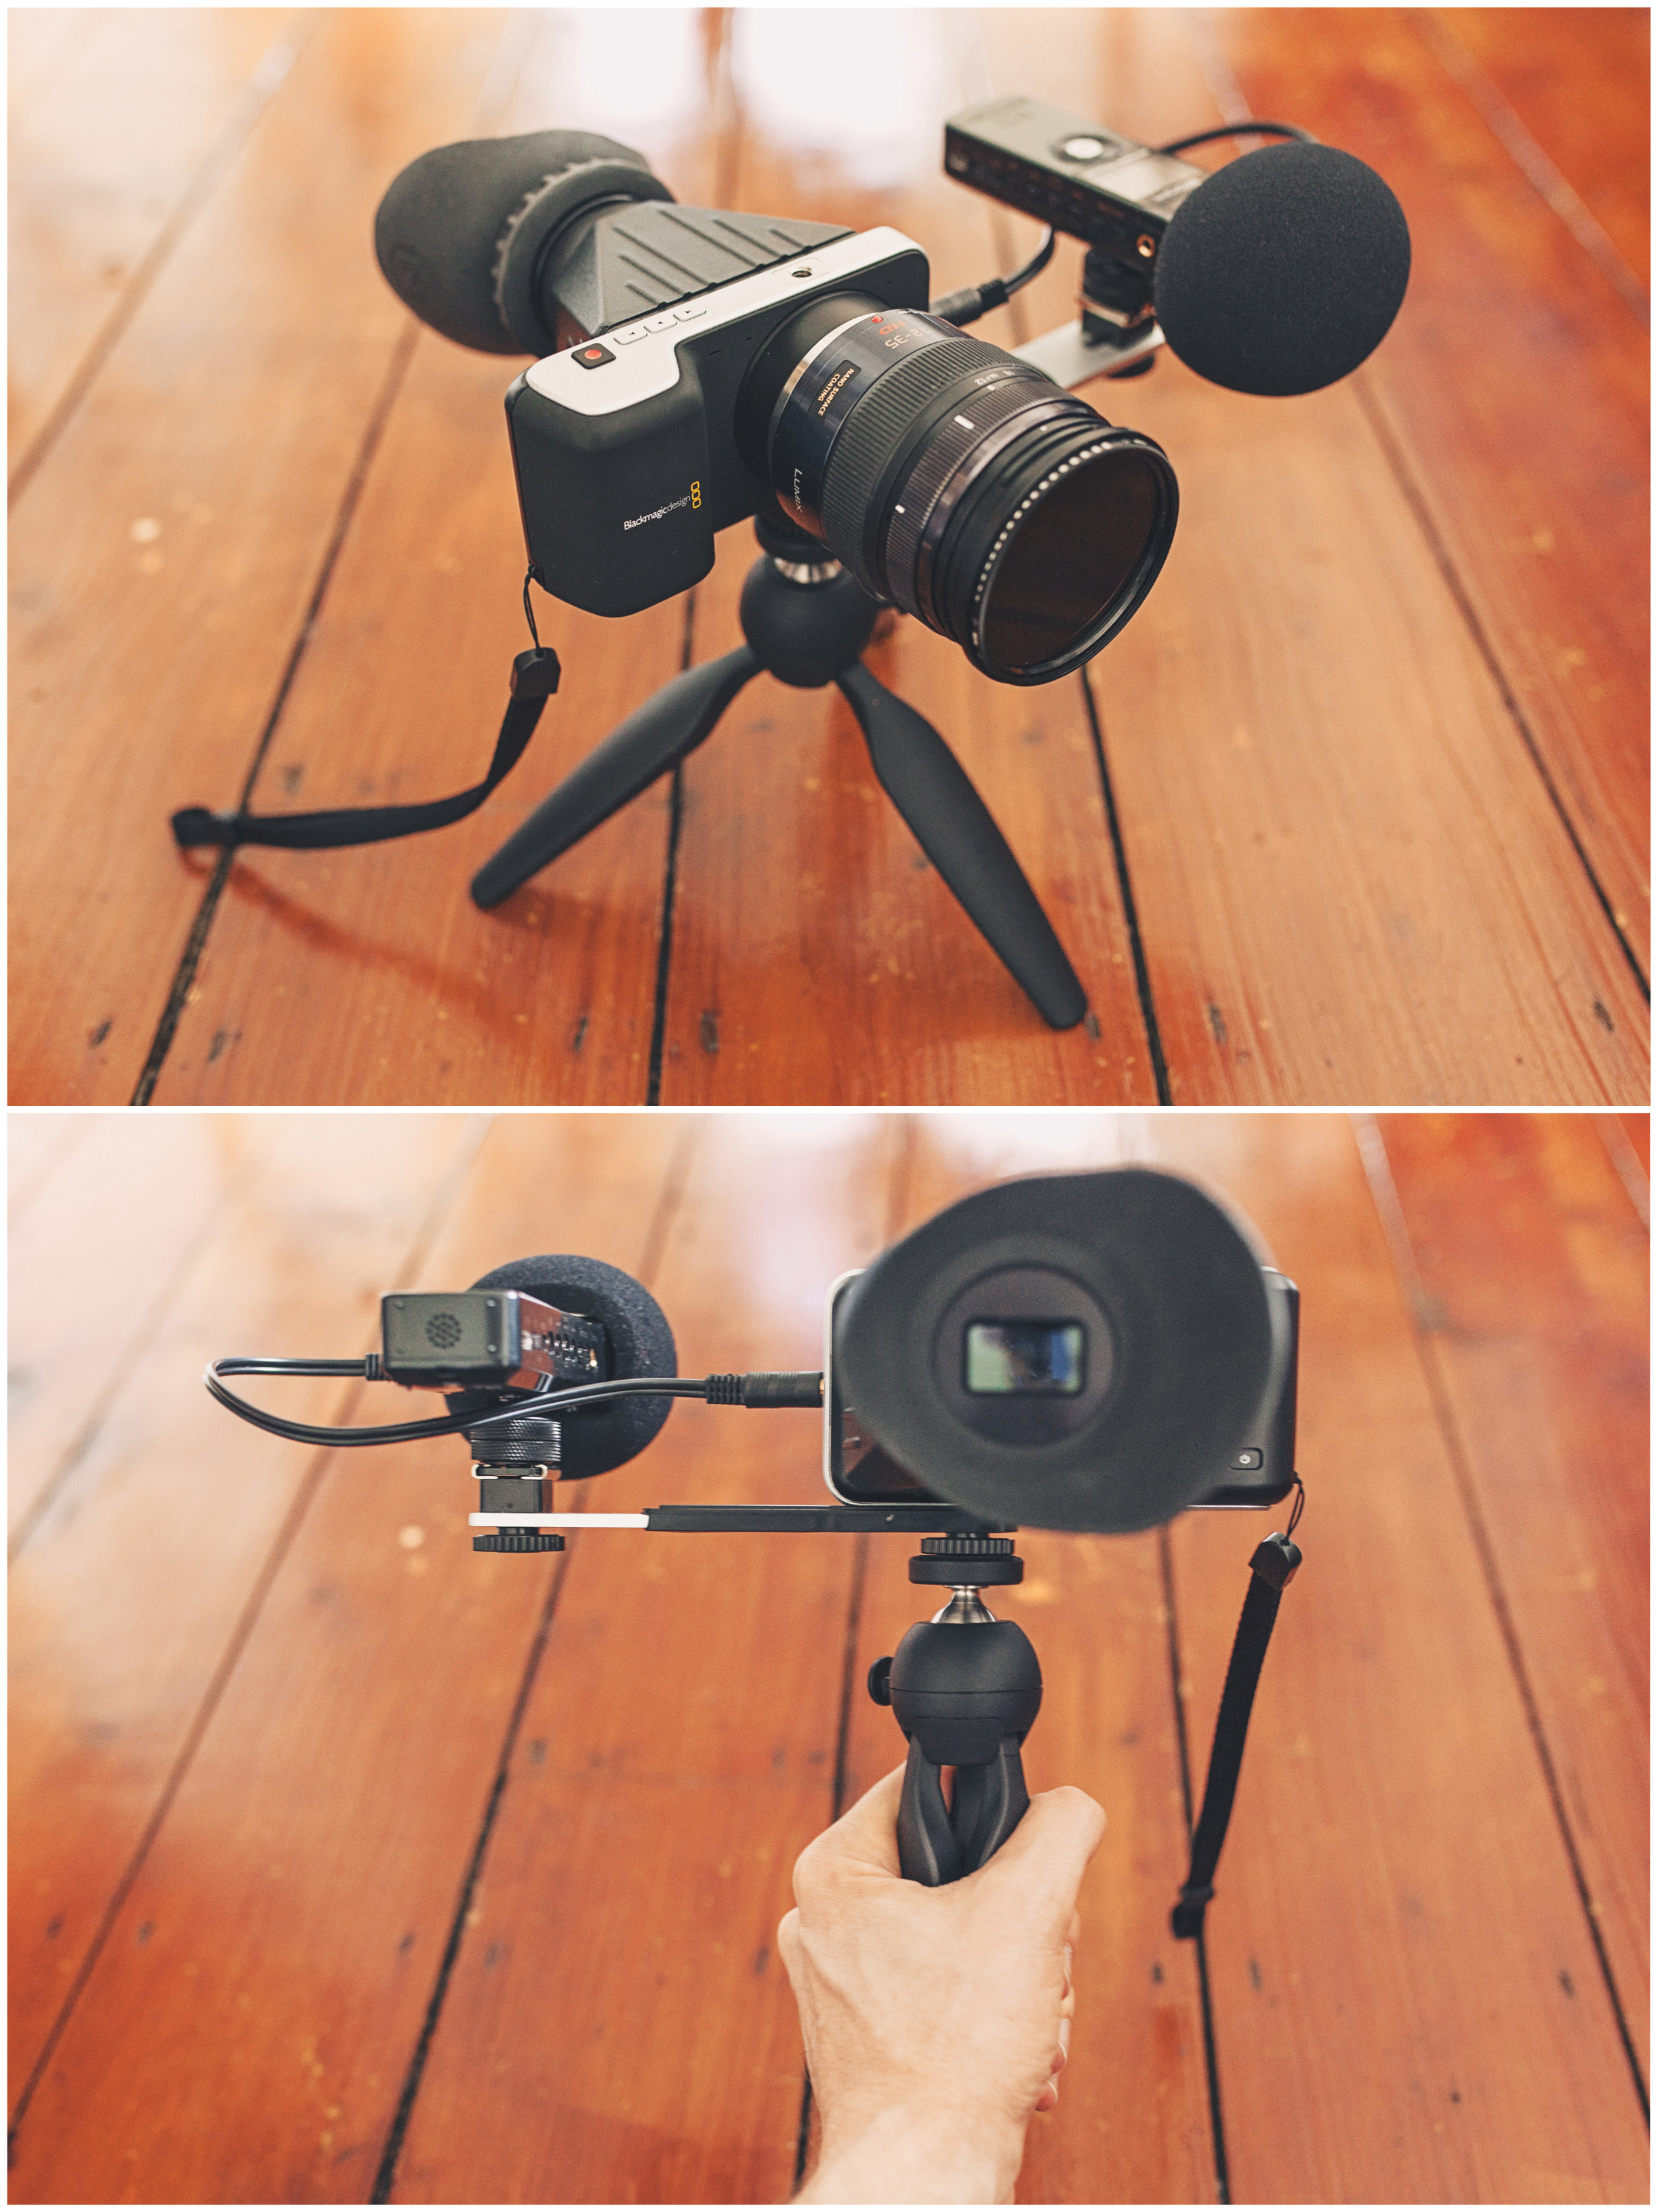
With this little kit I can be very mobile whilst producing super high quality video if the need, or want, arises. I use the Zoom H1 to jack audio straight into the side of the Black Magic Pocket, because the onboard mic is only really good for reference audio. The table top tripod means that I can rest the camera on a surface for stable shots, or fold the legs together and use it like a grip. When you have the viewfinder against your face and you're holding the grip as shown here, you can actually achieve pretty stable run-and-gun shooting due to the two body contact points.
Of course it would be nice to have a series of fast primes but that defeats the object of keeping the kit small. I find that 12-35mm (36-105mm taking the crop factor into account) gives me all the range I want, and I can achieve f2.8 in any situation, even direct sunlight, thanks to the variable ND filter, and that is plenty. Speaking of direct sunlight; I have found the Zacuto to be essential with this camera for keeping with screen visible.
If I am recoding audio from someone speaking and really want to make sure I capture that well, then I pull out the Rode Smartlav.
By attaching the Smartlav to the Zoom H1 (you will need the SC3 adapter) and placing the Zoom in the pocket of whoever I happen to be interviewing, I can ensure that I won't miss a word. I have recorded audio like this in a loud club setting with people shouting and music blaring, and still been able to hear every word. I will need to sync audio in post, but this usually only takes a moment.
So for me this is a perfect little set up. The bag is small and light weight, even with all this kit; but if I found myself in a situation where I needed to film I am confident that I would be able to produce something of a very high quality. This would actually make the perfect roving reporter's bag in my opinion.
I'll leave you with a quick little video I shot with my wife in New York a couple of weeks ago, just on the spur of the moment because I had this set up with me:
A Blackmagical Weekend
I received a slightly vague phone call recently.
To be fair I was in a bus full of noisy crew on the way to a location scout, so I was struggling to hear, but from what I could make out, a company with whom I was fairly familiar, called Blackmagic Design, had identified a number of photographers, who also practiced the dark arts of videography. The friendly guy on the other end of the line told me that they liked our respective work, and that they wanted to take us away for a weekend to the Lake District.
No arm twisting required there.
So mid last week I received a nice parcel with first class train tickets and, joy of joys, some free gear.
So, come Sunday lunchtime, I boarded Virgin's high speed Train bound for the Lake District. As we sped up the spine of the country, with all four seasons raging outside the windows, I have to admit to wondering what this was all really about, and was still wondering as we pulled into a snow covered Oxenholme Station.
Why were they spending money on us like this? Why the free stuff? Why the fancy weekend away? Why take so much time out of their schedules?
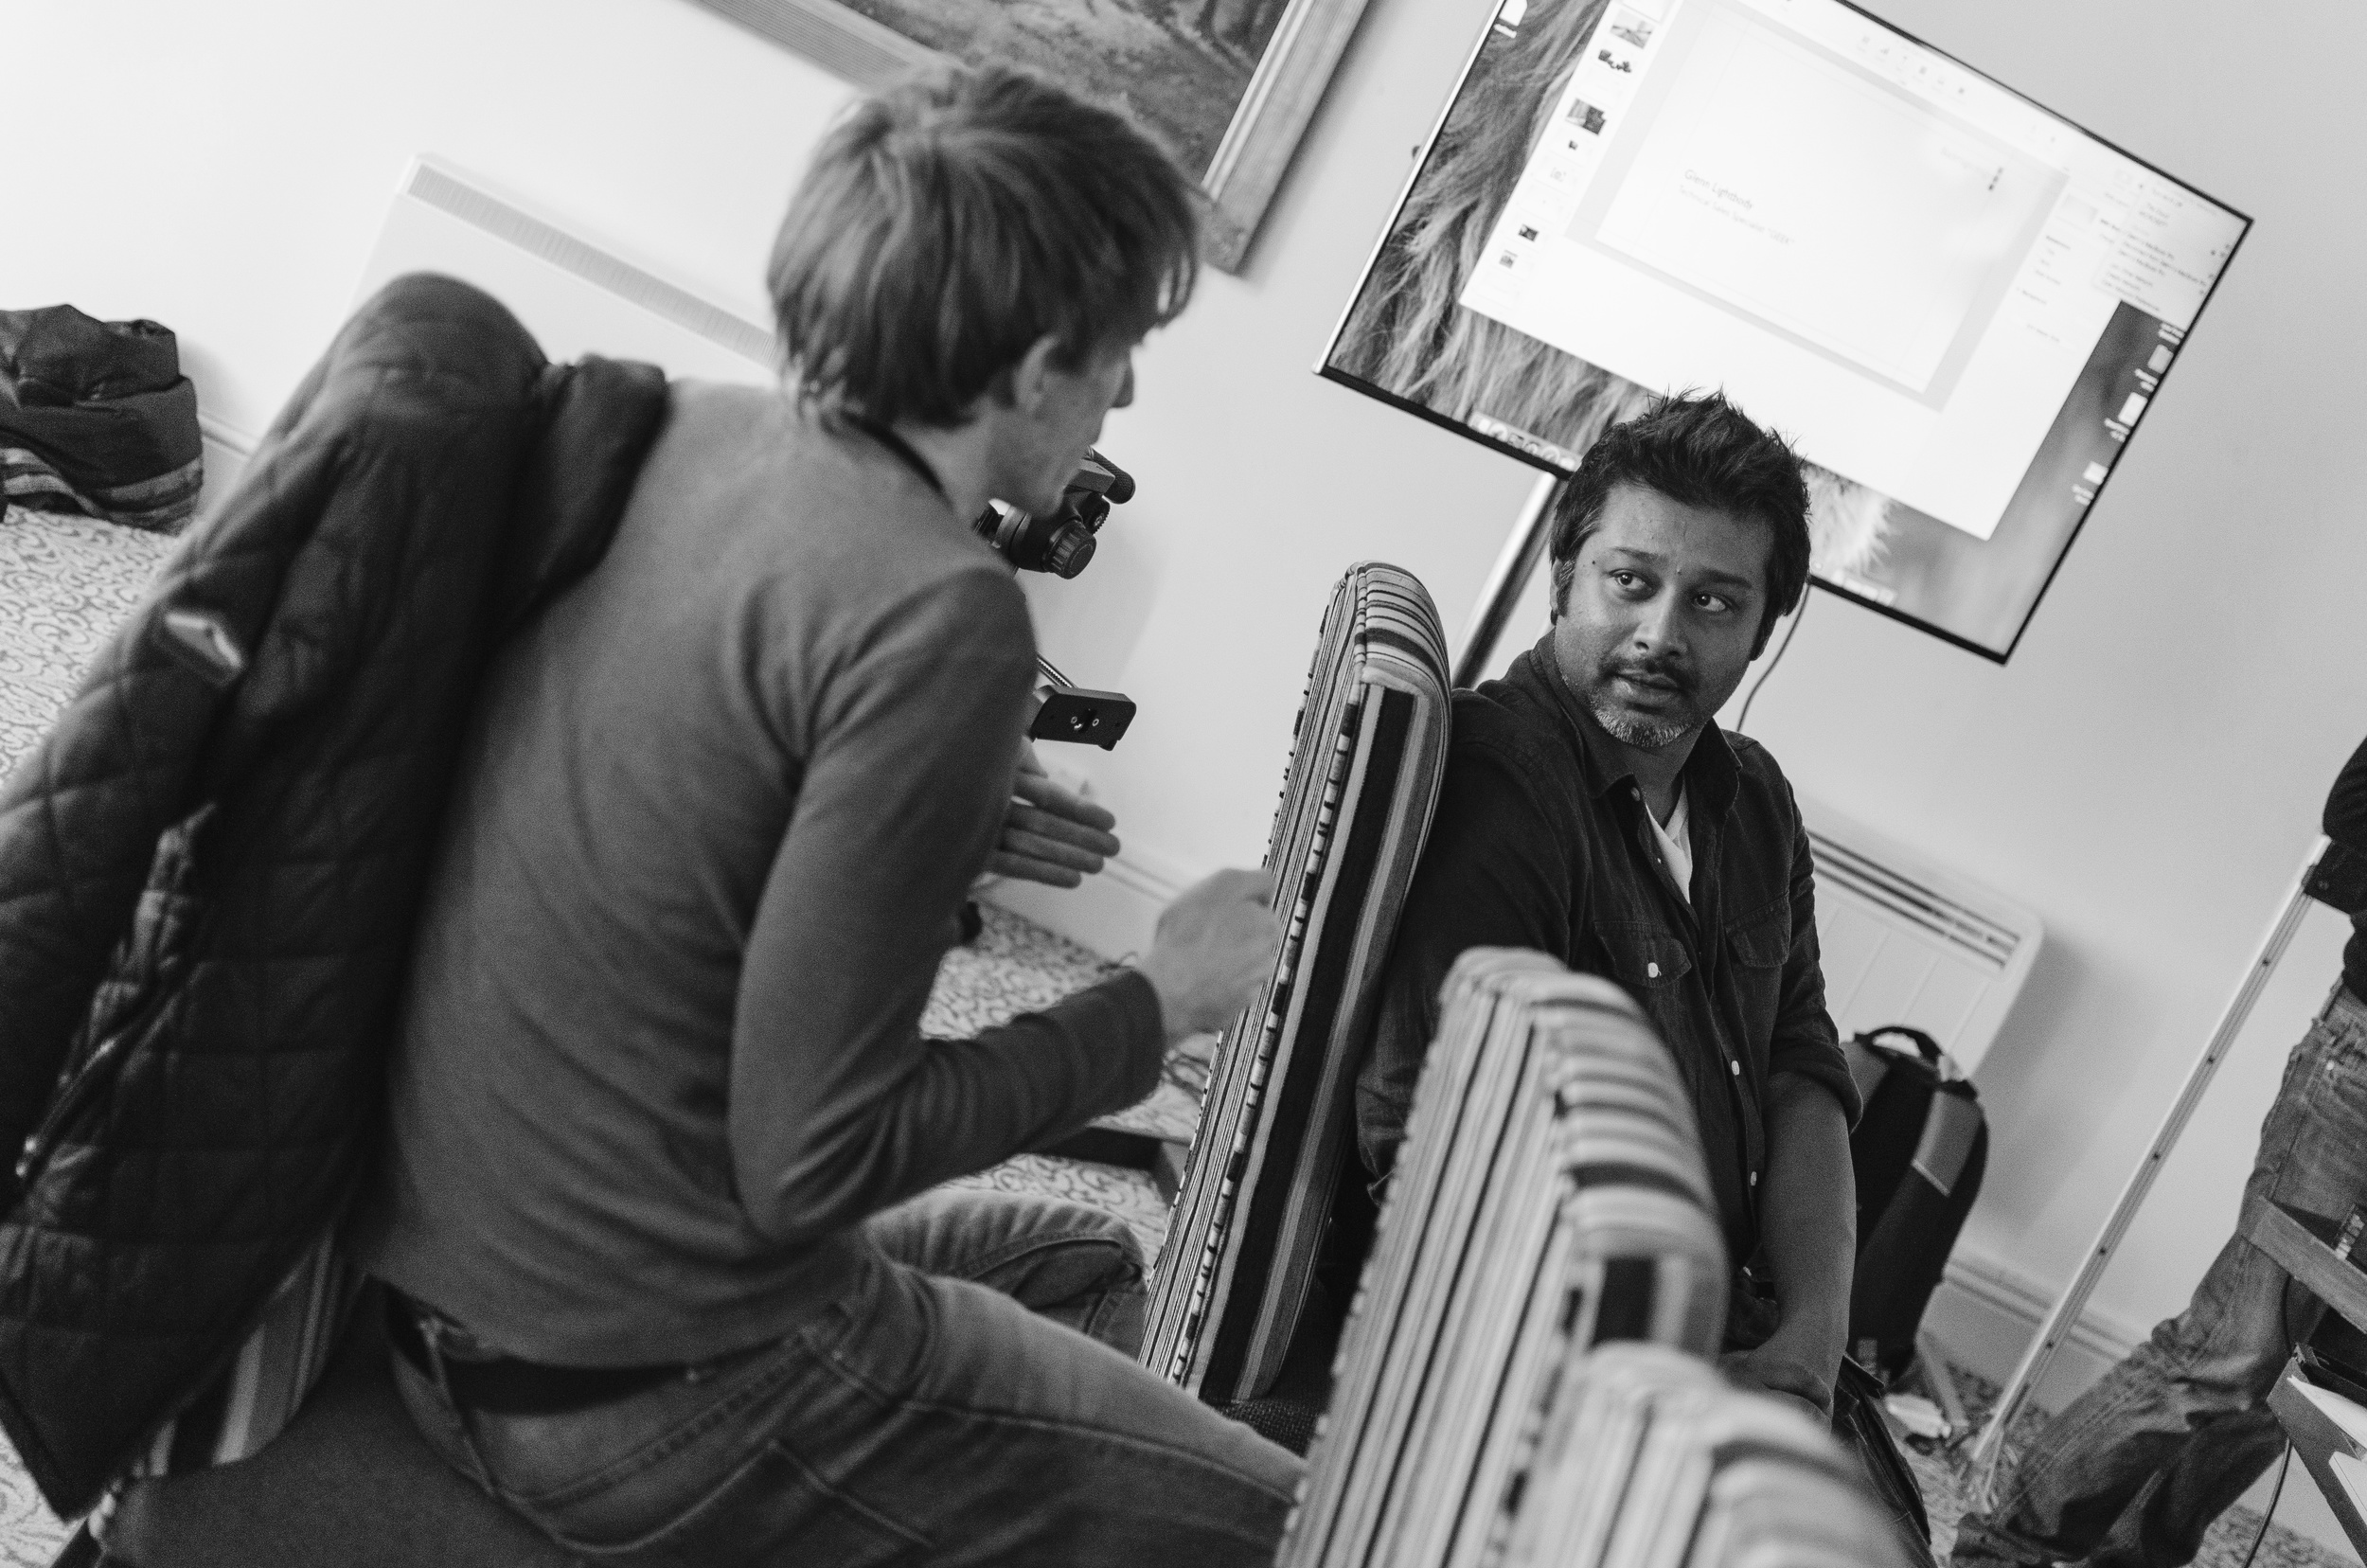
I unpacked in a very comfortable room and made my way down for drinks in the bar to discover that they had selected 9 of us in total, and brought along 11 of their staff to give us maximum individual attention, and be able to answer any questions we may have over the coming days, whether it be about their cameras, their software, or even just if we wanted to nerd out about photography and filming in general.
I find this sort of interaction so invigorating. Being a photographer is often quite a solitary job and it's great to feel part of a broader community, even just for a few days.
The basic outline of our time spent together was as follows:
1st Session: Introductions, with each of the nine of us invitees being given the opportunity to talk a bit about what we do. This included sharing one of our images which had some sort of story behind it, presumably to give a feel for our work and our specific passions.
2nd Session: Film Theory, with tips on how to use camera movement and story telling devices to add a more professional cinematic feel to your shots. We spent some time analysing footage from some of the best films of our generation as well as talking about how to make the transition from photographer to cinematographer.
3rd Session: Technical, with a complete overview of the Blackmagic Pocket Cinema Camera, which we received in the post. I'll will get to my thoughts on it specifically in a mo.
4th Session: Shooting, where we were split into two groups, with each group being given two actors. We then took it in turns within the group to shoot and direct scenes, which we had to devise on the spot. Here are a few shots taken by the Blackmagic guys of us 'hard at work':

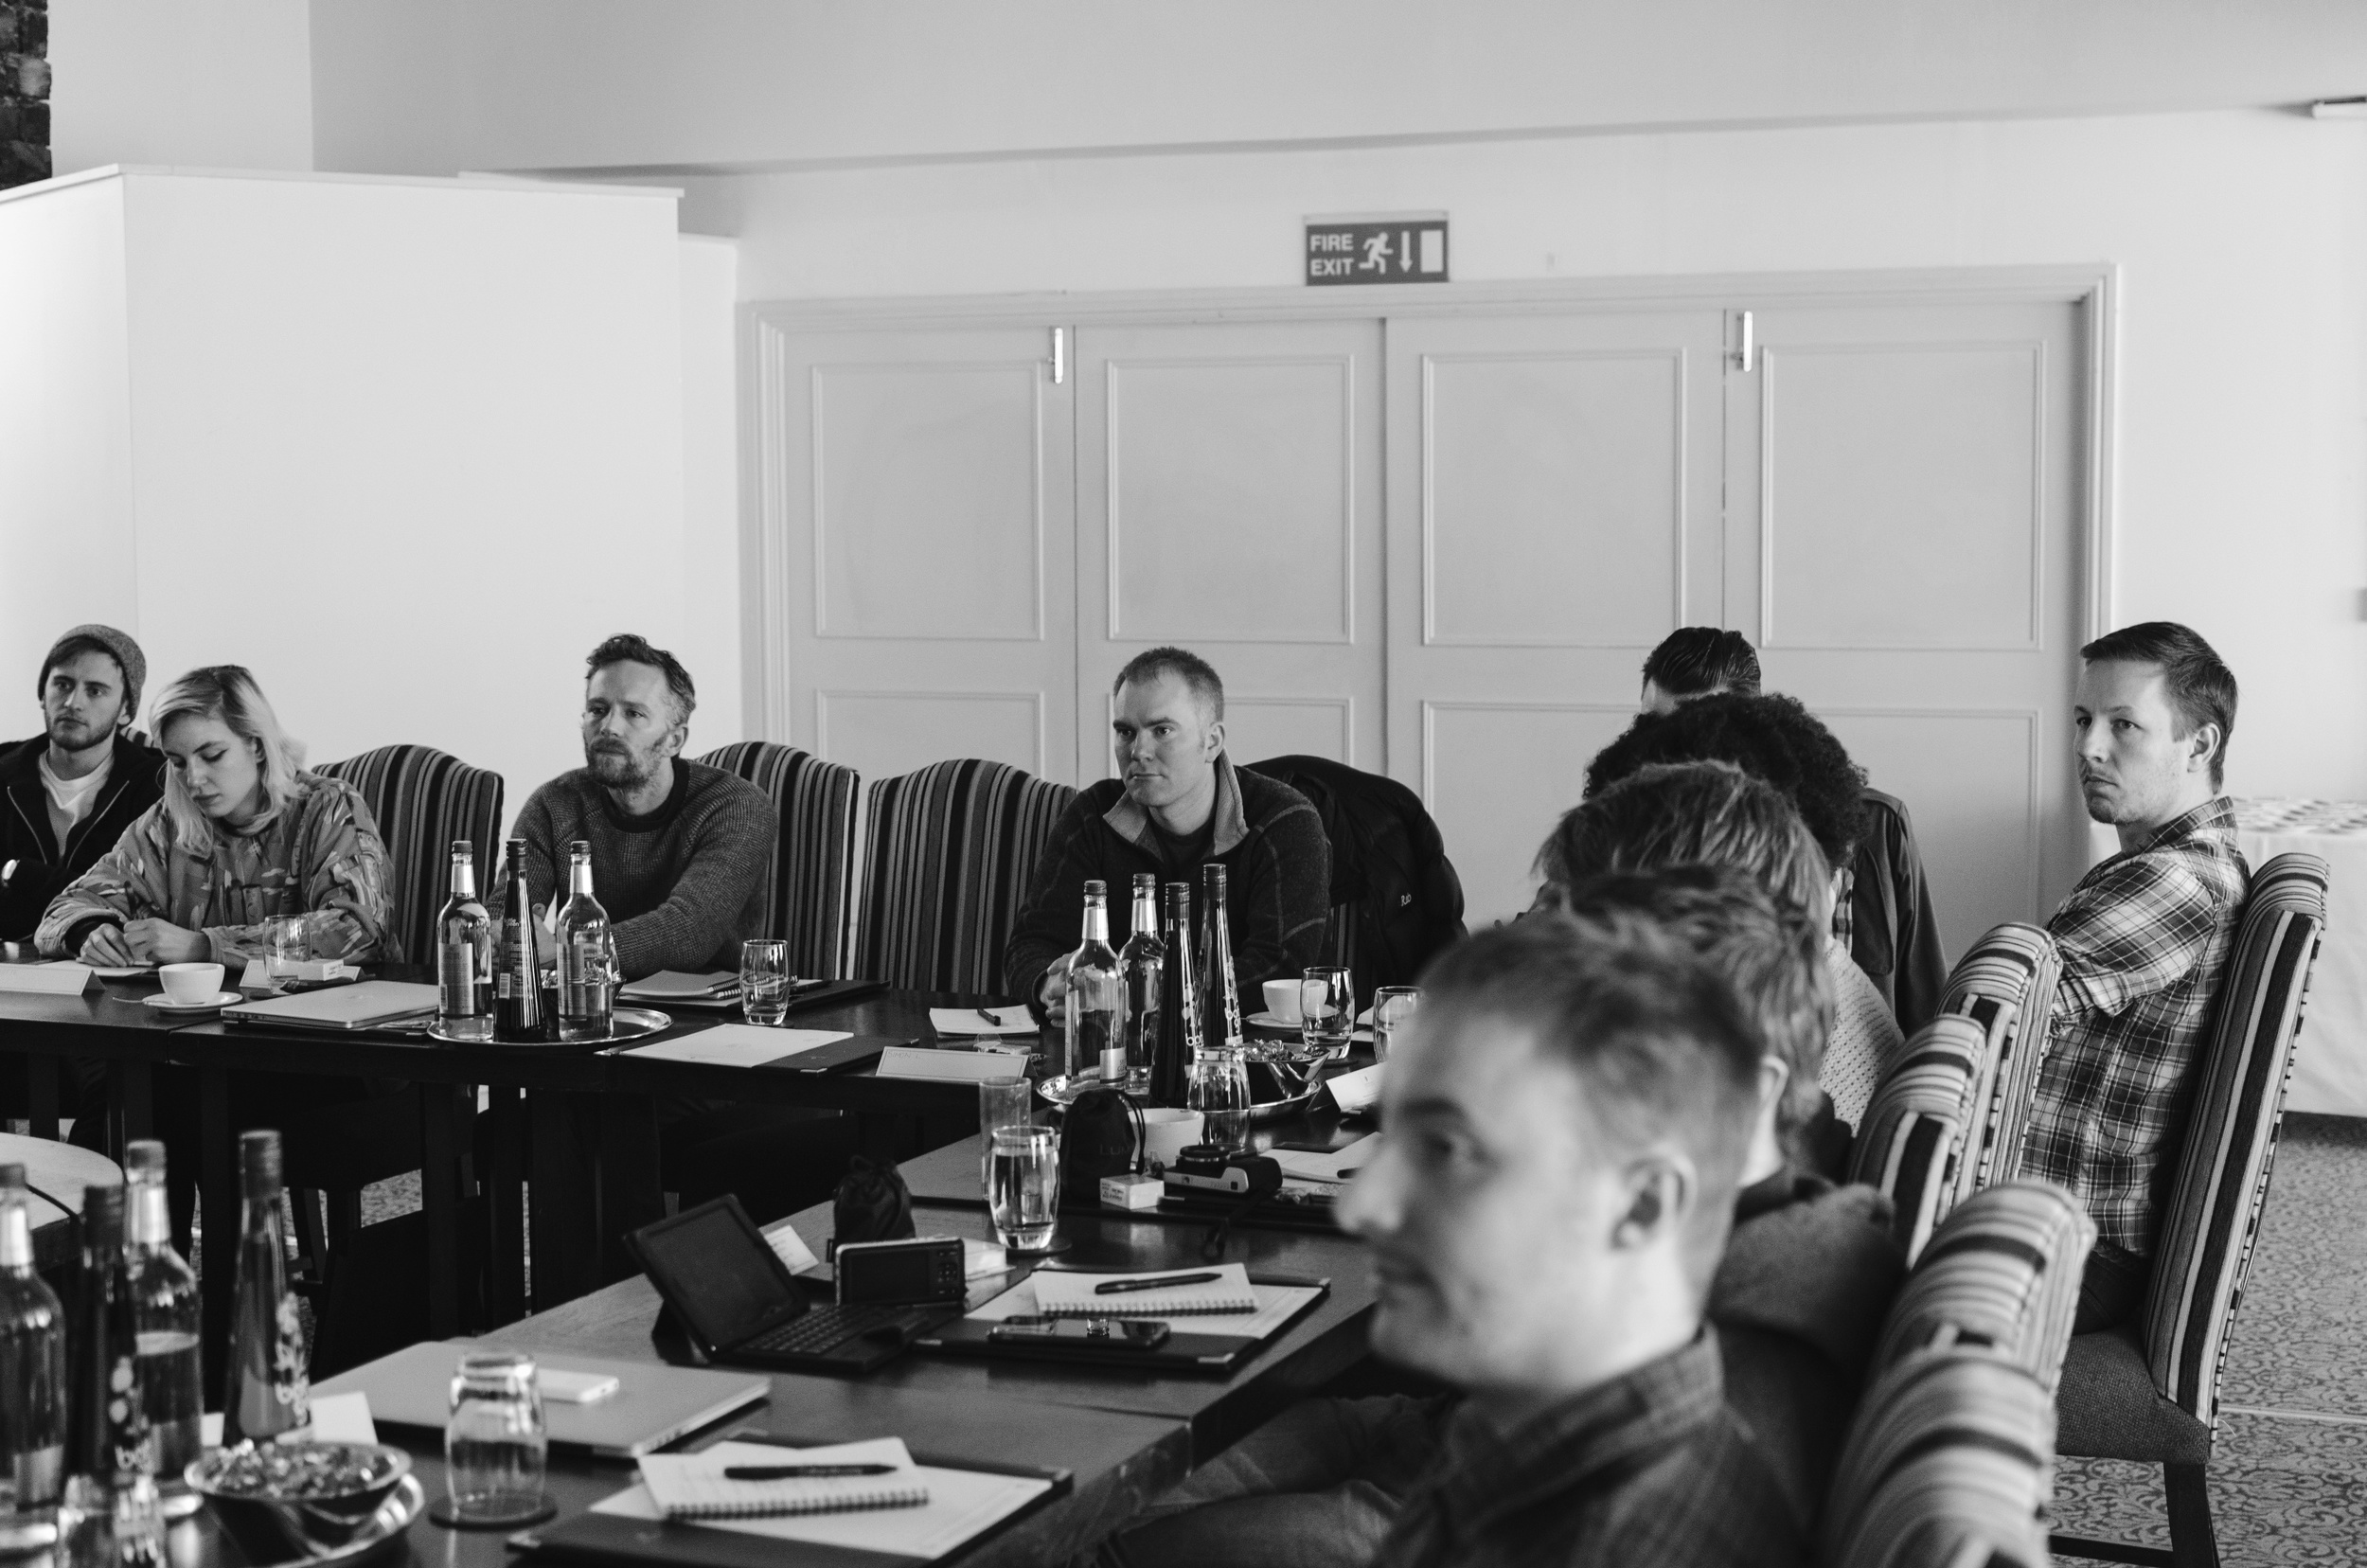
5th Session: Editing, with an overview of basic editing techniques, and how they can be used to create drama and mood, as well as moving your story along.
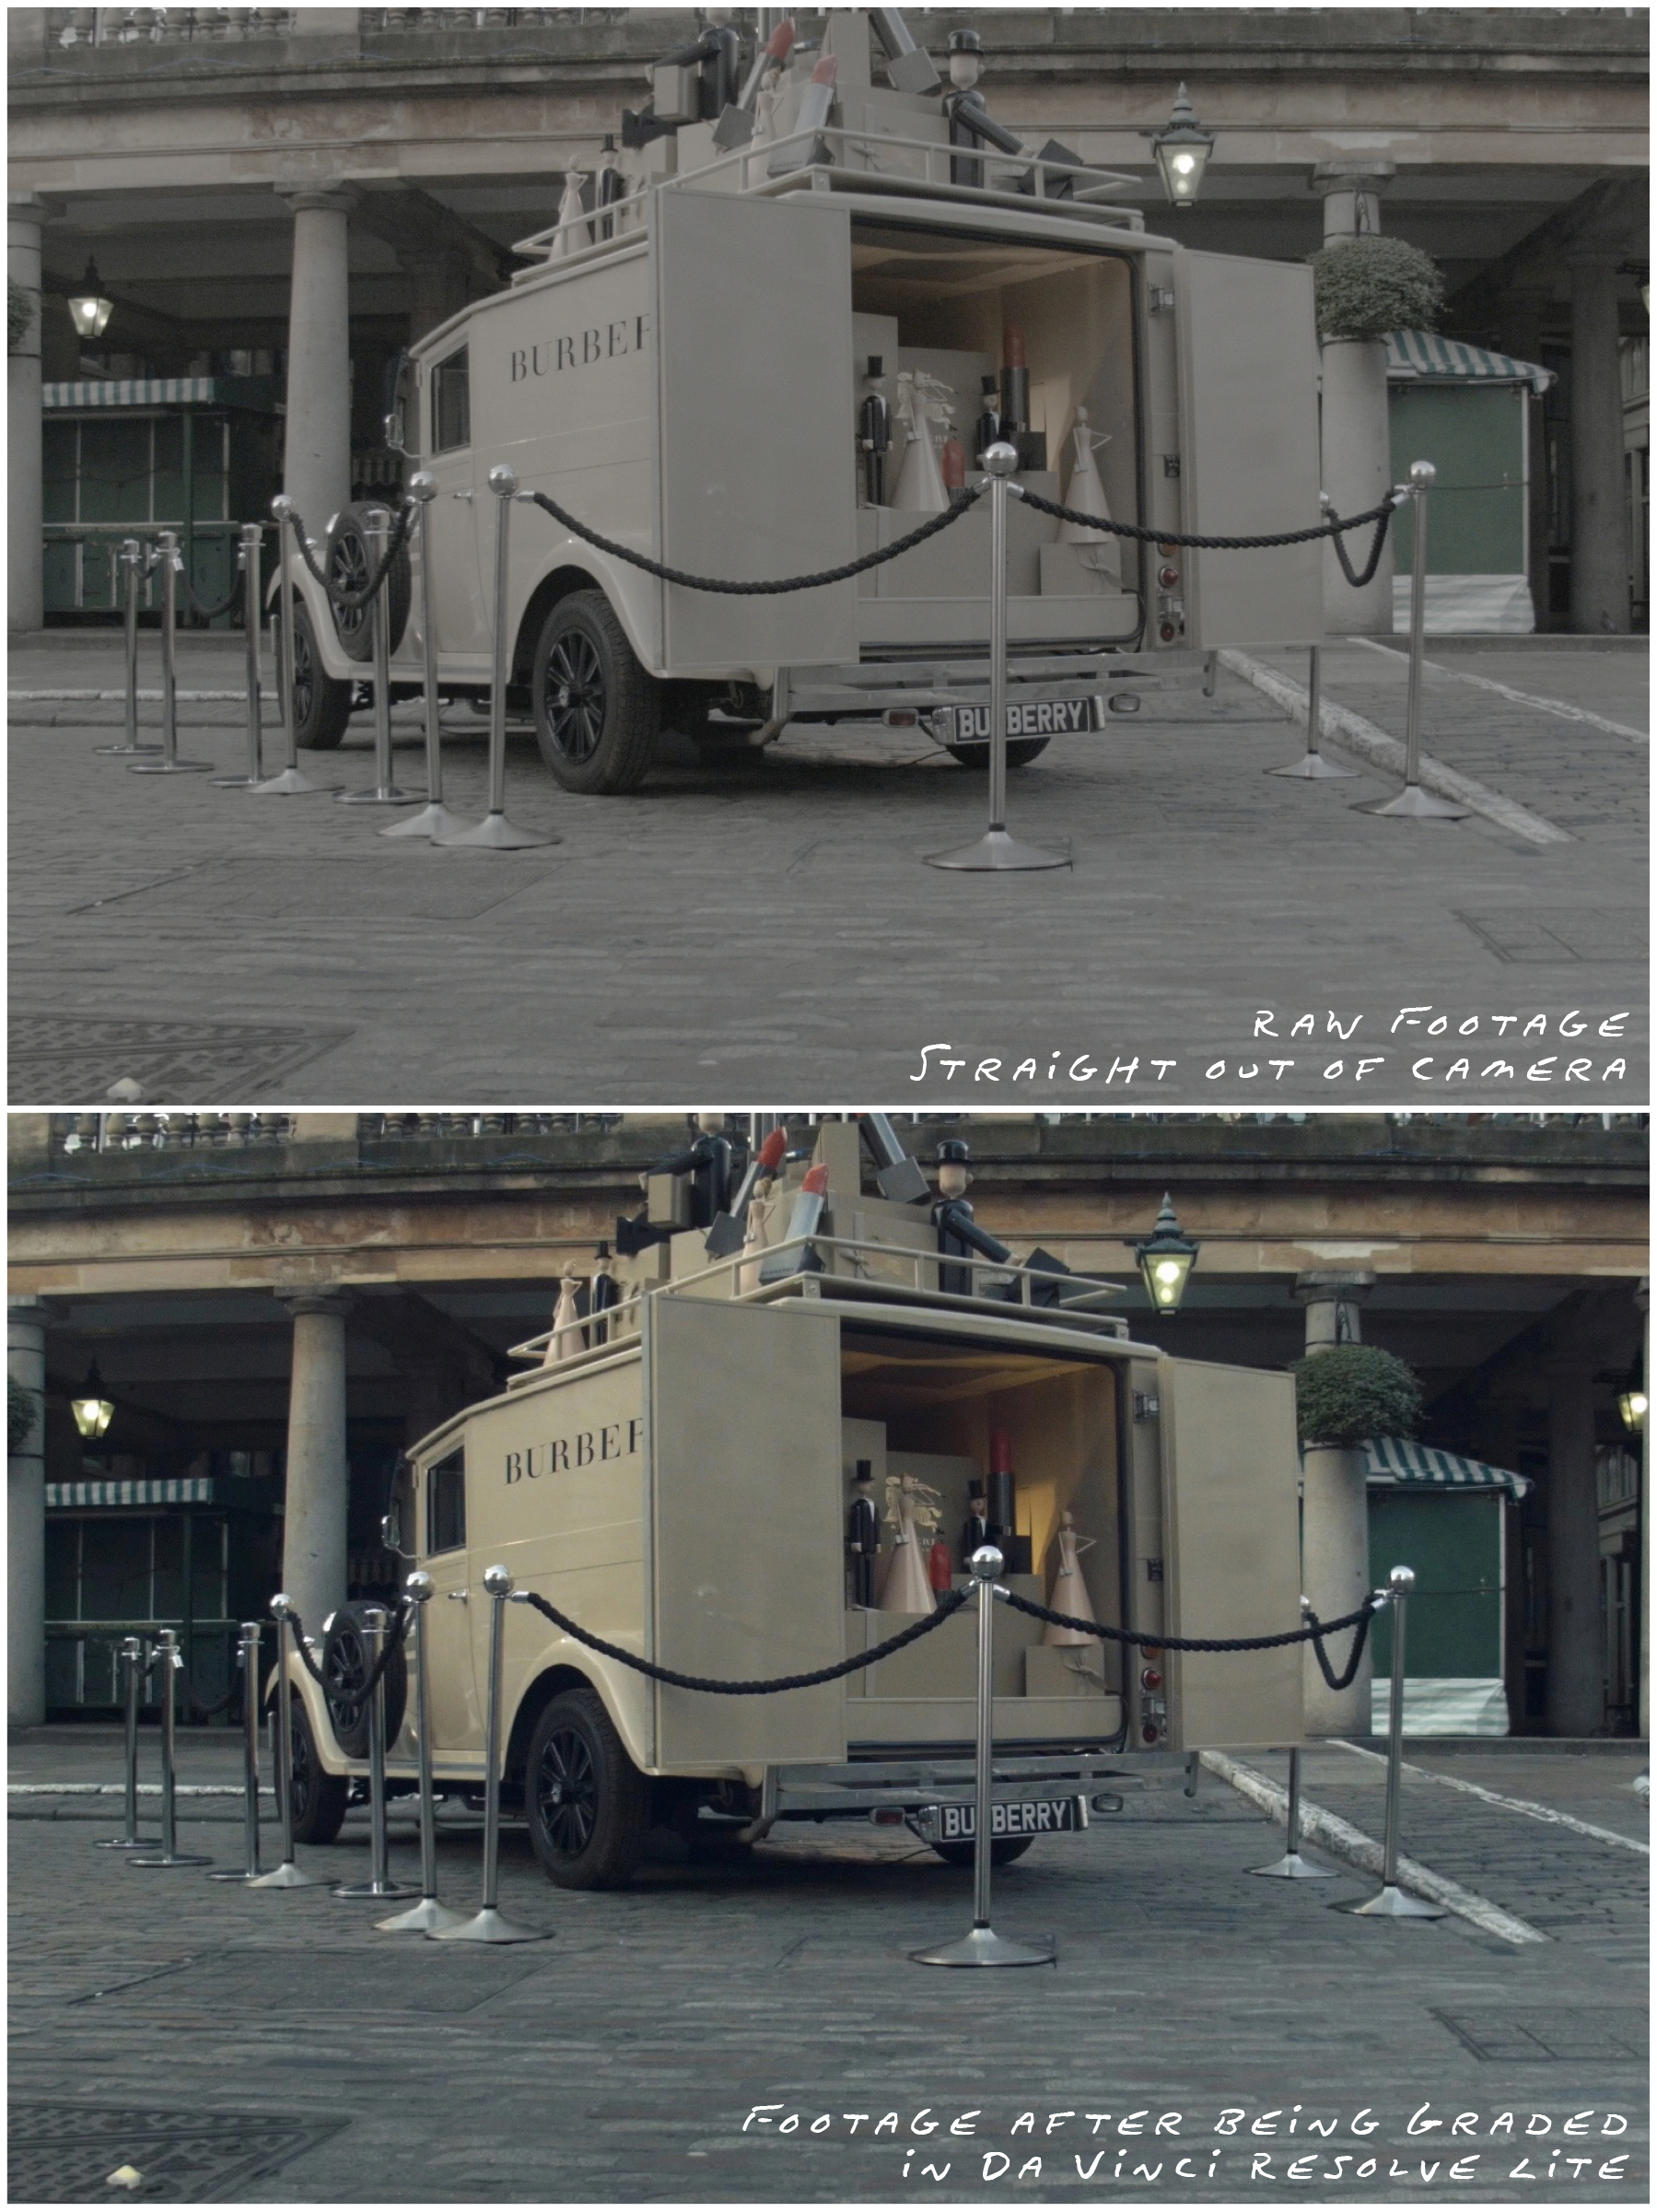
6th Session: Grading, which was a run down of Da Vinci Resolve; Blackmagic Design's impressive colour grading software. This program is used on numerous blockbuster movies and gives you incredible control when colouring and finishing your footage.
This weekend was a gift in so many ways. There is obviously no space here to share all the things I learnt, but let me quickly tell you about the camera, the software, and the company:
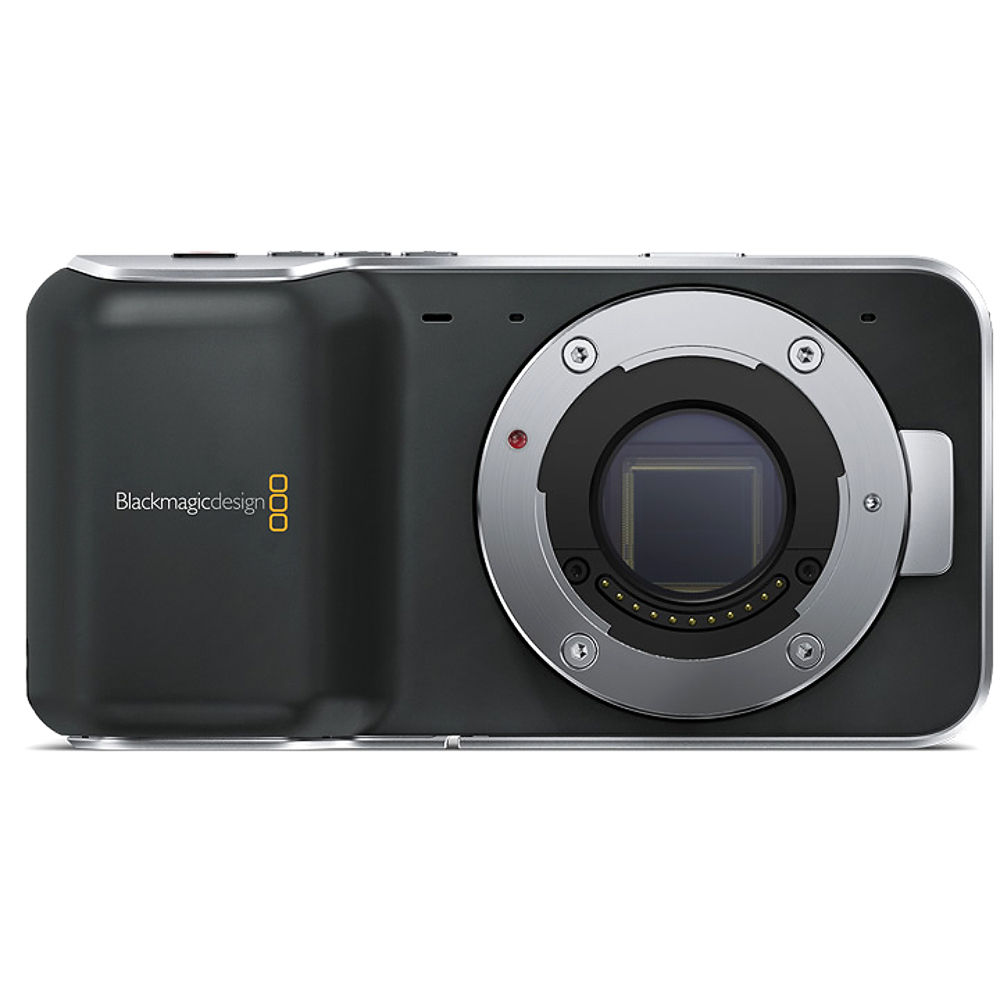
The Blackmagic Pocket Cinema Camera is an odd one for me.
Let me give you the positives up front.
It's incredibly simple to use, and for such a diminutive device, at a reasonable price, it gives you some similarly incredible footage. They boast 13 stops of dynamic range (which I've explained on this blog before is the amount of information the sensor can hold between the brightest highlights and darkest shadows before blowing to pure white or black respectively). 13 stops is very impressive and having used the camera I can report that it's all there. This also means however that this is a professional camera and not for consumers. If you simply picked one of these cameras up off the shelf and shot footage, you would likely be disappointed by the flat, washed out, grey look of your shots. You HAVE to colour grade this footage. It's not an optional extra as with other cameras, but this has to be the process in order to give you all that latitude.
Take a look at this example:
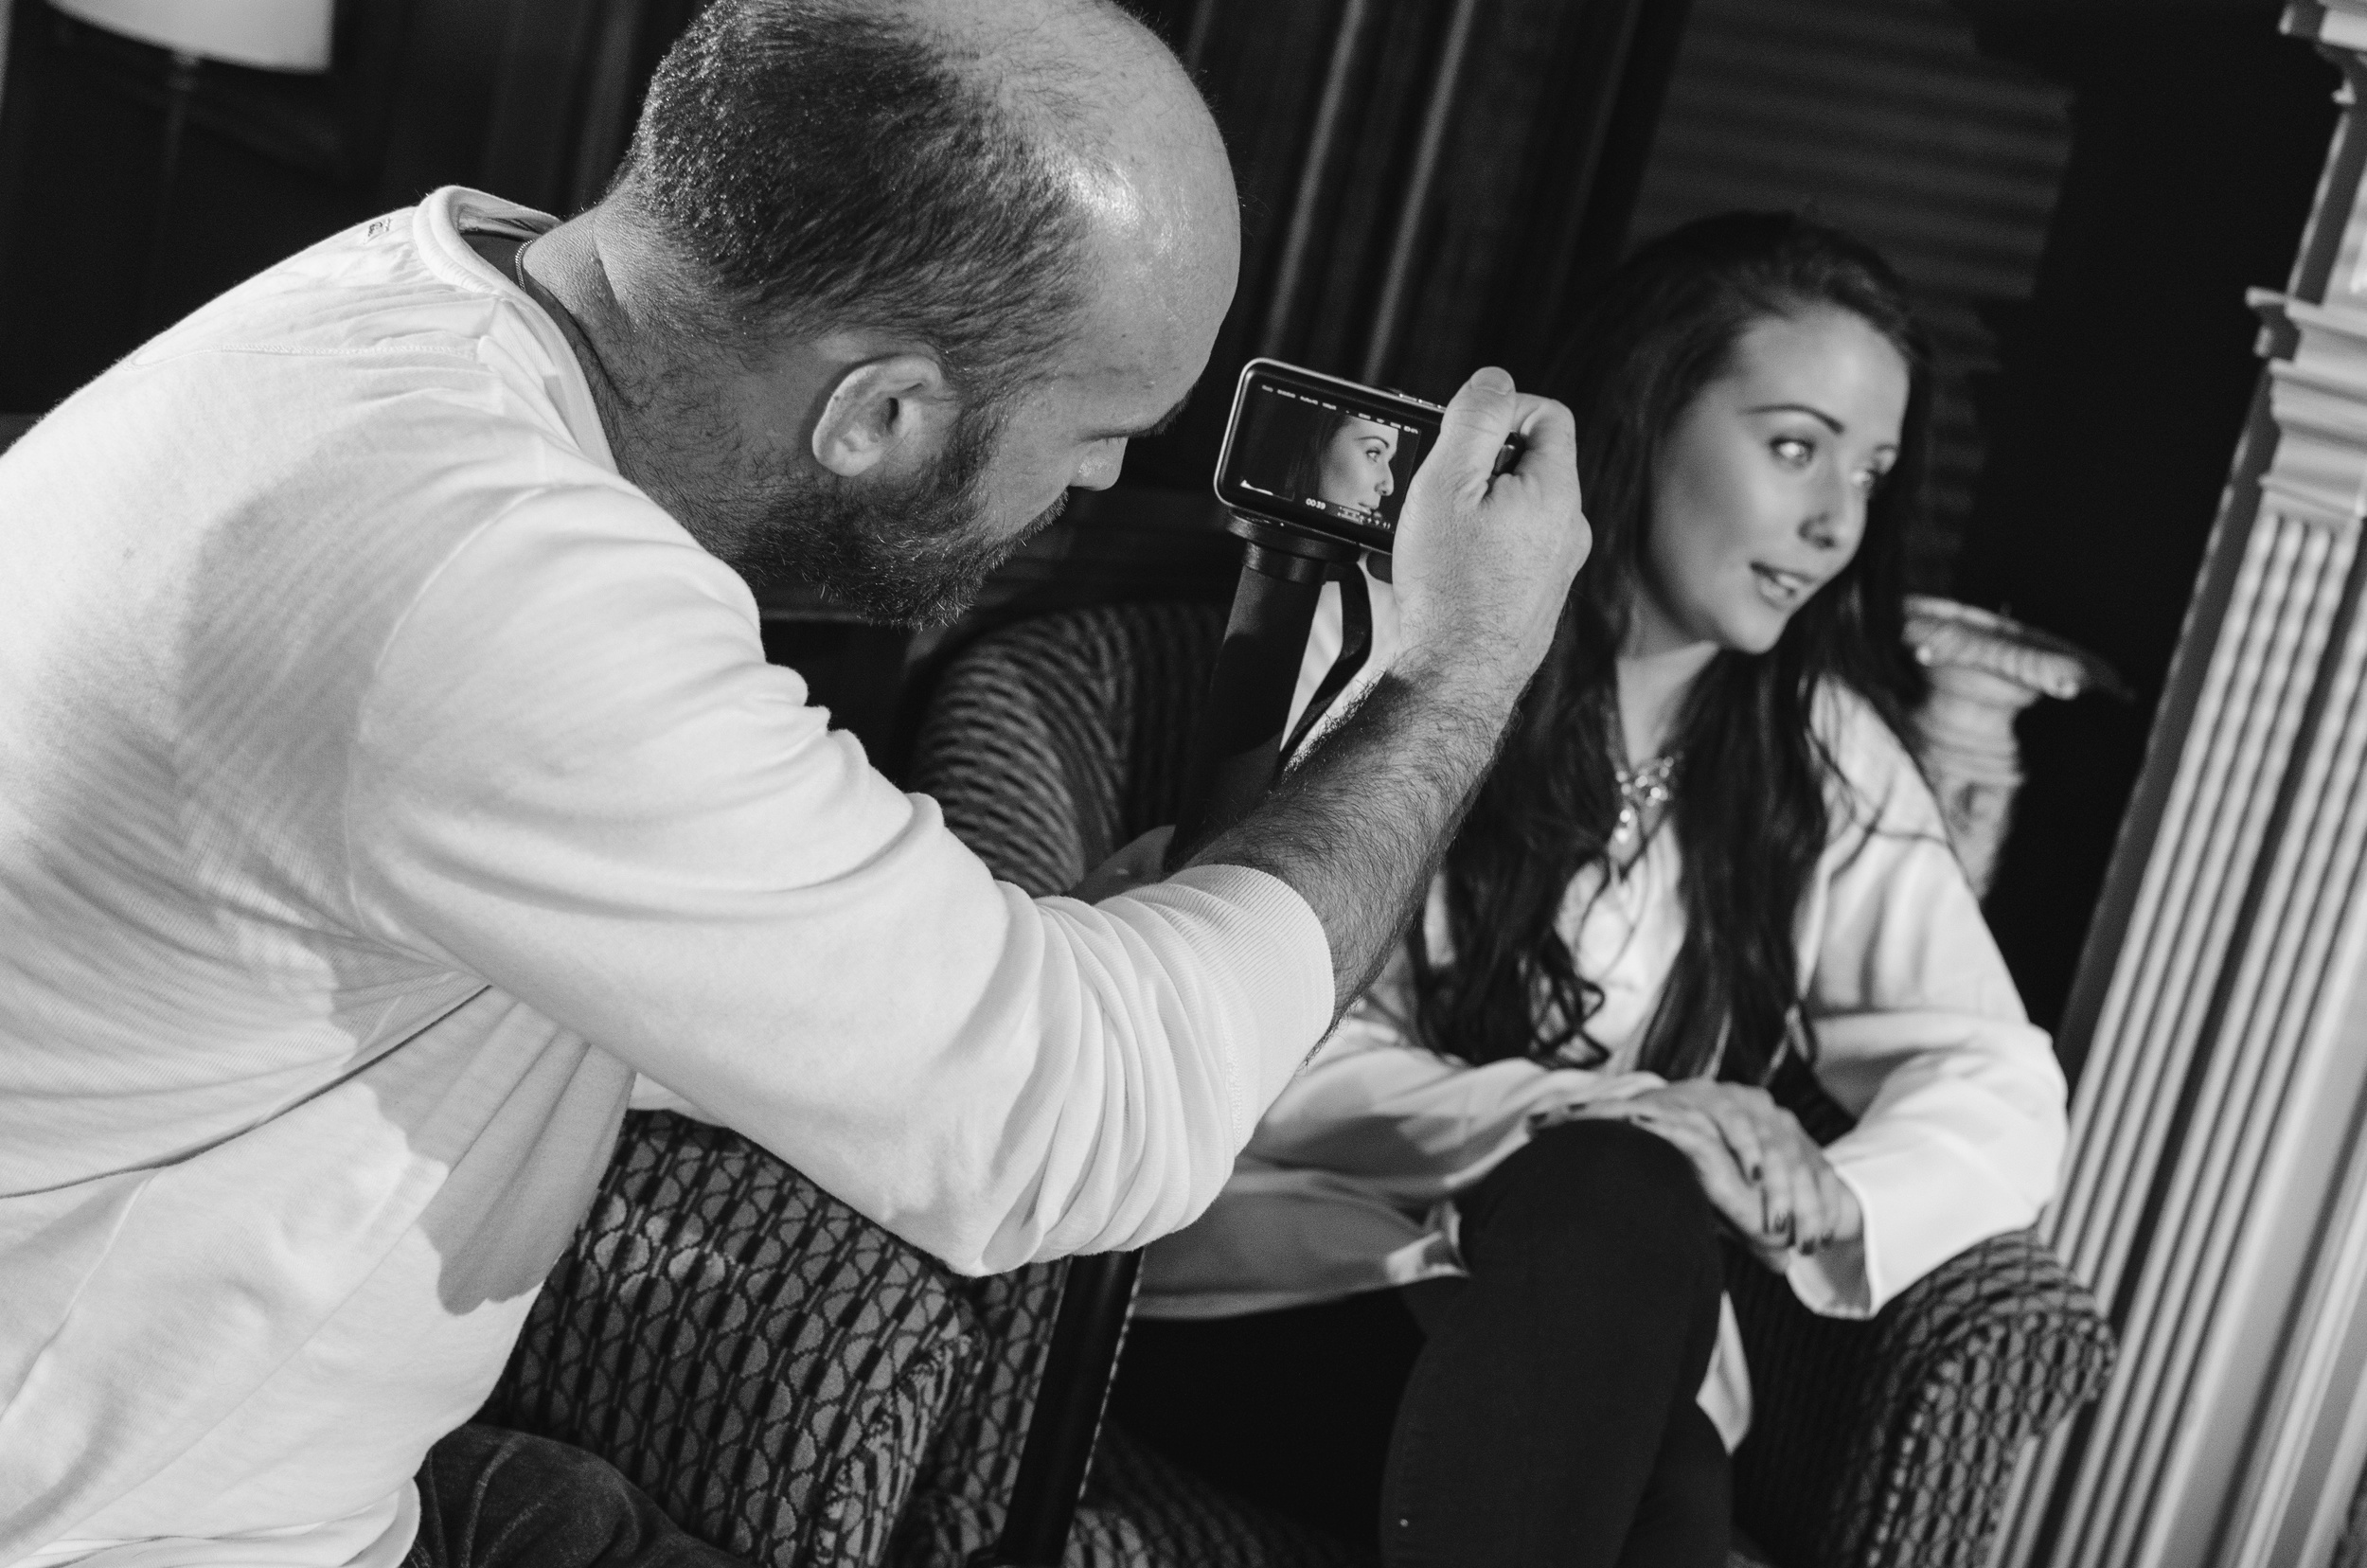
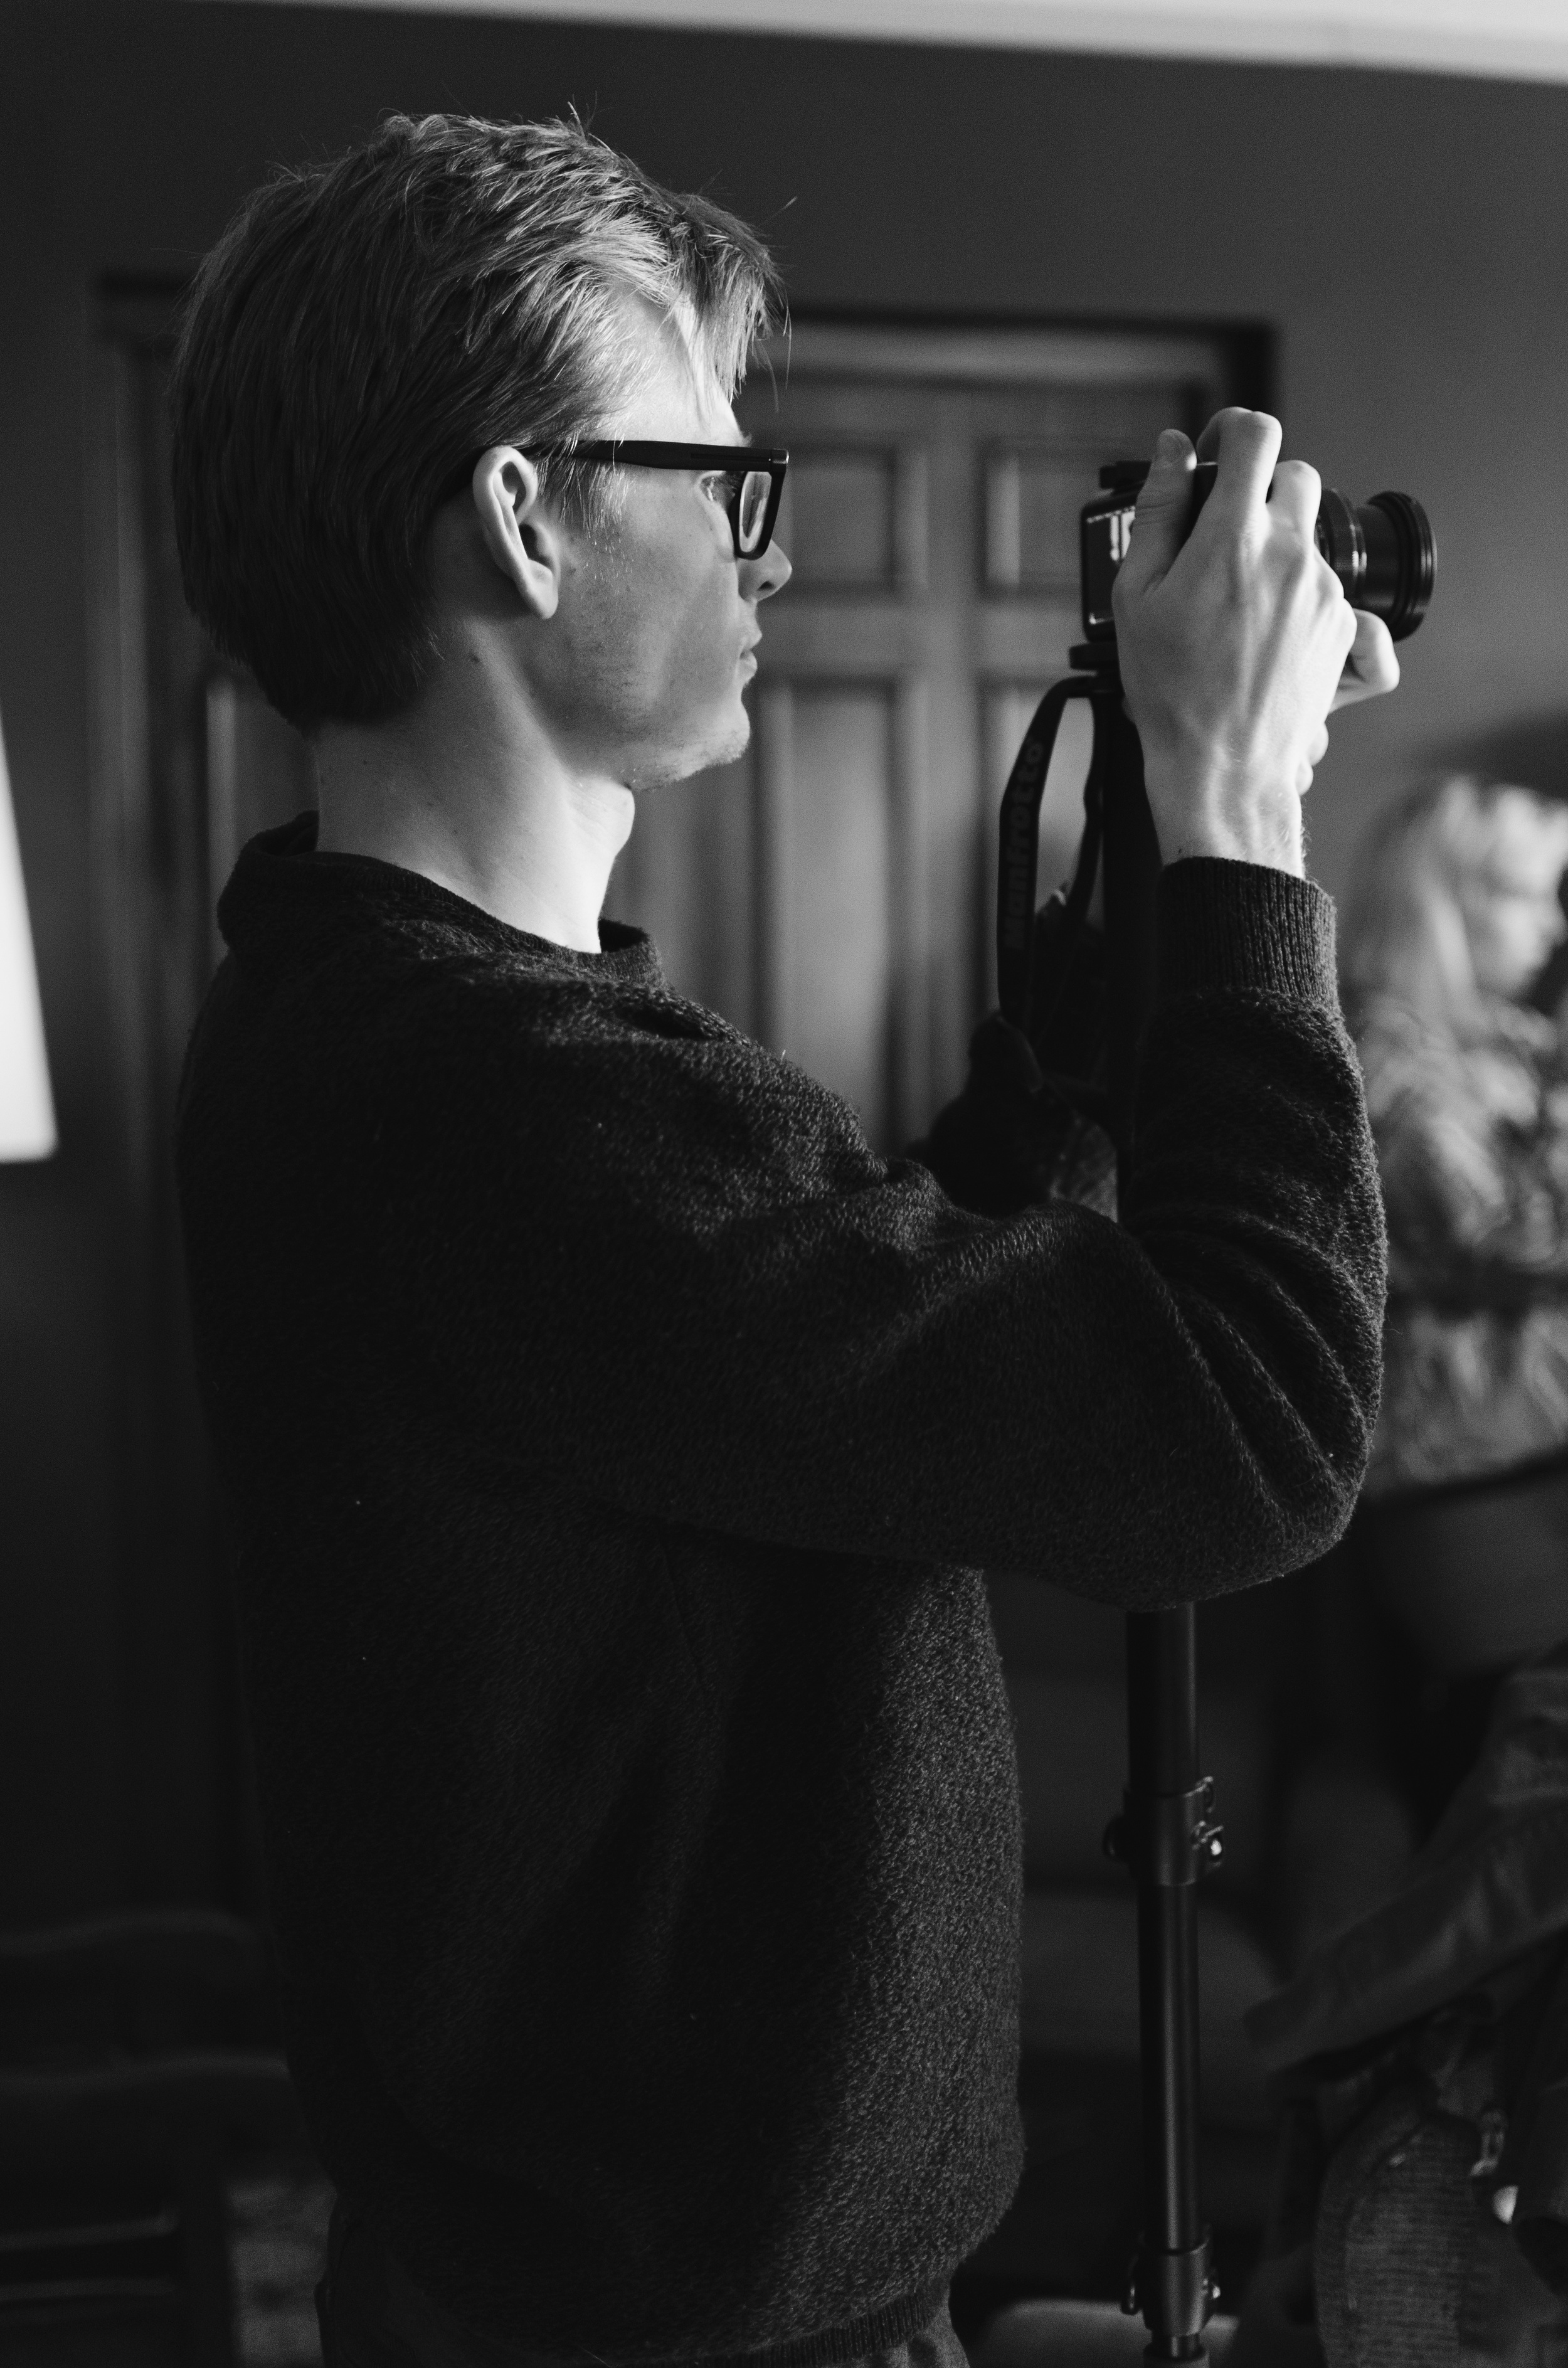
The footage also feels 'soft'. Not really sure what other word to use here but it has a filmic feel to it. Digital works very hard to be pin sharp, but in doing so can often feel clinical, whereas the BMPCC takes the hard edge off your images, whilst somehow managing keep all the detail you need. I find this trait a hard one to describe, so maybe the best thing to do is to watch this little test video I made with my patient wife and see if you can pick up the same thing:
On the negative side, the sensor is a super 16mm, which means it is a whole lot smaller than the full frame I'm used to. This means that I have to work very hard to get the depth of field in the shots which I'm looking for. That said, this may be a welcome hamstring for me at the moment as I am trying to move away from shallow DOF shots, because they can become a fall back for a lack of content. By that I mean if I don't have anything that great to point the camera at, I just open the aperture up and show lots of creamy bokeh and people are automatically impressed. That said, I still want the option.

The micro 4/3 mount also means in my case that I would have to invest in all new glass. Even if I got an adapter to use my Canon lenses, the small sensor size means a 3 times crop factor, which would turn my 50mm into a 150mm effectively, and render it almost useless. We were kindly provided with a Lumix 12-35mm f2.8 to use with the camera, but I would need a whole lot more lens options to get the shots I'm used to getting.
The other obvious niggle is the battery life. It's terrible. You will need an arsenal of spares as you won't get much more than an hour of filming time on a full charge, even if you're as fastidious as I am about powering your camera down between shots.
Overall though it's an amazing little camera. I would love to be able to invest in glass for this little one as I think it would make for an incredible travel camera with it's small size being both convenient, as well as stealthy in situations where you want to get great shots without drawing huge attention to yourself.
Let's move on to the software.
Da Vinci Resolve is just about the best and most accessible colour grading software out there. Full stop.
It is an incredibly powerful platform which lets you make the kind of fine tuned corrections to your footage you've always dreamed of. If you're a Final Cut Pro user like myself, you will be used to it's ham-fisted bludgeoning of your detail and dynamic range when attempting to create any kind of look for your footage. Now admittedly my fledgling experience with Resolve this week has been solely editing the 13 stops footage pushed out by the BMPCC, but I think I can already see it will be leaps and bounds ahead of FCPX in it's ability to grade flat DSLR footage as well.
And here's the best part: it's bloody free!!
Well the full version of Resolve isn't, but Resolve Lite is, and it packs all the punch of it's big brother with most of the features available to you. I almost dropped £50 on a colour grading plugin a couple of weeks ago and I'm so glad I didn't, because now I have the industry standard for colour grading sitting on my machine for free.
If you grade, and don't have this software, go grab it, and learn how to use it.
Round tripping from Final Cut Pro has been a bit of a challenge in my testing, but I'm sure that will get better with experience. The software itself though, is stunningly good.
Lastly, the company.
Blackmagic Design are very clever.
From what I can see they have given up time, energy and resources to provide a weekend away for a few photographers whose work they appreciate. They are investing in us by giving us gear, and knowledge, and the offer of assistance as we shoot.
Why?
Because now we know their brand. We understand their gear and what makes it so good. We will unconsciously compare any kit we get in the future to their '13 stops of dynamic range' and ability to 'shoot in DNG RAW'. They haven't asked for a thing from us but they know we will go on to tell others about the weekend (I'm doing it now, unbidden) and we will likely end up using their gear in our workflow. They are not only creating future customers, but also partners.
I admire companies like this who understand that generosity is the way to build relationships. Coercing email addresses out of large crowds and spamming their inboxes is, in my mind, a sure fire way to sour your brand in the minds of many; but this kind of targeted giving is certain to yield firm followers, and even friends in the right places.
I was so impressed with the hours of time the staff put in to answer my slew of stupid questions, not to mention the being spoiled rotten for three days on the shores of Lake Windermere.
This is how you build partnerships with creatives.
A lot of generosity, and the little bit of flattery didn't hurt either.
Tech companies take note, because from this photographers point of view Blackmagic Design have their boot squarely up your proverbial.
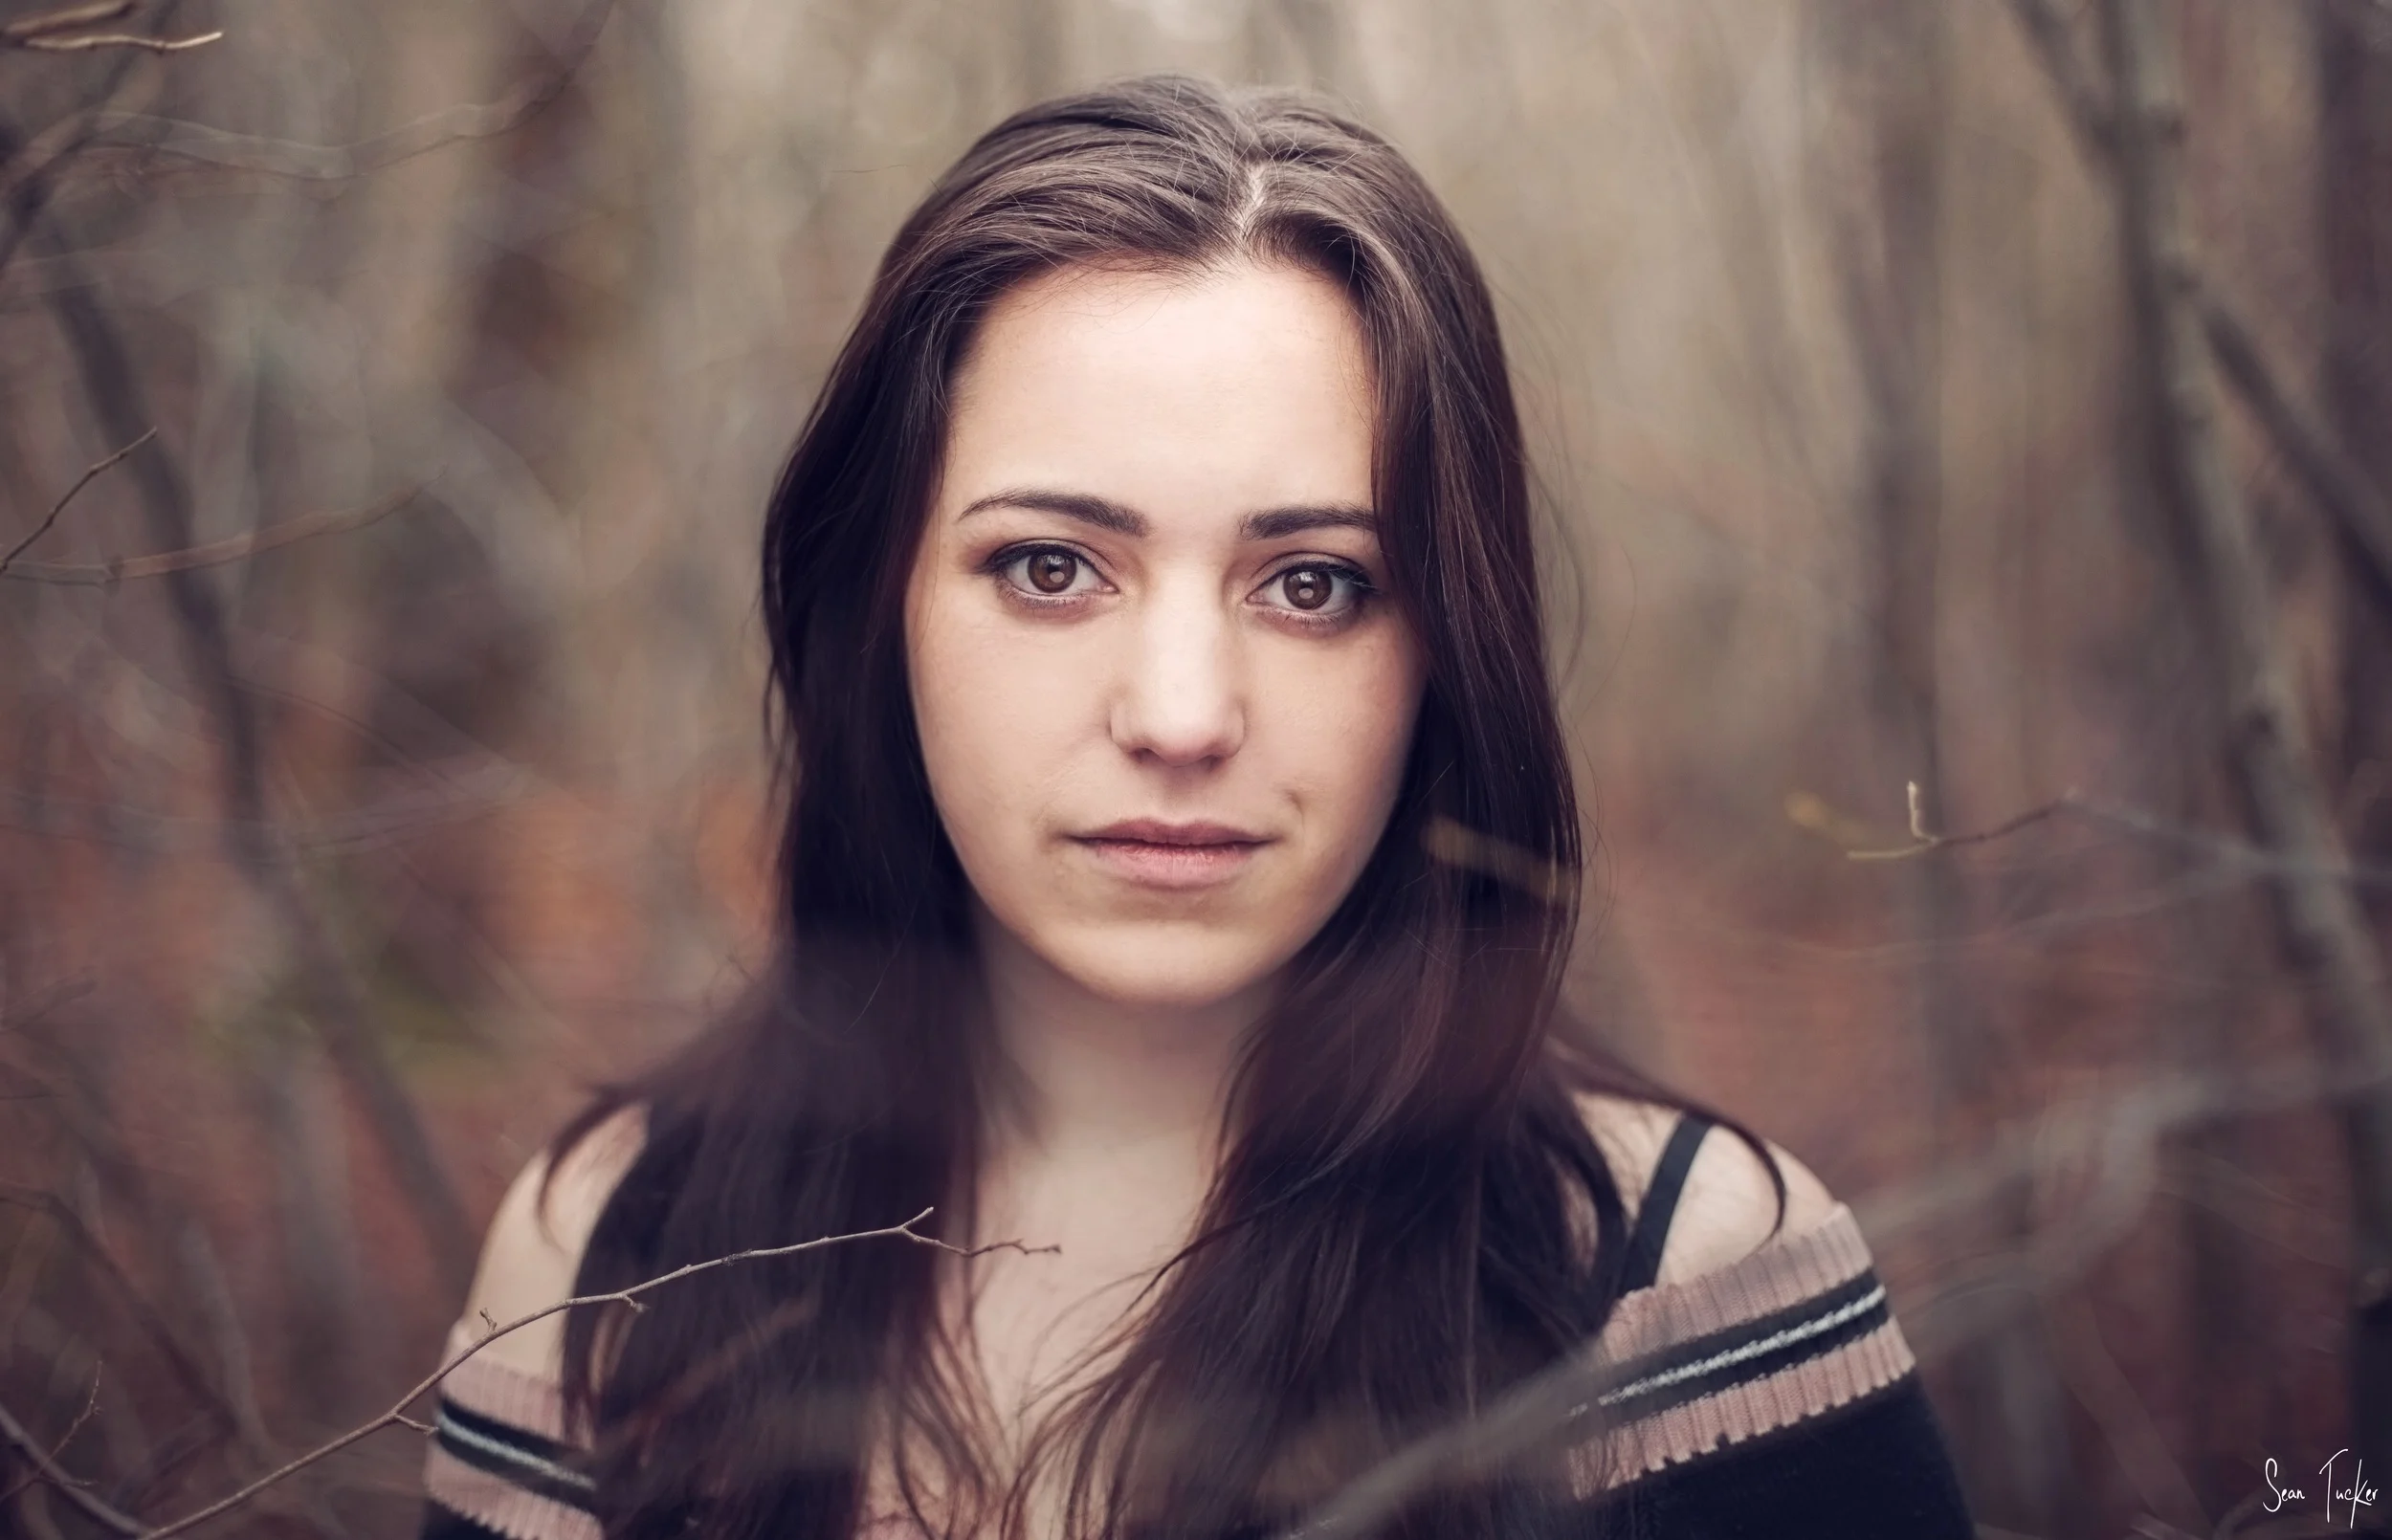
How I made that shot: Moonika

This is a shot I took recently of Moonika, and I thought I would show you how I pulled it off.
Moonika and her friend Lisa are costume designers for the stage here in London, and they contacted me to take some shots of the new pieces they had made. We decided to head out into the woods out back of Lisa's house to see if we could get some Tudor-style shots, for those of you familiar with the recent bodice-ripping Showtime series.
I knew in my head what sort of shot I wanted:

I was looking for a shot of the setting sun coming in through the trees while the subject strolls through the woods. I would bring along my Alien B800 light to act as a fill for the obvious shadows which the setting sun would cast, and then balance it all out to maintain a natural feel. I chose to use a Strip Box modifier because I wanted the light to have a reasonable even spread across Moonika's whole length, head to toe,, rather than the fall off I would have had if I used a 1m softbox placed at head height. I could have got the even spread with a large 2m softbox, but then I would have had a lot of light spreading across the floor as well. The strip box gave me the most control.
Unfortunately, as you can see from this 'behind the scenes' shot, the weather wasn't playing ball:

No sun.
Flat grey skies.
Not to worry.
I positioned her with her back to the sun anyway to get at least some rim light and lightly filled from the front with the strip box.
I'll get to how I accentuated the light in the edit.
We had done a bit of walking around and Lisa had discovered a fallen tree. I asked Moonika to stand in middle and positioned myself so it created a natural frame to the image with her standing center frame.
I also knew that I wanted to imitate a medium format look, with a full length square cropped shot, and a shallow depth of field. No small task with a DSLR.
My equipment was as follows:
Camera: Canon 5DmkII
Lens: Canon 85mm f1.8
I knew this combo would give me the shallow depth of field I wanted, but there was a bit more work to do to get the shot I wanted.

Now follow my logic here. If I want the square crop and depth of field which a Medium Format would give, I could get close with a few stitched shots from my 35mm full frame DSLR.
If I shoot 3 portrait-oriented shots, at a low aperture, and then stitch them together and crop the image square, I should be able to replicate some of the feel and depth I'm looking for. So I lined up my first shot with Moonika sitting in centre frame, and then warned her that I needed her to freeze for 3 consecutive shots, including one left and one right of the centre frame, with a small over lap between each so that photoshop would have something to stitch. Here are the raw shots out of camera:

And here is the shot after stitching the 3 shots together and cropping:

So I'm closer to the framing and depth of field I want.
Back to the lighting. What sun was making it in through the cloud cover was still highlighting her from behind, including her hair and shoulders, but not nearly as much as I wanted. It still looked a little flat.

So with the lighting I wanted in mind I went to work in Photoshop.
There is too much to go into detail about here, and it's a bit technical in places, but let me list the steps I took and you may pick up some tricks:
- I removed any obvious distractions with the Healing Brush and Clone Stamp tools.
- I dodged the highlights to accentuate shape using a Curves Layer set to Screen, and masking it in.
- I burned the shadows to accentuate shape using the Curves layer set to Multiply, and masking it in.
- I then went to work on colour using a combination of Curves, Colour Balance and Levels to get the feel I wanted. In short I was looking to warm up the whole image, and introduce some cooler tones to the shadows to create some colour contrast.
- I then used the Lighting Effects Filter to direct the light from the rear of the image. This layer only ends up being used at about 20% opacity but gives a nice starting point.
- I then created a fake sun in the background using the Lens Flare Filter on two layers, one small one at the centre point of my proposed sun, and one larger at a lower opacity to give the light some depth. These layers were both masked using the Apply Image function so that they only applied to the highlights of the image.
- I created some subtle rays for the sun by creating a curves layer with brightened mids and highlights, and boosted yellows, and then drawing rays extending out into the image on a mask layer. To blend everything I blurred the mask layer until I couldn't see any defined lines.
- I burned the edges of the image to pull the focus towards the centre, again using a masked Curves Layer set to Multiply.
- I boosted the Saturation of her hair with a masked Saturation Adjustment Layer.
- I further corrected the colour, as before, to create more feel after completing the light changes.
- To finish I sharpened the image using a High Pass Filter.
Here, once again, is the final image:
If you want to find out more about stitching images see my post on Bokeh Panoramas.
How to Photograph Large Products (part three)

I am filming a series teaching you the basics of shooting larger products and putting them on a white background. This will especially suit companies who are looking to set up their own studio to photograph their products and get them onto their website. Here is part three which will teach you how to recolour your product by sampling a swatch and mapping the target colour onto your image:
I hope you've enjoyed this series.
Please get in touch if you have any specific questions.
Best of luck.
How to Photograph Large Products (part two)
I am filming a series teaching you the basics of shooting larger products and putting them on a white background. This will especially suit companies who are looking to set up their own studio to photograph their products and get them onto their website. Here is part two which will show you how to edit, retouch, cut your product out onto a white background, and add a drop shadow:
Part three, which will follow soon, will teach you how to recolour your product by sampling a swatch and mapping the target colour onto your image.
If you have any specific questions, get in touch via the contact page.
Good luck.
How to Photograph Large Products (part one)

I am filming a series teaching you the basics of shooting larger products and putting them on a white background. This will especially suit companies who are looking to set up their own studio to photograph their products and get them onto their website. Here is part one which will teach you lighting and camera settings:
Part two, which will follow soon, will show you how to edit, retouch, cut your product out onto a white background, and add a drop shadow. Part three will teach you how to recolour your product by sampling a swatch and mapping the target colour onto your image.
If you have any specific questions, get int ouch via the contact page.
Good luck.
Confessions of a Digital Lover
I'm whatever the opposite of a hipster is because, and I understand this is heresy, I don't really get film photography.

Minolta X700, Tri-x 400
Of course it's stupid to say because it's where photography came from, but in today's day and age I don't see it as a viable option for me, and I'll outline why.

Minolta X-700
Last year I bought myself a Minolta X-700 35mm SLR, and this year I purchased a TLR Medium Format Mamiya C330.
The idea was to revisit film and hopefully it would slow me down and inject some new inspiration into my work. You hear so many photographers talk about how shooting film turns them into these 'floating, contemplative world-ramblers' with new eyes to see, as if being spiritually awakened to the 'now' which digital had perviously blinded them to.
I'm a complete hypocrite I know because about 18 months ago I wrote a post about how much I was enjoying film and named the things it was teaching. Let me give them here, because they are all still true:
- Shooting film does force you to slow down. You have to plan your shots and know your exposure triangle because it takes a second to dial things in, and each shutter click is costing you money in film and development. This means you are forced to pre-visualise your shots and it's a good reminder that shooting digital, chimping your screen, and moving incrementally towards the shot you intend is likely the lazy way to get there. Film won't let you get away with this, if only because of the lack of a digital screen. That first shutter click should be your final shot.
- Film does give you some advantages in increased dynamic range. For the uninitiated "Dynamic Range" is how much information your sensor or film can hold in the darkest shadows and brightest highlights before they just disappear to pure black or white with no hope of recovery. I have heard it said that digital can only hold one stop of light in either direction from your exposure, where as film can hold up to three stops, which if true is a huge difference, and means you can hold your shadows and highlights in some tricky lighting situations.
- There is something attractive about shooting with a machine which is mechanical. It feels robust and timeless, so I do understand the romance of it all, and see why film cameras are catnip for hipsters. The objects themselves are something special. I felt more excitement walking home on the first day with my Mamiya C330 than with my Canon 5DmkII for example. I do get it.

Mamiya C330
But for me that's where it ends. I have shot a few rolls on each camera now and as I went through the process of shooting and developing I had the epiphany that maybe most of my love for these things is because I know I'm 'supposed' to love them. Maybe shooting with these beauties is actually a royal pain in the ass. This post may serve little more than to betray the fact that I am a massive control freak but these are my frustrations with shooting film (and it's goodbye to some dear photography friends at this point I would imagine):
- I don't know what I've just shot. It may slow me down but there is nothing more frustrating than shooting a portrait only to develop the shot and find that the subject blinked at the crucial moment. On my digital screen I can see that and shoot some more frames, but with film I have missed what could have been a great opportunity with someone which I may never have again.
- I can edit the shot the way I want with digital. Often the film I have chosen to use has made some key decisions for me. The beauty of RAW is that the files come out very flat with a lot of detail. They may not be very appealing to look at sometimes, but they provide a beautiful canvas from which to dial in the colour and contrast which you like. The Fuji Superior 400 I shot with for a bit gave everything a green tint which drove me a bit nuts. Pulling the scans into Lightroom and correcting from there was ok, but I found the image quickly broke down because the contrast was baked into the shot. I had little say as to how the final shot felt. Chemicals had irreversibly made a lot of those decisions for me.
- The lack of ability to change ISO drives me up the wall. The beauty of our digital cameras is that we don't need to wait till we've finished our roll of film to be abel to shoot in a different light. We just crank up the ISO. I found myself in a number of situations where we were walking around the streets and then went into a dark room with 400 speed film, and I could no longer shoot really. I instantly appreciated the progress we've made with digital cameras. In fact I pulled out my iPhone and carried on shooting.
- It's not sharp enough! I know this is a weird one and I am likely on my own here, but I find film too soft. My wife, pictured below, thinks I'm a soulless cyborg for saying this. To be fair, I remember first seeing digital shots and thinking that it was too sharp and clinical, but I've since changed, and it's now how I want to see my shots. I spent years working with lenses and settings to get my images razor sharp, and shooting with film now just frustrates me when I zoom in and see the 'creamy goodness' which everyone else but me seems to appreciate as something magical. I know that makes me an unfeeling robot, but I can't help it. It's now how I see.

Shooting with my Mamiya C330. (Shots by Bayek Photography)
Don't get me wrong, I understand the appeal of film. I hugely respect those who shoot film as part of their work. I've recently stumbled across some who shoot whole weddings on Medium Format film, which means changing rolls every 12 shots! That's hardcore. (For a great example of this check out Ann-Kathrin Kock) But for me personally, I appreciate the technological advances we've made in photography, and I think I'll be sticking to my digital-work-horse 5DmkII's, at least for now.
My Mamiya C330 sadly gave up the ghost after only 3 rolls of film with a mechanical failure.
My Minolta X-700 has gone to my celluloid-loving wife who is getting a great deal of joy out of it.
Here are some more film shots I took during my brief love affair:
Mamiya C330, Kodak Portra 400

Minolta X700, Tri-x 400
Minolta X700, Tri-x 400

Mamiya C330, Kodak Portra 400

Minolta X700, Tri-x 400
Minolta X700, Tri-x 400

Minolta X700, Tri-x 400
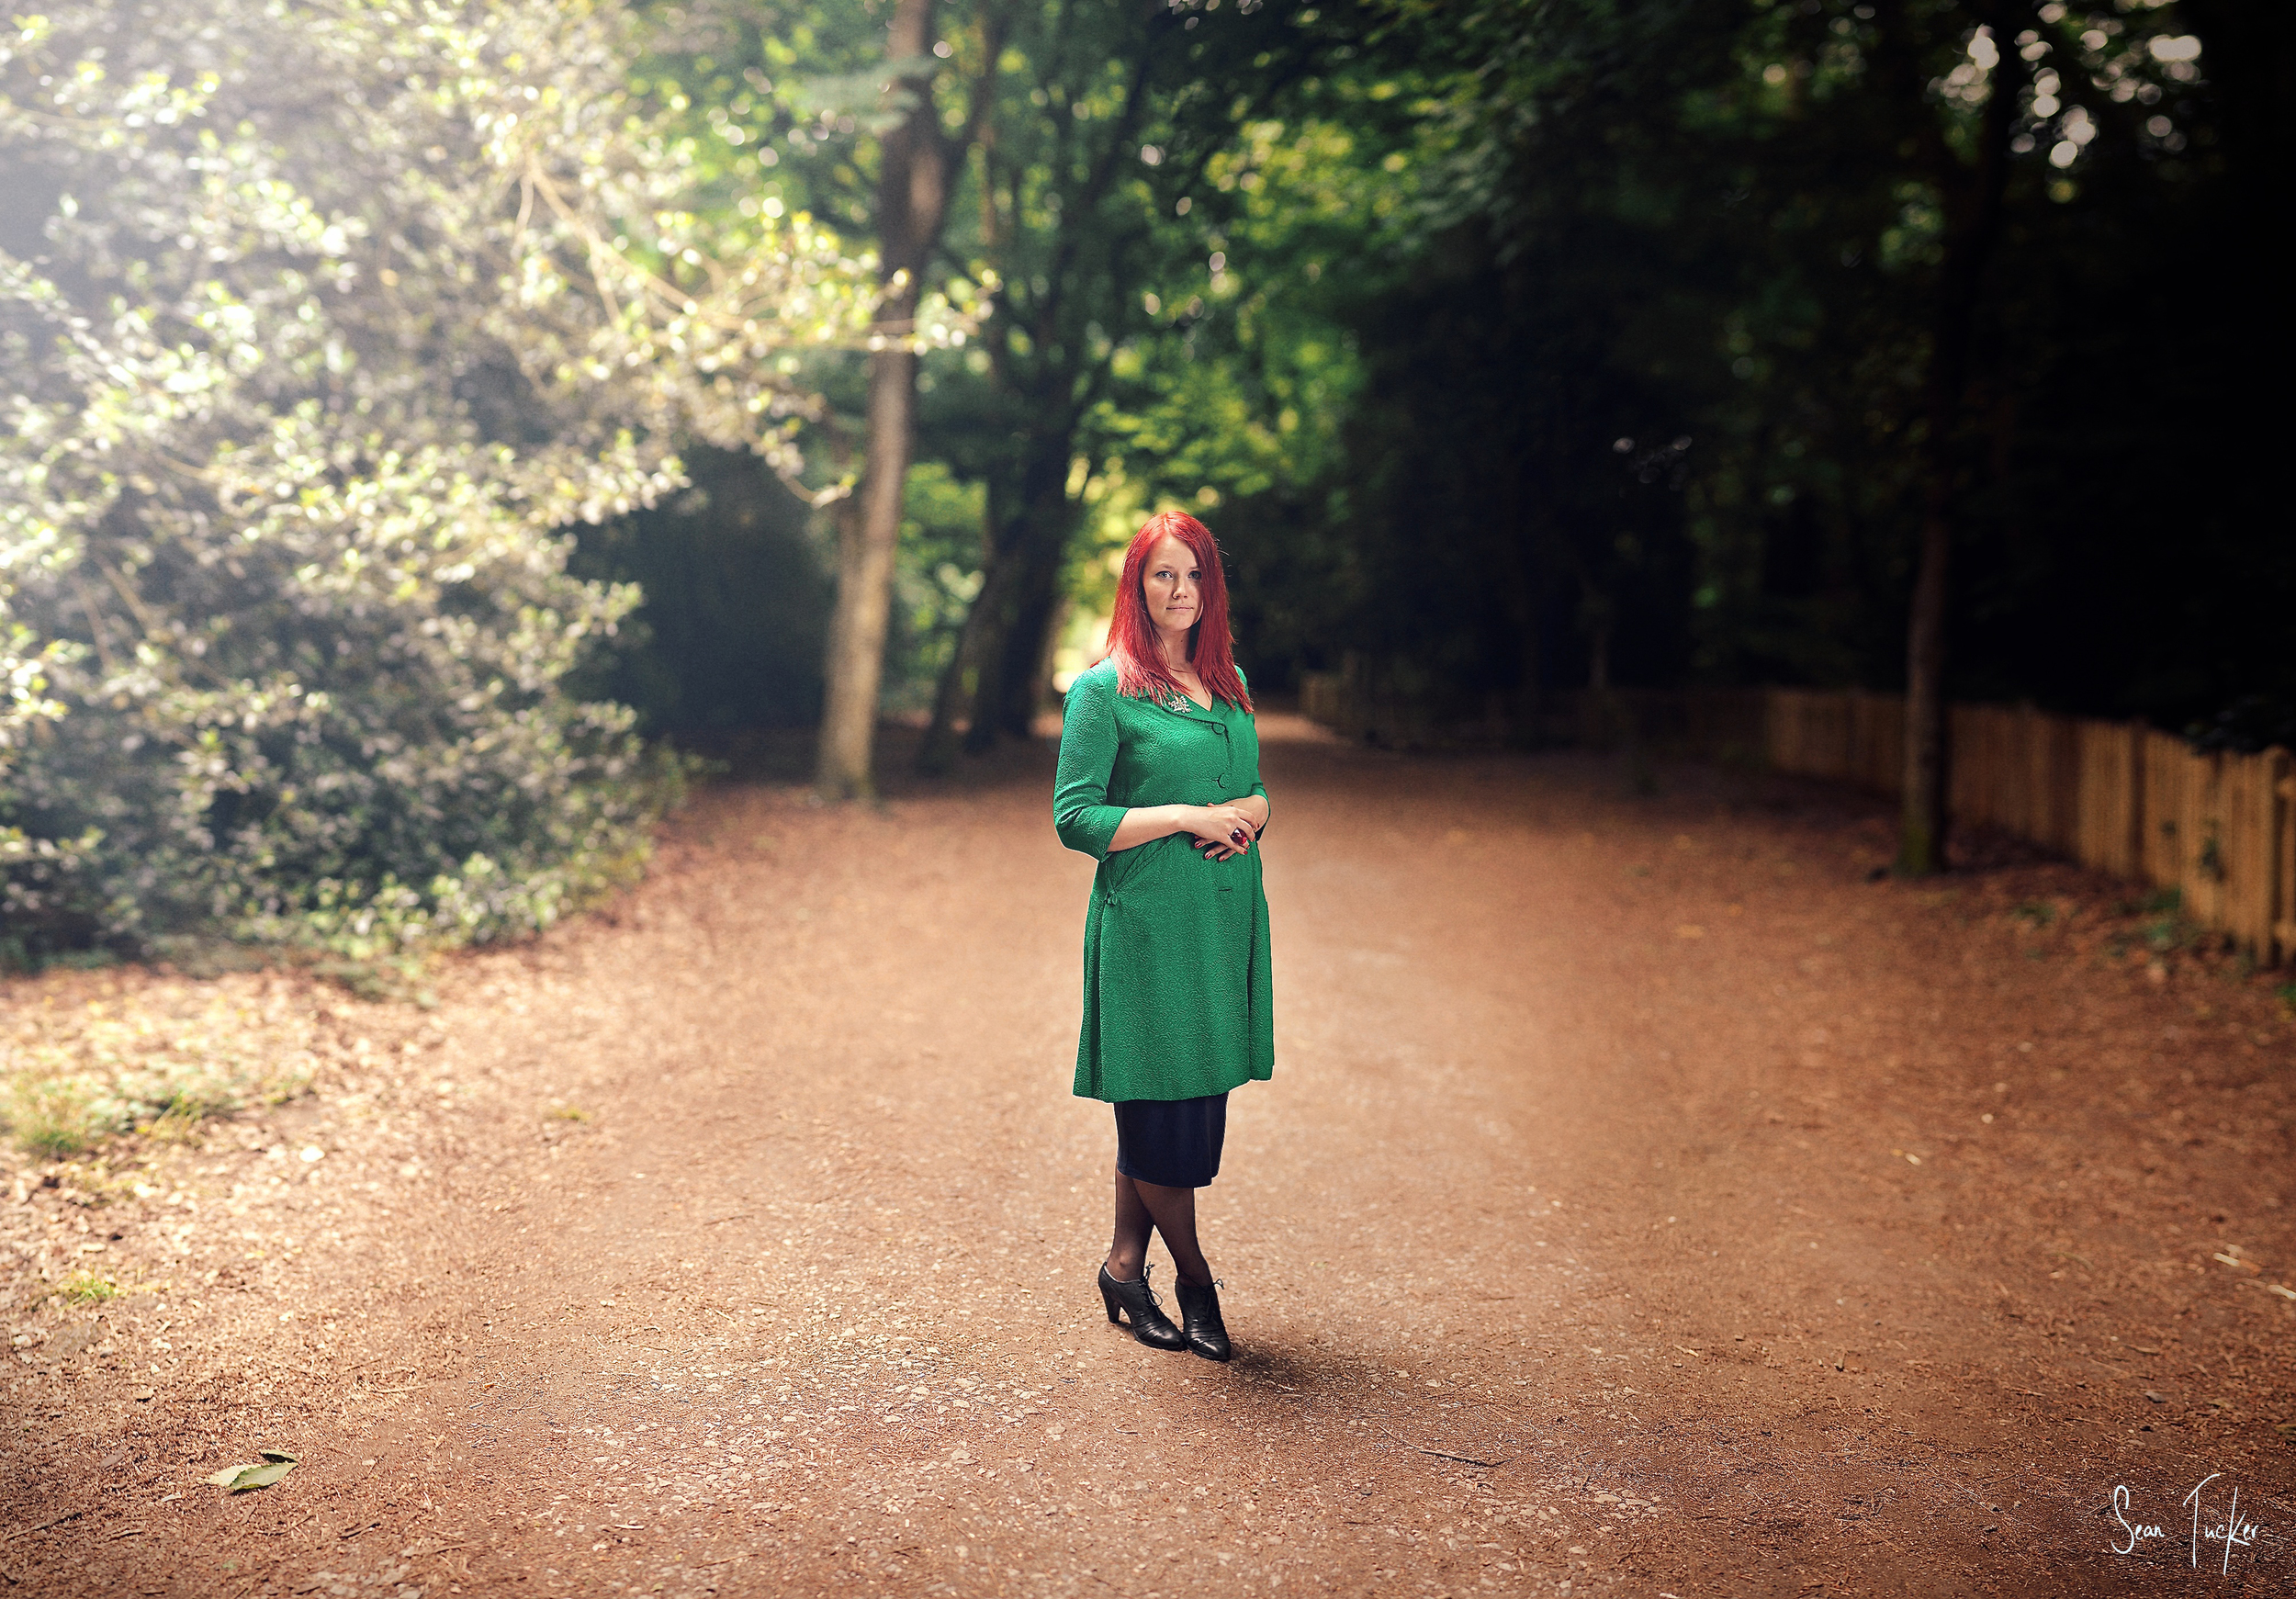
One Light: Using the Sun as a Rim Light
I've done a couple of shoots lately with beautiful outdoor evening light and I am falling in love with one particular setup, which is going in my shot arsenal from now on. It's nothing new or ground breaking, but it is very effective. Let me share it with you:
ISO100 f2.2 1/160 85mm
It's a one light set up, using the sun as a 'rim', or 'hair' light and a single strobe as fill. I think the effect, if balanced correctly, gives the professional feel of a studio, with the organic feel of an outdoor setting.

ISO160 f2.0 1/125 85mm
So how is it done?
It's actually very simple. I know many of you are likely afraid of flash, as I was for years, but getting this shot is really not too technical.
Firstly, this is how I position myself:

I make sure the sun is hitting the subjects shoulders and hair from behind. This means that in choosing the composition the direction of the sun directs where I point the camera, but I still need to position myself so that I have a pleasing background in the correct direction. I mostly shoot this shot with a shallow depth of field so it's more about finding something which will create a pleasing bokeh (lens blur) with good colour and little distraction.
The next step is to take a shot without the strobe to get a good 'ambient exposure'. I want the background to be slightly darker than than it appears to my eye in order for my subject to 'pop' off it when lit correctly with the strobe. I also want to keep the sun at bay and not let it's light become too over powering. To pull this off with a shallow depth of field I often need to use an ND filter (for the uninitiated this is basically sun glasses for your camera).
As I've mentioned before, to control the ambient light I need to focus on my shutter speed, where as my aperture is going to control my flash output.
A couple of things I need to be aware of when setting my exposure:
1. I cannot really shoot faster than 1/160 shutter speed because I will lose flash sync, which just means that my shutter fires faster than my strobe pops and it will leave a portion, or all, of my shot dark. Your camera my be different but I know this is the magic number for my 5DmkII. Just Google your camera make and 'sync speed' to find yours.
2. In bright sunlight I want my ISO as low as possible to help me maintain detail and control the light.
3. I want to make sure that if I need to slow my shutter speed down a lot to let in enough ambient light that I put the camera on a tripod to reduce camera shake and motion blur. The thumbnail rule is that your shutter speed should not be less that your focal length: in other words you shouldn't shoot handheld at slower than 1/50 on a 50mm lens, 1/100 on a 100mm lens etc.
Obviously once I have the ambient exposure dialed in correctly my subjects face will be dark and filled with shadow because the sun is hitting her from behind.
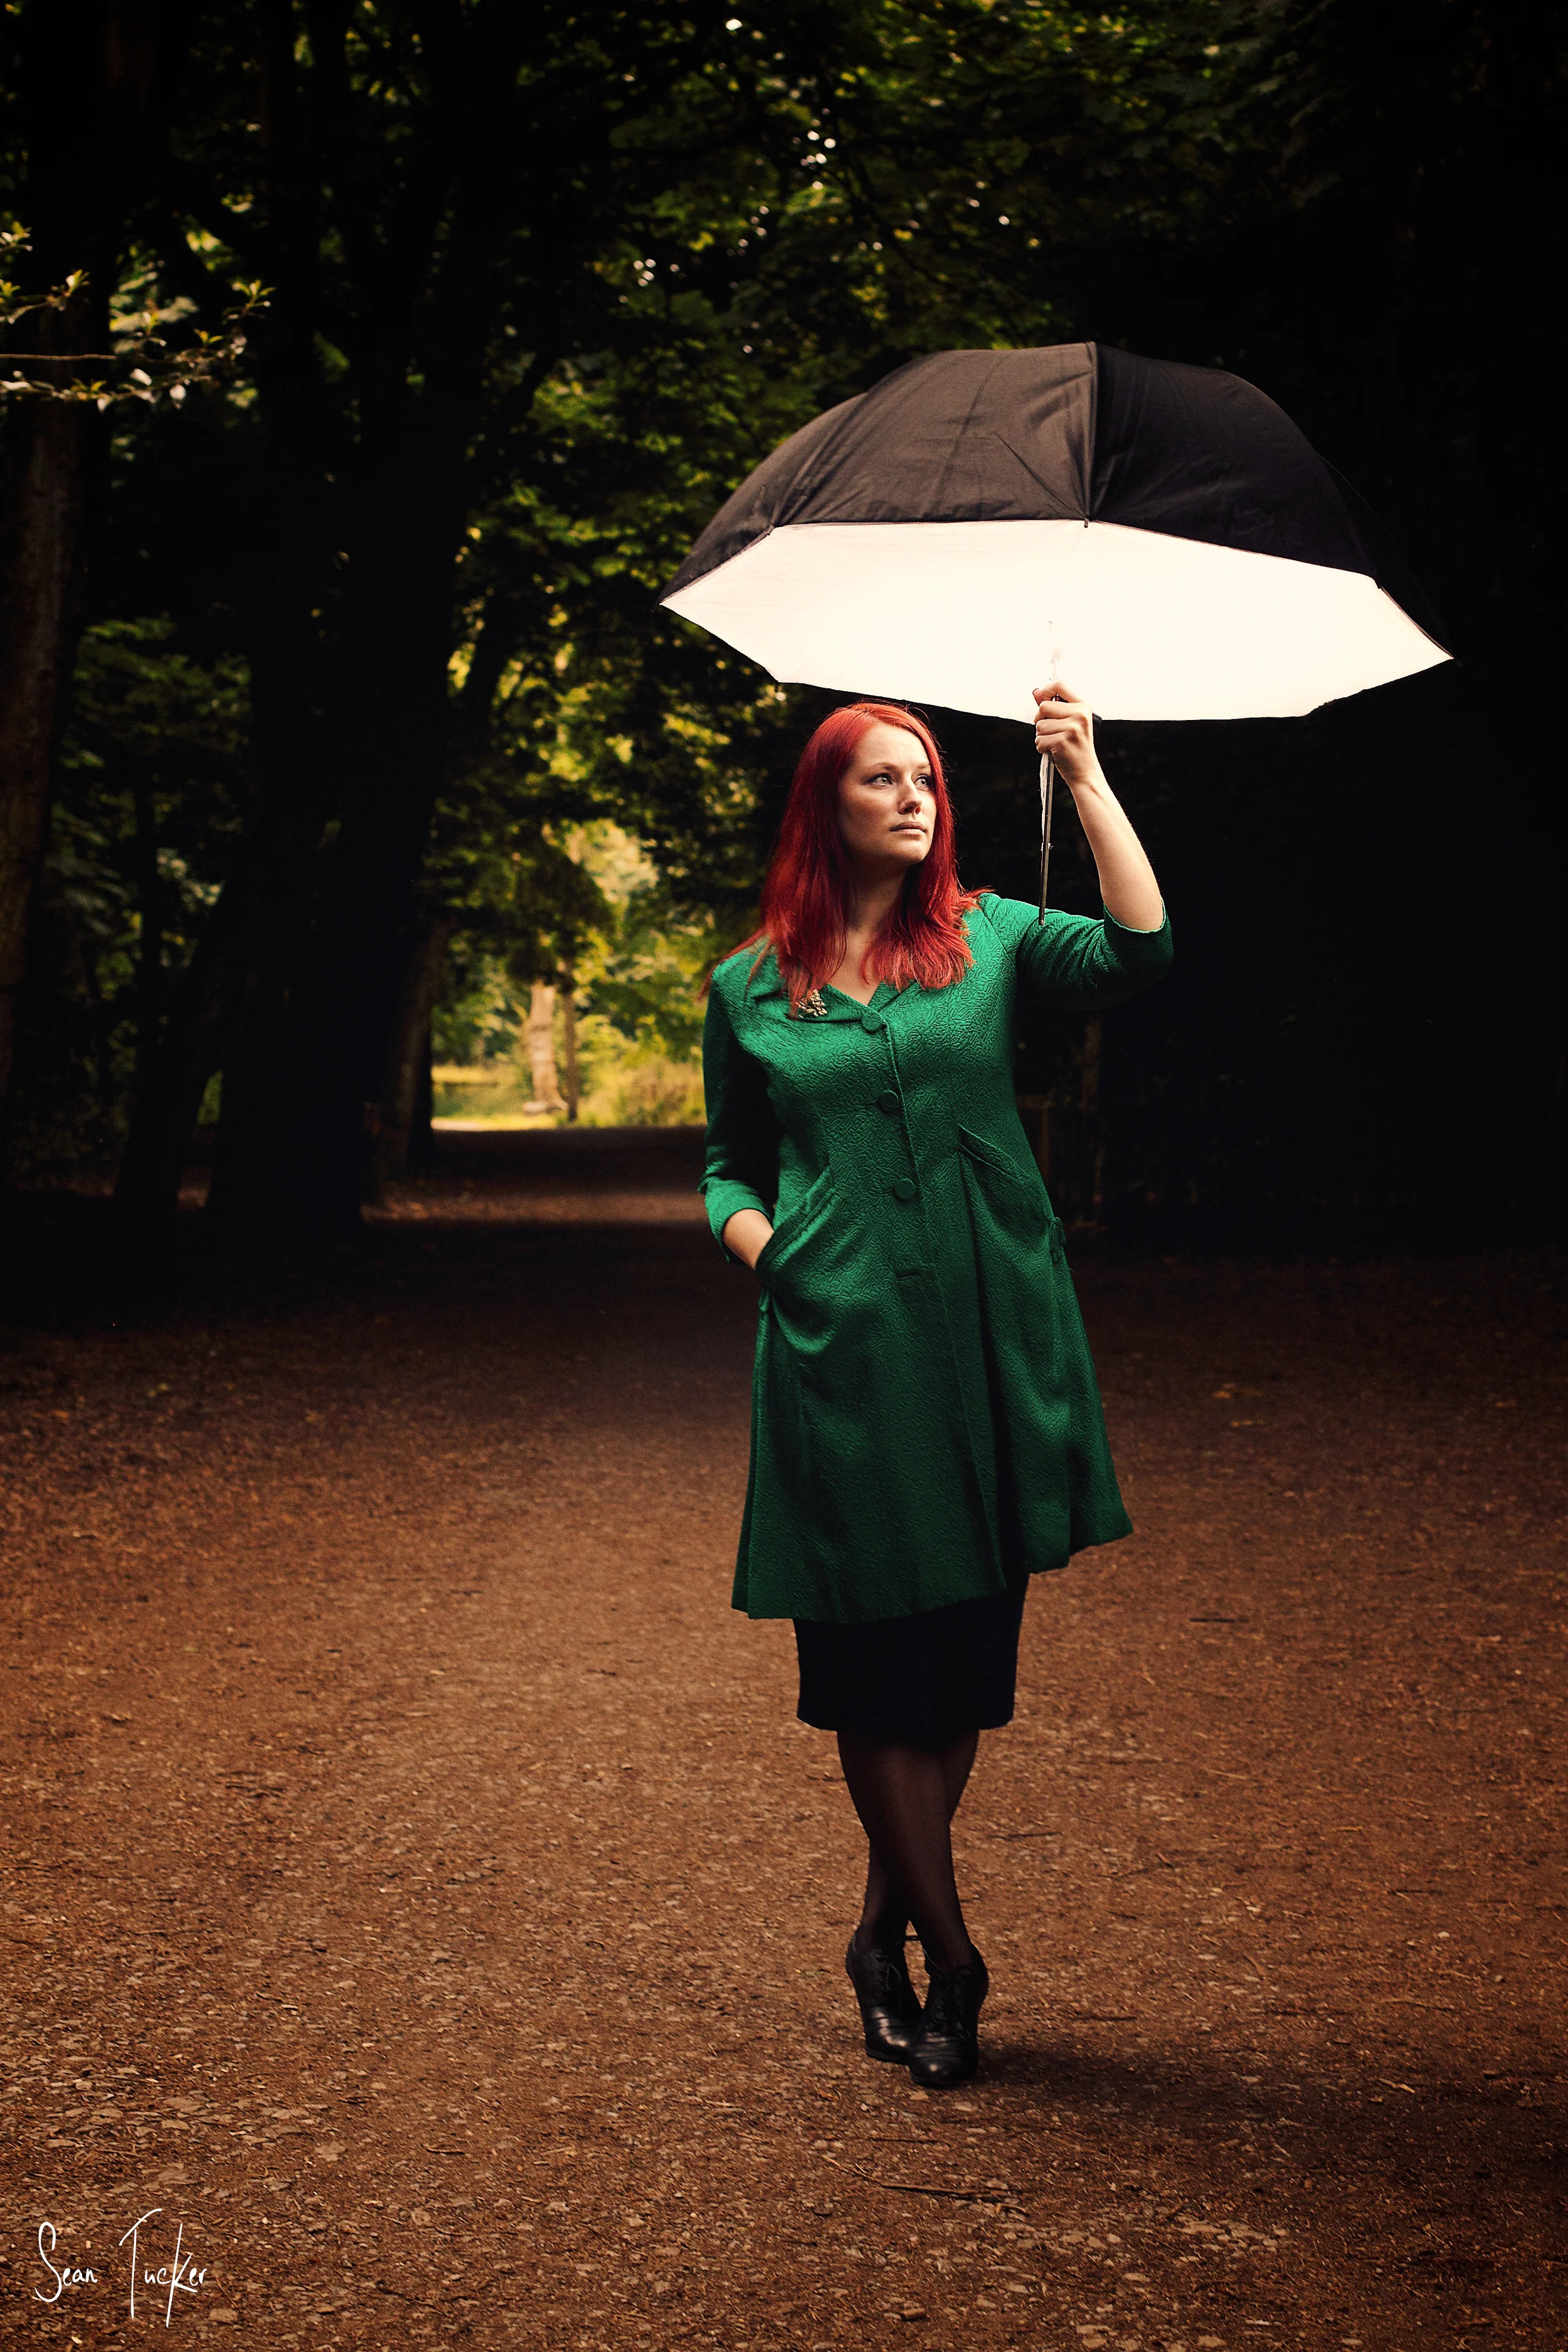
Enter my strobe.
In the BTS shot above I am using my Alien B800, Vagabond power pack and a 1m softlighter, but you can use a speedlight and a shoot-through umbrella if the ambient isn't too strong. Your speedlight won't be able to fill against full noon day sun, but it will work nicely with a muted setting sun.
Then I simply bring my light in close to make sure it's soft and dial it up until it provides a natural fill light to the setting sun. I already have my slightly darkened background, now I just need a good exposure on the skin to complete the light for the shot. I want to position it at 45 degrees above the models head and slightly off to one side to mirror the direction of the sun. I'm looking for a good catch light in the models eye, and I often use a small handheld reflector to add a second catch light in the lower portion of the eye as well.

ISO125 f2.5 1/100 85mm
Something to take note of: you'll find the smallest moves in the camera will control how much flare you allow into the lens. A slight bend at the knees can mean that you flood the lens with sun light, and as you straighten slightly you can kill it altogether. It's going to come down to taste, and some strong quad muscles, as to how much flare you want in your shot.
Here are few more examples:

ISO160 f2.0 1/125 85mm

ISO100 f1.8 1/160 50mm

ISO160 f2.0 1/125 85mm
Go try it for yourself, and post me links to your shots in the comments.
Thanks to the beautiful models:
Actor and Director, Lucy Drive: http://www.modelmayhem.com/548139
and Professional Dancer and Model, Beth Willetts: http://www.modelmayhem.com/824462
Bending Light
Last weekend Sarah and I headed into the woods to play with strobes and practice balancing them with ambient light. While we were scouting out the location and testing the ambient light, I got this shot of Sarah with a 50mm and a handheld reflector to give a nice catch light in the eyes:
Then we pulled out my Alien B800 and Vagabond battery pack. The main reason I was keen to do some testing was that I had recently bought a 1.8m softlighter. A softlighter is a large umbrella with a silver inlay which you shoot the light into for shape, but it also has a white diffusion panel over the front to soften the light up on the return journey. Being 1.8m big I assumed that this was going to give me a huge, soft, wrap around light source. The general rule with lighting is that the larger the light source relative to your subject, the softer the light. The sun for example, while bright, is only a tiny point in the sky relative to us, which is why it gives such harsh shadows. A big light source held close to the subject though will fill in shadows and give a soft, pleasing light.
So what I thought this big 1.8m light source would do was this:

But when I took a test shot what I actually got was this:

The light was soft, but it wasn't a big light source. In fact it barely covered head and shoulders. I was really confused for a while because this was breaking the rule I had learnt. It took me a few minutes but from what I could tell, this was what was happening:

Due to the fact that the umbrella is so shallow the light source was only bouncing off the centre and so creating a small light coming back through the diffusion panel. That diffusion panel may have been almost two meters big, but the light was only bouncing back through the very centre of it. The small reflection size, and the concave shape of the umbrella meant that I was left with a shot which looked like it had been lit with a snoot and a bit of ambient back lighting. I think it's actually a flaw with this particular product (Walimex 180cm Reflex Umbrella). Ideally the umbrella should have a deeper concave shape, so the light can sit further away from the inside surface, and so spread light over the whole surface and come back through the diffusion panel as large a source as possible.
Don't get me wrong, I actually like the shot. It was a happy accident and I stayed there shooting for a few minutes and got some great shots with that set up. But it wasn't what I had planned. I still wanted a bright ambient hair light from the sun, filled with a big soft light from the front.
So how did I get there?
Well first I had to slow down my shutter speed to let in more ambient light. The rule is, when balancing ambient light with strobes, that shutter speed controls your constant ambient light, and your aperture controls your strobes. Slowing down my shutter speed, means keeping the shutter open for longer and allowing more constant light in to the sensor. It doesn't effect the strobe though because it only fires momentarily within that shutter duration anyway.
I still had the same problem with the softlighter though. So I decided to pull the diffusion panel off the front and hang it spread out in the tree branches off to camera right. I then took my light and pulled it back so that the light would fall full across the surface of the diffusion panel without spilling past the edge:

This now meant that I had my large soft light from the front to fill. As a trade off I lost the shape of the light somewhat because Sarah was now only being lit by a bare strobe firing through a flat diffusion panel instead of being shaped by light returning from a concave umbrella, but it gave me the balance that I needed to get the shot I wanted. Which was this one:

So I used the sun coming in through the trees as a hair light, or rim light, and just balanced the strobe to fill in the front of Sarah's face. The trick with this kind of photography for me is to keep it looking as natural as possible, and I like the result of this one.
There are million ways to light. Once you get a sense for how it moves and behaves you can get a vision for what you want, and then work out how to get it. There are a slew of modifiers to help you get there too, from snoots to softboxes, umbrellas to beauty dishes, even just a white wall, or in my case, a diffusion panel hung from a tree. The point is to experiment and learn to bend the light through your lens and onto your sensor to get the shot you want.
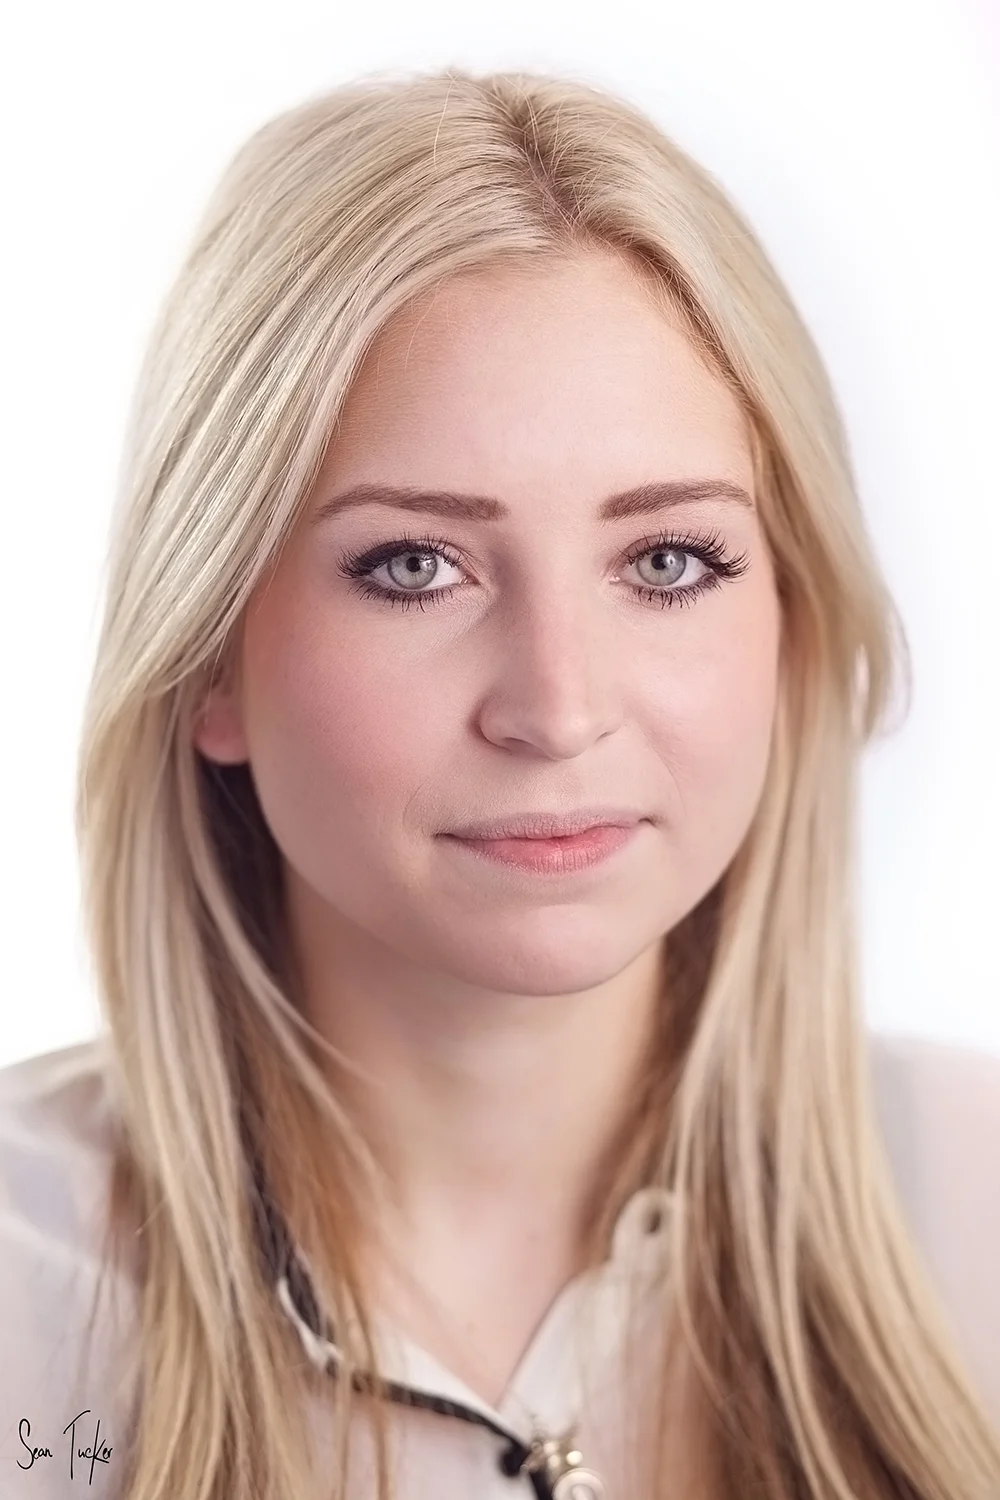
Shooting Business Headshots
I was recently asked to shoot, what would turn out to be, a Headshot Marathon.

By day I am a product photographer for a big ecommerce company in London. I have plans to do a series of posts on shooting and editing product images, so make sure to subscribe to the blog if you're interested.
In the meantime though I thought I would talk about a recent assignment at work. I was asked to shoot headshots for the company staff which turned out to be a challenging experience.
Let me get the technical side out of the way first because I know some people will be interested:

As you can see my light set up was fairly simple. I placed one soft key light on camera right using a 1m softlighter, one hair light on camera left to give some hair and jaw line shape, and one background light which is hiding behind the fill reflector. This is the lighting diagram:
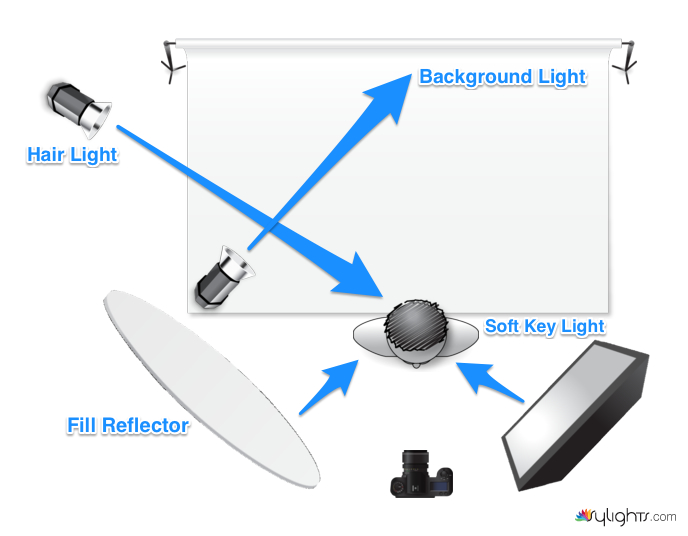
My camera (5DmkII) settings were 85mm, iso 100, f2.8, 1/125.
So now that you know the technical stuff I wanted to talk about the experience of having to fire through 70 plus headshots in a couple of hours.
I share the technical stuff briefly because that really wasn't the challenge on the day. The tough part of this assignment was the fact that I was given between 30-60 seconds with each person, and most really weren't that keen to have their photo taken. How was I going to get a rapport going, relax the subject, set up the shot, dial in the lighting, organise a pose, and capture, in half a minute, all the while having the distraction of their friends and colleagues looking on and cracking jokes, making the subject just want to run a mile?
Well it didn't start off well to be honest.
The first few I took I immediately felt the pressure of making this experience as painless as possible for my reluctant subjects, and I rushed the shots. I have a strong empathy for people, and feel uncomfortable myself if I am the source of their discomfort as a photographer. I feel this failing often when shooting portraits with people and know I need to overcome it, and this day turned out to be a bit of a breakthrough. After I had cracked through the first 4 or 5 headshots, I had a moment of epiphony.
I may have thought I was being compassionate by rushing them through, but I was actually doing these people a disservice.
It was a case of short term / long term goals. In the short term I could have argued that I was helping them by making the process as brief as possible; but in the long term I was taking pictures which were not as good as they could be. The pictures would last. The discomfort they felt would only be extended by seconds and it could mean the difference between an image they like of themselves, and one they never use or look at willingly again. The answer is not to rush and get them out of the firing line of my lens because they are squirming a bit, the answer is to keep the big picture in mind and help get them a great image which they will get a lot of mileage out of.
That doesn't mean I should just ignore their discomfort though.
After getting the first 10 or so done, I found myself quickly developing a 'shtick'; a routine with each person which would quickly relax them, give them the info they needed, and keep them from overthinking the whole thing.
It went something like this:
"Hi.
Don't worry. We'll make this quick and painless for you. I promise it will be worth it. We've been getting great images all morning.
Can you just write your full name on this sheet for me so I can match your name to the image afterwards?
Thanks.
Take a seat up on the stool for me and face your shoulders towards this light here."
Gesture to the key light.
"Turn your face to me a little.
Great."
Take a shot.
"See it's not that painful."
Take a second shot as they inevitably smile at that comment, even if just to be polite. Now you have the ball rolling.
"These are looking great."
Make small adjustments between shots to work on the pose and expression, keeping it light and casual. If the subject is very rigid and struggling then I would try this little trick:
"Ok lets try this. Close your eyes. I'm going to count to 3 and on '3' you are going to open your eyes and look right into my lens. 1. 2. 3."
The trick with this is to catch the eyes in the moment between their widest and before they settle. I find there is a moment of honesty before your face works out how to cover for you. It may sound odd, but I find it works for me. Give it a go.
"That was really good. Thank you. I'll let you know when the images are ready. You've been great."
That takes me to nearly a minute and the good thing is I have been giving clear directions, taking shots, and reassuring the subject the entire time. I found that the less dead space there was, the less opportunity there was to feel self conscious. As the session continued I was coming up with banter which hit more often and phrases which got my suject to the expression I wanted more efficiently. It was a great, compact learning experience to have to get through so many, so quickly, not that I hope to repeat it soon.
If you want to see a master of Headshot Photography check out Peter Hurley's DVD The Art Behind the Headshot for some amazing tips on posing your subject and getting the best expression out of them.
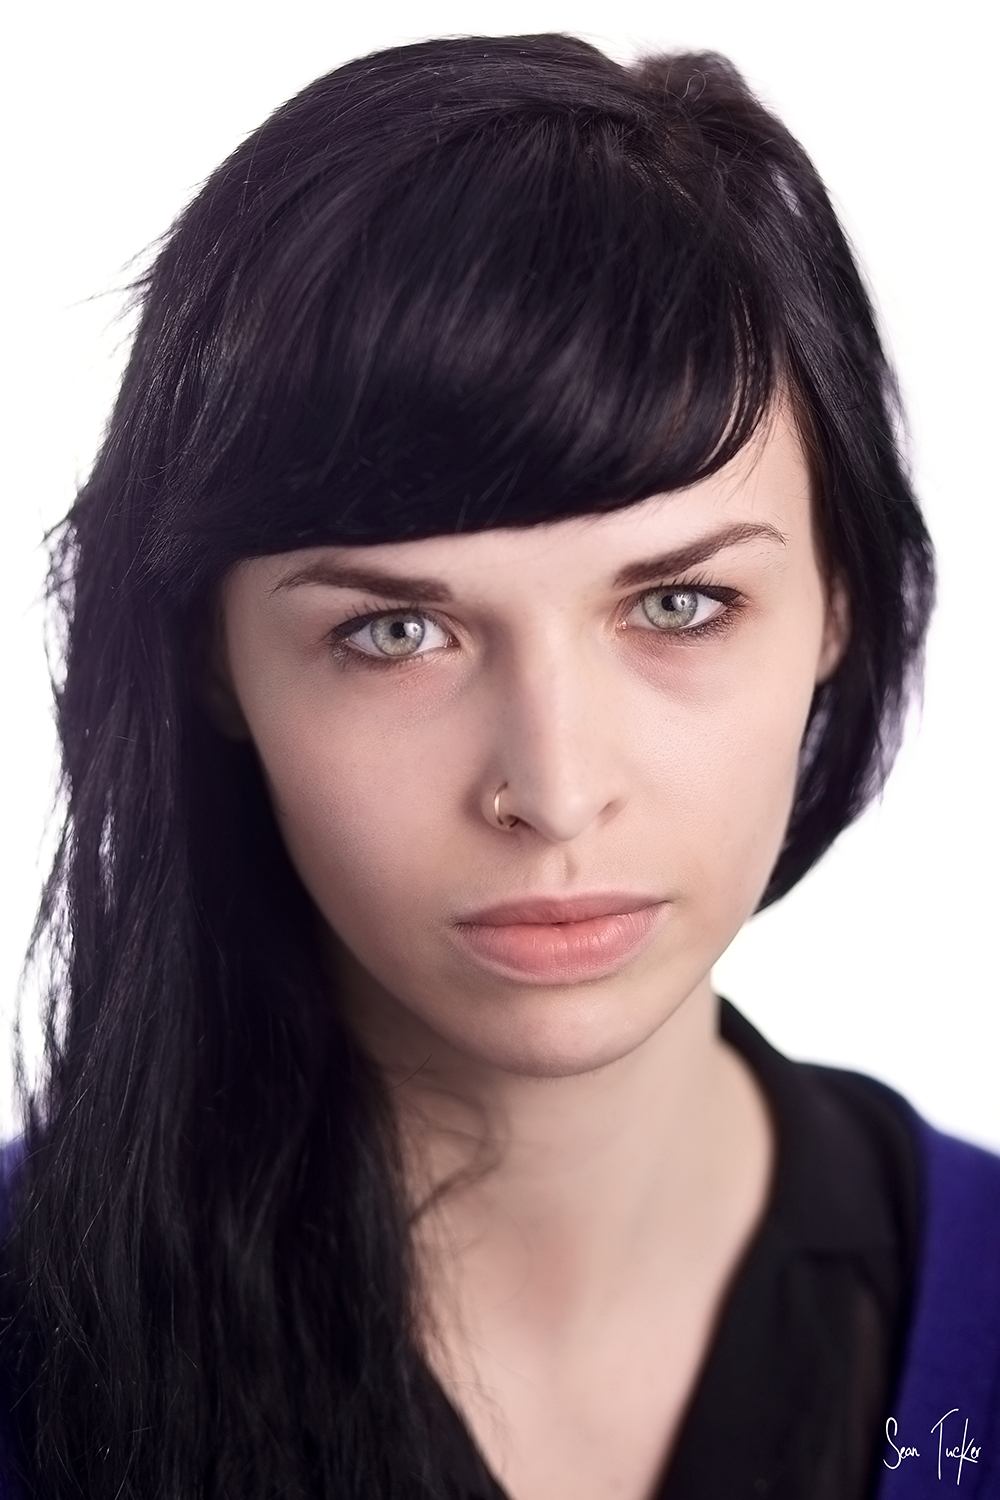
Here are some more shots from the day:


Balancing Colours
I recently shot for Moonika, who is building a portfolio to put herself out there for modelling.
She has the most striking red hair, and so early in the planning process I had to consider how to deal with, and compliment, such a strong colour.
Confession time: I am slightly colour blind, especially when it comes to reds and greens ironically. I often confuse them, particularly when they have similar tonal values. I actually have this constant insecurity that the colour balance in my edited shots isn't very good and no one is telling me I'm messing it up; like maybe everything I shoot has a slight green tinge for example and, best-case-scenario, people think it's a deliberate stylistic choice.
To compensate I have a few photography friends who I bounce my portfolio off to get some honest feedback and see if I'm off track. This is a really good idea by the way, especially while you're learning to colour correct your images. Source some trusted, honest, brutal opinion.
When shooting though, I try and keep the colour wheel in mind to plan out some sort of balance, because it really is as important as spatial composition.
I found this great graphic on visual.ly, which explains many aspects of colour theory and gives a really helpful overview:

Obviously I'm not thinking about all of this when shooting, although I do try and bring some of this knowledge into my compositions. At least knowing this stuff in the back of my mind often helps me to work out when something just 'looks wrong' and I can't figure out why. So it may look very complicated, but let me break down just two of the things I try and stay aware of:
Analogous Colours can add thematic interest. These are colours which sit close to each other on the colour wheel (Pink/Red). If you place these sort of colours together, especially in styling, you can create depth and interest while still playing on a theme.
Opposite Colours provide separation. In colour theory they are called 'Complimentary Colours' (Red/Cyan). They will give you the greatest separation from fore-background, whilst playing nicely together.
Let's take the next two shots of Moonika to demonstrate.
I used Analogous Colours in the styling. I say "I", but she brought along this pink scarf for the shoot deliberately, and as a costume designer herself, she understood that the combination of the pinks and reds works well together in colour theory. So the pink of the scarf and red of her hair give us an Analogous Colour theme, but now I have to separate her from the background.
The Complimentary Colour for red on the Colour Wheel is cyan, but there was no cyan to hand to use as a backdrop so I tried the next two best options: green and blue (which strictly speaking is triad theory in the graphic above, but I think you'll get the idea).
First I lined her up with a rich green background to make the red of her hair pop and it worked quite well. Fortunately she also had this great green coat which helped me frame the bottom edge of the image too and draw the focus into the middle of the frame. The green also helped to accent the deep green of her eyes and the colours played well together. The point was that I was getting the separation I wanted.

But I also really wanted to try the blue because I had a feeling it would work well and give a very different feel.
On the day, I was shooting with a photographer friend of mine, Radek (Check him out at Bayek Photography). While we were walking around he noticed a bush with very light green leaves, which when blurred out in the bokeh made her dark-toned hair really pop, so we decided to use it as a backdrop for a while. Even when taking the shot I knew what I was going to do with this image in the edit. I wanted to give the impression of a cold, icy background and let the cool desaturated texture give her hair that extra punch and separation, so when I got the image onto the computer I isolated the leaves in the background and turned them a chilly blue/grey. The final image makes me think of the White Witch in the Narnia Chronicles for some reason, but the point is the separation works really well.

I can't pretend that I'm always this deliberate, and admittedly the strong colour of Moonika's hair forced me to think more than I normally may have about this stuff, but I am always working hard to keep colour balance in mind when shooting portraits. It really can make the difference between a flat and uninteresting shot, and one that really pops.
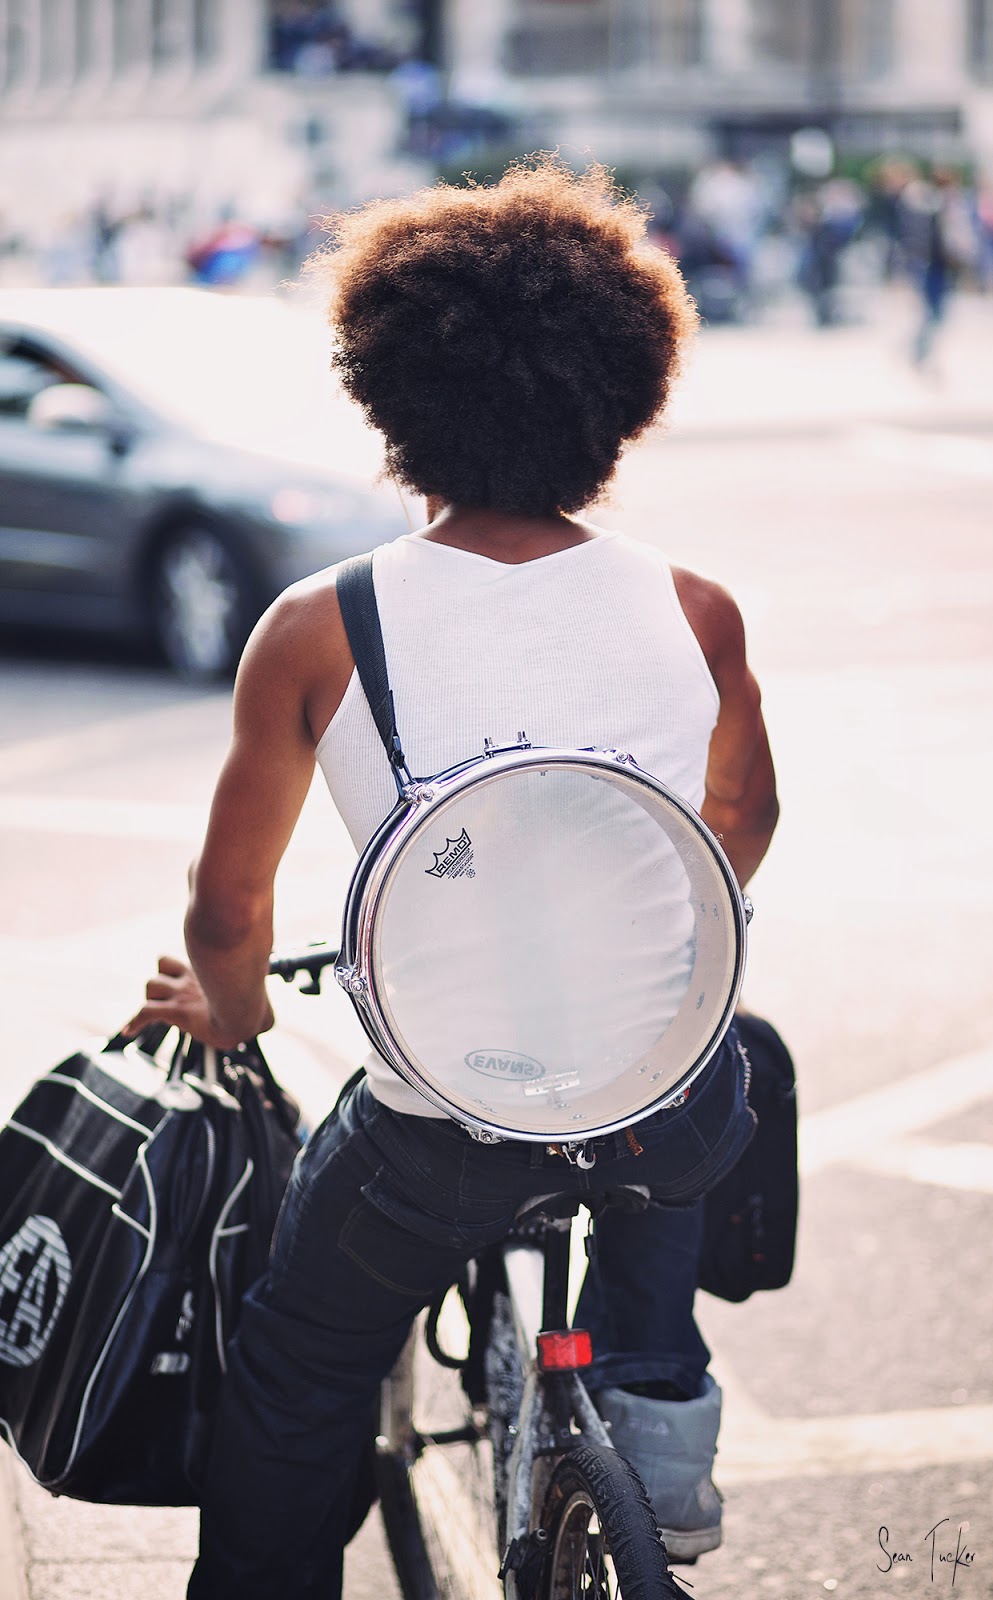
50mm: Focal Length Series
So this is the challenge I have given myself: to head out on a series of Photomissions where I am only allowed to use one focal length per session. I will walk the same route each time; between Waterloo Station and Oxford Circus Underground, and shoot using only one prime lens along the route to see what I can catch, and report back the experience and challenges of shooting with that particular focal length. I'm hoping to cover 24mm, 35mm, 50mm and 85mm.

This week it's the
50mm f1.4 prime.

NOTE: I am shooting on a full frame camera. If you're shooting on a cropped sensor camera (APS-C sensor) then these comments will apply more to a 35mm prime.
The Great Grandaddy of street photography, Henri Cartier-Bresson, was a proponent of this focal length, using it almost exclusively throughout his career. So I figured I would be in good hands with this one.
Starting off from the station I felt immediately at home with this focal length. I have heard people suggest that 50mm on a full frame camera is pretty close to the natural focal length of the human eye, and I could feel that straight away. I had this strange experience when I was looking around for shots to take; the moment I lifted the camera to my eye, the shot I had envisioned was right there in my viewfinder, with no intermediate calculation needing to take place.
It felt very natural.
When shooting with the 24mm, or even the 35mm, I found that I had to try and lock the focal length in my minds eye to predict the composition of each potential shot, but with the 50mm, "what you see is what you get."
I think this is why the 50mm is my favourite street focal length.
It's a great compromise between standing far off and compressing the background, and having to get in your subjects face, distorting them in the process. It gives you context by included background elements, but also separates your subjects nicely.
It really is a great allrounder.
In the world of primes, your legs are your zoom anyway, and I find the 50mm puts you in a comfortable place to shoot most of the action. It makes your viewer feel like a part of the scene, but doesn't mean you have to be shooting in people's personal space to do it.
There is this scene in the opening of "The Bang Bang Club", where one of 4 photojournalists covering the violent transition of power in '92 in South Africa, pulls out a long lens and begins shooting the action from a safe distance. The 3 other characters in the movie come hurtling past him right into the middle of the action with 50mm primes to get the shots. After things have calmed down they turn to their timid colleague and tell him to 'throw that lens away and get into the action with a 50mm, or else you can't call yourself a photojournalist.' Famous war photographer, Robert Capa, used to say, "If your photos aren't good enough, you aren't close enough."
There is a great deal to be said for the proximity of photographer to subject when it comes to street photography, and how this effects the viewers perception.
This lens will get you close without the compromises. I know some people take quotes like this and insist on shooting even wider (35mm) but I find that the trade off with distortion, and the fact that you effect the scene by getting too close, aren't worth it.
For me this lens is the one I use the most often. This is my street photography, go-to prime.
The Canon 50mm f1.4 was the first prime I bought and is my baby, both because of the quality, and the sentimentality as it marked my entrance into the world of serious photography. The 50mm prime is always the cheapest prime in any brand, and is often the first lens people buy for their DSLR's, aside from their kit lens. It is the gateway to a whole wide world of better photography, and the beginning of the deep, dark gear hole. The Canon 50mm f1.8 is only around £90 (R1000) and is so worth the price. If you can shell out a bit more for the f1.4 it is really worth your money.
If you want a way in, this is it. Go grab one and get shooting.
Here are some more of the shots I got:


85mm: Focal Length Series
So this is the challenge I have given myself: to head out on a series of Photomissions where I am only allowed to use one focal length per session. I will walk the same route each time; between Waterloo Station and Oxford Circus Underground, and shoot using only one prime lens along the route to see what I can catch, and report back the experience and challenges of shooting with that particular focal length. I'm hoping to cover 24mm, 35mm, 50mm, and 85mm.
This week it's the
85mm f1.8 prime.
NOTE: I am shooting on a full frame camera. If you're shooting on a cropped sensor camera (APS-C sensor) then these comments will apply more to a 50mm prime.
This is one of my favourite lenses at the moment.
I use it a great deal in the portrait shoots I do and love the way it separates the subject from the background, with beautiful bokeh and compression. With this in mind I knew I would be looking for individual subjects, and that this lens would give me the ability to pull them out of their surroundings.
Walking out of Waterloo this time I had to immediately adjust my viewpoint. I had last shot this route on the 24mm and was now on the other end of the spectrum. I stopped in the station for a little while and looked around through the viewfinder so I could lock the focal length into my minds eye. No point in jamming the camera up to my eye every few seconds for shots I would never be able to get at this focal length. I needed to be walking around with that 85mm frame in my mind to know what was possible, and to react to the right things.
I headed out and began looking for interesting people doing interesting things. It's something I am learning a lot at the moment: I would rather take a bad photo of an interesting subject, than take a slick photo of a boring subject. Learning to find those moments, or create them, and then capture them is really more than half the photographers job. We all focus so much on gear and techniques, but too few of us work on creating or finding great subjects which compel. We also have to come to terms with the fact that some days you'll find those subjects, and some you won't, and the only way to 'up' your chances is with perseverance, or "Tenacity!!", as my Grandfather would yell when giving his secret to life and success.
With street photography, you have to invest time. Be patient. Stay out as long as you can.
The other great thing about this lens is it allowed me stand off at a distance more often, and grab unguarded moments without being detected and altering the scene. I know that sounds voyeuristic, but it really is the nature of street photography. The moment someone notices you they will 'pose' or 'run', and you will have lost the opportunity to catch a real moment with a real human being. It's the constant battle of the reportage photographer: how to capture human beings without changing them. I know the arguments about shooting wider and being closer, but this longer focal length does have the payoff of anonymity, and right now that suits my non-confrontational style of photography well.
This Canon 85mm f1.8 is a fantastic lens. I only bought it recently and could kick myself for not buying it sooner. It's super sharp, with beautiful Bokeh. As a portrait lens it really is one of the best affordable primes and will give you professional results every time. Well worth a look.
Here are some more of the shots I got:


24mm: Focal Length Series
So this is the challenge I have given myself: to head out on a series of Photomissions where I am only allowed to use one focal length per session. I will walk the same route each time; between Waterloo Station and Oxford Circus Underground, and shoot using only one prime lens along the route to see what I can catch, and report back the experience and challenges of shooting with that particular focal length. I'm hoping to cover 24mm, 35mm, 50mm, and 85mm.
This week it's the
24mm f2.8 prime.
NOTE: I am shooting on a full frame camera. If you're shooting on a cropped sensor camera (APS-C sensor) then these comments will apply more to a 15mm prime.
24mm was always going to be the difficult one. Usually when you shoot with this width you have a strong idea of the vista you want to capture, so it's not really suited to run-and-gun street photography.
That said I did learn some things.
I set off from Waterloo about 7pm again to try and catch some 'golden hour' light. The moment I stepped out of the station I started shooting buildings because of the extra width. The problem I experieced immediately was the distortion I got with the lens. I had to be very careful about framing because, obviously, with a lens this wide I was getting the most distortion closest to the edges of my frame (barrel distortion) so it meant I was going to have to frame my subjects closer to the clean center and ignore the rule of thirds for the day.
I haven't corrected the distortion in the images below so you can a feel for what I'm talking about.
You do get super wide prime lens which correct for this distortion, like the Canon 14mm rectilinear, but they are very expensive. You can also correct in post, but I find that the more you pull the image around, the more detail you lose.
After sticking to shooting buildings and wide scenes I decided to mix it up a bit so at one point I set myself the challenge of shooting a person with this focal length. To be surreptitious about it I found myself having to shoot from the hip. I almost bumped into the subject to get close enough without simply walking up and sticking the camera right in his face. You'll see below that he was busy dancing so didn't really notice me, but I was less than two paces away from him when I took the shot, so this obviously isn't a great lens for people unless you are looking for something more stylised and you are able to get right in your subjects face. Don't forget they will distort like crazy too so watch the shape, although you can get some pretty cool effects shooting portraits at this focal length, like this one I shot a while ago.
The 24mm f2.8 I was using is another of the 'cheap plastic' primes from Canon. It performed ok. I'm not sure if I'm being harsh on it because I was grumpy about being stuck with such a wide focal length, but I found there wasn't as much latitude in the light and shade during the edit, and I really had to work at the sharpness of some of the images. It's still worth it as an inexpensive lens, but if you are a fellow pixel-peeper there are annoying little traits that may bug you.
I used to shoot a lot more landscapes than I do currently and I felt myself out-of-practice with this width. Nowadays I shoot mostly in the high rise confines of a city, or up close and personal with portraits and products. My 24mm doesn't come out of the bag much, but this little exercise made me want to get out into open space again and rekindle an old love for wide angle photography.
Here are some of the shots:


Wells Blog
Duis mollis, est non commodo luctus, nisi erat porttitor ligula, eget lacinia odio sem nec elit. Maecenas faucibus mollis interdum. Nulla vitae elit libero, a pharetra augue.