24mm: Focal Length Series

So this is the challenge I have given myself: to head out on a series of Photomissions where I am only allowed to use one focal length per session. I will walk the same route each time; between Waterloo Station and Oxford Circus Underground, and shoot using only one prime lens along the route to see what I can catch, and report back the experience and challenges of shooting with that particular focal length. I'm hoping to cover 24mm, 35mm, 50mm, and 85mm.

This week it's the

24mm f2.8 prime.

NOTE: I am shooting on a full frame camera. If you're shooting on a cropped sensor camera (APS-C sensor) then these comments will apply more to a 15mm prime.

24mm was always going to be the difficult one. Usually when you shoot with this width you have a strong idea of the vista you want to capture, so it's not really suited to run-and-gun street photography. 

That said I did learn some things.

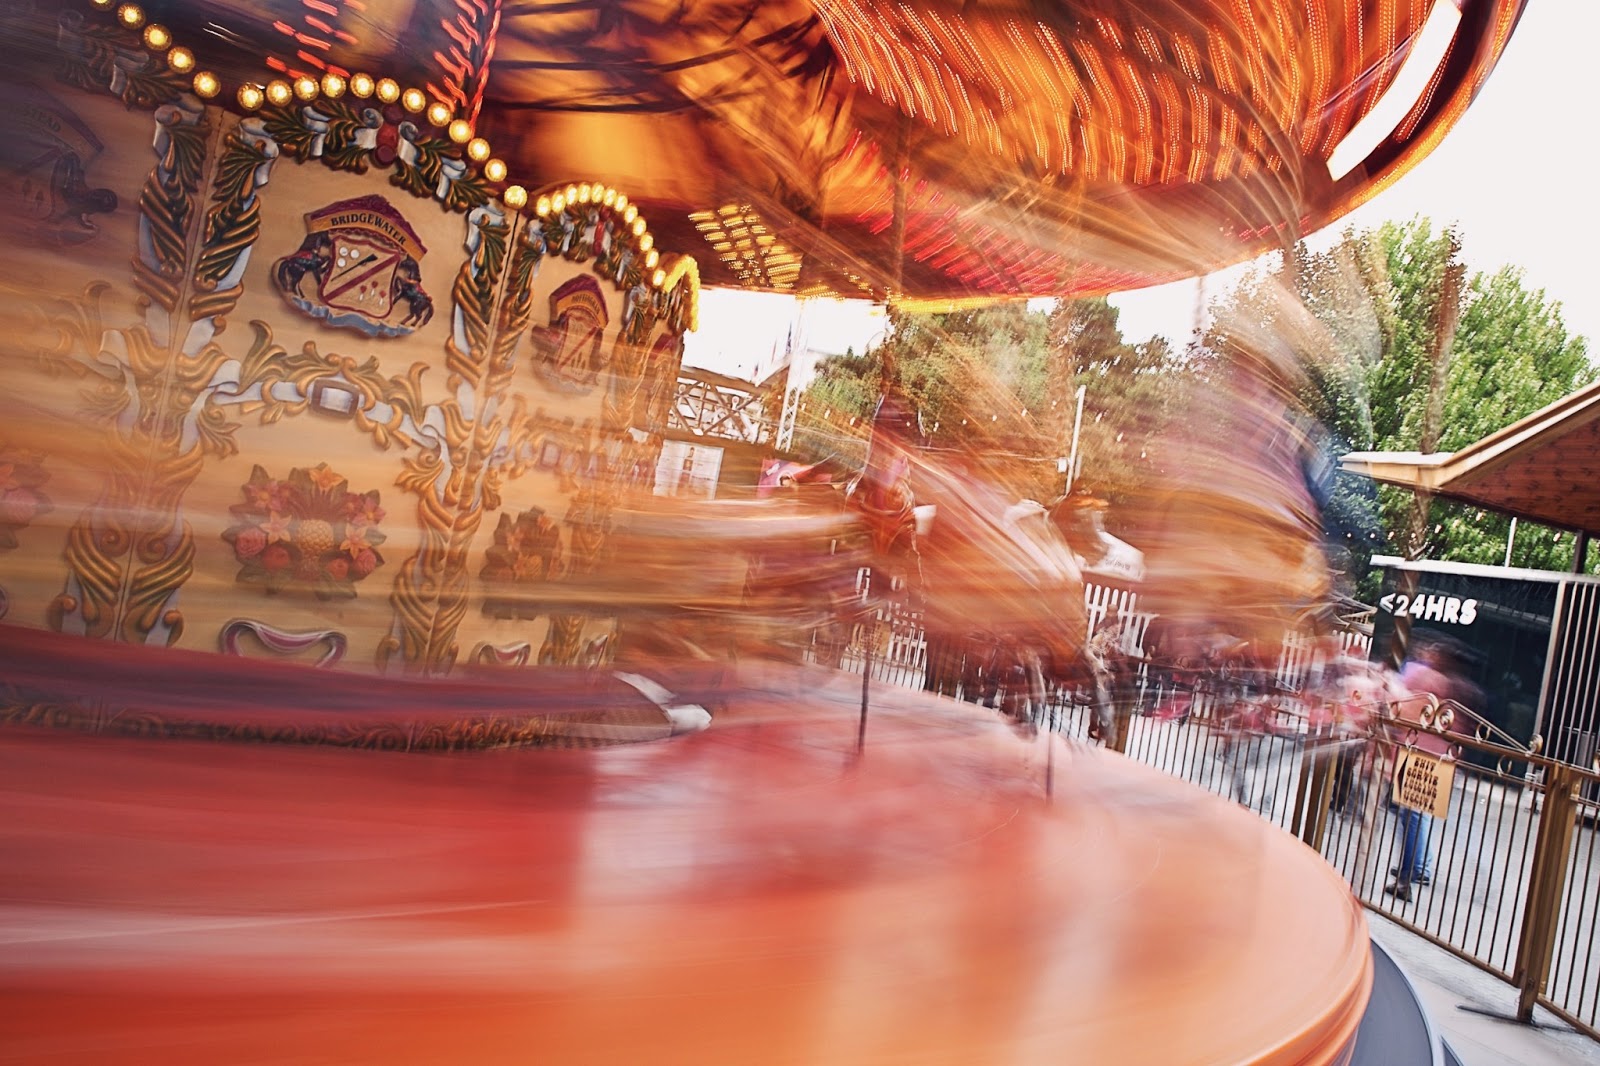
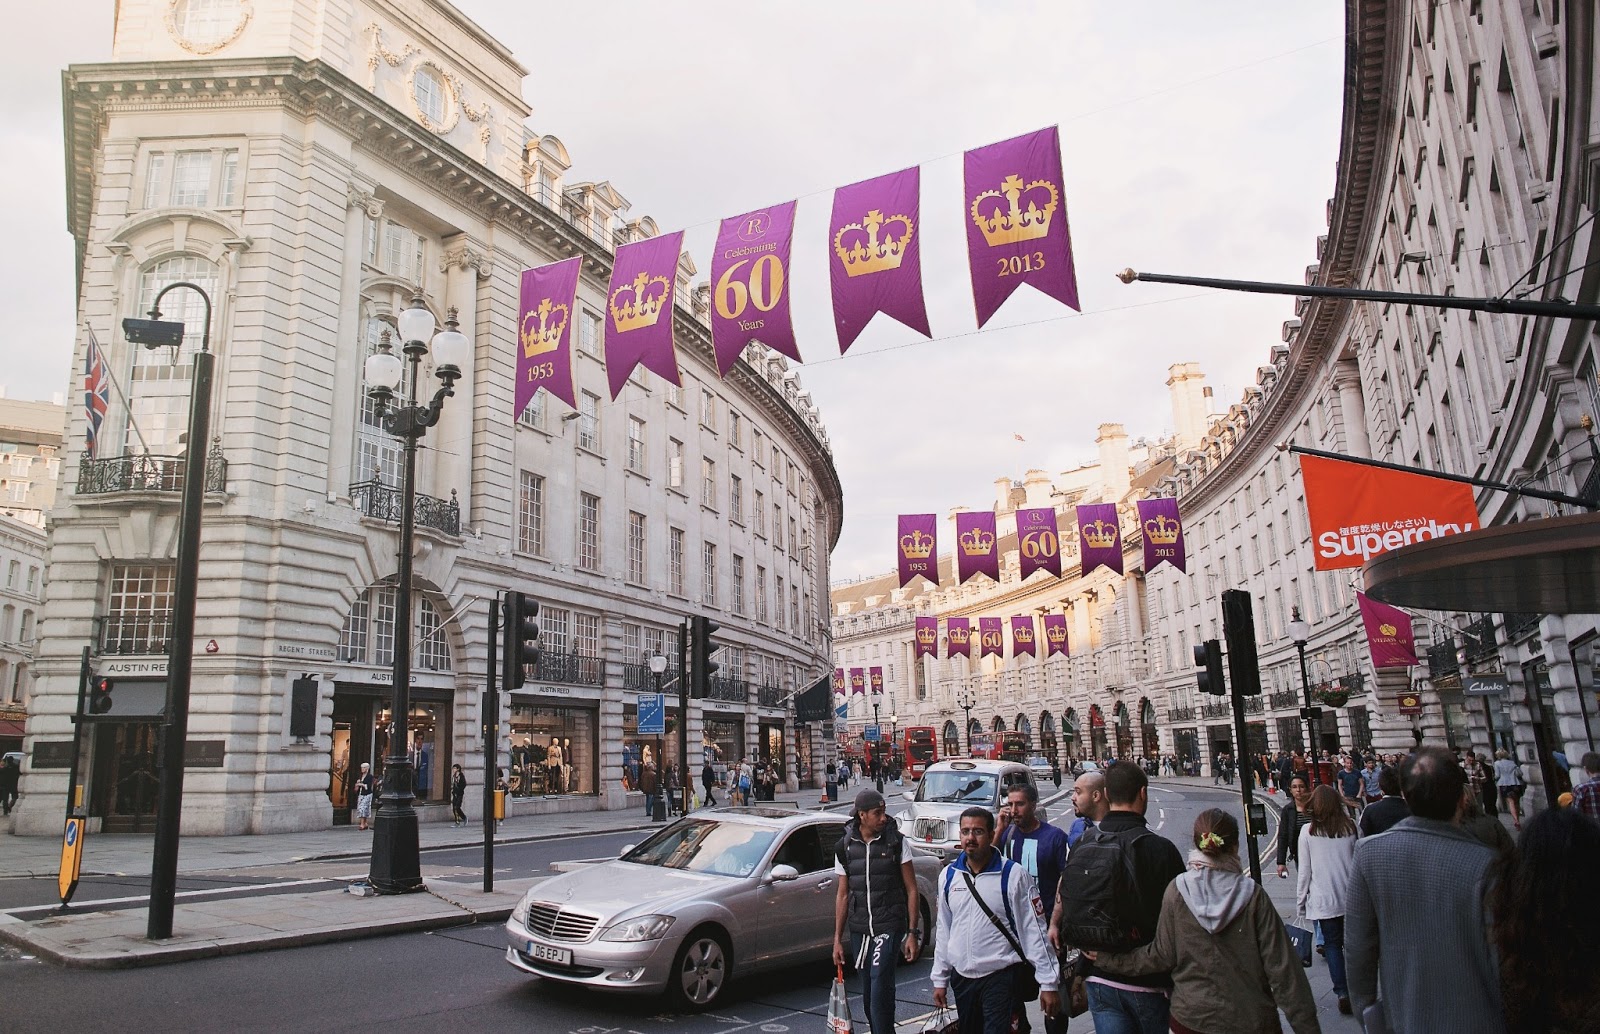
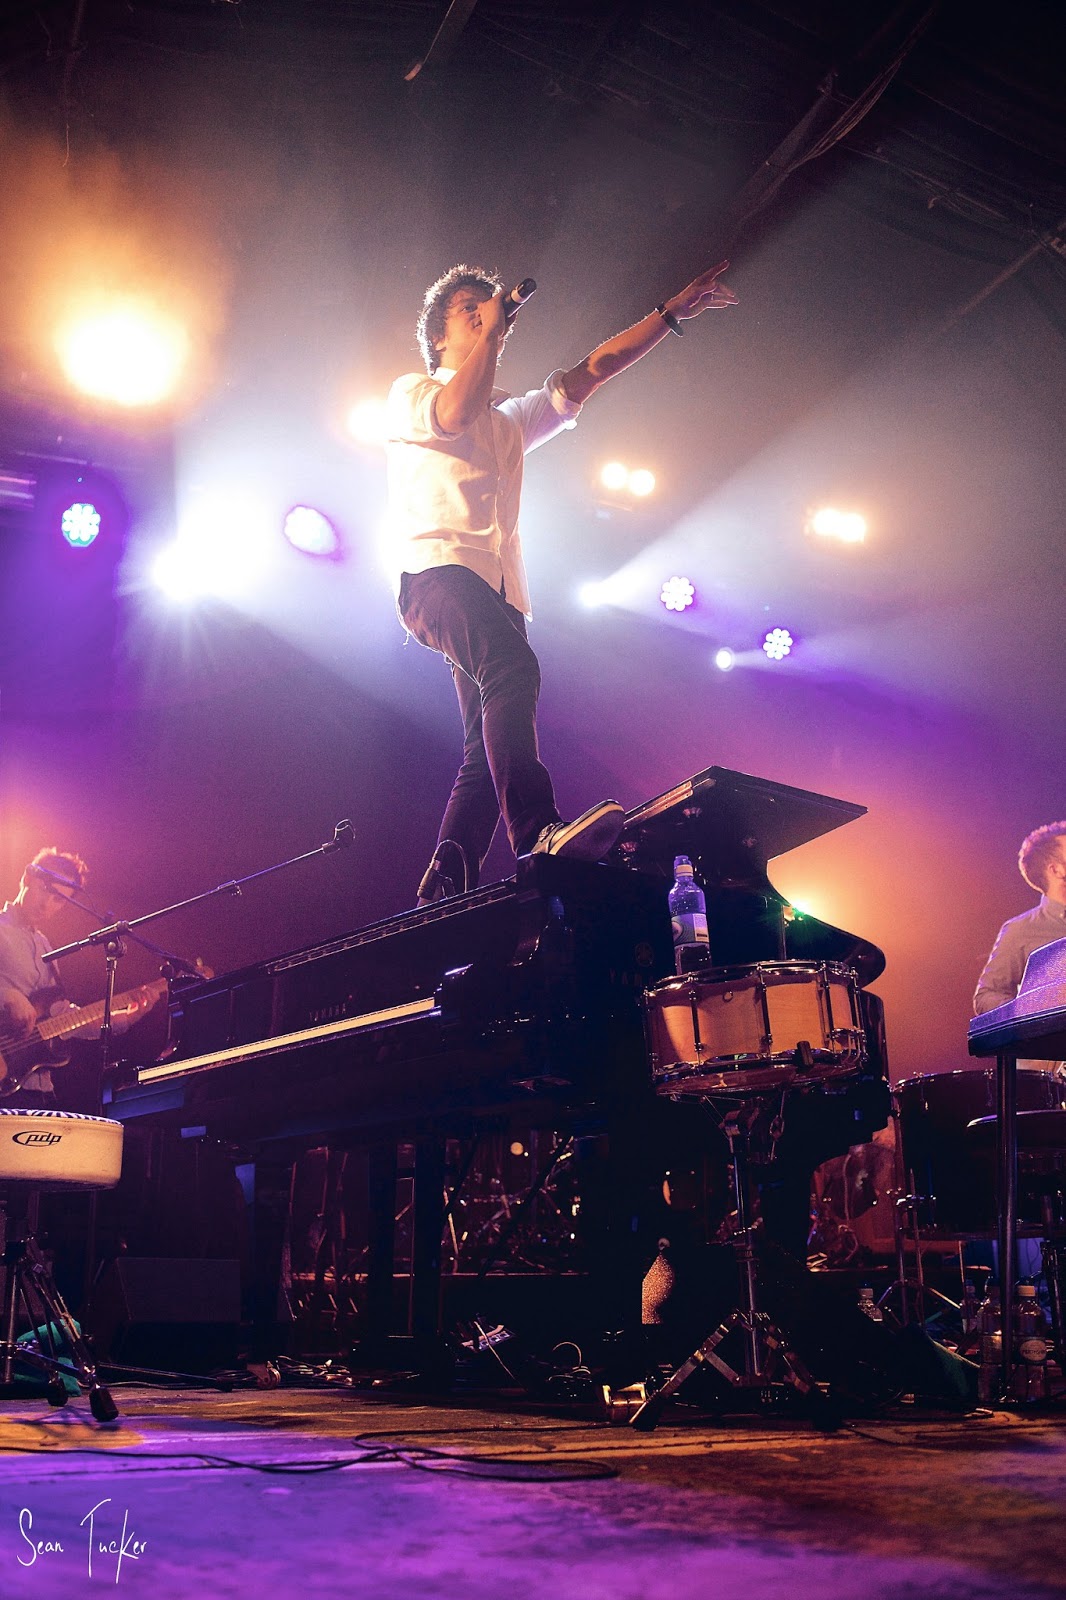
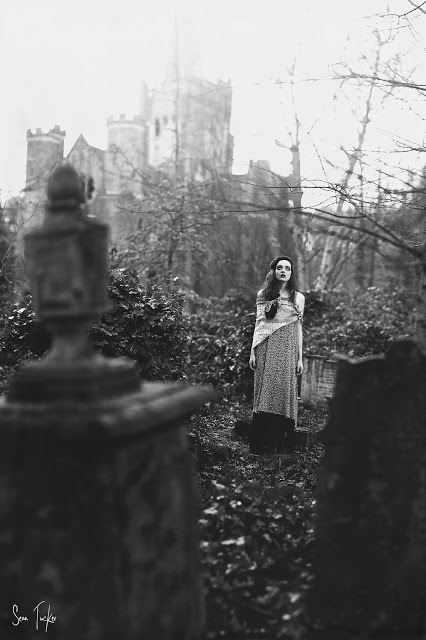
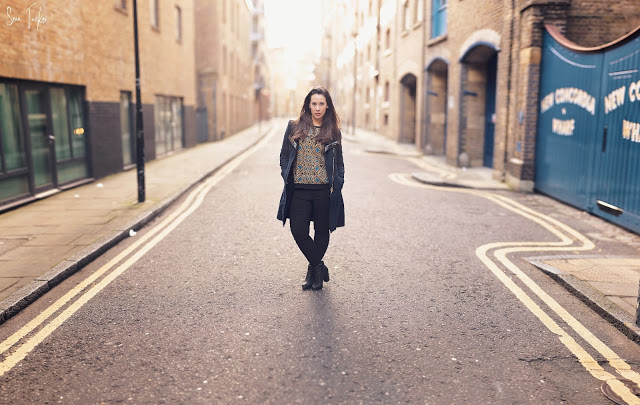
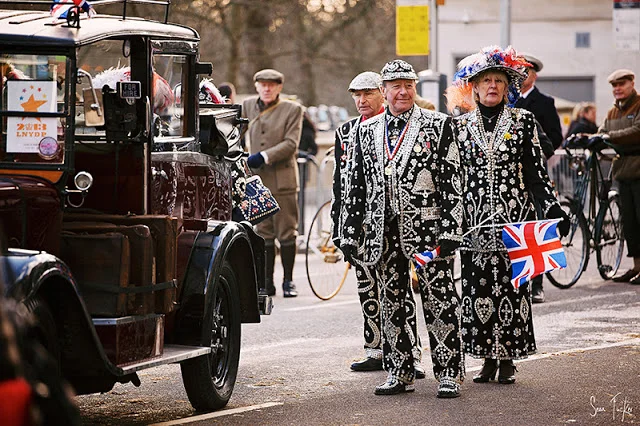
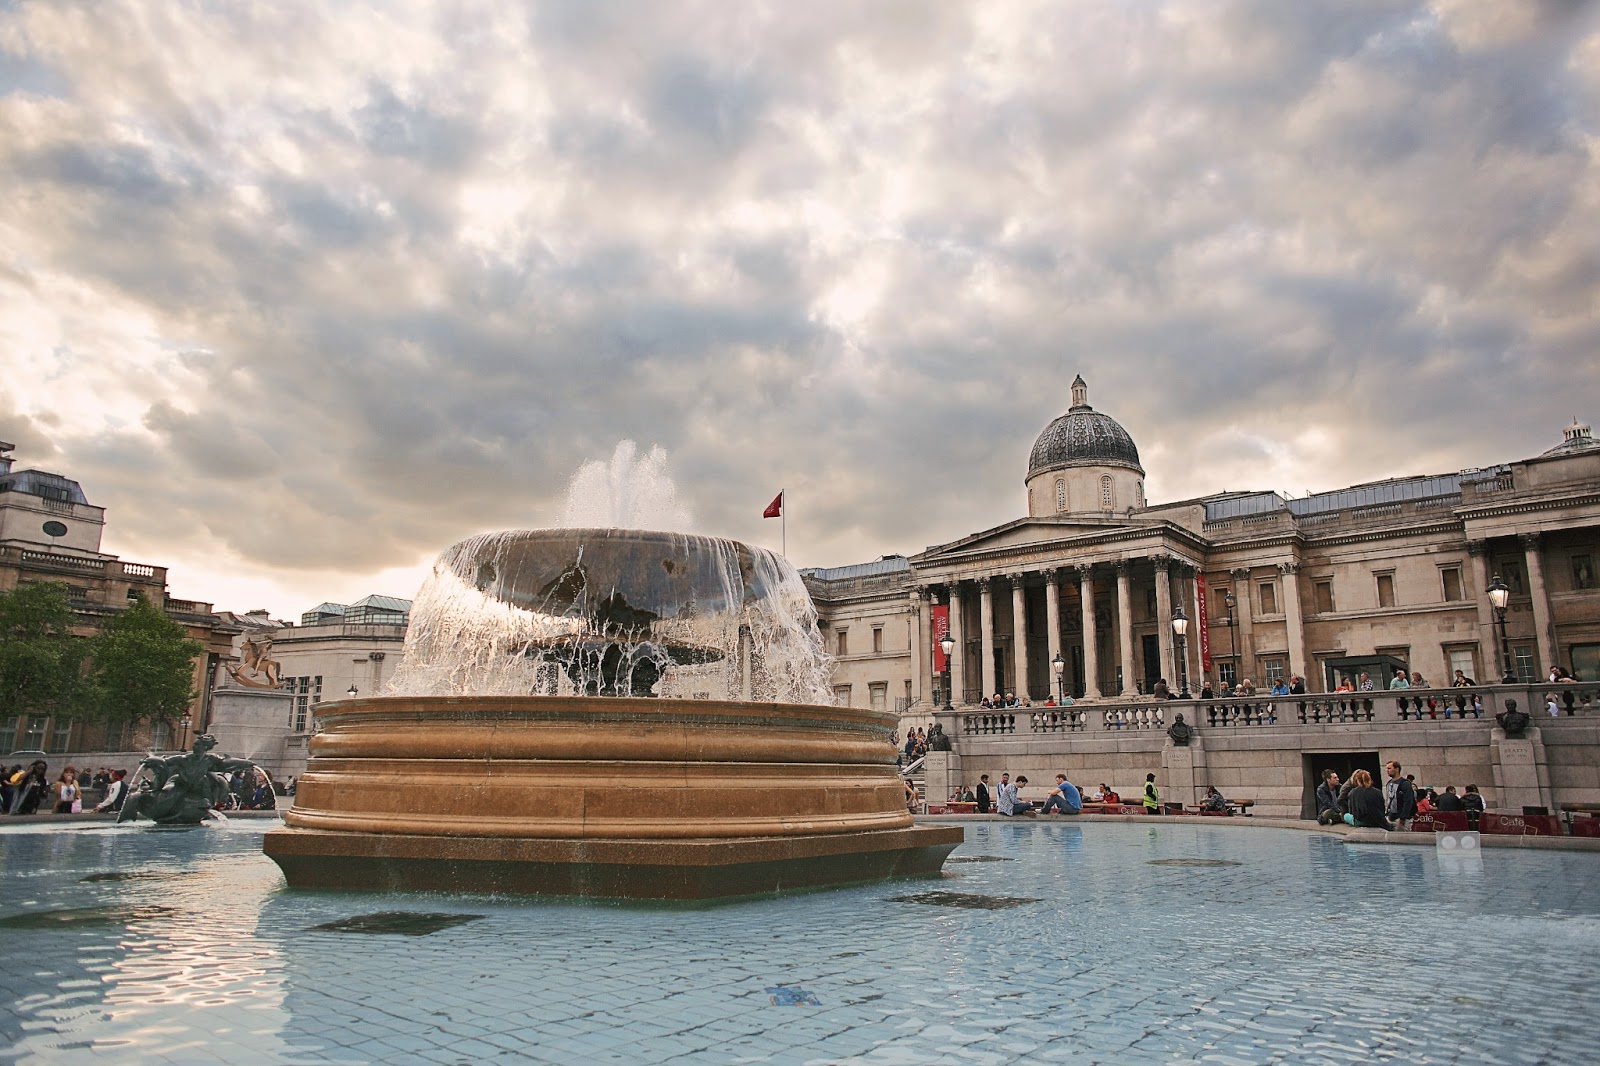
I set off from Waterloo about 7pm again to try and catch some 'golden hour' light. The moment I stepped out of the station I started shooting buildings because of the extra width. The problem I experieced immediately was the distortion I got with the lens. I had to be very careful about framing because, obviously, with a lens this wide I was getting the most distortion closest to the edges of my frame (barrel distortion) so it meant I was going to have to frame my subjects closer to the clean center and ignore the rule of thirds for the day. 

I haven't corrected the distortion in the images below so you can a feel for what I'm talking about.

You do get super wide prime lens which correct for this distortion, like the Canon 14mm rectilinear, but they are very expensive. You can also correct in post, but I find that the more you pull the image around, the more detail you lose.

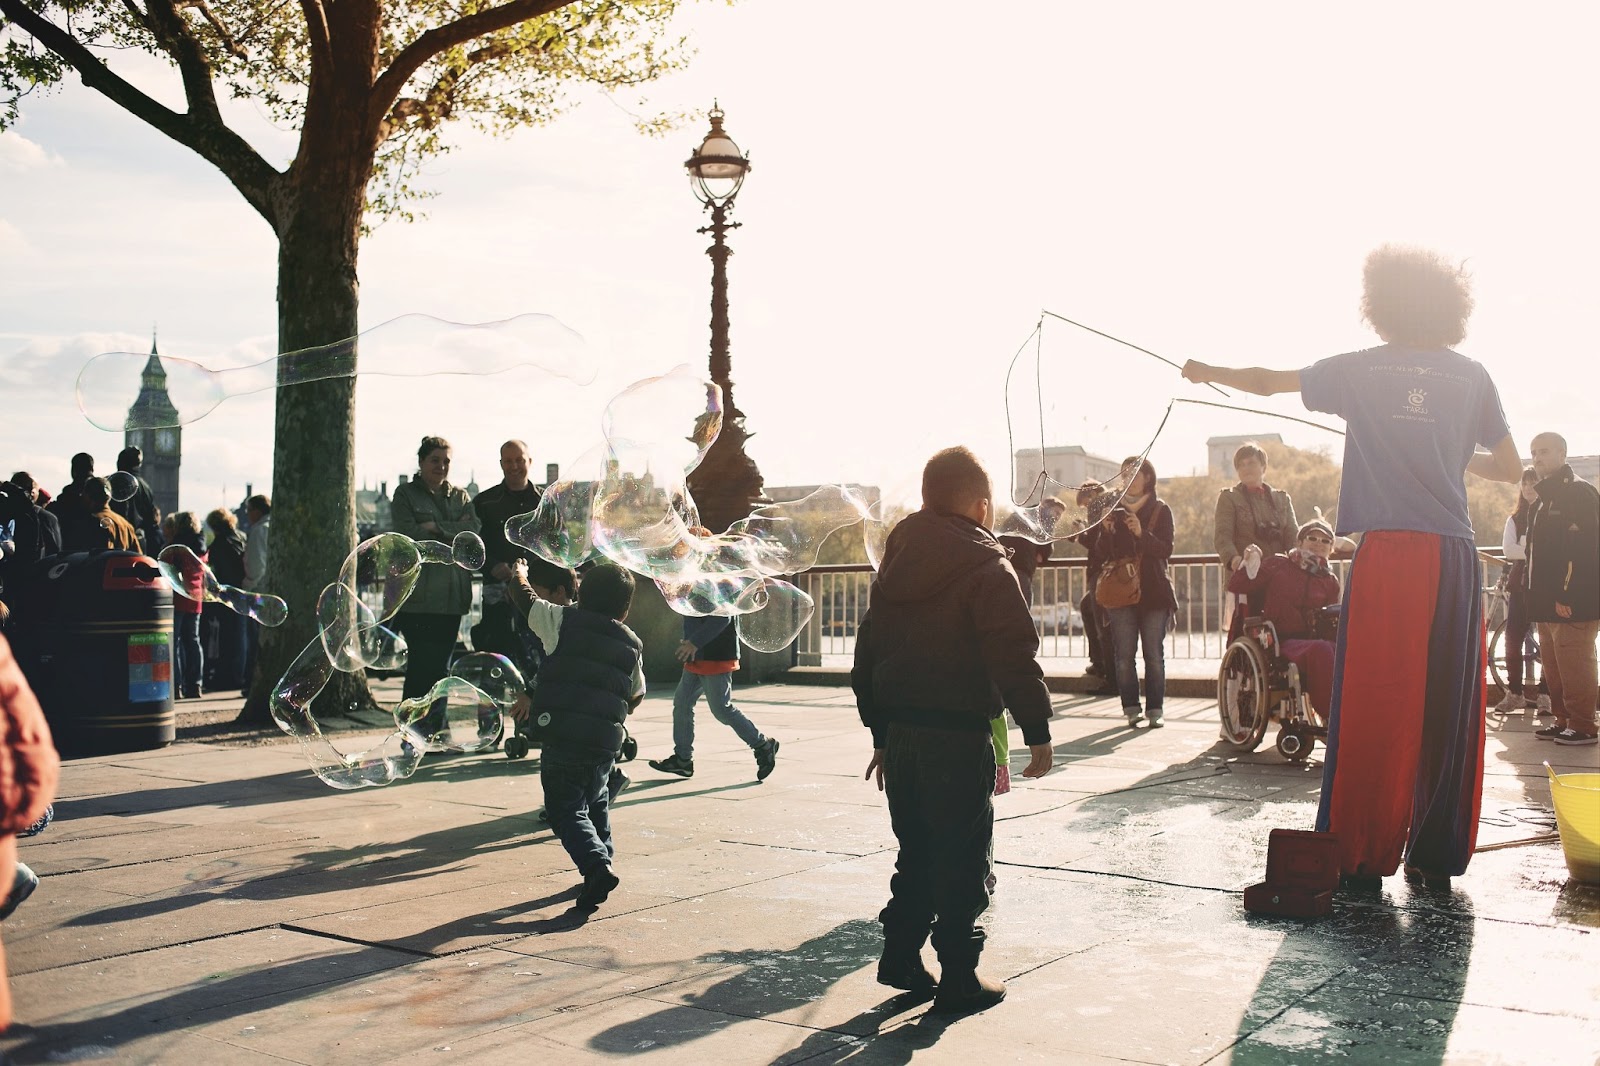
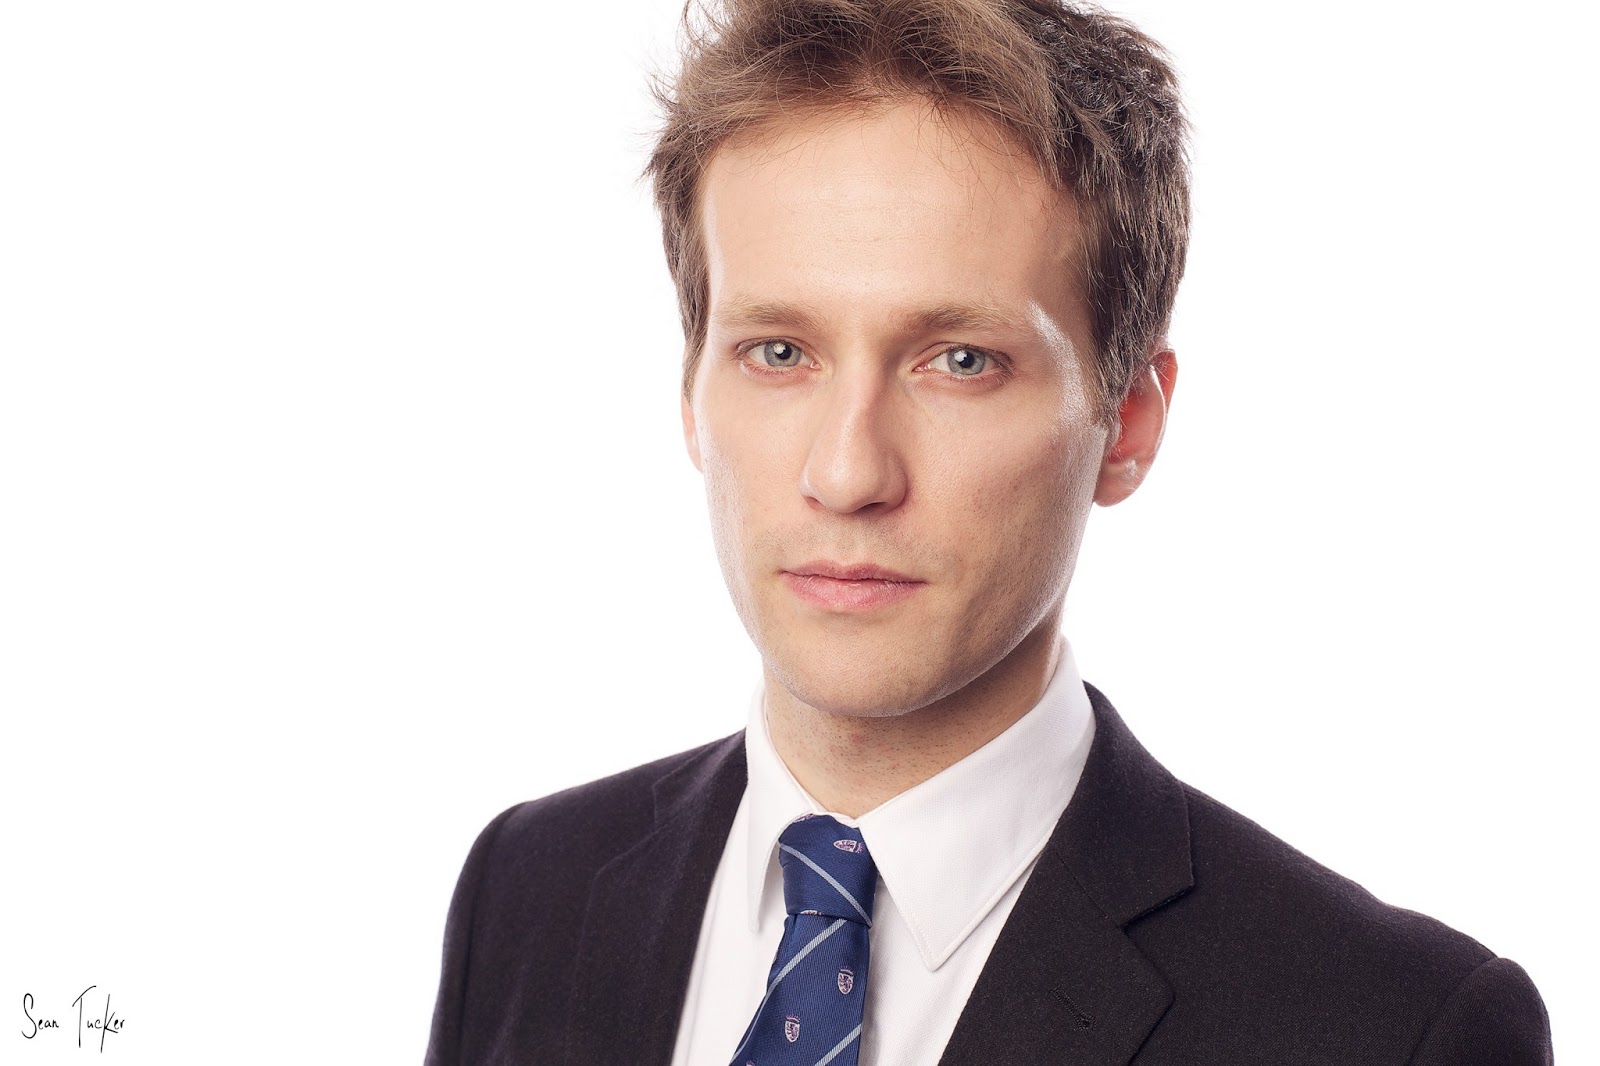
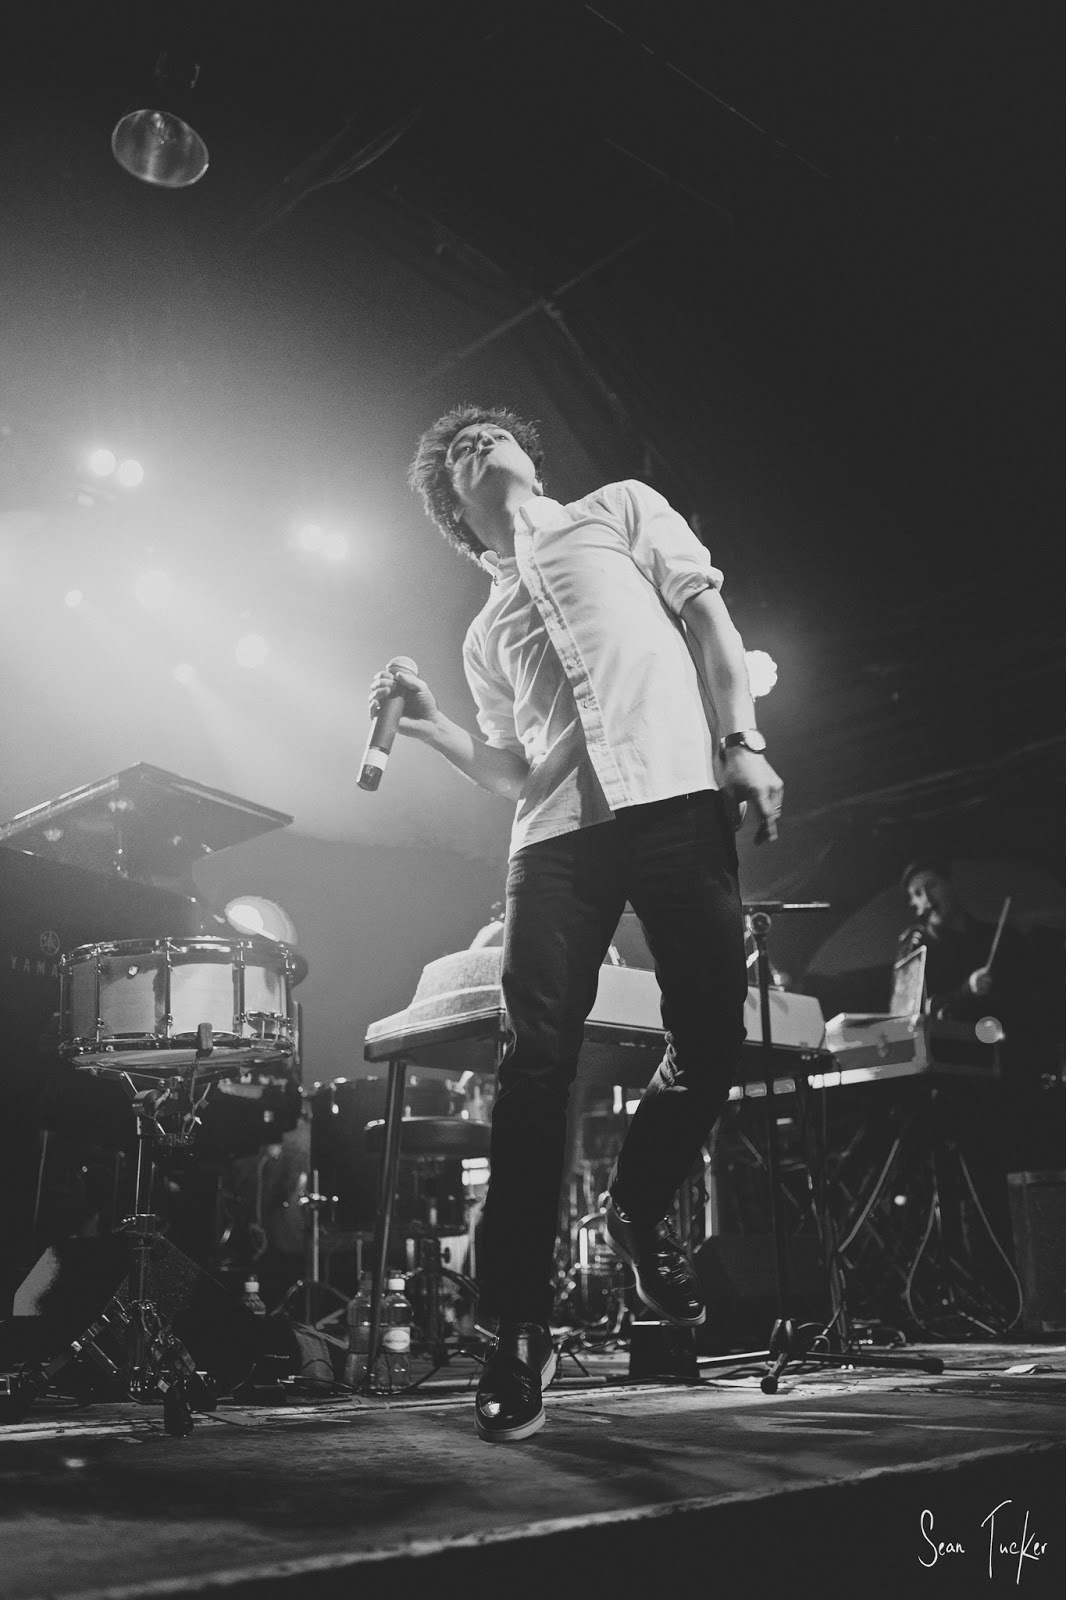
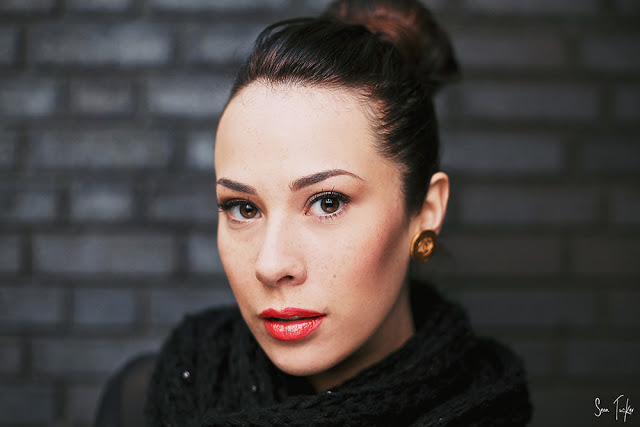
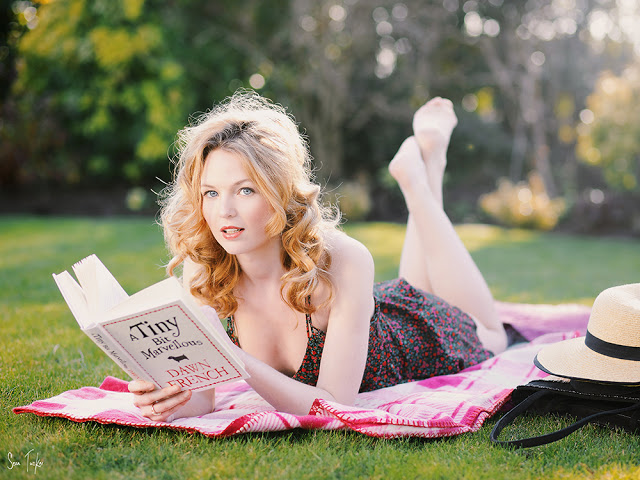
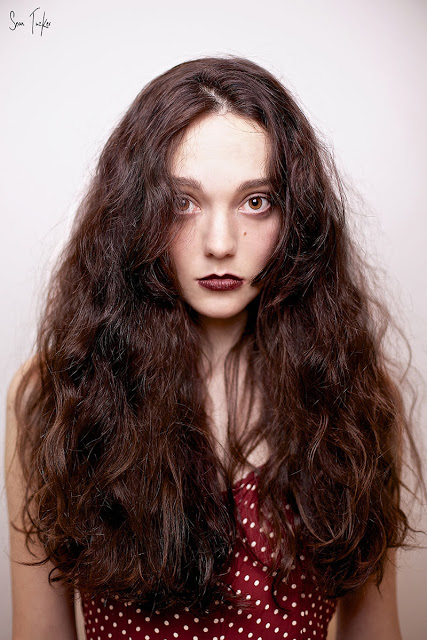
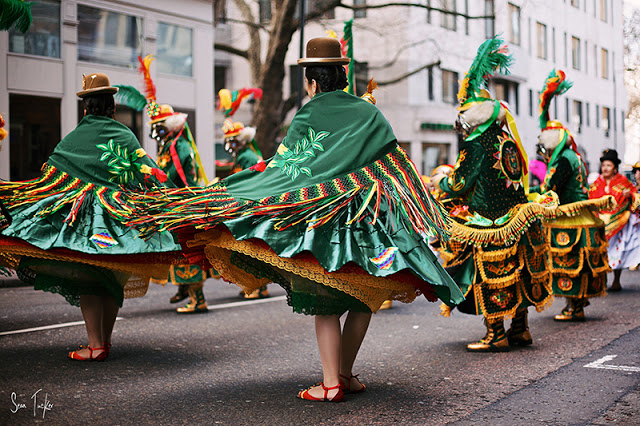
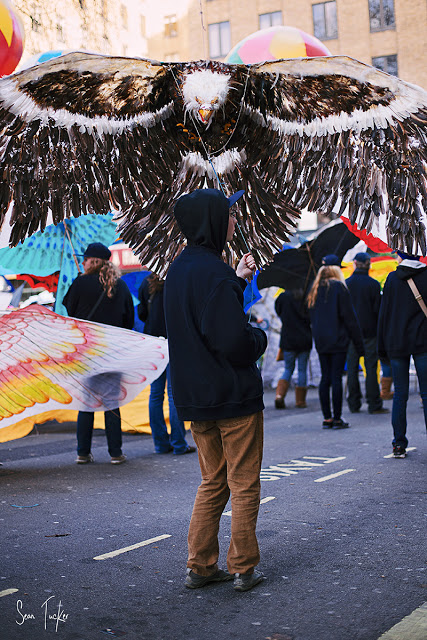
After sticking to shooting buildings and wide scenes I decided to mix it up a bit so at one point I set myself the challenge of shooting a person with this focal length. To be surreptitious about it I found myself having to shoot from the hip. I almost bumped into the subject to get close enough without simply walking up and sticking the camera right in his face. You'll see below that he was busy dancing so didn't really notice me, but I was less than two paces away from him when I took the shot, so this obviously isn't a great lens for people unless you are looking for something more stylised and you are able to get right in your subjects face. Don't forget they will distort like crazy too so watch the shape, although you can get some pretty cool effects shooting portraits at this focal length, like this one  I shot a while ago.

The 24mm f2.8 I was using is another of the 'cheap plastic' primes from Canon. It performed ok. I'm not sure if I'm being harsh on it because I was grumpy about being stuck with such a wide focal length, but I found there wasn't as much latitude in the light and shade during the edit, and I really had to work at the sharpness of some of the images. It's still worth it as an inexpensive lens, but if you are a fellow pixel-peeper there are annoying little traits that may bug you.

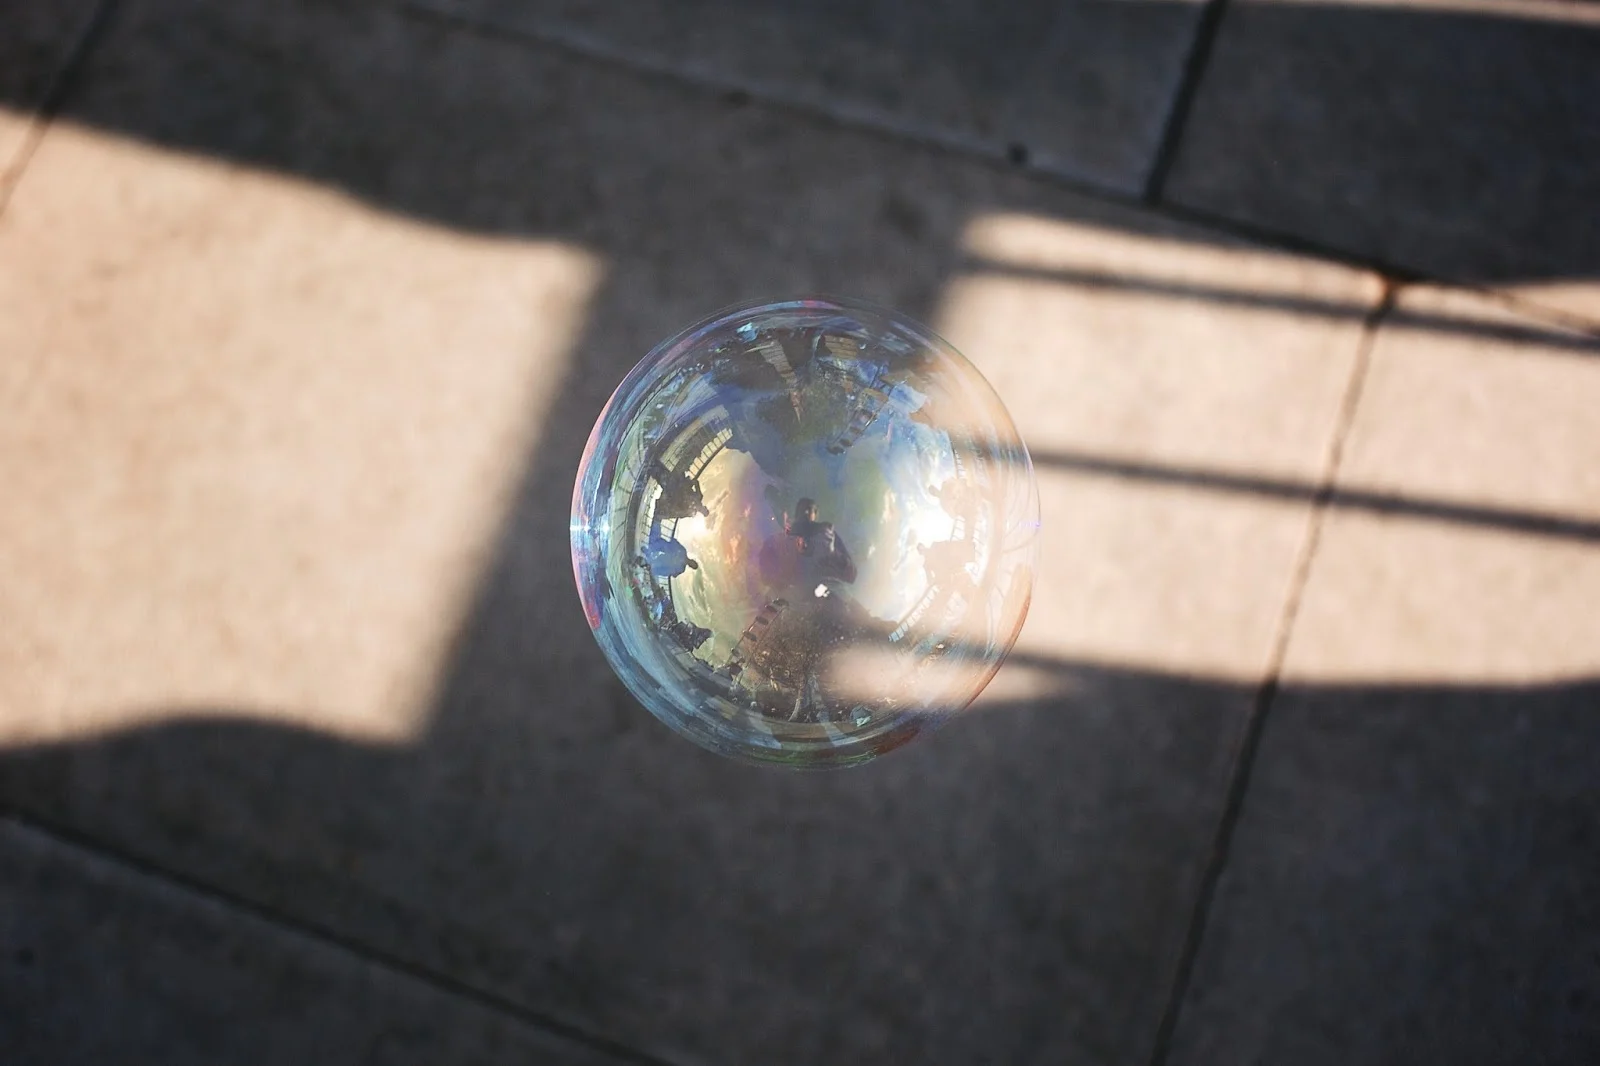
I used to shoot a lot more landscapes than I do currently and I felt myself out-of-practice with this width. Nowadays I shoot mostly in the high rise confines of a city, or up close and personal with portraits and products. My 24mm doesn't come out of the bag much, but this little exercise made me want to get out into open space again and rekindle an old love for wide angle photography. 

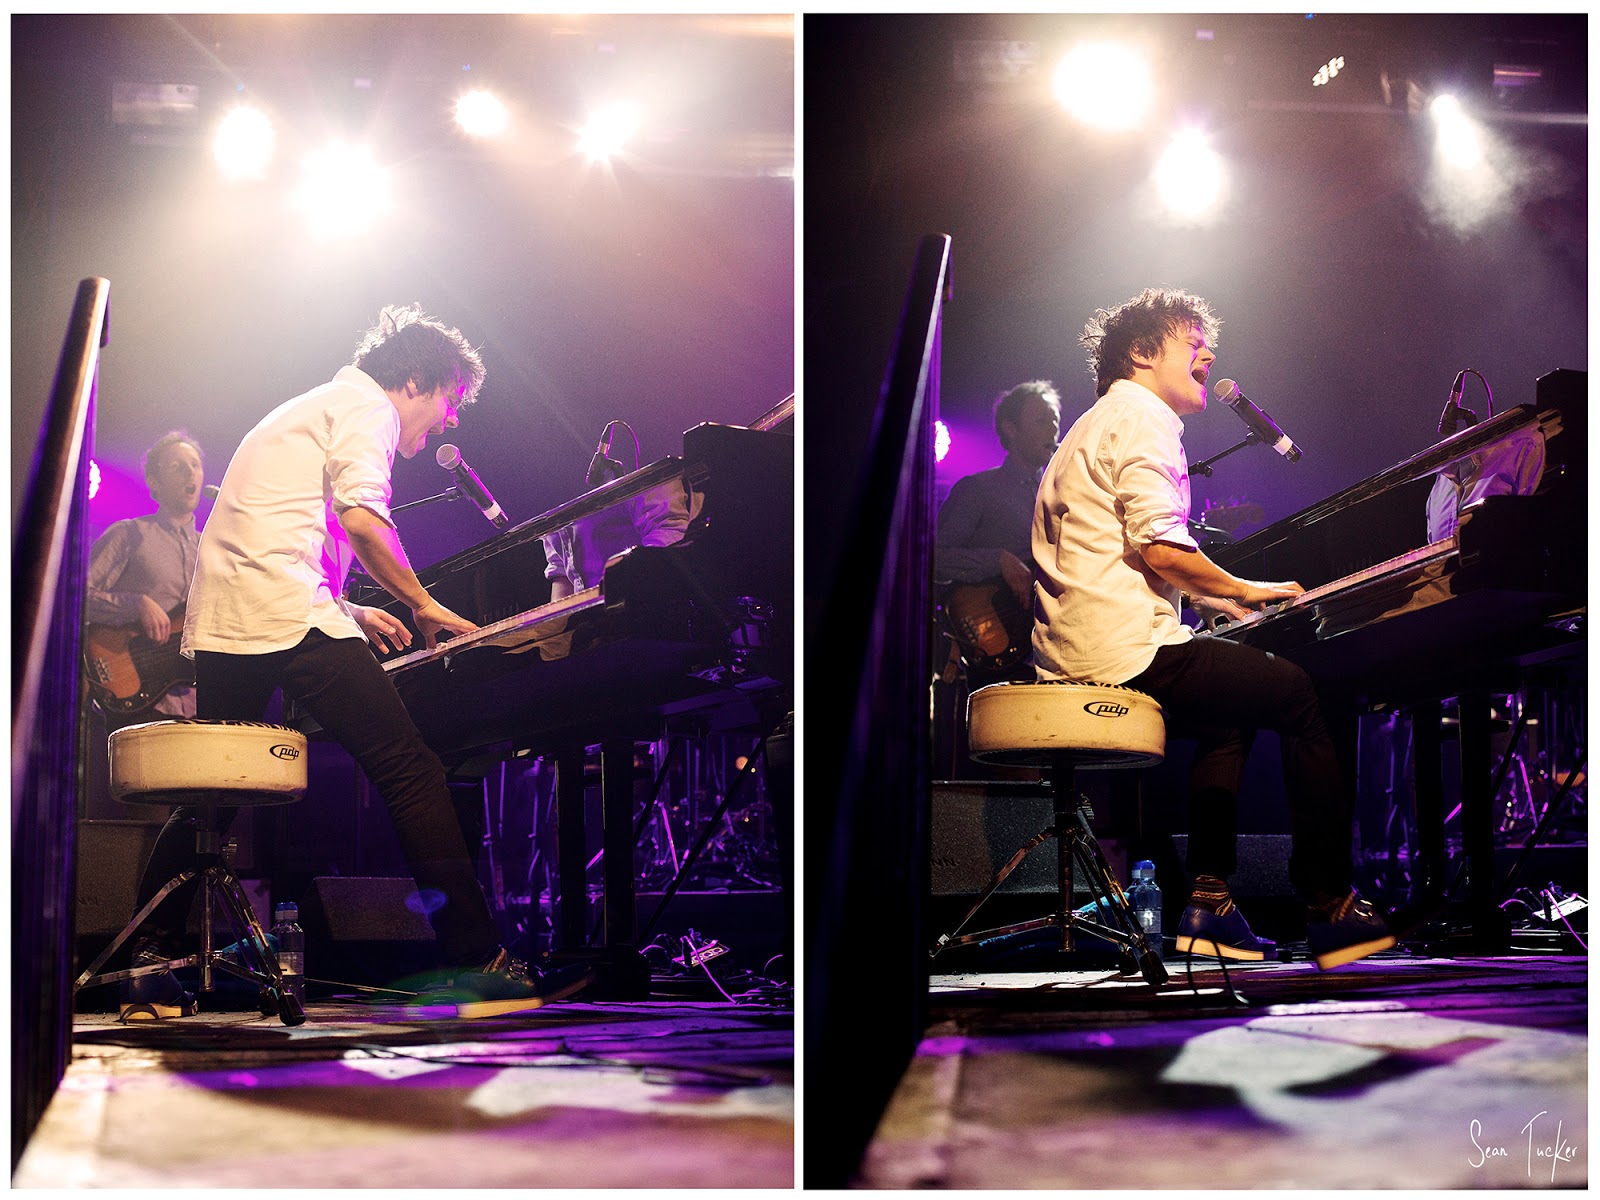
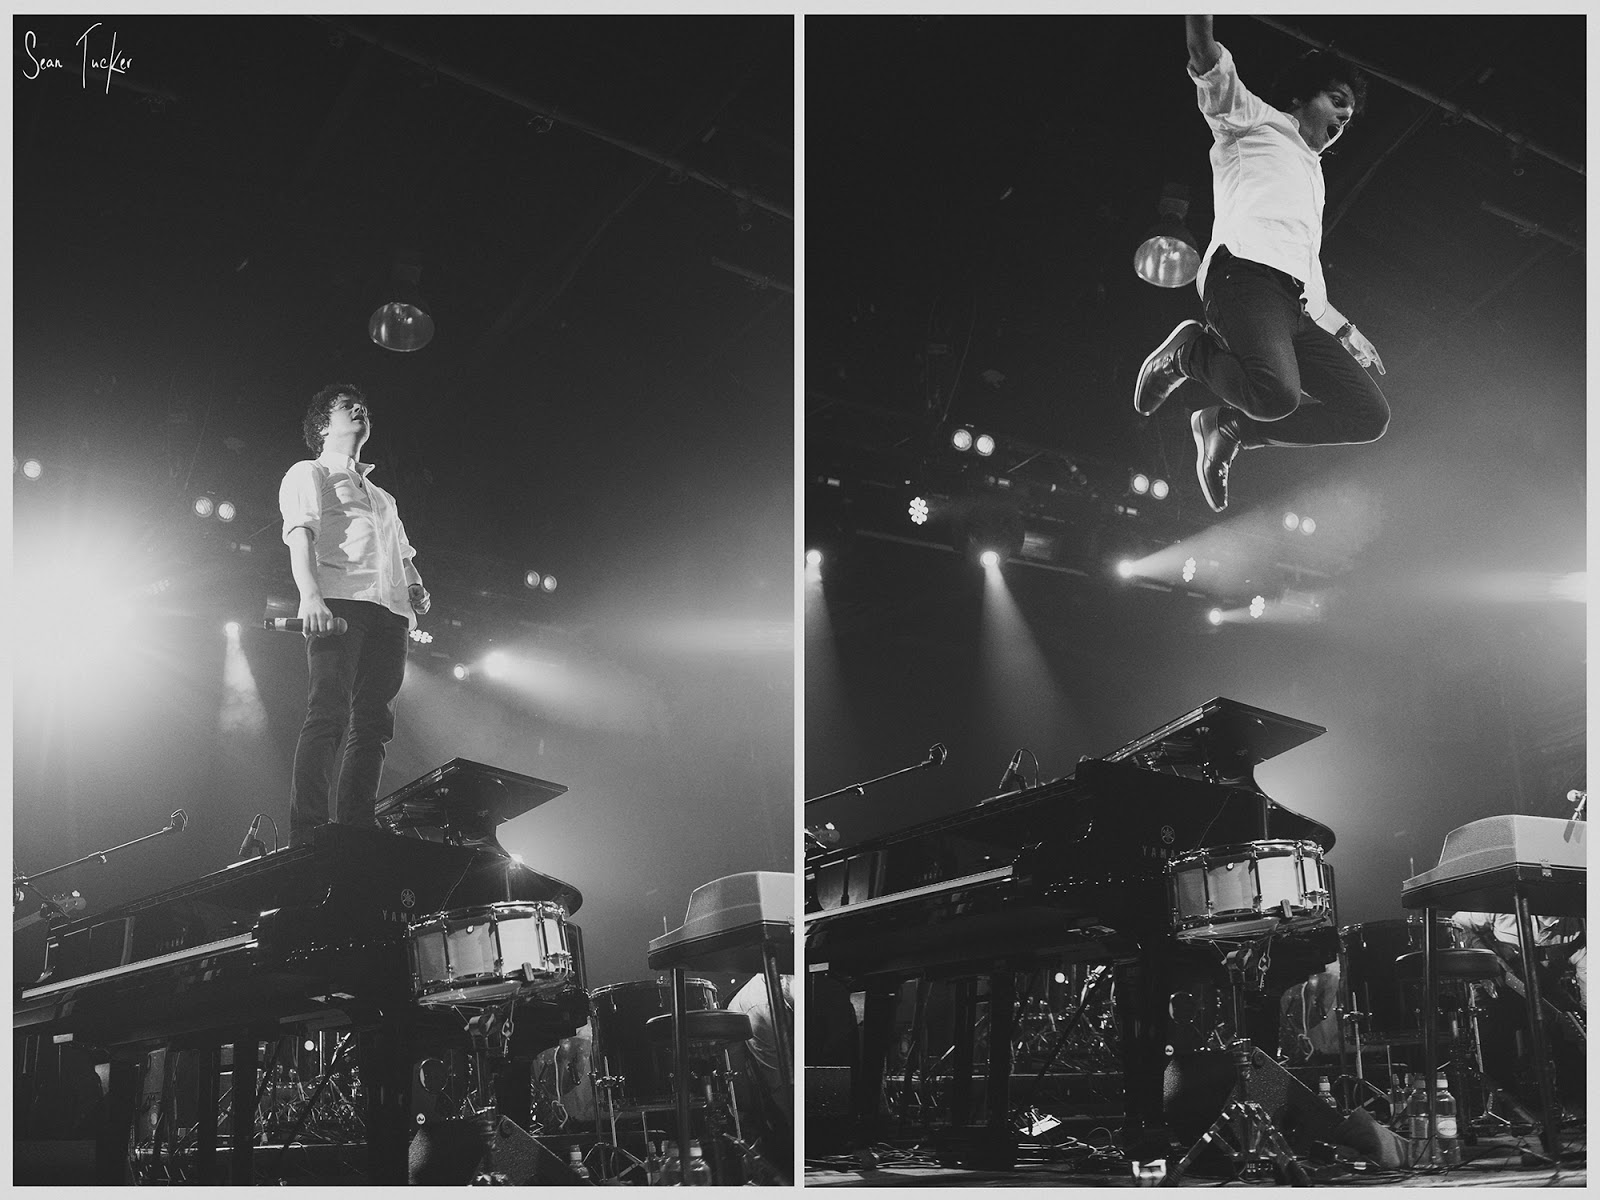
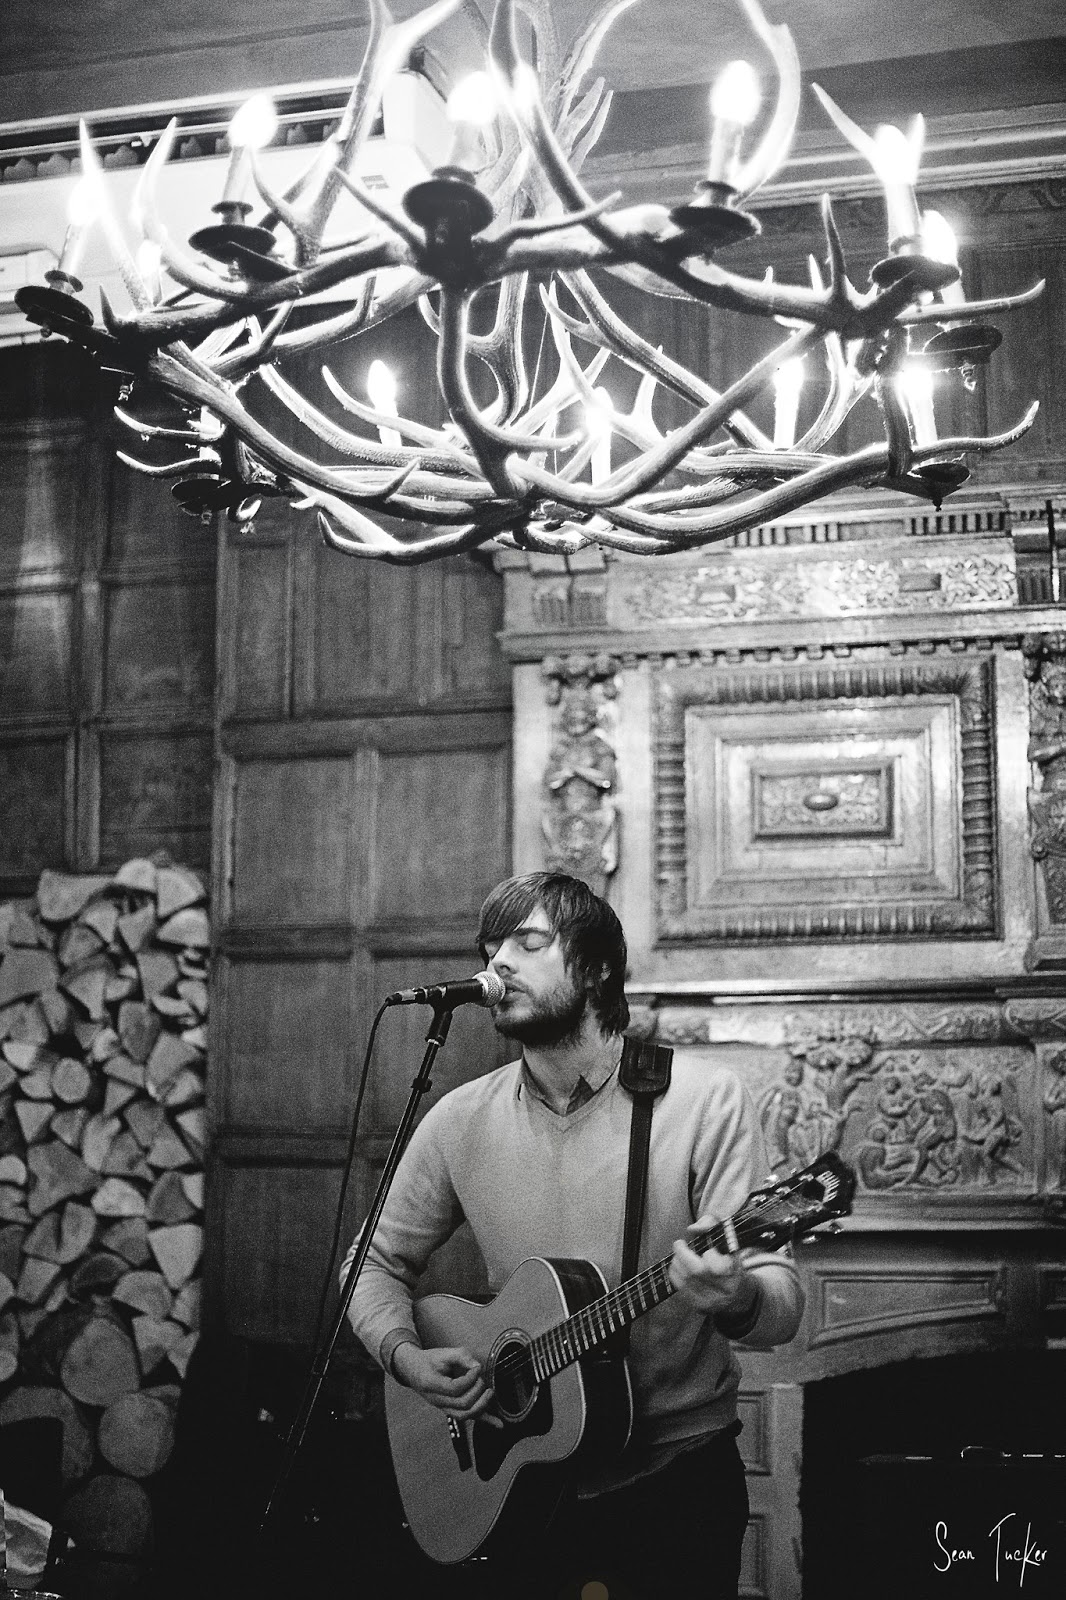
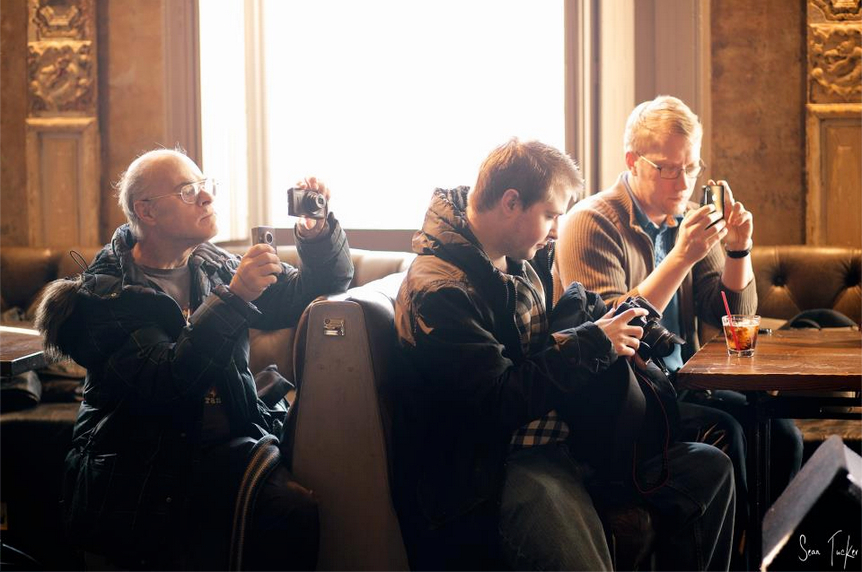
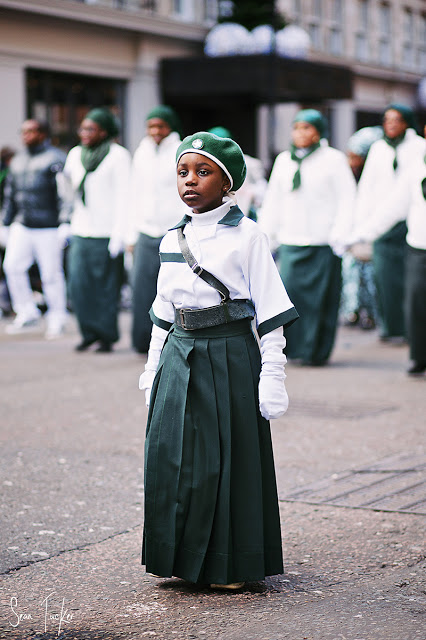
Here are some of the shots:

35mm: Focal Length Series

So this is the challenge I have given myself: to head out on a series of Photomissions where I am only allowed to use one focal length per session. I will walk the same route each time; between Waterloo Station and Oxford Circus Underground and shoot using only one prime lens along the route to see what I can catch, and report back the experience and challenges of shooting with that particular focal length. I'm hoping to cover 24mm, 35mm, 50mm, and 85mm.

This time it's my

35mm f2 prime.

NOTE: I am shooting on a full frame camera. If you're shooting on a cropped sensor camera (APS-C sensor) then these comments will apply more to a 24mm prime.

It was a beautiful sunny afternoon when I set off from Waterloo, maybe a little too sunny. I was a bit early for the 'golden hour', which is only arriving about 7:30pm in the UK at the moment, but I decide to make the most of it anyway. 

The first thing I noticed, not having shot on this lens for while, is how wide true 35mm is. I was instantly faced with a problem when shooting on the street; if I wanted to capture subjects I would have to get right in their face to do it. I couldn't stand off at a distance and shoot without people noticing. I would have to make myself obvious. Some photographers are good at this, but I'm not one of them, yet. In fact it got me thinking at one point that good photographers are really half technique, and then half sheer balls to get themselves in a postion to get the interesting shots. I think I'm still too self conscious, which is something I have to work on.

So I ended up shooting more 'scenes' than 'subjects', which is maybe the point of this focal length.

I know many photojournalists swear by the 35mm focal length. They suggest that shooting an event with a long focal length, from across the street, will give your viewer a sense of separation from the action, because, perhaps subconciously, they know the shot was taken far from the action. If you chose to use a 35mm to capture the action there is no choice but to get in it's face, and you carry your viewer into the midst of the action with you.

What I did love about this focal length is the context it gives you. It allows you to place your subject in it's surroundings. I am most used to shooting portraits close up at 50mm or 85mm, which means that my background usually becomes insignficant bokeh, rather than meaningful context. I enjoyed getting the shots back home and looking around the corners of the image and seeing faces and details I didn't notice in the second I snapped the shutter. 

I was concerned that I would be stuck with a lot of image distortion with the extra width, but it really wasn't bad. I didn't end up correcting any of it, and 35mm seems to be the last prime on the way down to wide that gives you a relatively pleasing persective which isn't distracting.

The 35mm f2 I was using is one of the 'cheap plastic' primes from Canon, but I was really surprised by how sharp it was. It performed very well in different light conditions, and there was a lot of high contrast 'light and shade'. If you're thinking about rushing out and buying one I really would recommend it, but just note that you do have to 'baby' these lenses a bit to get them to last the years, because the build quality isn't that great, but if you're willing to love it, it will give you some great shots at a really affordable price.

This is a focal length I definitely want to play with more, although I will have to strap on a pair to do it well.

Challenge accepted.

Here are some more of the shots:

...and a selfie:)

Shooting at Big Gigs

I have followed Jamie Cullum's music since his 'Twenty Something' DVD  grabbed my attention, and then stayed on hard rotation in my DVD player for weeks on end back in 2004, much to the annoyance of my roommate at the time. He is one of the most talented musicians and dynamic entertainers out there today, in my humble opinion.

So when they advertised limited tickets for his pre-album launch show here in London, I immediately applied; and was lucky enough to be selected for a ticket in the second round.

I usually don't take my camera to big gigs, partly because of security issues, partly because I am unlikely to get good shots unless I wind up close to the stage, and partly because trying to shoot in those crowded situations can get in the way of enjoying the show.

But a few days before the gig Jamie's people sent out an email asking people to bring their cameras along because he wanted to film a crowd sourced video of one of his songs. The idea was that he would prompt the crowd to pull out cameras for a particular song and get them to film the entirety. Everyone would then head home after the gig and upload their footage to 45sound.com. The venue would upload their sound from the desk (likely post mixed) and fans could then view the song from a couple of hundred angles around the venue.

Great idea.

Mostly because it gave me an 'in' with my DSLR.

I arrived early to get a good spot in the front of the cue, but as we were being ushered through the security check point I was still pulled aside because I had a big camera bag on me. I found myself waiting in a pit off to the side, with a growing group of DSLR users, all pulling out our phones to show the 'Gig Nazis' the emails which had asked for us to bring cameras, all the while the rest of audience are streaming in ahead of us. I saw one guy head through with a Leica M9. I asked the security guy why he had let him go through and not me. He said, "Because he's only got a small camera. Yours is a professional one." He obviously had no clue what a Leica was and that it took much better pictures than mine. Got to get me one of those.

Eventually, after frantic conversations over walkie talkies, the 'misunderstanding' was cleared up and we were allowed into the venue with our gear.

The crowd had now filled up a 3rd of the room, but I managed to pull a sneaky maneuver via the arches and through the bar area to the left hand side of the stage. Why the left? The first thing I looked for when I walked into the room was to see which way his piano would be facing. Knowing I wouldn't be able to move around much, and that I would have to pick my angle from the start, I wanted to have a clear, over-the-shoulder-shot of his hands on the piano. The last thing I wanted was to be stuck on the opposite side of the piano and be shooting just the top of his head the whole night. 

So with some sneaky elbow work I made my way into the perfect position between his piano and his keyboard and was able to capture some great action. If there was a media pit that night, I would have been standing in it, so good was my position.

The other joy about big gigs like this is that the lighting does all the work for you. I could lock my settings into manual for most of the time and rely on the professional lighting rig to create some interesting mood changes. All I needed to be aware of was that I was never losing my exposure when the brightest lights hit his skin. Other than that I let the chips fall where they may. With gigs like this you can't be afraid of shadows, because you're not looking for even exposure of the whole scene. You're looking for good skin tone, and then you can allow the shadows to create mood and negative space.

I must admit that this is a once off for me. I don't enjoy shooting at big gigs, and unless you have a press pass it really isn't worth bringing your pro camera along to fight security and get frustrated over the shots you can't get because you can't move. Rather just enjoy the experience and forget that you're a photographer for a evening.

On this occasion I got lucky.

Here are some of the shots I got:

This is the video I shot from my prime location:

My view at the recent Jamie Cullum show at Heaven, Under the Arches in London. New album Momentum coming out very soon!

Respecting the Room

I love going to quiet, intimate gigs and listening to acoustic music by solid song writers. I'm really lucky here in London to know people who organise some amazing evenings on a regular basis where writers and performers of insane quality pedal their melodious wares.

I went through to one such gig at The Old Queens Head in Angel on a recent public holiday.

I'll be honest and say that I find shooting at these gigs quite challenging. It's often difficult to strike a balance between moving about and getting interesting shots, and making sure I am no distraction to the artists, or those enjoying the music. The fact is though that you have to move around because, at the end of the day, you are shooting the same individual, in the same sort of pose, against the same background. So you have to find ways to mix it up, whilst being respectful of everyone else in the room, and not making a nuisance of yourself.

I have made a few simple rules that I follow:

  1. DISCRETION: I don't move during a song. I find a spot during the applause break and stay there until the next one. This often means having a quick look around the room before the gig kicks off and picking a couple of angles I'd like to shoot from. I also make sure that if I stand in those spots which will give me the shots I want, that I'm not obstructing anyones view. I don't have the right to ruin someone else's experience of the gig, just because I have a camera in my hand.
  2. TIMING: Once I've chosen a spot for the song, I wait for a moment. I use the timing of the song, and the structure, to anticipate highlight moments where the artist will hit a high note or do something interesting with their instrument. Don't just fire continuously. I was at a gig recently where this guy was running around the room, standing in front of the patrons and blocking their view, whilst shooting away on burst mode with his camera which obviously made for a huge distraction. Don't do that! Respect the room. Your shots will also be better if you are deliberate about when you click the shutter, rather than just adopting the 'spray and pray' approach.
  3. APPRECIATION: I always make sure to enjoy the song. I feel personally like I am doing the artist a great disservice if I am just concentrating on the shots I'm taking rather than enjoying the moment they're creating, especially in an intimate venue. In that moment I attempt to be present and soak up what's going on. I came to listen to music, and shooting the musician is a bonus. I never want to end up going to gigs TO shoot musicians (unless it's a job). I am there to appreciate the work the artist has put in. I see too many photographers shooting gigs and I think to myself, "Wow, you missed that entire set because you were obsessively shooting and chimping." Be a fan first! I think it will come through in your images.

This particular day I shot everything with my 50mm and 85mm primes, and I tried to use the afternoon light coming in through the windows wherever possible. I often shoot in these venues at night so I was keen to have these photos stand out from the rest by making the most of the sunlight coming in.

Here are a few of the shots I took. I have added links to the artist's web pages below the images. Be sure to look them up. They are all very good at what they do.

(Some of you may recognise the second shot is a Bokeh Panorama made up of 12 stitched shots.)

Antonio Lulic and John Parker

www.antoniolulic.com

Russell Swallow

www.russellswallowandthewolf.co.uk

...and for a giggle, this was the impromptu media pit including the talented duo from Mid Tea Sessions. A very respectful group of photographers who shoot music professionally:

Mid Tea Sessions

midtea.com

Bokeh Panorama

...also known as "The Brenizer Method" because this technique has been popularized by New York Wedding Photographer, Ryan Brenizer.

The idea behind the shot comes from a creative bit of problem solving. The question which needs answering is "How do I build a shallow depth of field (lots of focus blur) into a wide angle shot"? As you will probably know, when you shoot with a wide angle, everything is usually in focus. When you shoot at a longer focal length your background compresses, and you get a pleasing blur, or 'Bokeh', which serves to really separate your subject from it's surroundings.

So how do I build 'long focal length blur' into a 'wide angle shot'?

Well the answer is, "Shoot your scene by stitching together a series of images shot with a longer focal length, and low aperture, to make up your wide angle." This way you can create a shot with plenty of context, but your subject will now 'pop' off the out-of-focus background.

There are many techniques for this shot, but personally I usually use my 85mm f1.8, because I want both a lens which will compress the background, and has a low potential aperture (sub f2).

You need to start by composing the scene in your head. You obviously won't be able to do this through the lens as you normally would, so you need to imagine the borders of your shot. The trick then is to shoot in such a way that you piece together your total shot one frame at a time. It's vital to keep a track of the areas you've covered, which means you always have to have the big picture in your minds eye. Some people shoot in a spiral out from their subject. Some people shoot in a grid. You'll have to find the technique which works for you, but it's important that you cover all the areas of the total image otherwise you will have 'holes' in your final stitch which you'll have to deal with in post.

When you are ready to shoot you need to make sure all your settings are manual so they don't change from shot to shot. Remember you are shooting pieces of a whole image, not individual shots. Here's a check list to get yourself ready for the shot:

  1. Put your camera in Manual mode.
  2. Select the appropriate ISO depending on the ambient light.
  3. Set your aperture as low as your lens will allow so that your depth of field will be as shallow as possible.
  4. Dial in your shutter speed until you have the right amount of light for your subject. If you are shooting a person make sure the skin is exposed correctly.
  5. Set your white balance.
  6. Then focus your lens on the subject and click your focus to manual (you don't want your lens refocusing between shots).
  7. Plant your feet firmly and burn that final image into your mind.

Then build your shot one image at a time. I begin with the head and torso of my subject, then the legs, and then I begin to fill in the scene around him/her by shooting a spiral outwards from the body on all sides.

Here is a recent Bokeh Pano I shot with a French Model in Bermondsey:

And these are the raw shots out of the camera which went into making it up:

The number of shots you need to take will vary depending on the setting. I have shot some with 8-9 frames, and then some with 60+ frames, which was quite an ask for my version of Photoshop Elements to stitch together. You will also notice that I am making sure to create some overlap between the shots so as to ensure I have no holes in the final image.

After this I open up photoshop and run file/automate/photomerge, and then select all my images and let photoshop go to work. Sometimes it does a great job, sometimes there is some work which needs to be done afterwards to fix areas where the stitching hasn't worked.

A quick tip: if you are shooting a series of these Brenizer shots, just shoot a black frame (with your hand over the lens) between each set so that you can easily identify the first shot of each batch when you come to the editing stage.

This technique really allows for a quality image. Due to the combined resolution of all the shots you've used, you could blow this image up to the size of a billboard if you wanted to. Not to mention the fact that no lens in the world could actually get this shot, because it would have to be a 15mm f0.4 or something like that; and they don't exist... yet.

Get out there and give it a go!

Here are a few examples of other recent Bokeh Panos I've shot:    

To end off, here is Ryan Brenizer himself speaking about the technique and demonstrating its use:

Model Mayhem and 'TFP assignments'

A couple of months ago I signed up to 'Model Mayhem', on the recommendation of another photographer.

'Model Mayhem' is an online collective for models, actors, photographers, make-up artists, designers and stylists. The idea, as far as I can tell, is to create a community where you can work together on projects; some paid, some free.

After posting my profile as a local London photographer I quickly began to get requests for 'TFP assignments', something which is very popular on these sort of sites. I had never heard the phrase, but let me fill you in briefly on what I've learnt, because if you're looking to shoot in this space it is something you are going to have to become familiar with.

Wikipedia says:

"'Time for Print', or 'TFP', is a term used in many online photography communities describing an arrangement between a model and a photographer, whereby the photographer agrees to provide the model with an agreed number of pictures of the best photographs from the session and a limited license to use those pictures in return for the model's time. There are benefits to both parties of such an arrangement: the model can build a portfolio of prints to show to prospective clients at little or no cost, while the photographer gets a model for a particular project with little if any outlay of cash."

The specific terms of the TFP agreement have to be decided before the actual shoot. This includes things like how many shots you will deliver, how long it will take you to edit and handover, where the images can be published etc. It is worth spelling this stuff out in an email when you begin to talk about the shoot so there is no confusion later, and both parties know what they're getting into.

Beyond the specifics, I agree to do these TFP assignments on a few of conditions:

  1. That the model has a concept which will result in shots that will enhance my portfolio. The time and effort spent has to benefit both of us, and considering I will be spending many more hours editing the images I need to ensure that it is time well spent.
  2. I don't limit the use of the shots I hand over, because I believe that generosity will come back to you in the end. My only stipulation is that if the shots are sold at any point that I would receive 50% of the fee.
  3. I also ask models to do practical things like always crediting me, including a website link, when they post the shots online, as well as 'liking' my Facebook fanpage and generally helping me get the word out there.

My Model Mayhem profile is here is you want an example of the environment: http://www.modelmayhem.com/2929596

Here are some shots from a recent TFP assignment I did with Cecilia from Paris: http://www.modelmayhem.com/714751.

She was staying in a very swanky flat in Bermondsey for the week, and so we met up and shot in the streets around the apartment. We didn't have very long together, and unfortunately I had no specific brief, but I was able to deliver the 10 shots I promised, and I ended up using a couple to broaden my fledgling headshot portfolio.

I always set myself the goal of editing one image an evening in the days following the shoot; that way the model waits no longer than 2 weeks for the final images to be delivered. I want the people I shoot with to remember me as being timeous and professional, as well as able to make a good image.

On a related note: I found this 'open letter from a model to photographers'. Definitely worth a read: http://jenbrookmodel.tumblr.com/post/45762723033/dear-photographer-kindest-regards-model-xxx

Shooting on Brief

I mentioned in a recent post that Brooke contacted me to do a shoot with her. She had quite a strong vision for what she wanted to accomplish. In her words, she wanted a "Lolita" feel to the shoot. I haven't seen the movie myself but, between a quick google image search, and reference shots Brooke sent me via email, I quickly had a decent mood board full of shot ideas.

What a pleasure.

It meant that I wouldn't have to pull every shot out of thin air on the day, with an expectant subject looking at me, waiting for visual inspiration to strike. She had done the work for me. She knew her look, and she understood what she wanted. It was then just left for me to interpret it and make the technical choices to get the shots she was looking for. I know this won't happen every time, or even very often, but it showed me how much better a shoot can be when shooting for a client with a clear vision.

On a practical level I obviously wanted this reference material with me on the shoot.

Pinterest turned out to be a ready solution.

The week before I set up and shared a Pinterest board with Brooke where we could both pin images to use as a guide on the day. I downloaded the app to my phone which meant that I could pull up the different images we had pinned as we were shooting to use as inspiration, and to ensure we were getting the kind of shots we agreed on. It was like having a portable mood board.

Perhaps embarrassingly, this is the first time I've shot like this (with this much planning and purpose I mean), and it made for a much less stressful, and more productive, shoot. I often have those quiet moments of inner panic where I am trying to work out what the hell to shoot next, and what the client will think of my next crazy shot idea; but using this method I had all that covered before I even arrived.

Not only this, but Brooke could see exactly what we were aiming for as we were setting up for the next shot, and she could instantly know how to pose and hold herself, rather than me having some secret vision I was slowly trying to direct her towards. It really greased the wheels and meant we got all these shots done (and more besides) in under an hour.

I am hoping to make this part of my work flow for all briefed shoots in the future.

It really works.

For the technical stuff; these shots were all taken with my 5DmkII and either my 50mm f1.4 or 85mm f1.8 lenses. The only additional light used was a large reflector with mixed silver and gold to bounce the sunlight back in as fill. Shot 3 is a Bokeh Panorama, which I will get to explaining in a post soon.

Personal Attention

I was recently contacted by a local up-and-coming actress named Brooke Burfitt.

She was interested in getting some headshots done for her portfolio. I didn't realise it, but actors and actresses need headshots done at least every two years, even more if their look changes regularly, because casting agents are looking for a bang-up-to-date representation when trying to fit potentials into a role. I suppose this is obvious, but it hadn't occurred to me that there may actually be a big market here.

Anyway, as we were setting up on the day Brooke was talking about her experiences with headshot photographers in the past, and how they made her feel like 'just another piece in a production line'. She would arrive at a studio and be given an hour, sandwiched between a slew of other performers. She told me how it didn't feel special, and that after hair and make up she only had about 20 minutes with the photographer, who then smashed out a few shot options in record time, charged her £200 for the hour, and only provided one final shot for the pleasure. Every additional shot she wanted needed to be purchased at a per-shot rate.

As I was fighting to open my old reflector with the broken zip, I made a mental note to ensure that this would be a good experience for her.

The location was a challenge. We were shooting in her friend's small bedroom, which had little natural light, but I had to work with what I had. Time to be resourceful. Whilst ordinarily I would have traded the locational difficulties for a professional studio and gear, I did like the fact that I could give her some dedicated time, and make her feel special, and not just like another item on a conveyor belt of would-be stars.

We had spoken briefly online before hand and she had told me she was looking for something feminine, sweet and virginal. I already had pastel tones in mind, and when I looked around the room I noticed it had an interesting green wall paper, which I thought may make a nice headshot background, and some nice pink bedding on the double bed.

The techy stuff:

Headshots: I ended up using my 50mm prime, shooting fairly close (not that I had an option). I used a speedlight in a softbox, on a monopod, held overhead by an assistant. I added a small handheld reflector just under her chest to give a nice catch light in the eyes. Pretty traditional clamshell setup.

Bedshots: I ended up exposing for the window light and then using a speedlight to fill from the other side by bouncing it off the ceiling from off camera. Even though I knew I would be fighting 3 colours of light in post I decided to turn the bedside lamps on to warm up the scene. I think it worked out quite nicely in the end.

The most important part of the shoot for me was that she had fun. We were there for a few hours (more outdoor shots from this shoot to follow) and we were able to take out real time and make her feel like this was 'her' shoot. I hope that even if I become a big shot I will always be able to build in real time with clients and make them feel valued. I never want people to feel like they are being pushed through Sean Tucker's Production Line.

Personal attention needs to become a value.

Move!

Recently I took a day long bus trip to Stonehenge and Bath.

I assumed shooting at Stonehenge would be really easy. I mean these are iconic stones which are instantly recognisable around the world. But it turns out that shooting them in a way which is interesting is quiet hard when pressed in with the crowds of tourists.

For starters, you can't actually approach the stones any more. They are roped off from the public, who are confined to a circular foot path which you can use to walk past the stones. The issue immediately was that the rope in front of the stones was jammed with people getting their friends to take shots of themselves on ipads and mobile phones with the stones in the background.

I have a quiet giggle at these shots because they seem little more than 'proof that you were there', like holding a newspaper in a ransom photo. There must be millions of albums out there with just a string of shots of happy holiday makers standing slightly awkwardly in front of the usual list of landmarks. Needless to say that it didn't really make for a great foreground when trying to capture the sense of this ancient place.

So the best vantage point was blocked, and wasn't about to clear up.

So I had to walk around a bit, even traipsing through some mud, but I eventually found a few vantage points away from the hoards to shoot. It seems a simple a lesson but it's one I've come back to again and again: MOVE.

If you're getting stuck, if you feel yourself getting frustrated with your shots and it's just not working: MOVE.

I pushed my headphones in my ears, pumped up some Justin Timberlake, and then just began to walk around. I didn't shoot at first. I knew I had 20 minutes or so, so initially I just walked around and changed the angle. As I did that possibilities began to present themselves and shots opened up. I was on my 5DmkII with my 24-105mm f4 lens on, which gave me maximum flexibility. I needed to be able to frame quickly and precisely with the zoom in order to compose. The old "use your legs as your zoom" adage touted by 'prime purists', isn't always possible.

So here are a few of the shots I managed to get.

Remember, if you're getting stuck, don't give up: MOVE.

Shooting Models

I have been trying to build a portrait portfolio.

If you want to make a real go of a career in photography, you have to pick a lane at some point. You have to decide what sort of photography you want to specialise in long term. It's all very well broadening your skill base and being able to shoot many subjects and in varying contexts, but at some point you want to specialise because it's how you 'get known'.

So to this end I have decided that I would like to work hard at becoming a good portrait photographer. Being a bit of a humanist at heart this seems to be the area I am most happy shooting in, and one I could see myself doing into the distant future.

In order to start building up a portfolio of work I decided to contact a friend of a friend who I knew was keen to dip her toe into modelling. I offered her a shoot with images we could both use for our respective portfolios, an old TFP (Time for Photos) model arrangement (something I will get into in another post).

I was really lucky with this shoot. Lauren was a star. In fact she lulled me into a false sense of security because I think I thought that it would be this easy all the time. She just knew what to do. Every time she heard the shutter click she would alter her pose to give me something different to shoot. As I clicked away I would wait until something she did looked interesting, at which point I would tell her 'stay there, and make smaller moves'. I would give fine tuning directions more than anything.

I have no doubt it won't be this easy with every model shoot, and some will need more direction, which I am going to have to learn how to give, but I got a glimpse into what makes a professional model so good at their job. They really have to be fearless and give you poses which look ridiculous when you're standing there watching them, but which translate into something beautiful on camera. It's a strange dynamic. It takes a huge amount of personal security, and body knowledge, on their part as well, and I instantly acquired a respect for their craft.

Another really helpful aspect of this shoot was that Lauren's room mate is working with Vogue and offered to act as stylist for the day! She had prepared a number of outfit options which we cycled through as the day went on. Some I didn't use. Some I did. But what a pleasure having both the poses and styles constantly changing. If I had just stood in one spot and clicked the shutter, I would have had a wide variety of stuff.

So what was my role, apart from camera monkey?

The challenge for me was to chose the set ups. When we arrived at their flat I walked around and looked at the space, then took a tour around the little garden. I picked backgrounds which I thought would work for different looks, and quickly summed up the light to see where we could get the best looking shots, and at what time of the day. I also began to plan where to create an indoor backdrop (what turned out to be just a white wall, or a patterned sheet over a door frame) so that when we began to lose light outside we could move indoors and carry on.

I learnt a few things on this shoot:

1. Come up with a short list of shot ideas while you're doing your initial location tour.

2. A good model is a joy to shoot. Let him/her move and watch for what works. Then 'fine tune' when something she/he does catches your eye.

3. Having a number of changes of clothes and make up options helps to vary your shots, and inspire ideas. It also gives you time to come up with a new set up and test the light while your subject is getting ready. From now on I will always ask a model if they could bring at least four changes of clothes, and see if they would like to bring a friend who can help them with changes. I will likely get a lot more options and the model will be more relaxed with a close friend around.

I shot all day on my 5DmkII and switched between my 50mm f1.4 and my 85mm f1.8. I had recently bought a softbox for my speedlight, which I mounted on a monopod and had a friend hold for me, so most of the shots I took are just using the ambient light and filling with a softbox, or using the softbox as a one light source when shooting indoors.

I think we got some good stuff between us.

Some thanks:

Lauren Franklin for Modelling: http://laurenfranklinmodel.wordpress.com/

Frith Carlisle for Styling.

Sarah Howse for retouching on shots 1, 3, 4 and 5: http://sarahjhowse.wix.com/sarah-howse-editing

Find Your Angle

On New Years Day I went into London to shoot the Parade.

The streets were lined, 2 or 3 people deep from the curb, with on lookers from all around the world, wielding their own cameras. As the parade began to go by, and with a cursory glance at the LCD screens of the cameras around me, I realised that I was getting exactly the same shots as everyone else.

I had one of those moments of clarity where I realised that if I was just going to be replicating the shots everyone was getting that day, I genuinely didn't want to bother shooting at all. I'm not creating at that point, I'm merely doing a shoddy job of reporting.

Who cares if I have a full frame DSLR?

It would be difficult to pick my shots out of a line up from the images being grabbed by the happy-snap holiday makers with point-and-shoots all around me, unless I could find another way to shoot this parade.

I committed that if I couldn't find a better way to shoot this, or a different angle, then I would put my camera away, and head home. In fact, given the icy wind, it only took a couple of minutes of fighting the crowds and cold before I resolved to head back to the soup I had waiting for me on the stove.

I was walking back to the tube station and decided to take some back streets and avoid having to push my way through the mass of humanity crowding the road side along the parade route. I rounded a few corners and stumbled upon the prefect situation; I walked right into the staging area for the parade, and as luck would have it there was no security to stop me.

I stayed there for a good hour, walking among the floats and acts as they lined themselves up to join the throng on the main street. I was able to walk into the middle of the road and get down to eye level for some shots which, I knew, would be something more intimate than your average photographer was able to get further up the way. It was worth the walk, and made the whole mission worthwhile.

My 'take away' from the day was to always look for another angle. If I am shooting the same shots as everyone else, then I am not being creative enough.

It reminded me of a documentary I watched recently about 3 of the founders of MagnumRobert CapaDavid Seymour, and Henri Cartier-Bresson.

In their early adulthood they were in Paris during a series of protests, and as friends they decided to Photomission and cover the happenings. One of the commentators in the documentary spoke about how you could mix those photos up on a table and still be able to tell whose was whose. Capa loved strength and drama, choosing to shoot men with fists in the air. Seymour caught the softer side, capturing woman and children as they watched. Cartier-Bresson loved to find a new angle, an interesting composition.

Each found their own way of shooting the events; their own angle.

So...

Find another angle.

Find your take on what's happening.

Here are a few of the shots I captured: