Canon 85mm f1.8

85mm: Focal Length Series

So this is the challenge I have given myself: to head out on a series of Photomissions where I am only allowed to use one focal length per session. I will walk the same route each time; between Waterloo Station and Oxford Circus Underground, and shoot using only one prime lens along the route to see what I can catch, and report back the experience and challenges of shooting with that particular focal length. I'm hoping to cover 24mm, 35mm, 50mm, and 85mm.

This week it's the

85mm f1.8 prime.

NOTE: I am shooting on a full frame camera. If you're shooting on a cropped sensor camera (APS-C sensor) then these comments will apply more to a 50mm prime.

This is one of my favourite lenses at the moment.

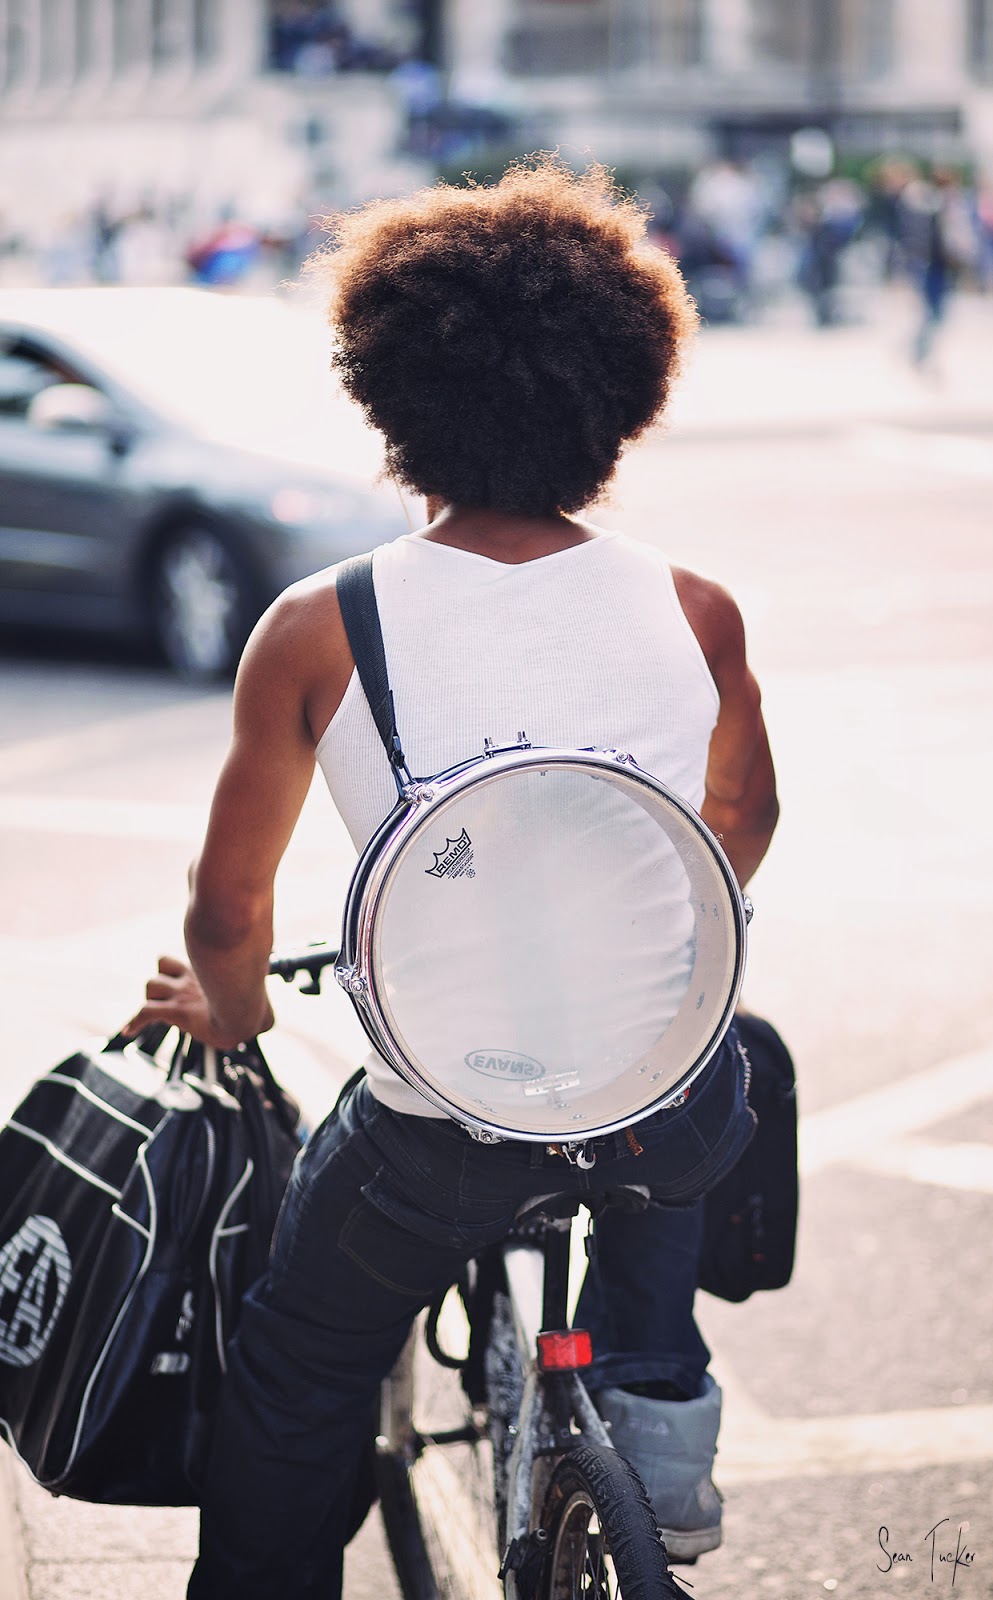
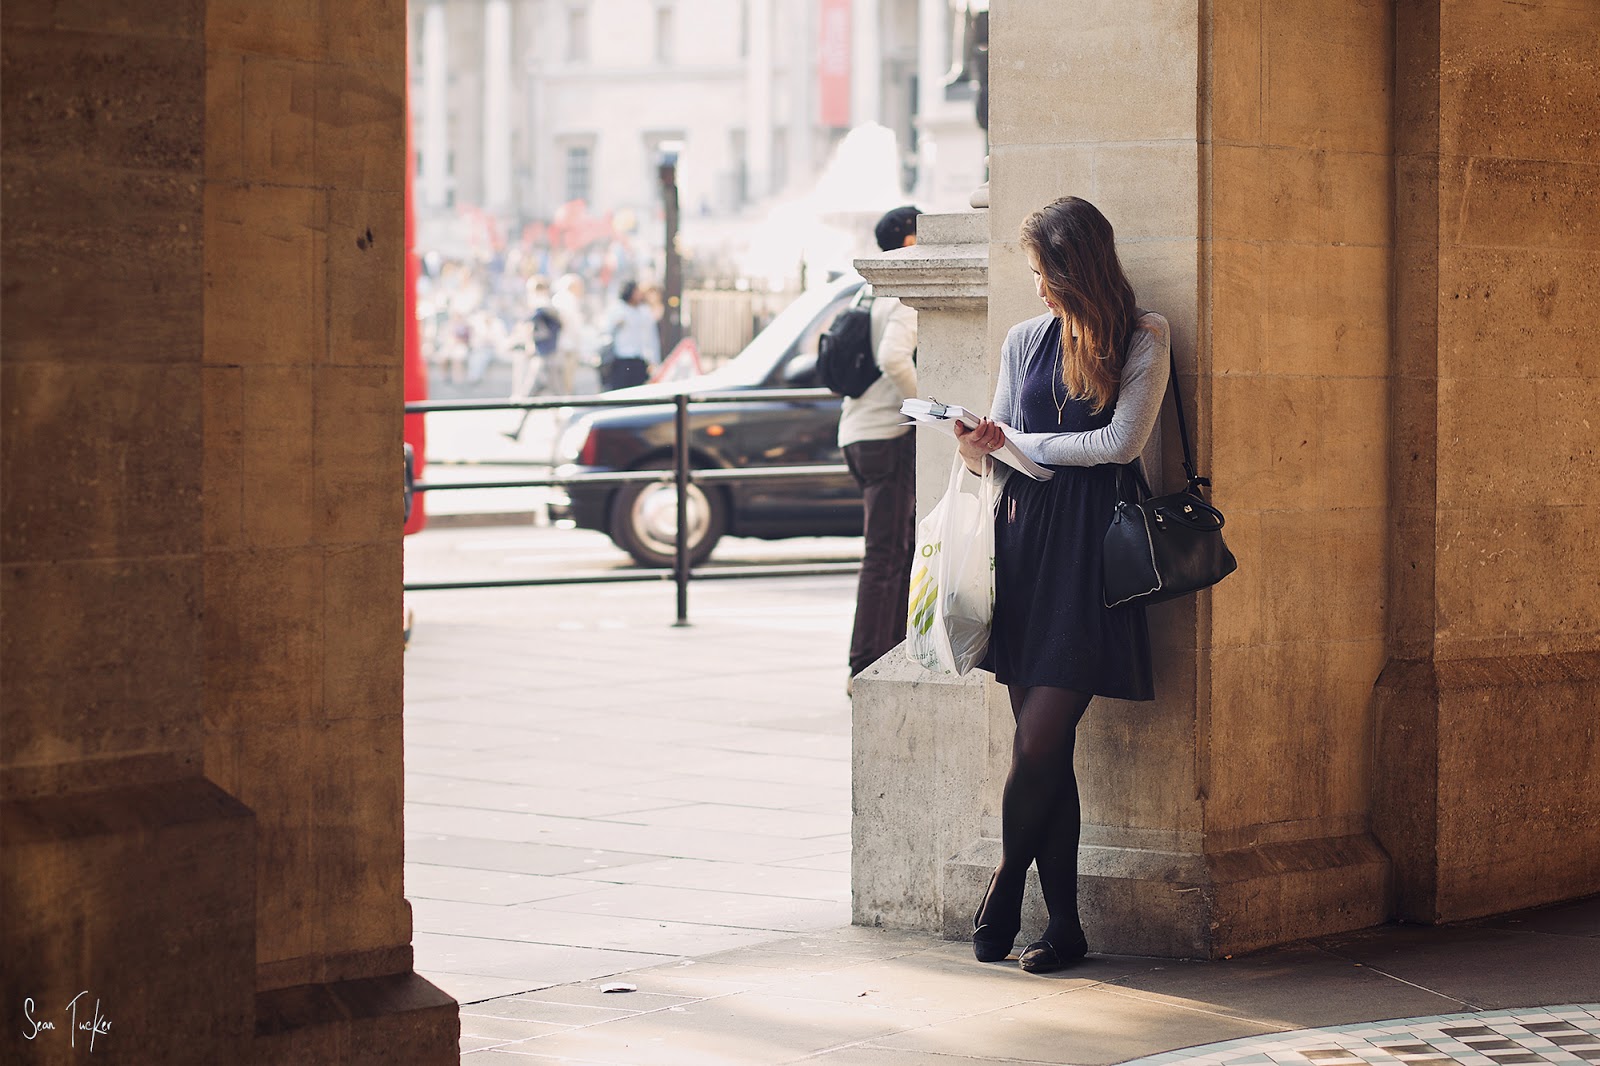
I use it a great deal in the portrait shoots I do and love the way it separates the subject from the background, with beautiful bokeh and compression. With this in mind I knew I would be looking for individual subjects, and that this lens would give me the ability to pull them out of their surroundings.

Walking out of Waterloo this time I had to immediately adjust my viewpoint. I had last shot this route on the 24mm and was now on the other end of the spectrum. I stopped in the station for a little while and looked around through the viewfinder so I could lock the focal length into my minds eye. No point in jamming the camera up to my eye every few seconds for shots I would never be able to get at this focal length. I needed to be walking around with that 85mm frame in my mind to know what was possible, and to react to the right things.

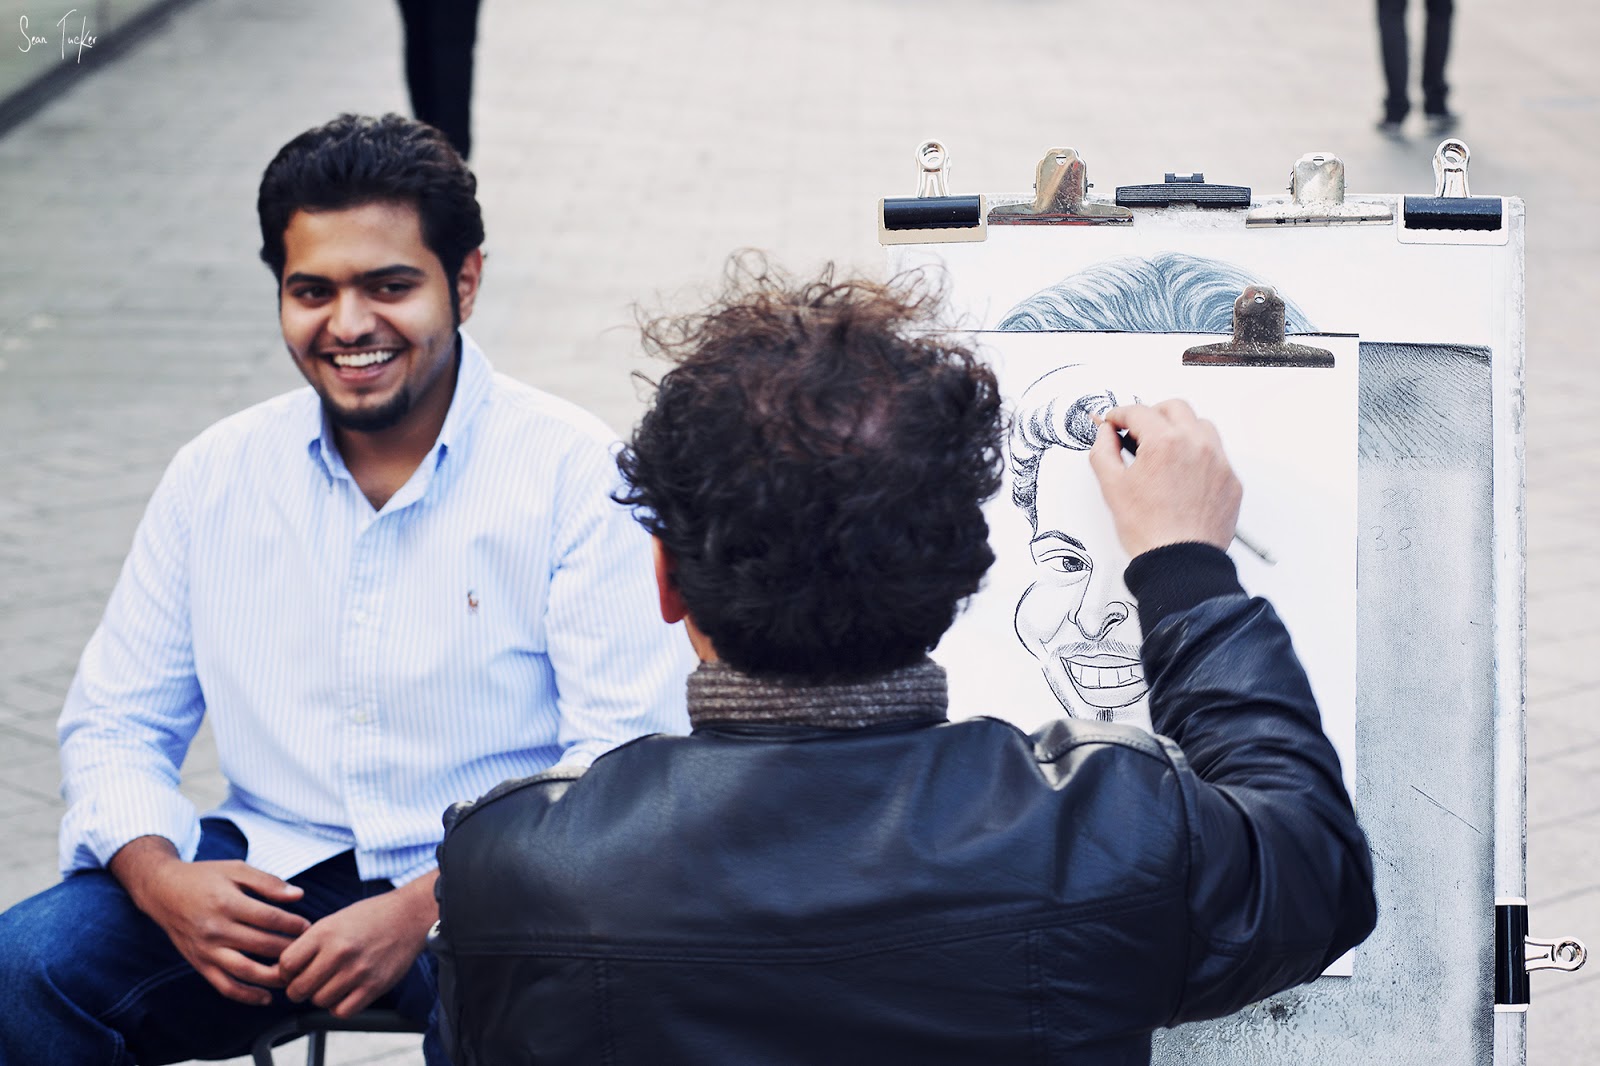
I headed out and began looking for interesting people doing interesting things. It's something I am learning a lot at the moment: I would rather take a bad photo of an interesting subject, than take a slick photo of a boring subject. Learning to find those moments, or create them, and then capture them is really more than half the photographers job. We all focus so much on gear and techniques, but too few of us work on creating or finding great subjects which compel. We also have to come to terms with the fact that some days you'll find those subjects, and some you won't, and the only way to 'up' your chances is with perseverance, or "Tenacity!!", as my Grandfather would yell when giving his secret to life and success.

With street photography, you have to invest time. Be patient. Stay out as long as you can.

The other great thing about this lens is it allowed me stand off at a distance more often, and grab unguarded moments without being detected and altering the scene. I know that sounds voyeuristic, but it really is the nature of street photography. The moment someone notices you they will 'pose' or 'run', and you will have lost the opportunity to catch a real moment with a real human being. It's the constant battle of the reportage photographer: how to capture human beings without changing them. I know the arguments about shooting wider and being closer, but this longer focal length does have the payoff of anonymity, and right now that suits my non-confrontational style of photography well.

This Canon 85mm f1.8 is a fantastic lens. I only bought it recently and could kick myself for not buying it sooner. It's super sharp, with beautiful Bokeh. As a portrait lens it really is one of the best affordable primes and will give you professional results every time. Well worth a look.

Here are some more of the shots I got:

Bokeh Panorama

...also known as "The Brenizer Method" because this technique has been popularized by New York Wedding Photographer, Ryan Brenizer.

The idea behind the shot comes from a creative bit of problem solving. The question which needs answering is "How do I build a shallow depth of field (lots of focus blur) into a wide angle shot"? As you will probably know, when you shoot with a wide angle, everything is usually in focus. When you shoot at a longer focal length your background compresses, and you get a pleasing blur, or 'Bokeh', which serves to really separate your subject from it's surroundings.

So how do I build 'long focal length blur' into a 'wide angle shot'?

Well the answer is, "Shoot your scene by stitching together a series of images shot with a longer focal length, and low aperture, to make up your wide angle." This way you can create a shot with plenty of context, but your subject will now 'pop' off the out-of-focus background.

There are many techniques for this shot, but personally I usually use my 85mm f1.8, because I want both a lens which will compress the background, and has a low potential aperture (sub f2).

You need to start by composing the scene in your head. You obviously won't be able to do this through the lens as you normally would, so you need to imagine the borders of your shot. The trick then is to shoot in such a way that you piece together your total shot one frame at a time. It's vital to keep a track of the areas you've covered, which means you always have to have the big picture in your minds eye. Some people shoot in a spiral out from their subject. Some people shoot in a grid. You'll have to find the technique which works for you, but it's important that you cover all the areas of the total image otherwise you will have 'holes' in your final stitch which you'll have to deal with in post.

When you are ready to shoot you need to make sure all your settings are manual so they don't change from shot to shot. Remember you are shooting pieces of a whole image, not individual shots. Here's a check list to get yourself ready for the shot:

  1. Put your camera in Manual mode.
  2. Select the appropriate ISO depending on the ambient light.
  3. Set your aperture as low as your lens will allow so that your depth of field will be as shallow as possible.
  4. Dial in your shutter speed until you have the right amount of light for your subject. If you are shooting a person make sure the skin is exposed correctly.
  5. Set your white balance.
  6. Then focus your lens on the subject and click your focus to manual (you don't want your lens refocusing between shots).
  7. Plant your feet firmly and burn that final image into your mind.

Then build your shot one image at a time. I begin with the head and torso of my subject, then the legs, and then I begin to fill in the scene around him/her by shooting a spiral outwards from the body on all sides.

Here is a recent Bokeh Pano I shot with a French Model in Bermondsey:

And these are the raw shots out of the camera which went into making it up:

The number of shots you need to take will vary depending on the setting. I have shot some with 8-9 frames, and then some with 60+ frames, which was quite an ask for my version of Photoshop Elements to stitch together. You will also notice that I am making sure to create some overlap between the shots so as to ensure I have no holes in the final image.

After this I open up photoshop and run file/automate/photomerge, and then select all my images and let photoshop go to work. Sometimes it does a great job, sometimes there is some work which needs to be done afterwards to fix areas where the stitching hasn't worked.

A quick tip: if you are shooting a series of these Brenizer shots, just shoot a black frame (with your hand over the lens) between each set so that you can easily identify the first shot of each batch when you come to the editing stage.

This technique really allows for a quality image. Due to the combined resolution of all the shots you've used, you could blow this image up to the size of a billboard if you wanted to. Not to mention the fact that no lens in the world could actually get this shot, because it would have to be a 15mm f0.4 or something like that; and they don't exist... yet.

Get out there and give it a go!

Here are a few examples of other recent Bokeh Panos I've shot:    

To end off, here is Ryan Brenizer himself speaking about the technique and demonstrating its use: