Bokeh Panorama
...also known as "The Brenizer Method" because this technique has been popularized by New York Wedding Photographer, Ryan Brenizer.
The idea behind the shot comes from a creative bit of problem solving. The question which needs answering is "How do I build a shallow depth of field (lots of focus blur) into a wide angle shot"? As you will probably know, when you shoot with a wide angle, everything is usually in focus. When you shoot at a longer focal length your background compresses, and you get a pleasing blur, or 'Bokeh', which serves to really separate your subject from it's surroundings.
So how do I build 'long focal length blur' into a 'wide angle shot'?
Well the answer is, "Shoot your scene by stitching together a series of images shot with a longer focal length, and low aperture, to make up your wide angle." This way you can create a shot with plenty of context, but your subject will now 'pop' off the out-of-focus background.
There are many techniques for this shot, but personally I usually use my 85mm f1.8, because I want both a lens which will compress the background, and has a low potential aperture (sub f2).
You need to start by composing the scene in your head. You obviously won't be able to do this through the lens as you normally would, so you need to imagine the borders of your shot. The trick then is to shoot in such a way that you piece together your total shot one frame at a time. It's vital to keep a track of the areas you've covered, which means you always have to have the big picture in your minds eye. Some people shoot in a spiral out from their subject. Some people shoot in a grid. You'll have to find the technique which works for you, but it's important that you cover all the areas of the total image otherwise you will have 'holes' in your final stitch which you'll have to deal with in post.
When you are ready to shoot you need to make sure all your settings are manual so they don't change from shot to shot. Remember you are shooting pieces of a whole image, not individual shots. Here's a check list to get yourself ready for the shot:
- Put your camera in Manual mode.
- Select the appropriate ISO depending on the ambient light.
- Set your aperture as low as your lens will allow so that your depth of field will be as shallow as possible.
- Dial in your shutter speed until you have the right amount of light for your subject. If you are shooting a person make sure the skin is exposed correctly.
- Set your white balance.
- Then focus your lens on the subject and click your focus to manual (you don't want your lens refocusing between shots).
- Plant your feet firmly and burn that final image into your mind.
Then build your shot one image at a time. I begin with the head and torso of my subject, then the legs, and then I begin to fill in the scene around him/her by shooting a spiral outwards from the body on all sides.
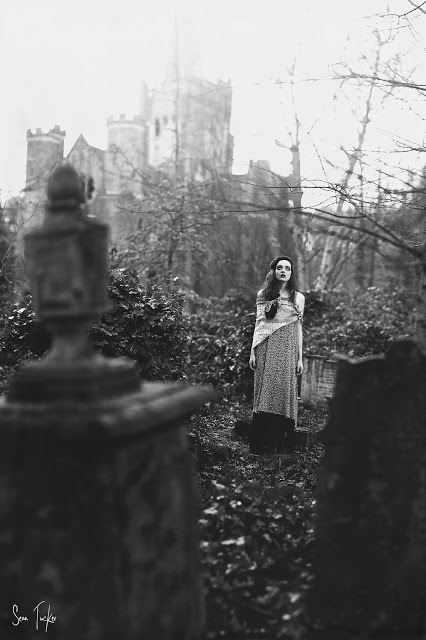
Here is a recent Bokeh Pano I shot with a French Model in Bermondsey:

And these are the raw shots out of the camera which went into making it up:

The number of shots you need to take will vary depending on the setting. I have shot some with 8-9 frames, and then some with 60+ frames, which was quite an ask for my version of Photoshop Elements to stitch together. You will also notice that I am making sure to create some overlap between the shots so as to ensure I have no holes in the final image.
After this I open up photoshop and run file/automate/photomerge, and then select all my images and let photoshop go to work. Sometimes it does a great job, sometimes there is some work which needs to be done afterwards to fix areas where the stitching hasn't worked.
A quick tip: if you are shooting a series of these Brenizer shots, just shoot a black frame (with your hand over the lens) between each set so that you can easily identify the first shot of each batch when you come to the editing stage.
This technique really allows for a quality image. Due to the combined resolution of all the shots you've used, you could blow this image up to the size of a billboard if you wanted to. Not to mention the fact that no lens in the world could actually get this shot, because it would have to be a 15mm f0.4 or something like that; and they don't exist... yet.
Get out there and give it a go!
Here are a few examples of other recent Bokeh Panos I've shot:


To end off, here is Ryan Brenizer himself speaking about the technique and demonstrating its use:
Personal Attention
I was recently contacted by a local up-and-coming actress named Brooke Burfitt.
She was interested in getting some headshots done for her portfolio. I didn't realise it, but actors and actresses need headshots done at least every two years, even more if their look changes regularly, because casting agents are looking for a bang-up-to-date representation when trying to fit potentials into a role. I suppose this is obvious, but it hadn't occurred to me that there may actually be a big market here.
Anyway, as we were setting up on the day Brooke was talking about her experiences with headshot photographers in the past, and how they made her feel like 'just another piece in a production line'. She would arrive at a studio and be given an hour, sandwiched between a slew of other performers. She told me how it didn't feel special, and that after hair and make up she only had about 20 minutes with the photographer, who then smashed out a few shot options in record time, charged her £200 for the hour, and only provided one final shot for the pleasure. Every additional shot she wanted needed to be purchased at a per-shot rate.
As I was fighting to open my old reflector with the broken zip, I made a mental note to ensure that this would be a good experience for her.
The location was a challenge. We were shooting in her friend's small bedroom, which had little natural light, but I had to work with what I had. Time to be resourceful. Whilst ordinarily I would have traded the locational difficulties for a professional studio and gear, I did like the fact that I could give her some dedicated time, and make her feel special, and not just like another item on a conveyor belt of would-be stars.
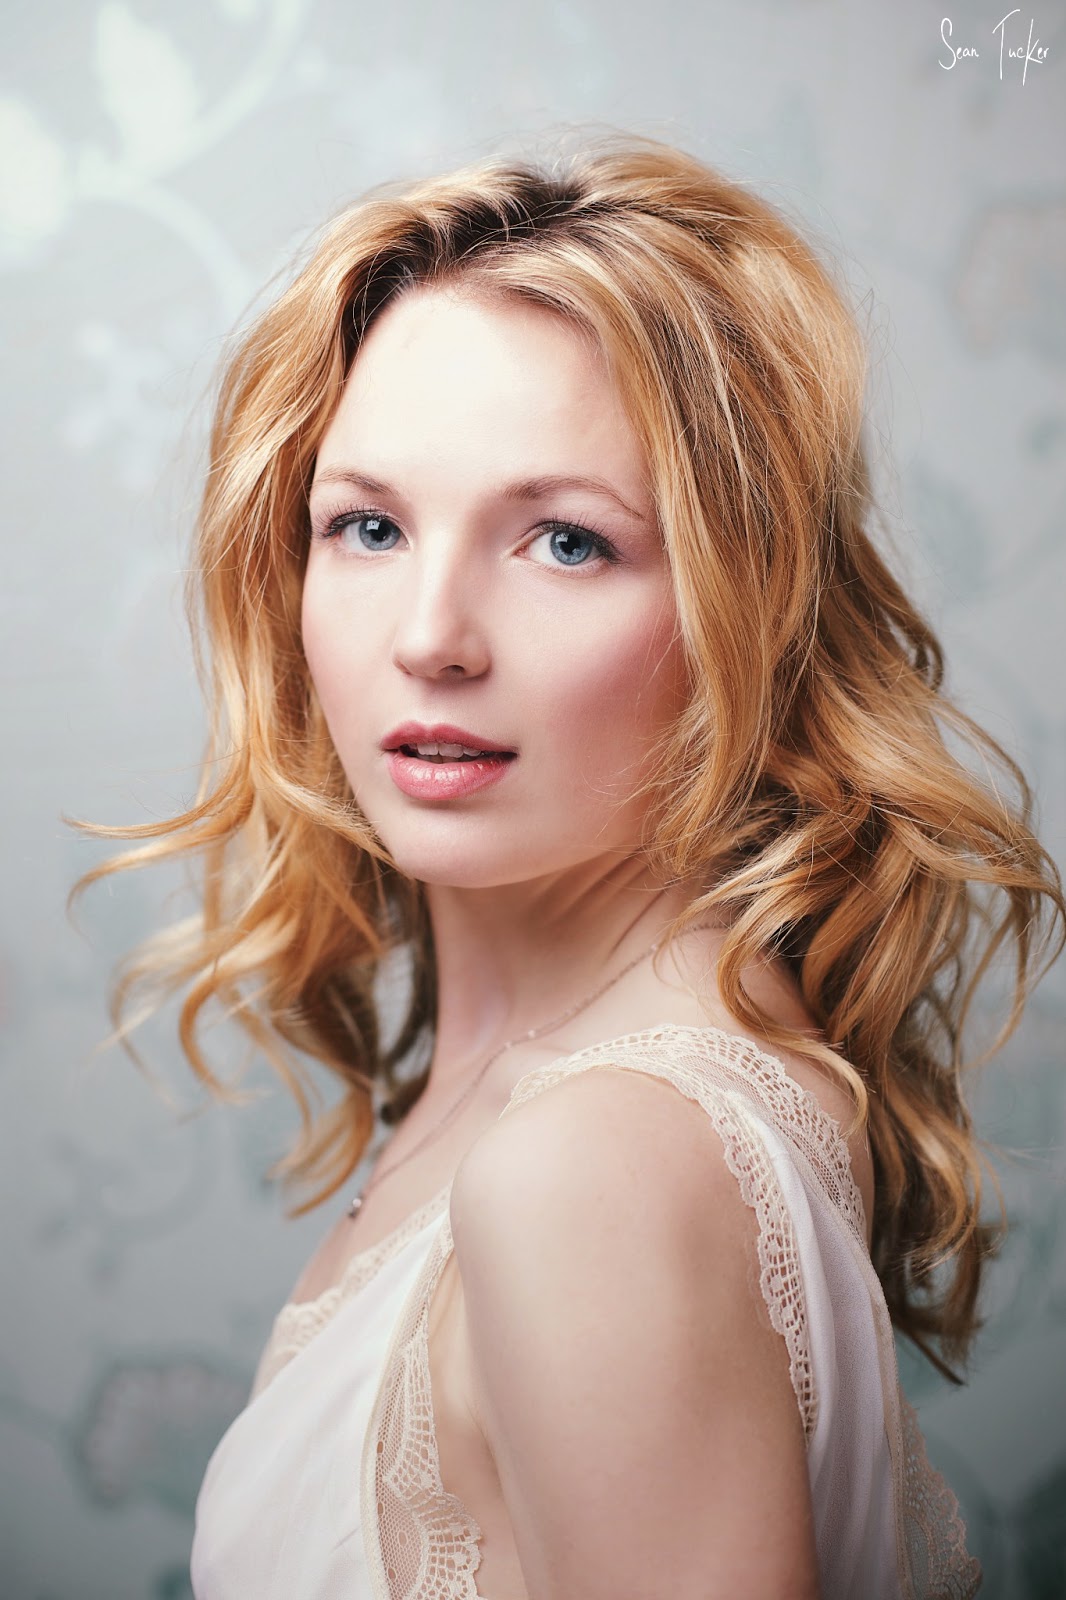
We had spoken briefly online before hand and she had told me she was looking for something feminine, sweet and virginal. I already had pastel tones in mind, and when I looked around the room I noticed it had an interesting green wall paper, which I thought may make a nice headshot background, and some nice pink bedding on the double bed.
The techy stuff:
Headshots: I ended up using my 50mm prime, shooting fairly close (not that I had an option). I used a speedlight in a softbox, on a monopod, held overhead by an assistant. I added a small handheld reflector just under her chest to give a nice catch light in the eyes. Pretty traditional clamshell setup.
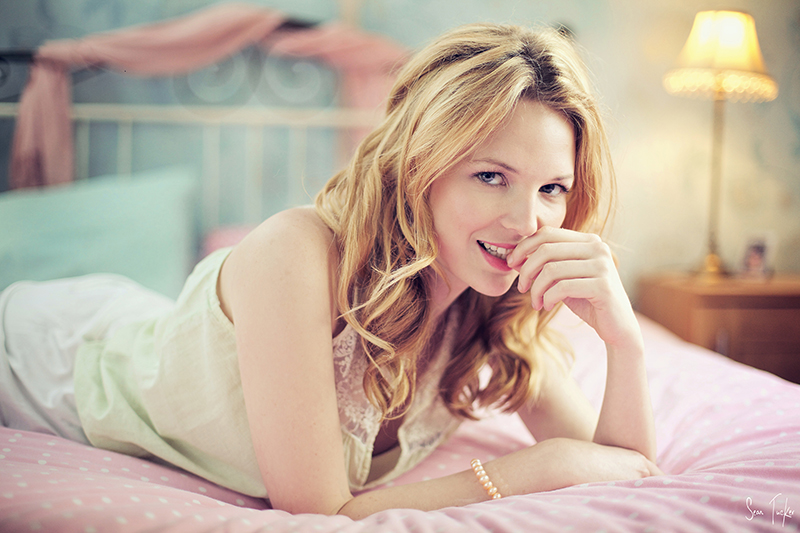
Bedshots: I ended up exposing for the window light and then using a speedlight to fill from the other side by bouncing it off the ceiling from off camera. Even though I knew I would be fighting 3 colours of light in post I decided to turn the bedside lamps on to warm up the scene. I think it worked out quite nicely in the end.
The most important part of the shoot for me was that she had fun. We were there for a few hours (more outdoor shots from this shoot to follow) and we were able to take out real time and make her feel like this was 'her' shoot. I hope that even if I become a big shot I will always be able to build in real time with clients and make them feel valued. I never want people to feel like they are being pushed through Sean Tucker's Production Line.
Personal attention needs to become a value.


Shooting Models
I have been trying to build a portrait portfolio.
If you want to make a real go of a career in photography, you have to pick a lane at some point. You have to decide what sort of photography you want to specialise in long term. It's all very well broadening your skill base and being able to shoot many subjects and in varying contexts, but at some point you want to specialise because it's how you 'get known'.
So to this end I have decided that I would like to work hard at becoming a good portrait photographer. Being a bit of a humanist at heart this seems to be the area I am most happy shooting in, and one I could see myself doing into the distant future.
In order to start building up a portfolio of work I decided to contact a friend of a friend who I knew was keen to dip her toe into modelling. I offered her a shoot with images we could both use for our respective portfolios, an old TFP (Time for Photos) model arrangement (something I will get into in another post).
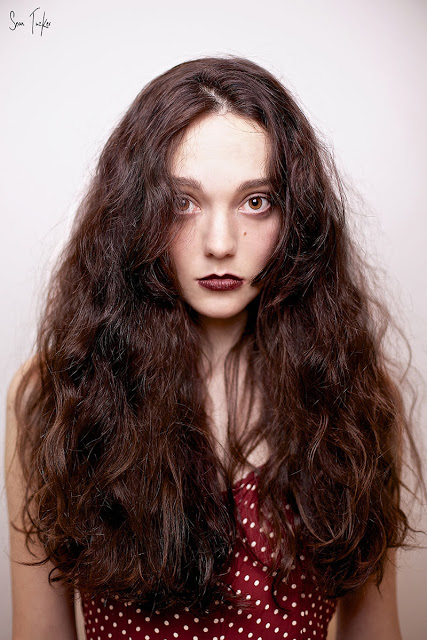
I was really lucky with this shoot. Lauren was a star. In fact she lulled me into a false sense of security because I think I thought that it would be this easy all the time. She just knew what to do. Every time she heard the shutter click she would alter her pose to give me something different to shoot. As I clicked away I would wait until something she did looked interesting, at which point I would tell her 'stay there, and make smaller moves'. I would give fine tuning directions more than anything.
I have no doubt it won't be this easy with every model shoot, and some will need more direction, which I am going to have to learn how to give, but I got a glimpse into what makes a professional model so good at their job. They really have to be fearless and give you poses which look ridiculous when you're standing there watching them, but which translate into something beautiful on camera. It's a strange dynamic. It takes a huge amount of personal security, and body knowledge, on their part as well, and I instantly acquired a respect for their craft.
Another really helpful aspect of this shoot was that Lauren's room mate is working with Vogue and offered to act as stylist for the day! She had prepared a number of outfit options which we cycled through as the day went on. Some I didn't use. Some I did. But what a pleasure having both the poses and styles constantly changing. If I had just stood in one spot and clicked the shutter, I would have had a wide variety of stuff.
So what was my role, apart from camera monkey?
The challenge for me was to chose the set ups. When we arrived at their flat I walked around and looked at the space, then took a tour around the little garden. I picked backgrounds which I thought would work for different looks, and quickly summed up the light to see where we could get the best looking shots, and at what time of the day. I also began to plan where to create an indoor backdrop (what turned out to be just a white wall, or a patterned sheet over a door frame) so that when we began to lose light outside we could move indoors and carry on.
I learnt a few things on this shoot:
1. Come up with a short list of shot ideas while you're doing your initial location tour.
2. A good model is a joy to shoot. Let him/her move and watch for what works. Then 'fine tune' when something she/he does catches your eye.
3. Having a number of changes of clothes and make up options helps to vary your shots, and inspire ideas. It also gives you time to come up with a new set up and test the light while your subject is getting ready. From now on I will always ask a model if they could bring at least four changes of clothes, and see if they would like to bring a friend who can help them with changes. I will likely get a lot more options and the model will be more relaxed with a close friend around.
I shot all day on my 5DmkII and switched between my 50mm f1.4 and my 85mm f1.8. I had recently bought a softbox for my speedlight, which I mounted on a monopod and had a friend hold for me, so most of the shots I took are just using the ambient light and filling with a softbox, or using the softbox as a one light source when shooting indoors.
I think we got some good stuff between us.
Some thanks:
Lauren Franklin for Modelling: http://laurenfranklinmodel.wordpress.com/
Frith Carlisle for Styling.
Sarah Howse for retouching on shots 1, 3, 4 and 5: http://sarahjhowse.wix.com/sarah-howse-editing


Wells Blog
Duis mollis, est non commodo luctus, nisi erat porttitor ligula, eget lacinia odio sem nec elit. Maecenas faucibus mollis interdum. Nulla vitae elit libero, a pharetra augue.