How to shoot portraits outside your culture (featuring The Himba)

I put out a video recently (https://www.youtube.com/watch?v=MSiZHcmflX4&t=241s) talking about how to start moving your photography career in a particular direction. I asked myself what sort of photography really spoke to me, and in my case it was pretty obvious.
It was people photography.
Portraits.
Especially portraits of people from different contexts and with different stories to my own.
My photography heroes are Steve McCurry, Sebastiao Salgado, Jimmy Nelson and Joey L for his work in Africa, India and Syria. I understand that it’s a different era now and that grabbing a job at National Geographic is not a realistic option. I also know that no one is coming to knock on my door to hire me for this sort of work just because I would love to do it. There are no favours in this industry.
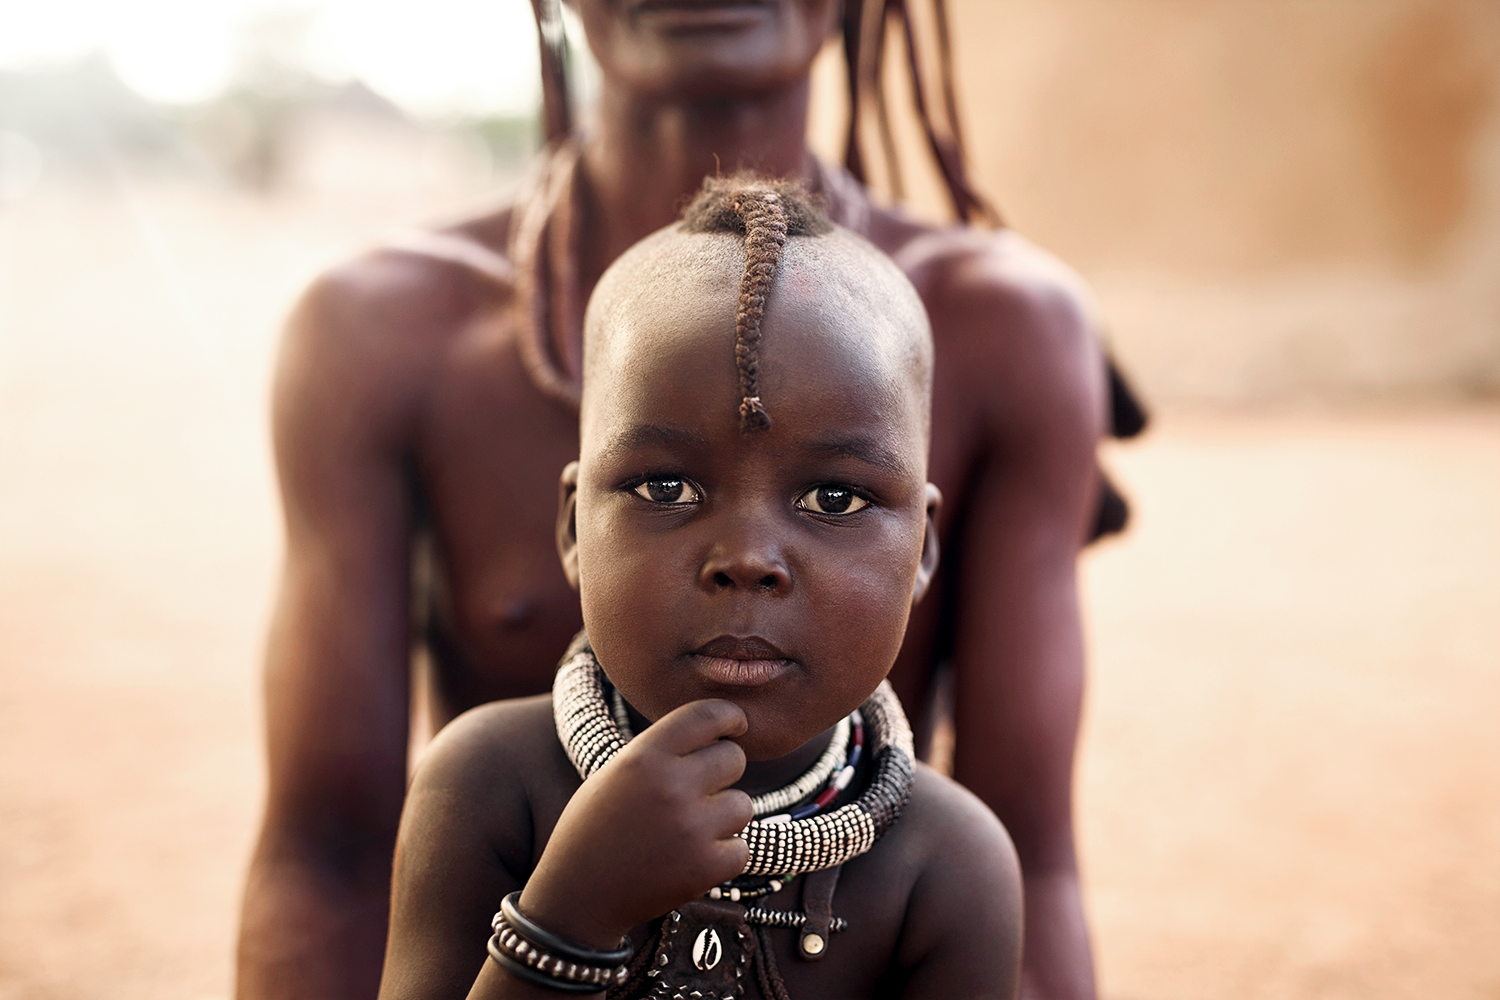
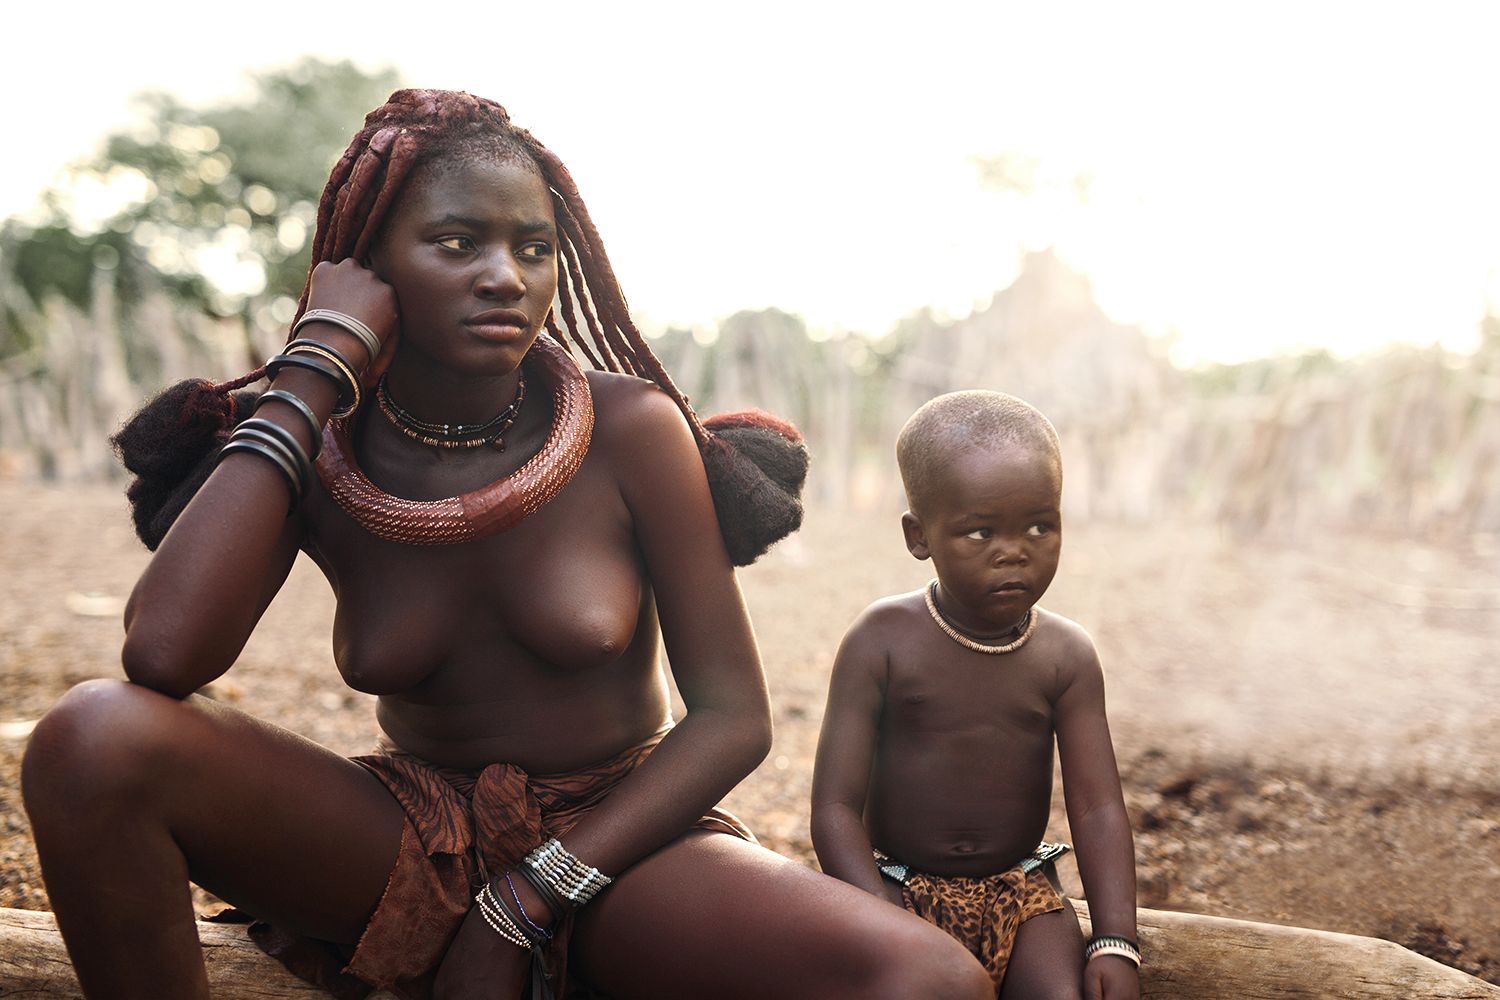
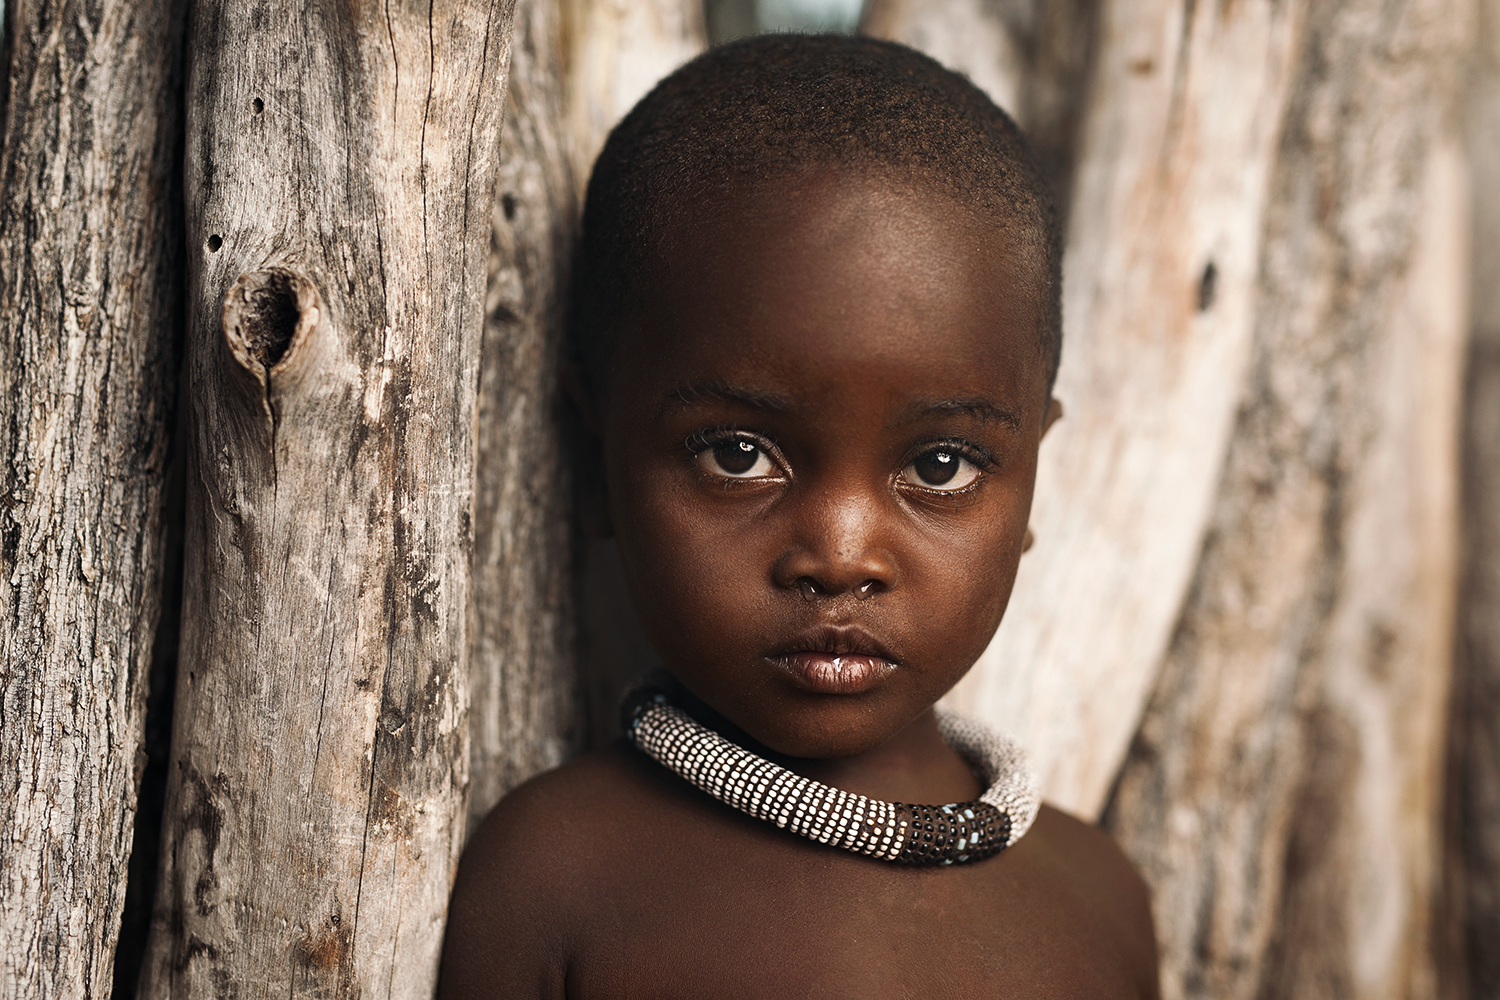
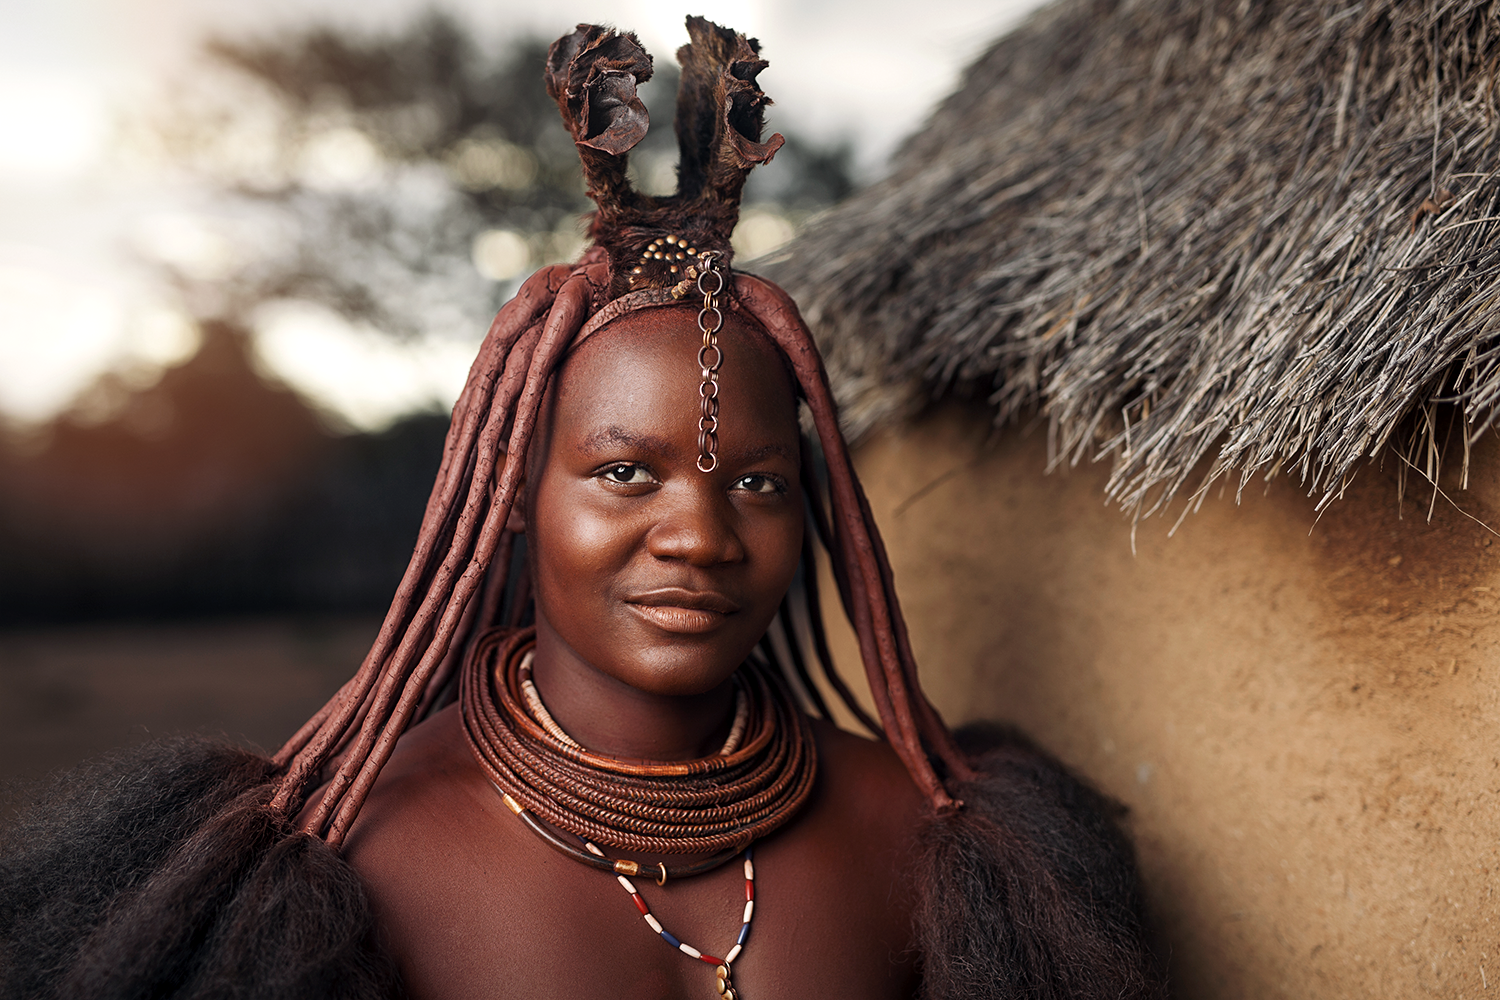
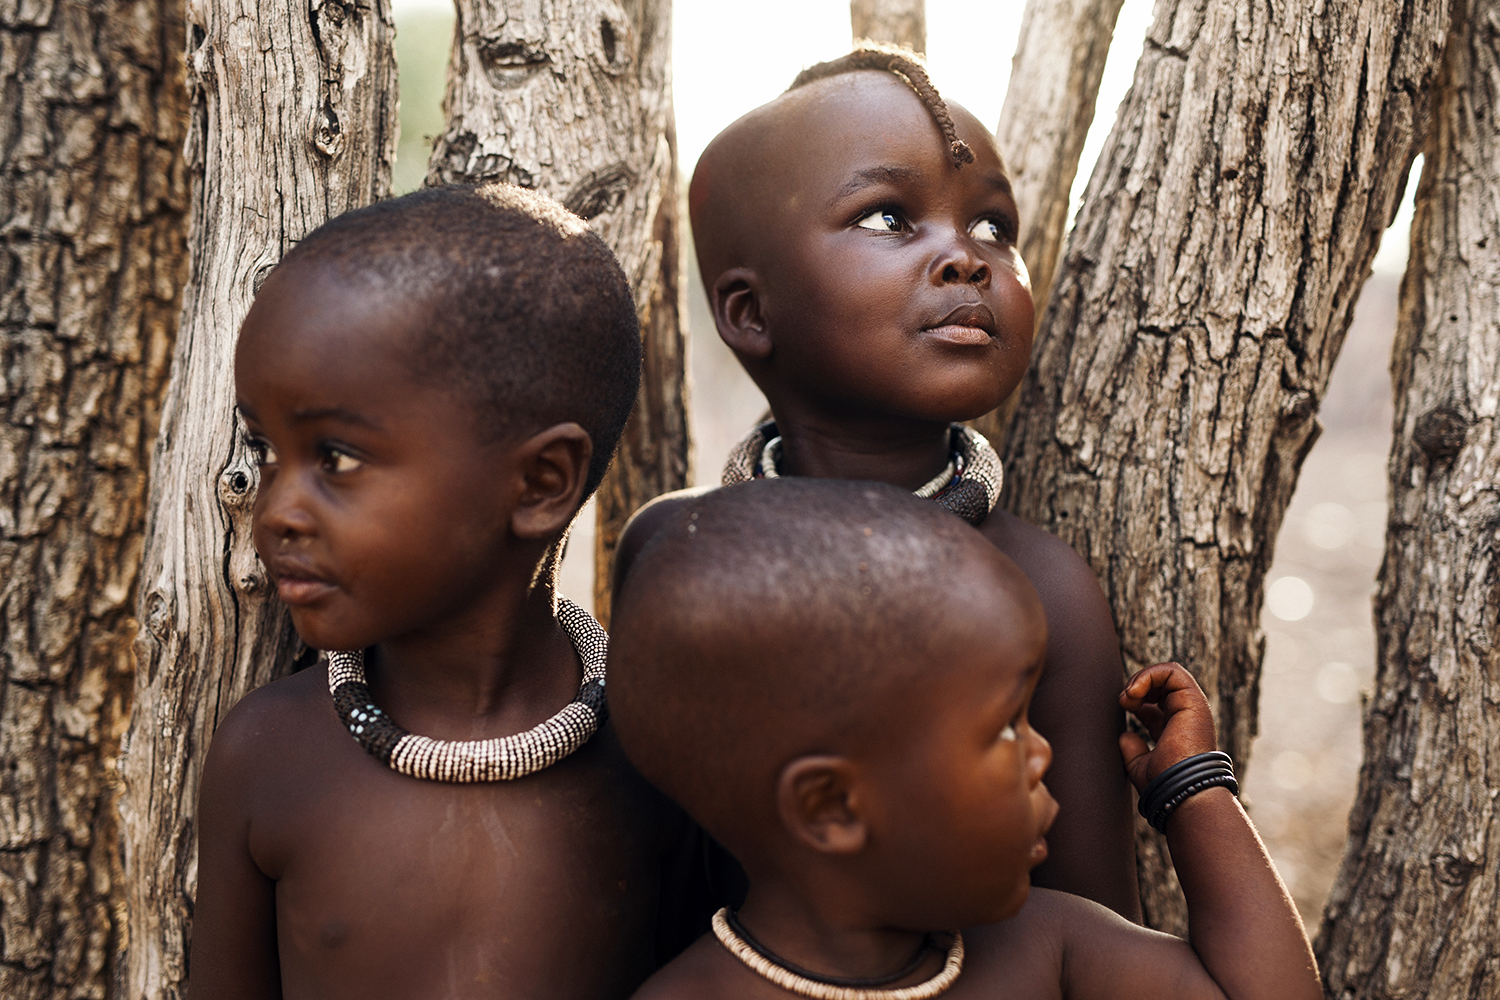
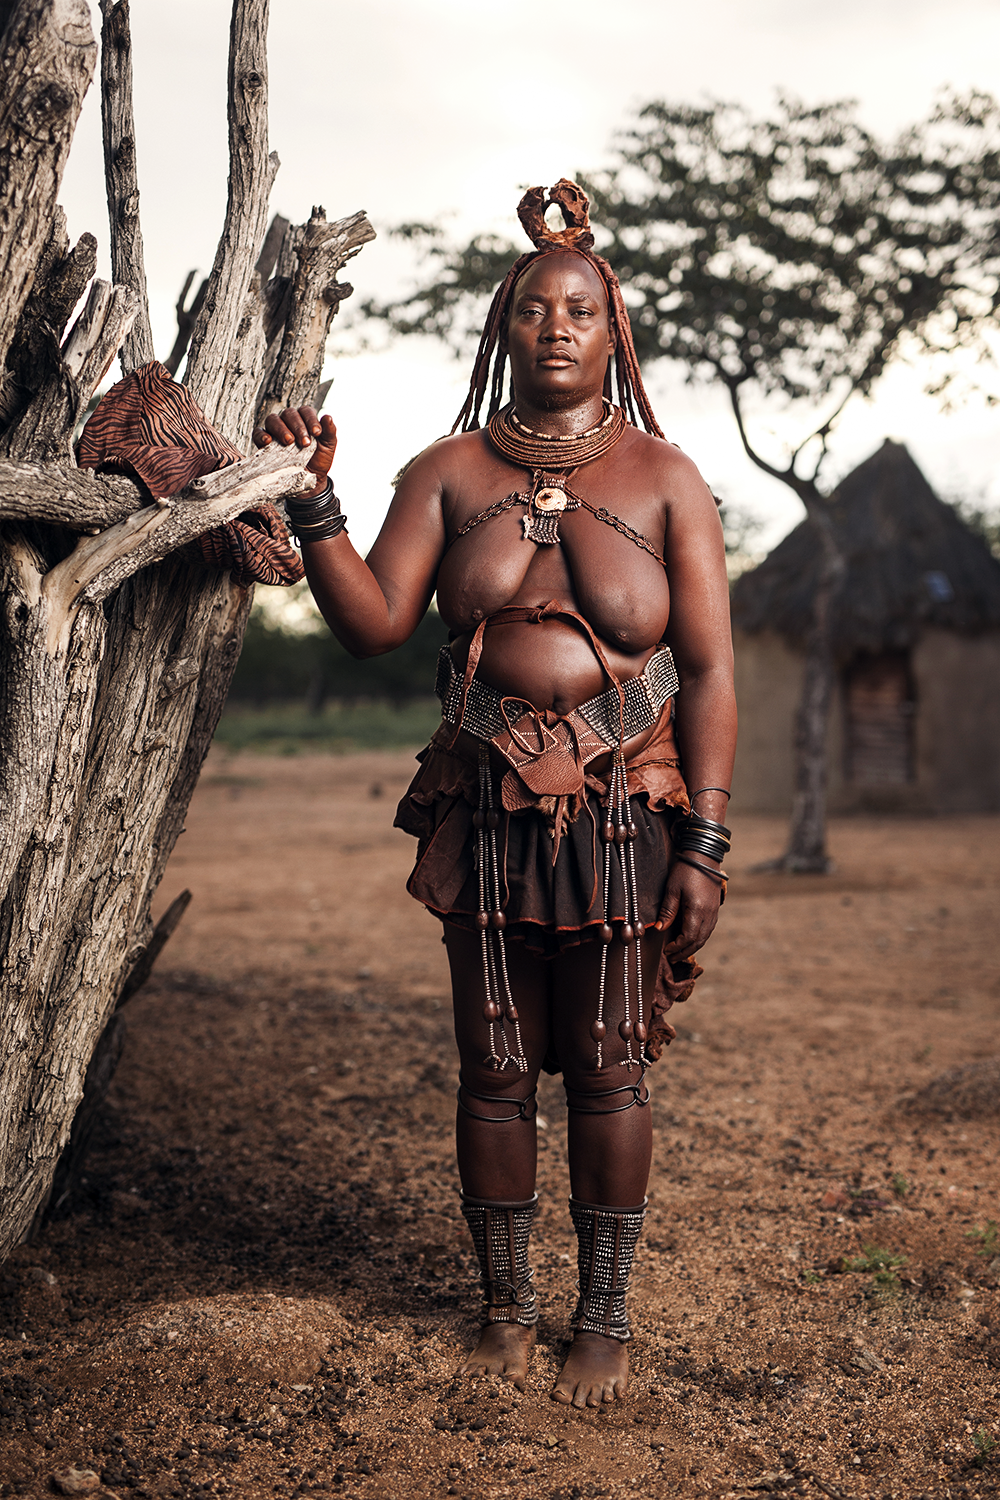
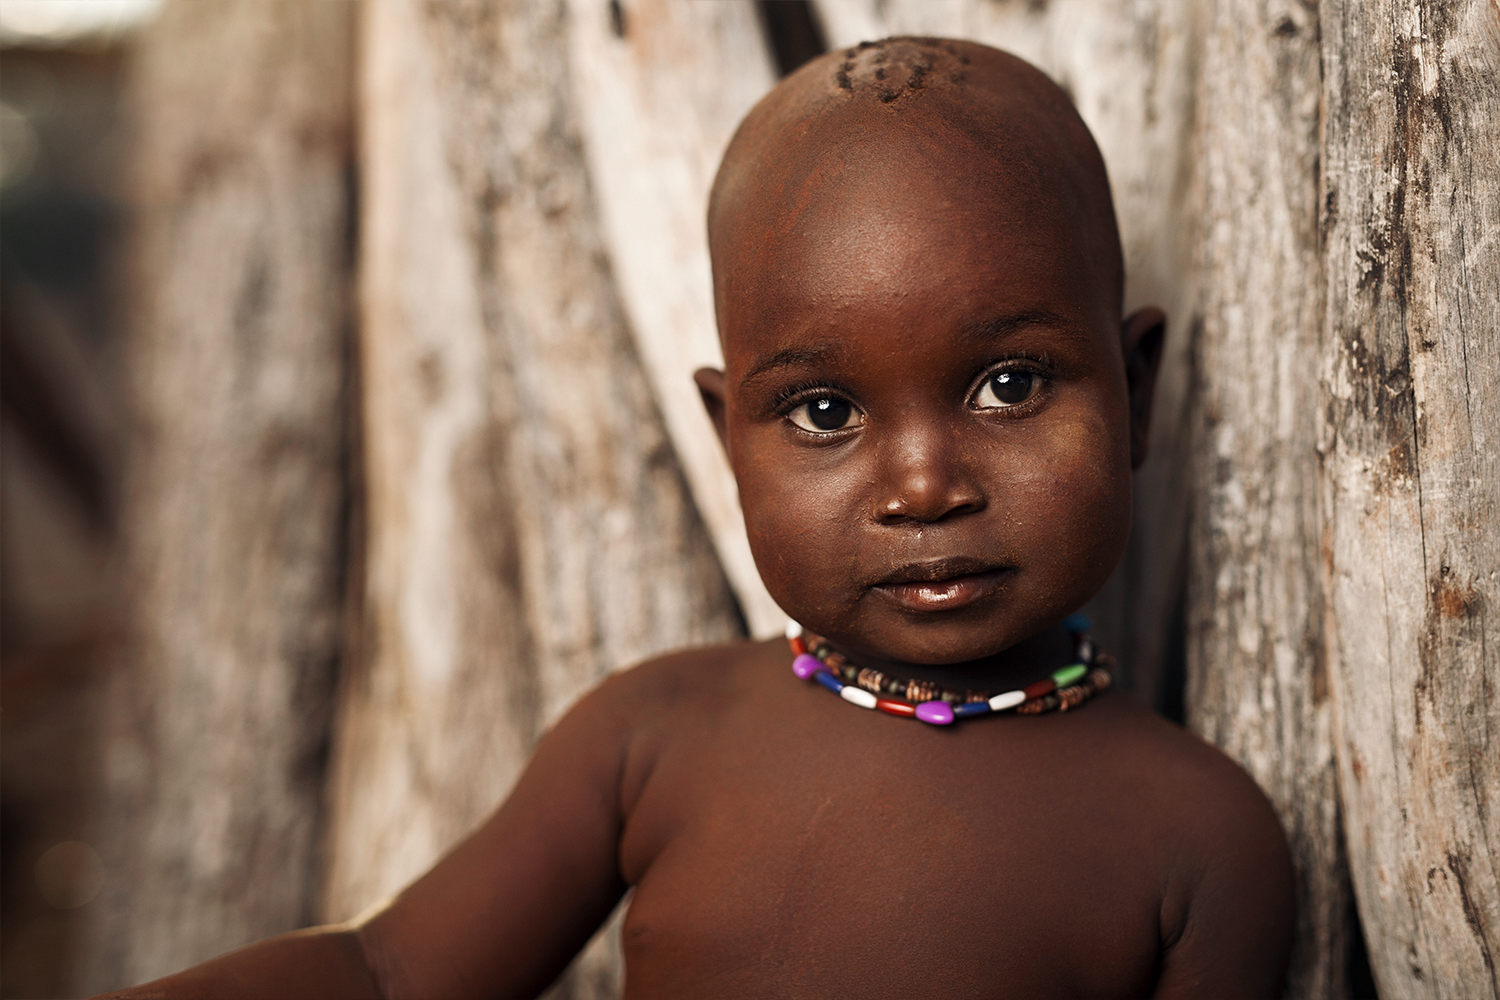
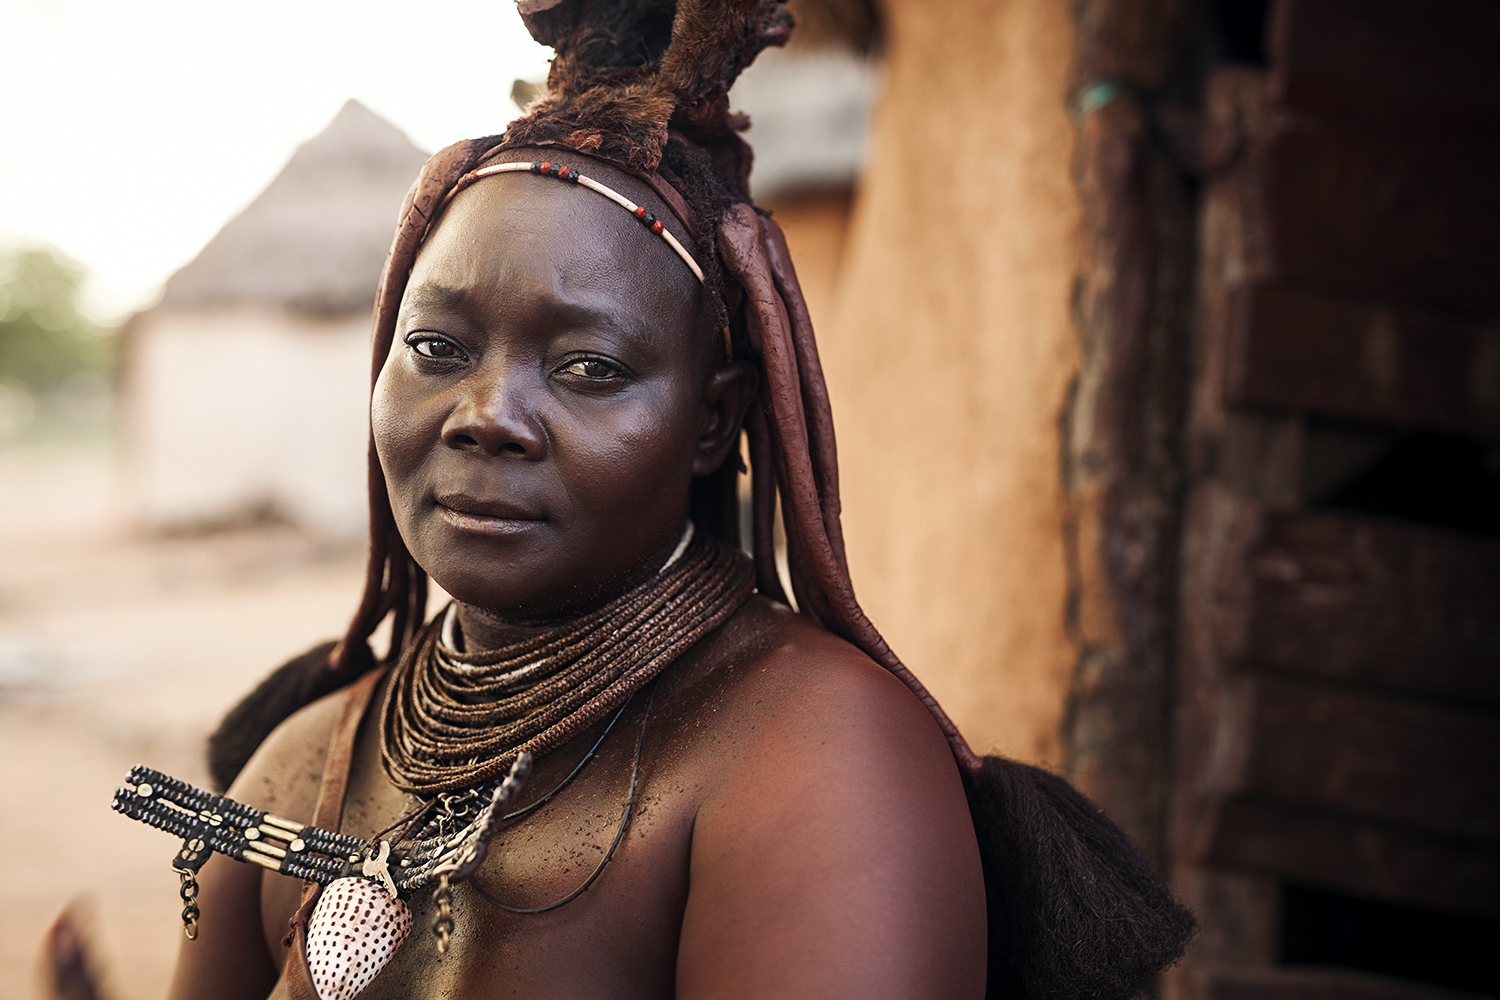
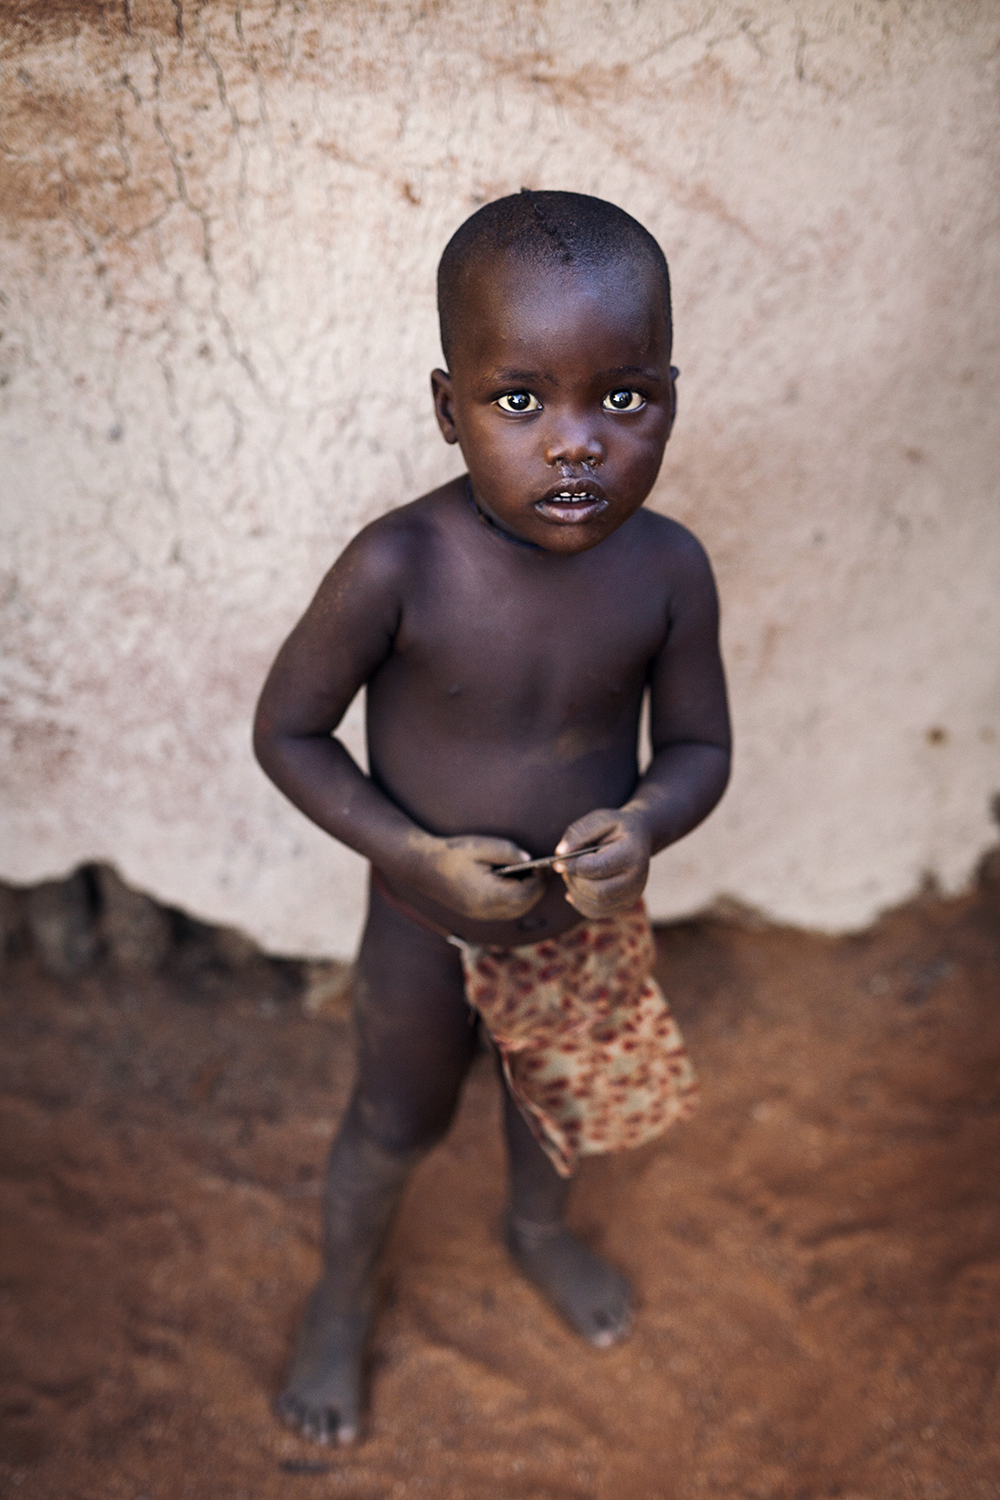
If I ever manage to make this sort of work my full time job it will be because I have already proved that I could produce quality imagery in this area. So I packed my bags and gear and headed to a country which has always held a special interest for me; Namibia. I went to the tribal homelands of the Himba people and organised through a local guide (the wonderful Vanessa) to head into one of the villages for golden hour, for two evenings in a row, to shoot portraits with them.
For the portraits I shot using my Canon 5DmkII and a Sigma Art 50mm f1.4. On top of this I was using a Tiffen Variable ND filter to be able to cut the light and keep the depth of field where I wanted it without overexposing.
The first evening I went in I shot all natural light with a large white reflector.
On the second evening I went in and shot mixing strobe and natural light using my Alien Bee 800 with Vagabond Mini battery pack, shot through a 1.5m Photek Softlighter. This had the desired effect of darkening the background and shaping the light on the face for a slightly more dramatic look.
The overall experience was amazing. I intend this to be the first of many trips, but I will likely always remember this one as important because it helped prove to myself that I can do this; that all the work I have put in to build up my skill set over the years has resulted in images like this. On my ever evolving photographic journey it has been great to discover that this is a valid direction for me, which is exciting because it’s one which I would get a great deal of fulfillment from.
Here’s to the journey ahead.
Enjoy the video:
Here are a selection of the images I managed to capture:


The War in every Portrait
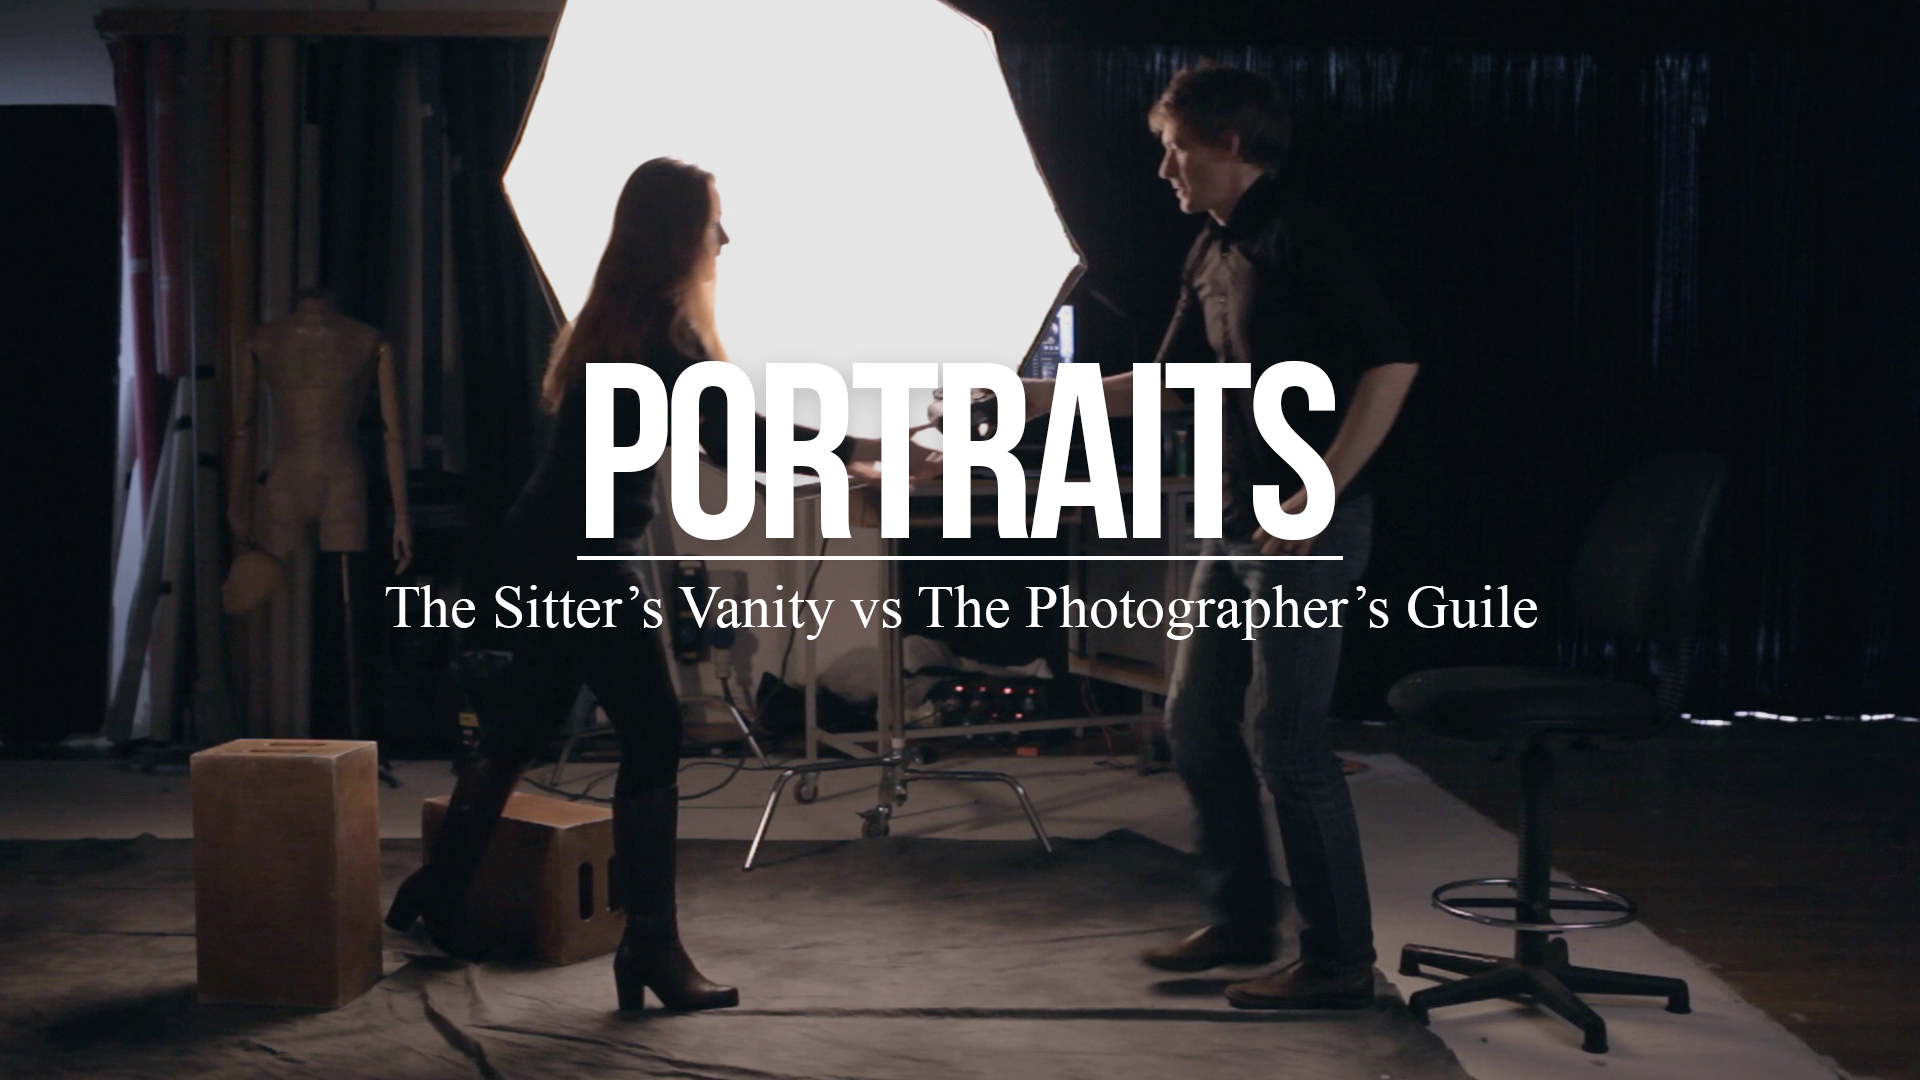
I created this video recently called, 'The war in every portrait.'
It's based on a quote I heard. Embarrassingly I can't remember where, and I've likely butchered by now but it said something like:
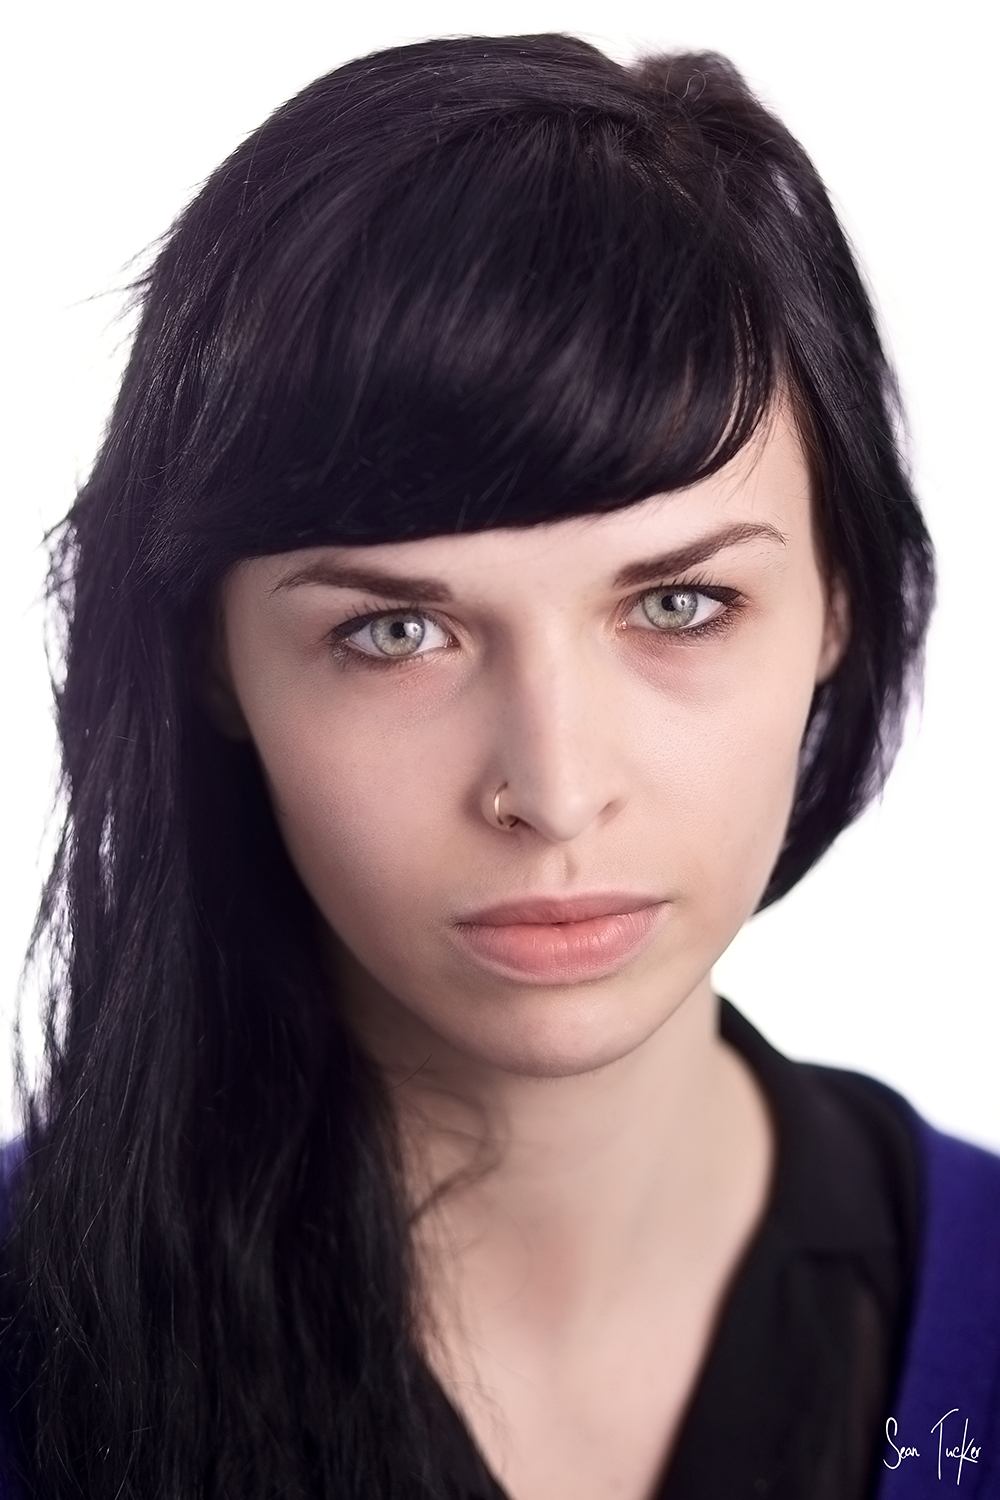
"Every portrait is a war between the sitter’s vanity and the photographer’s guile."
In the video I talk predominantly to portrait and headshot photographers about how to look beneath the exterior to capture the authentic person sitting in front of you. Using the example of Karsh's portrait of Churchill in '41 as a springboard I give some tips on making your subject feel comfortable, and a challenge to photographers to sit for their own portrait or headshot sessions to remind them how vulnerable it can feel, and to give them empathy when they shoot others.
But I'll shut up now and just let you watch:
If you enjoyed it, please share it on.
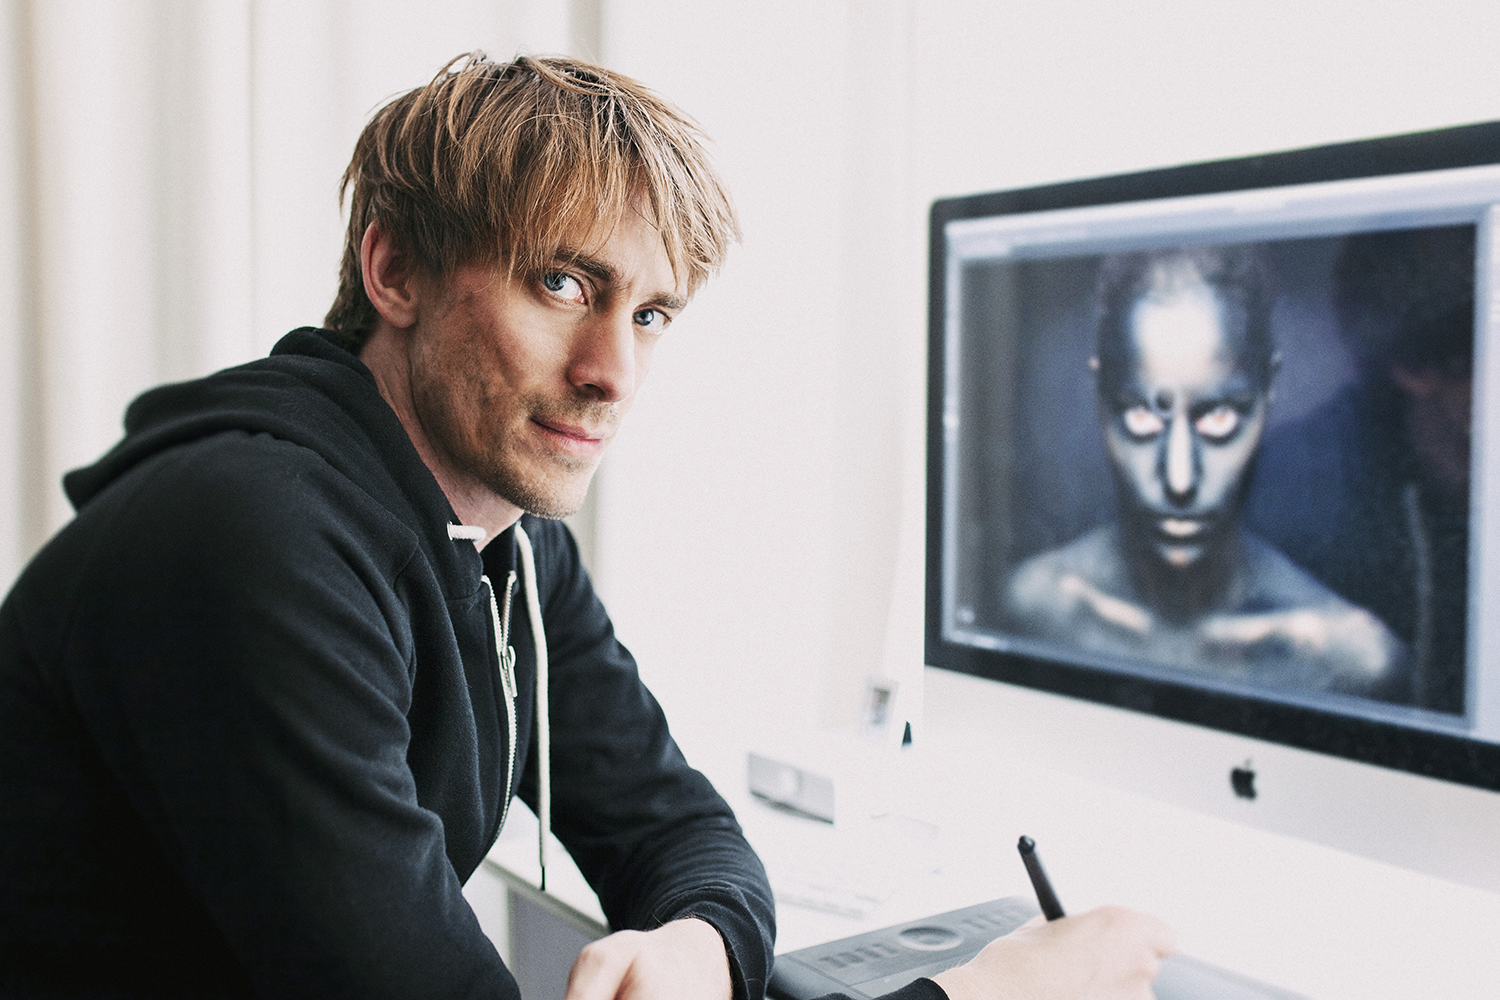
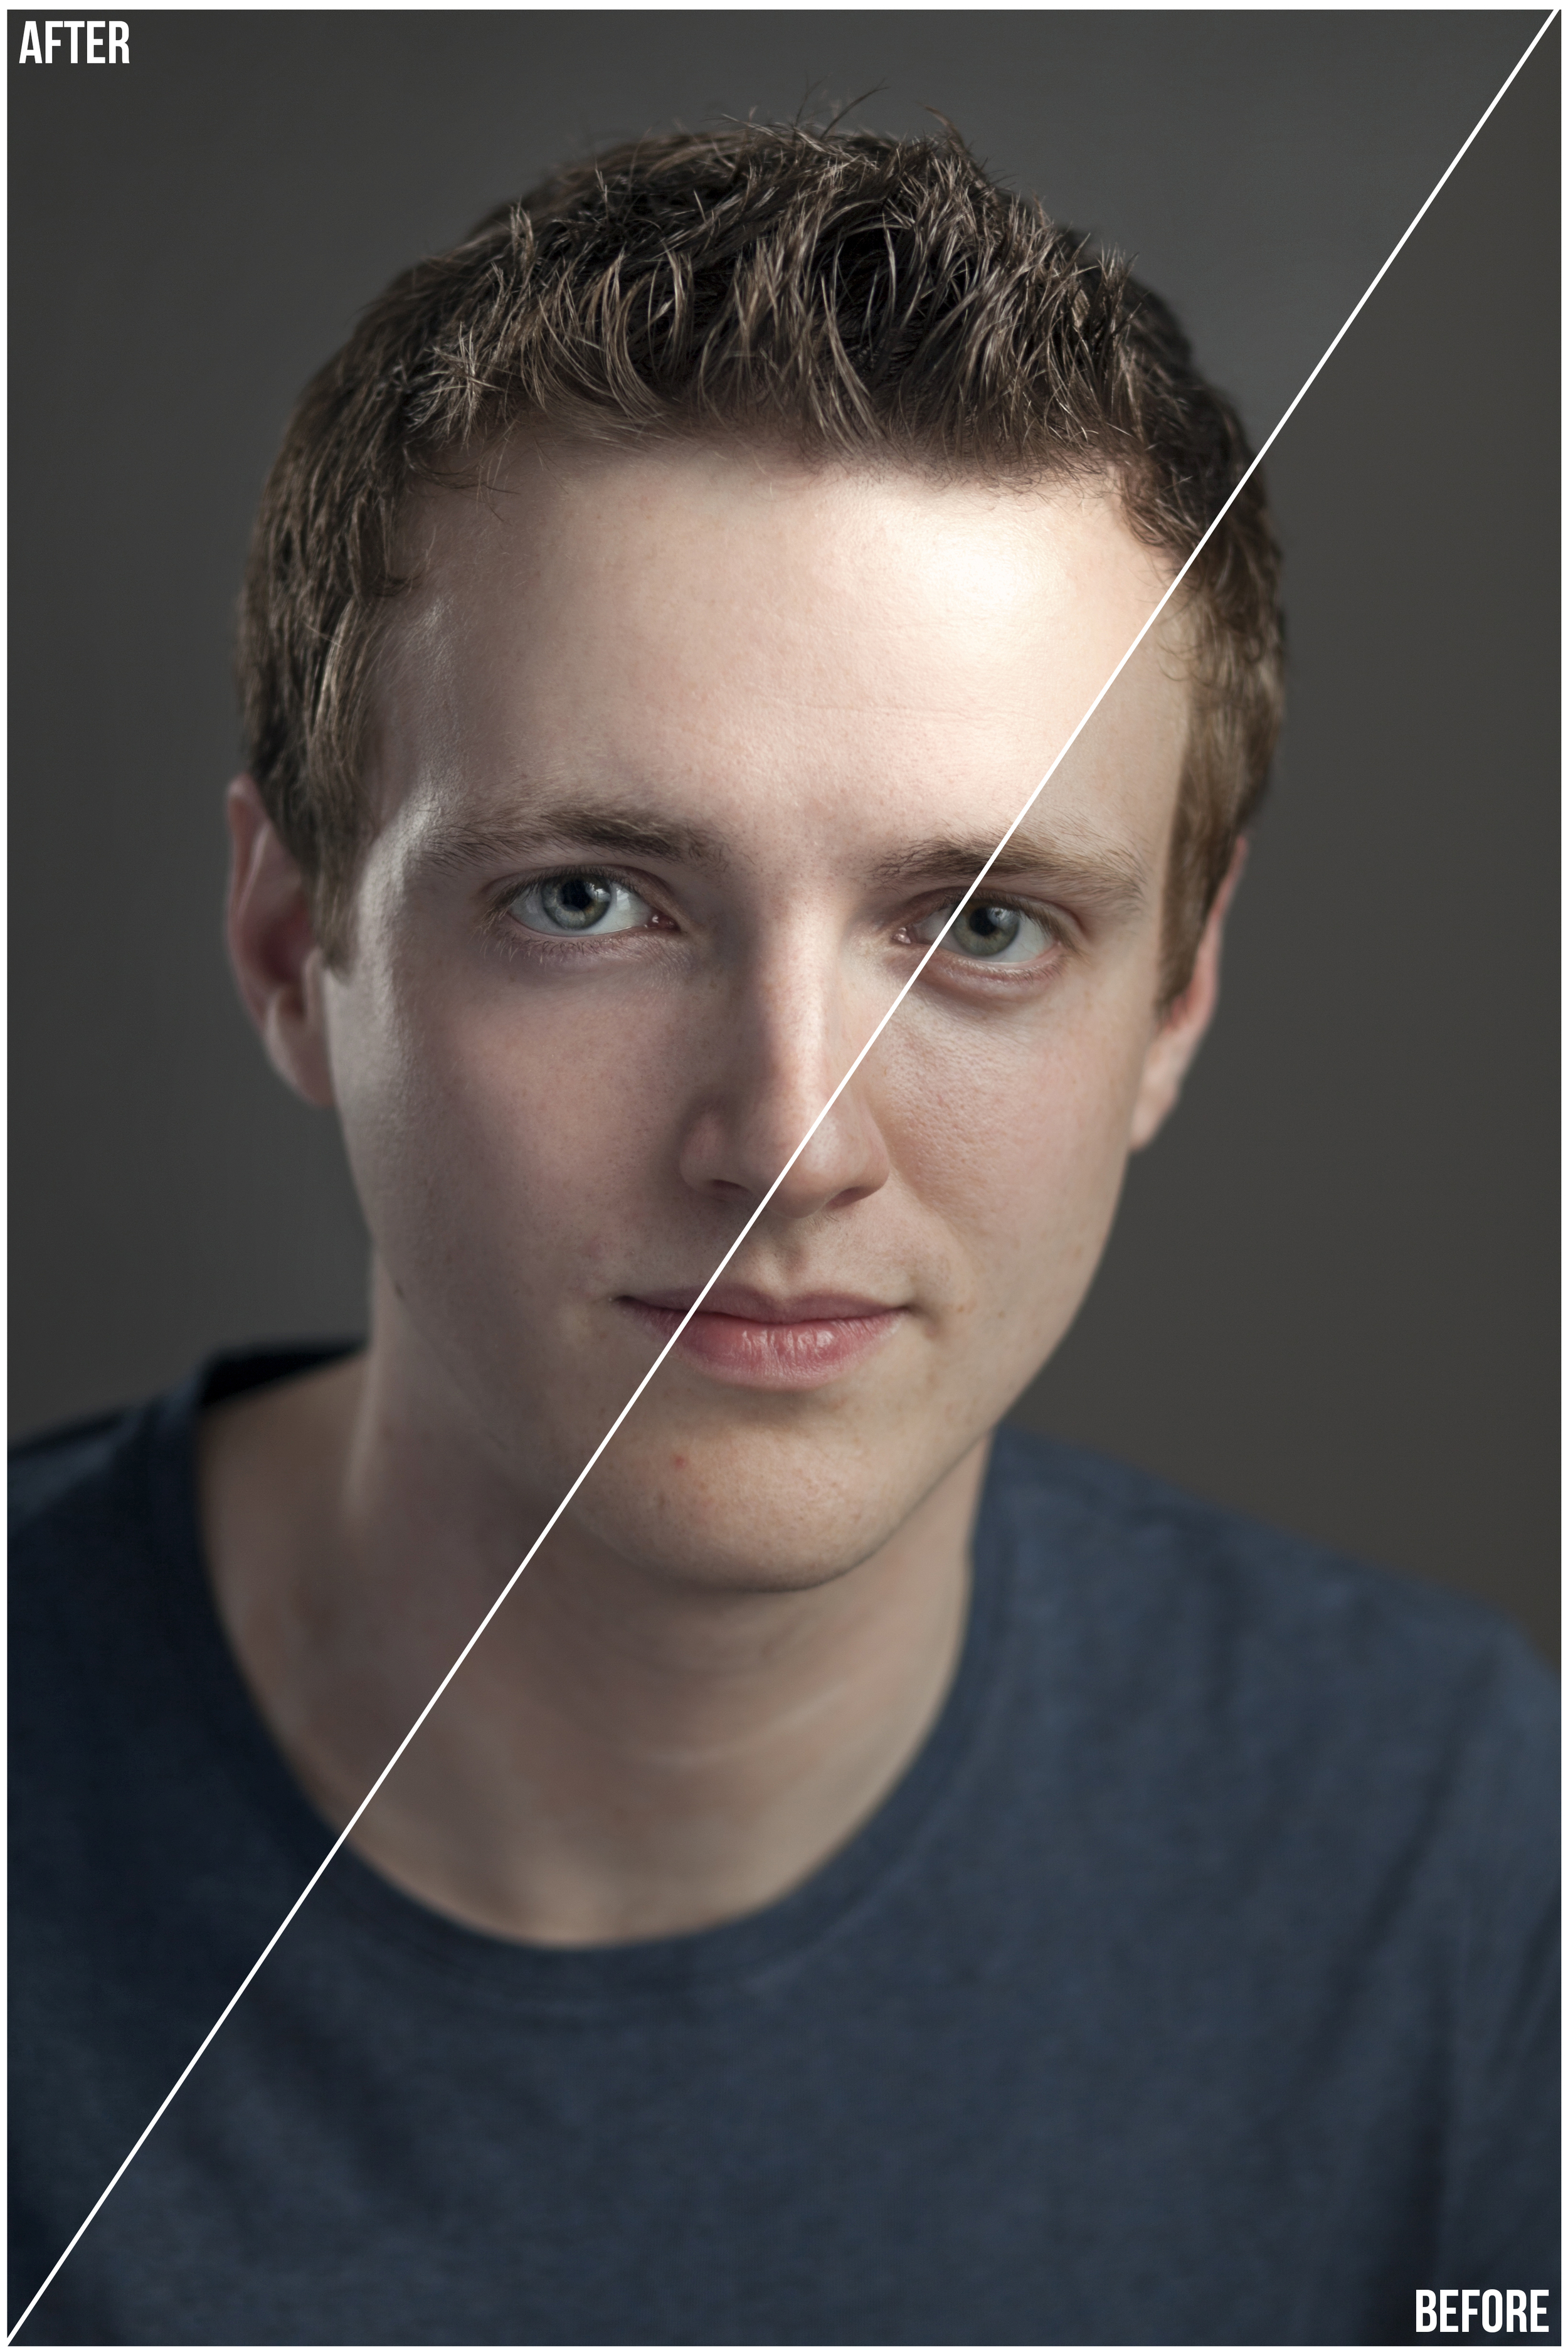
Here is a photo I shot of my wife during the making of this video:

...and here's one she took of me when we turned the tables:
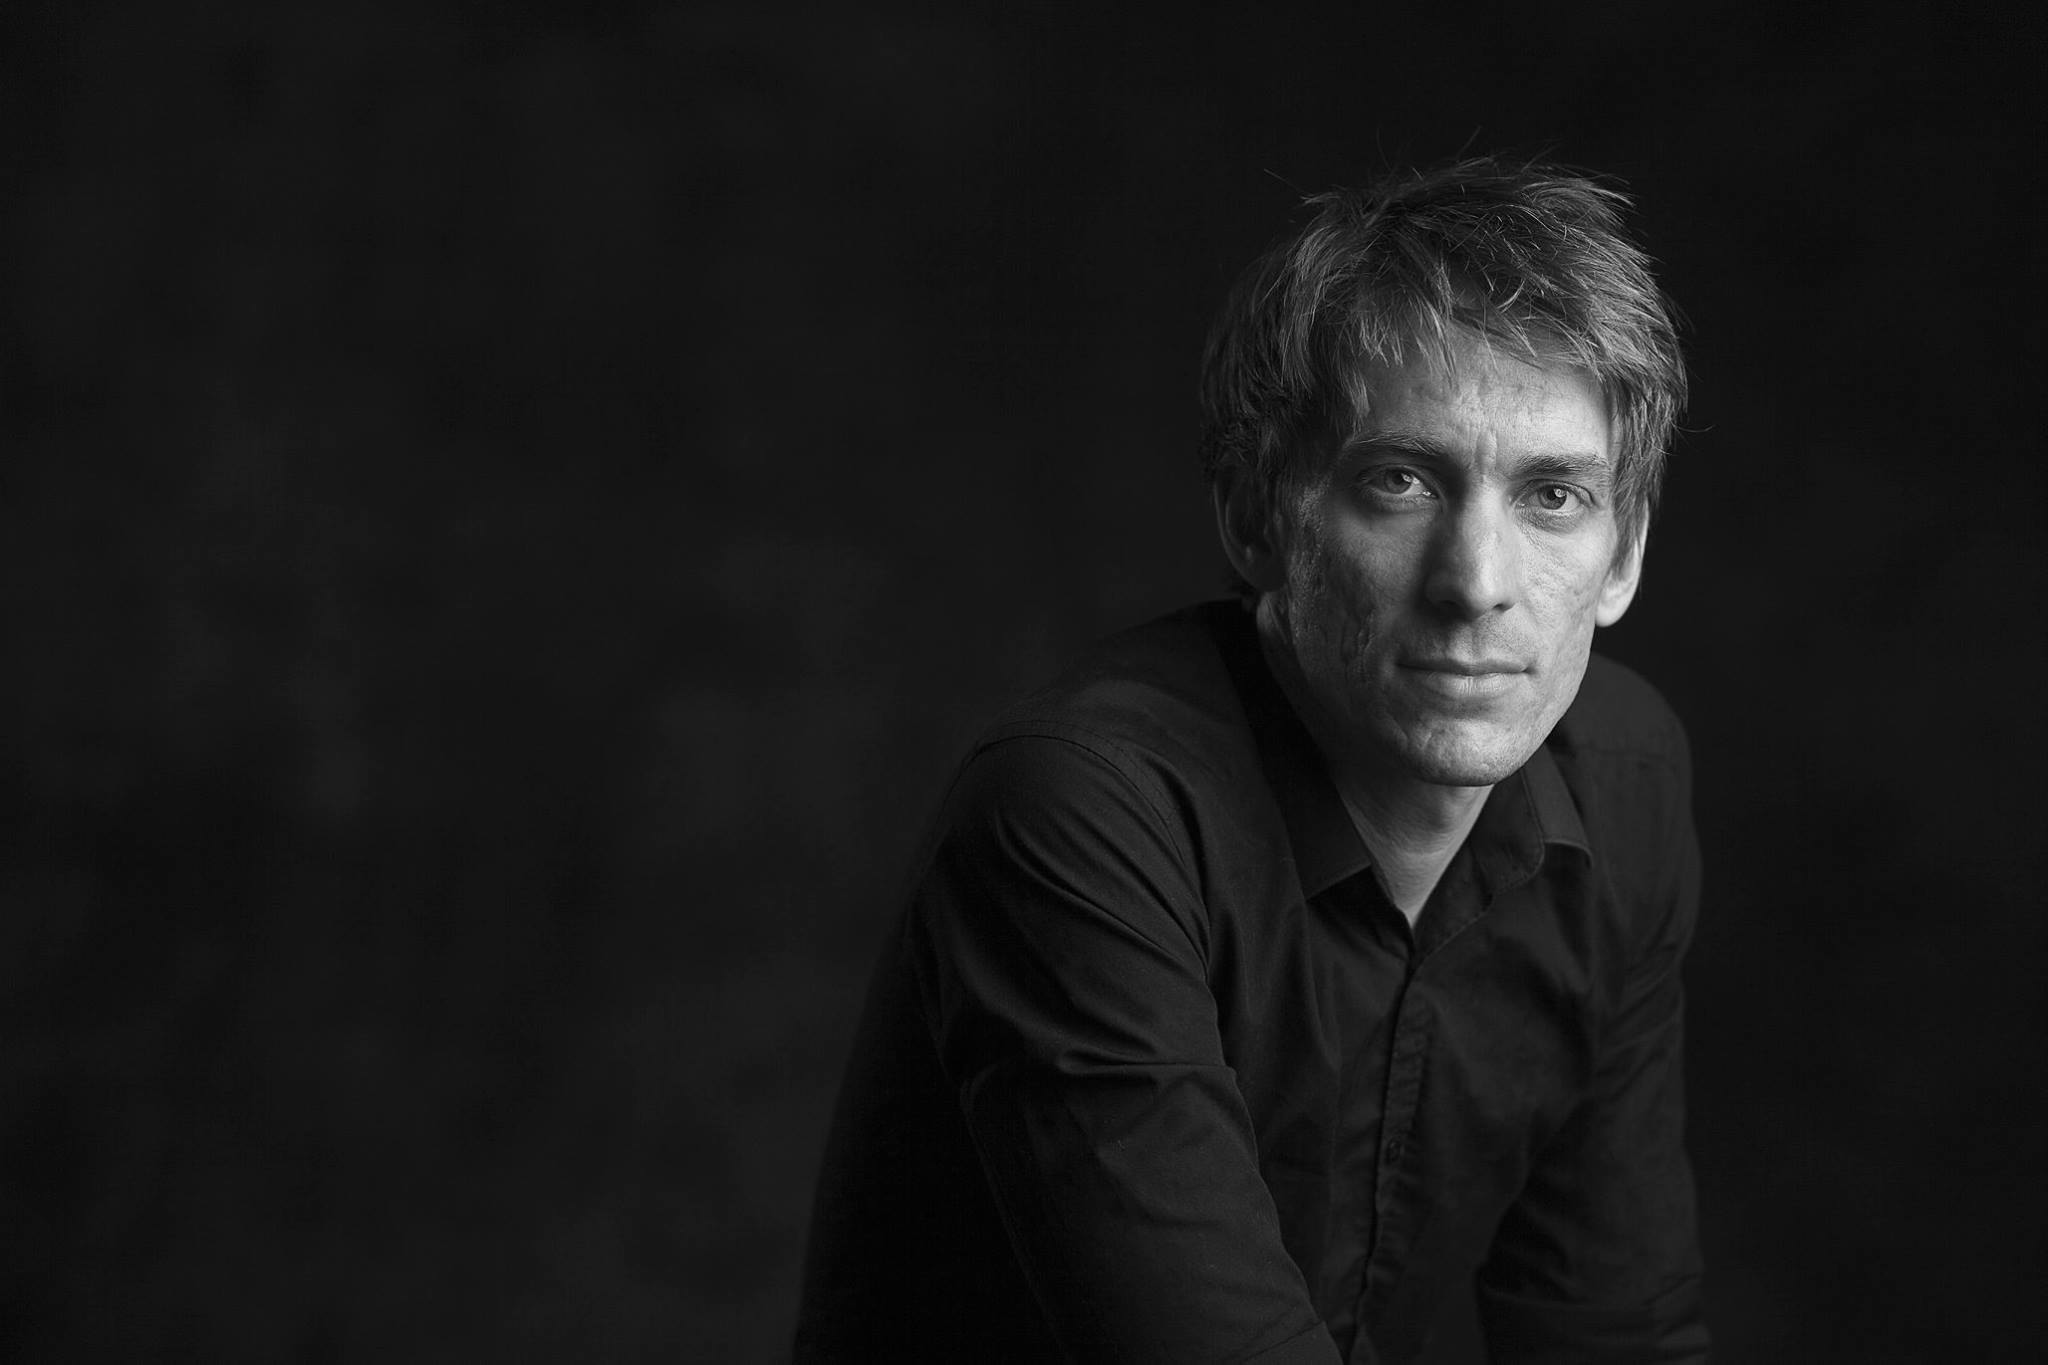
Check her out, she's a very talented, high end retoucher (as well as a talented photographer, even though she won't admit it): www.sarahjeantucker.com
Till next time.
A Post on Post
I often have people say, when taking a look at my pricing for headshots and portraits, 'I wish I could charge £150 for an hour's work'.
One hour?
Sure the session itself will last in the region of an hour, but in some ways that's only where the work begins. If it was as simple as pointing a camera at someone and clicking the shutter to create a professional portrait, a lot more people would be professional photographers. There are a load of decisions and skills which go into producing a high end shot; from camera setup, to lighting decisions, background and setting considerations, coaching poses and expressions, and finally post production.
That's what I want to focus on here because it's always the most time consuming element, and often goes unseen.
An edit will typically take me around an hour per image, sometimes more. I can often take an image through up to 4 separate programs to finish it, depending on what I'm trying to accomplish, and the work I do here is as important to creating the look which defines my style as any other stage.
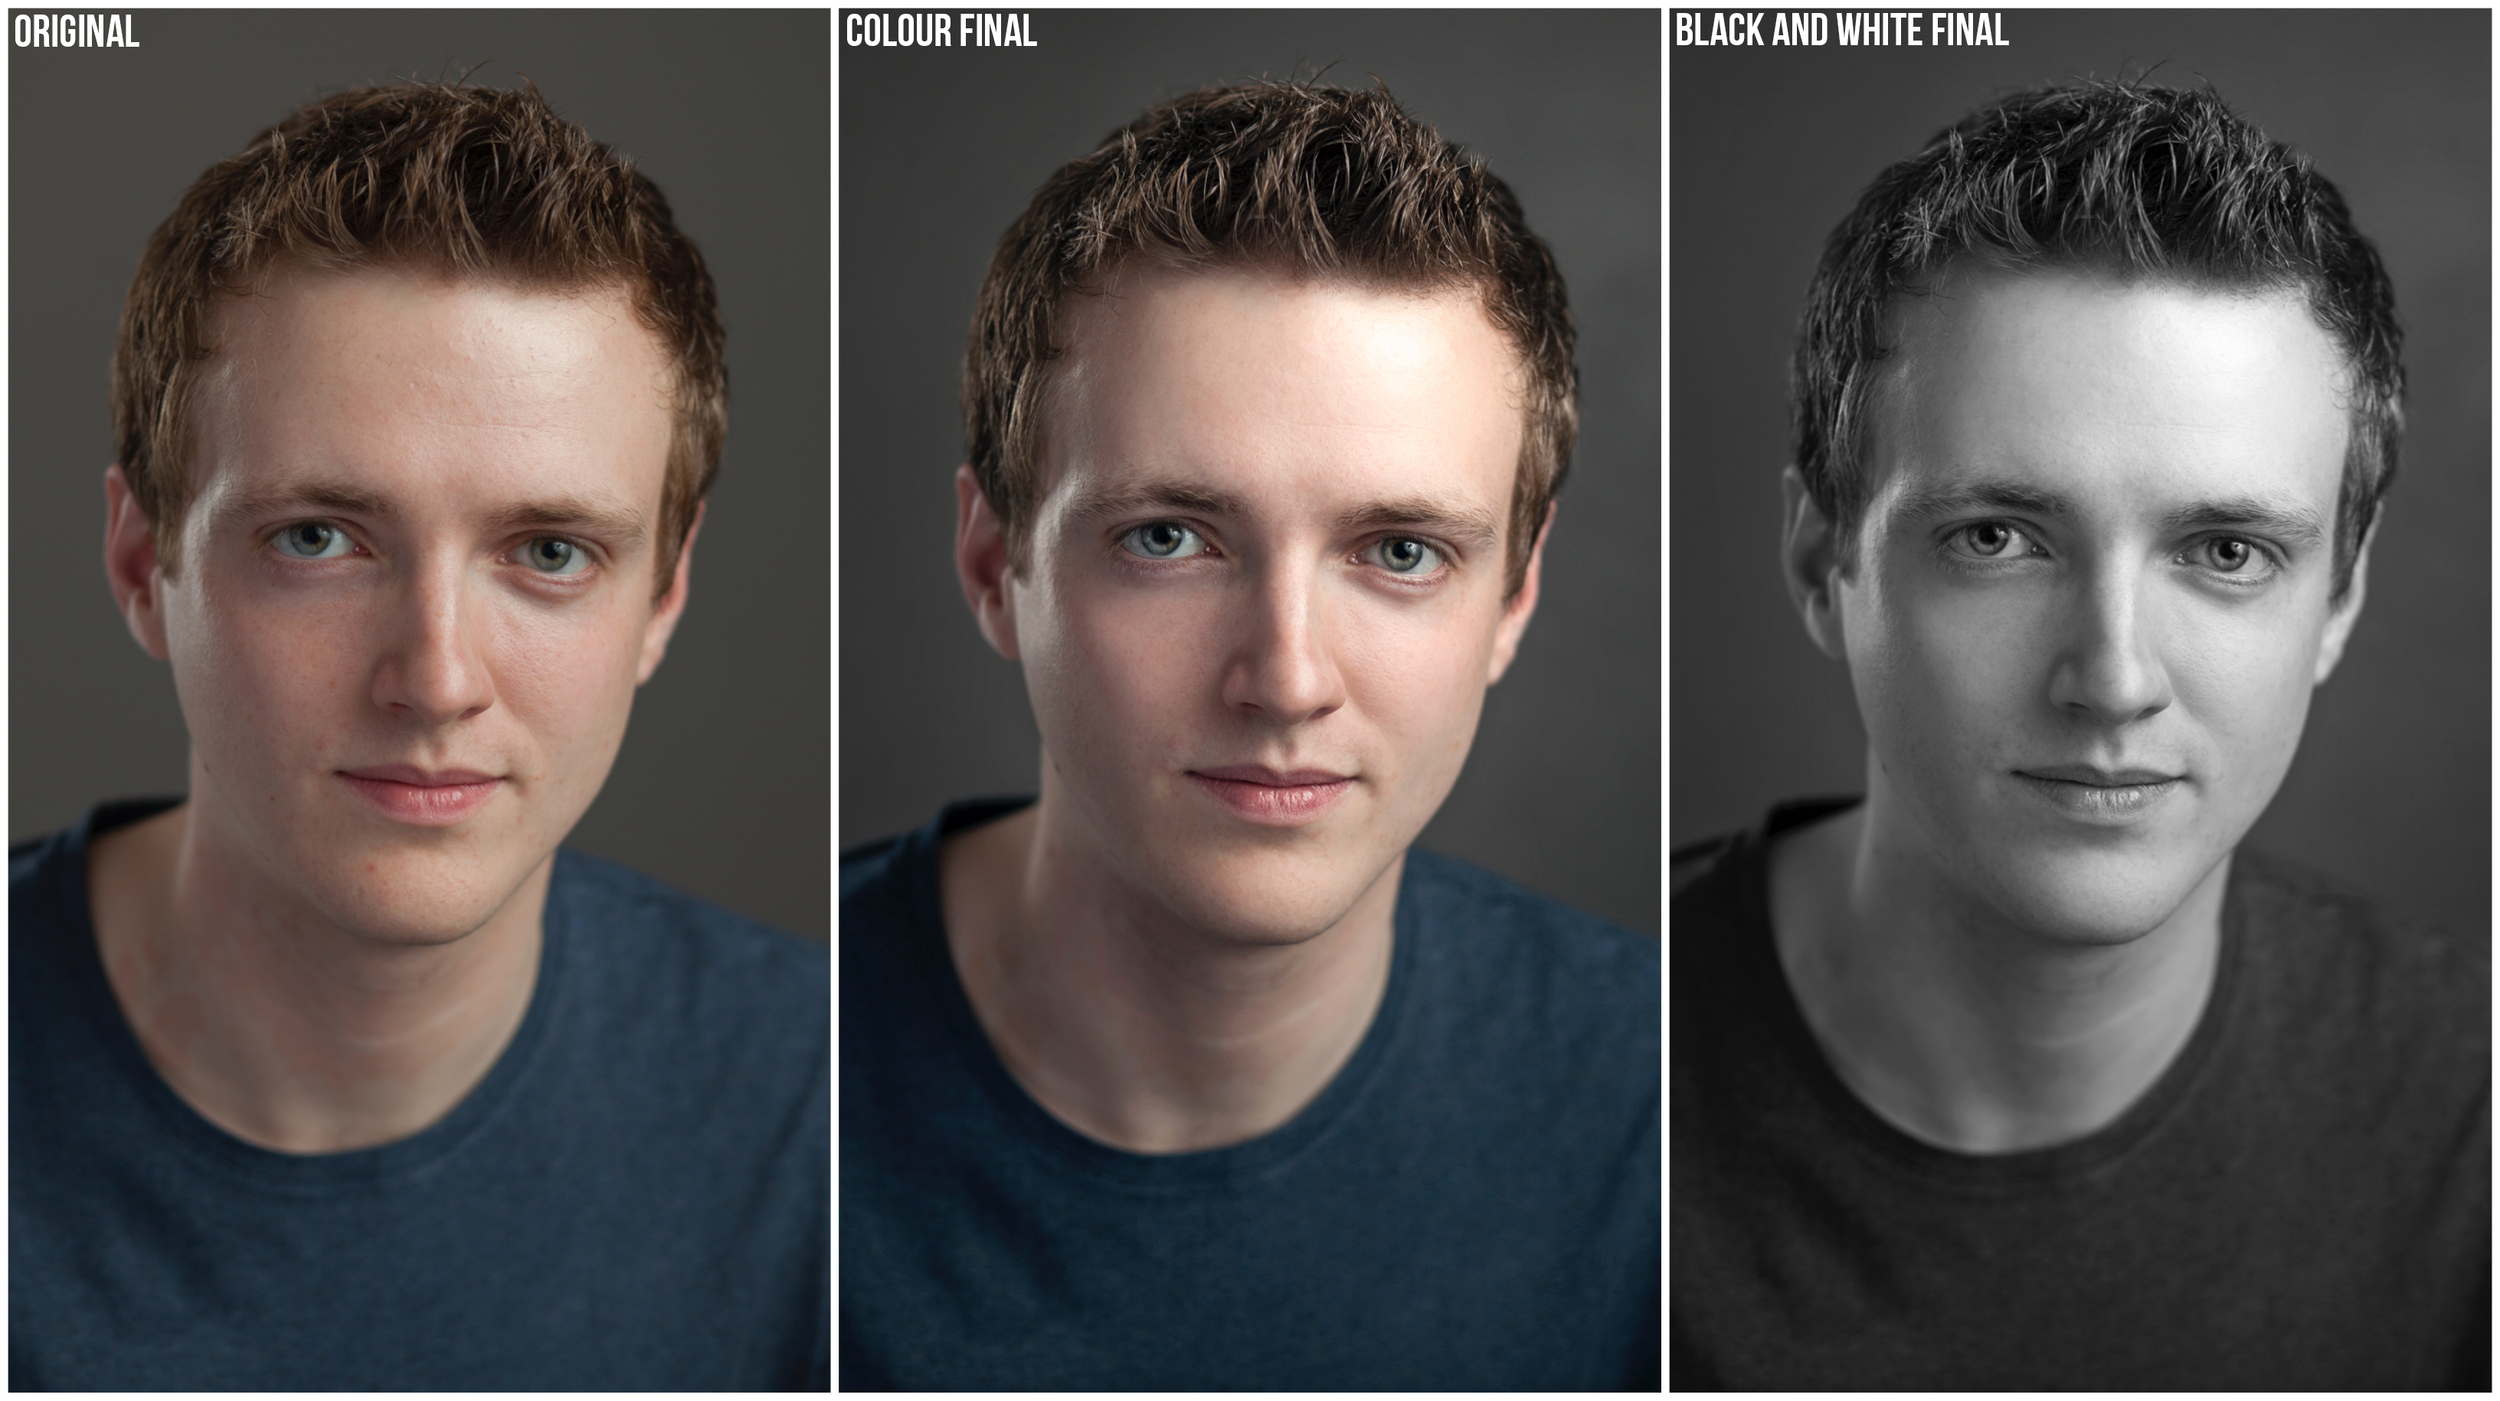
Let's take this most recent headshot shoot with RADA student, Finn as an example:
After importing the 200-300 images into Lightroom I will go to work selecting the best, and shortlisting the final 5. I will then work on white balance, exposure, shadow and highlight detail, clarity, vibrance and lens corrections so that I can export hi res images with good dynamic range. These will make clean canvases for the detailed work to follow in Photoshop. Here is a time-lapse of a typical edit in Photoshop to give you an idea of the behind-the-scenes work which goes into creating a professional portrait:
A headshot retouching timelapse by Sean Tucker Photography www.seantucker.photography
Coming out of Photoshop I should have 2 final versions to hand over; a Colour and a Black and White:
That means of course, taking in to account that I provide 5 retouches, each in Colour and BW versions, that you are actually paying for 6 hours minimum (1 for the shoot and 5 for the editing). This doesn't factor in the fact that shoots often run over time, edits can take longer, equipment set up and pack down takes a mo on it's own, and organising the shoot takes it's own time; but let's ignore that and say that actually I am now charging you £150 / 6 hours = £25 per hour.
This assumes of course that you were only paying me for time, but as many photographers have pointed out on many blogs over the last few years we have to cover costs like insurance, gear purchases and repairs, website hosting, taxes, internet, software, and the list goes on.
I don't tell you this to complain, but I hope this gives you a better idea of the hard work and skill which goes into creating the portraits or headshots you're parting with your hard earned cash to obtain. The session you are involved in is only really the tip of the iceberg.
I usually end up telling people who ask the question which started this post, that I'm very proud of the work I do to produce these images, and I stand by my pricing as I believe they are worth every penny.
Having peeked behind the curtain, I hope you now do too.
How I made that shot: Moonika

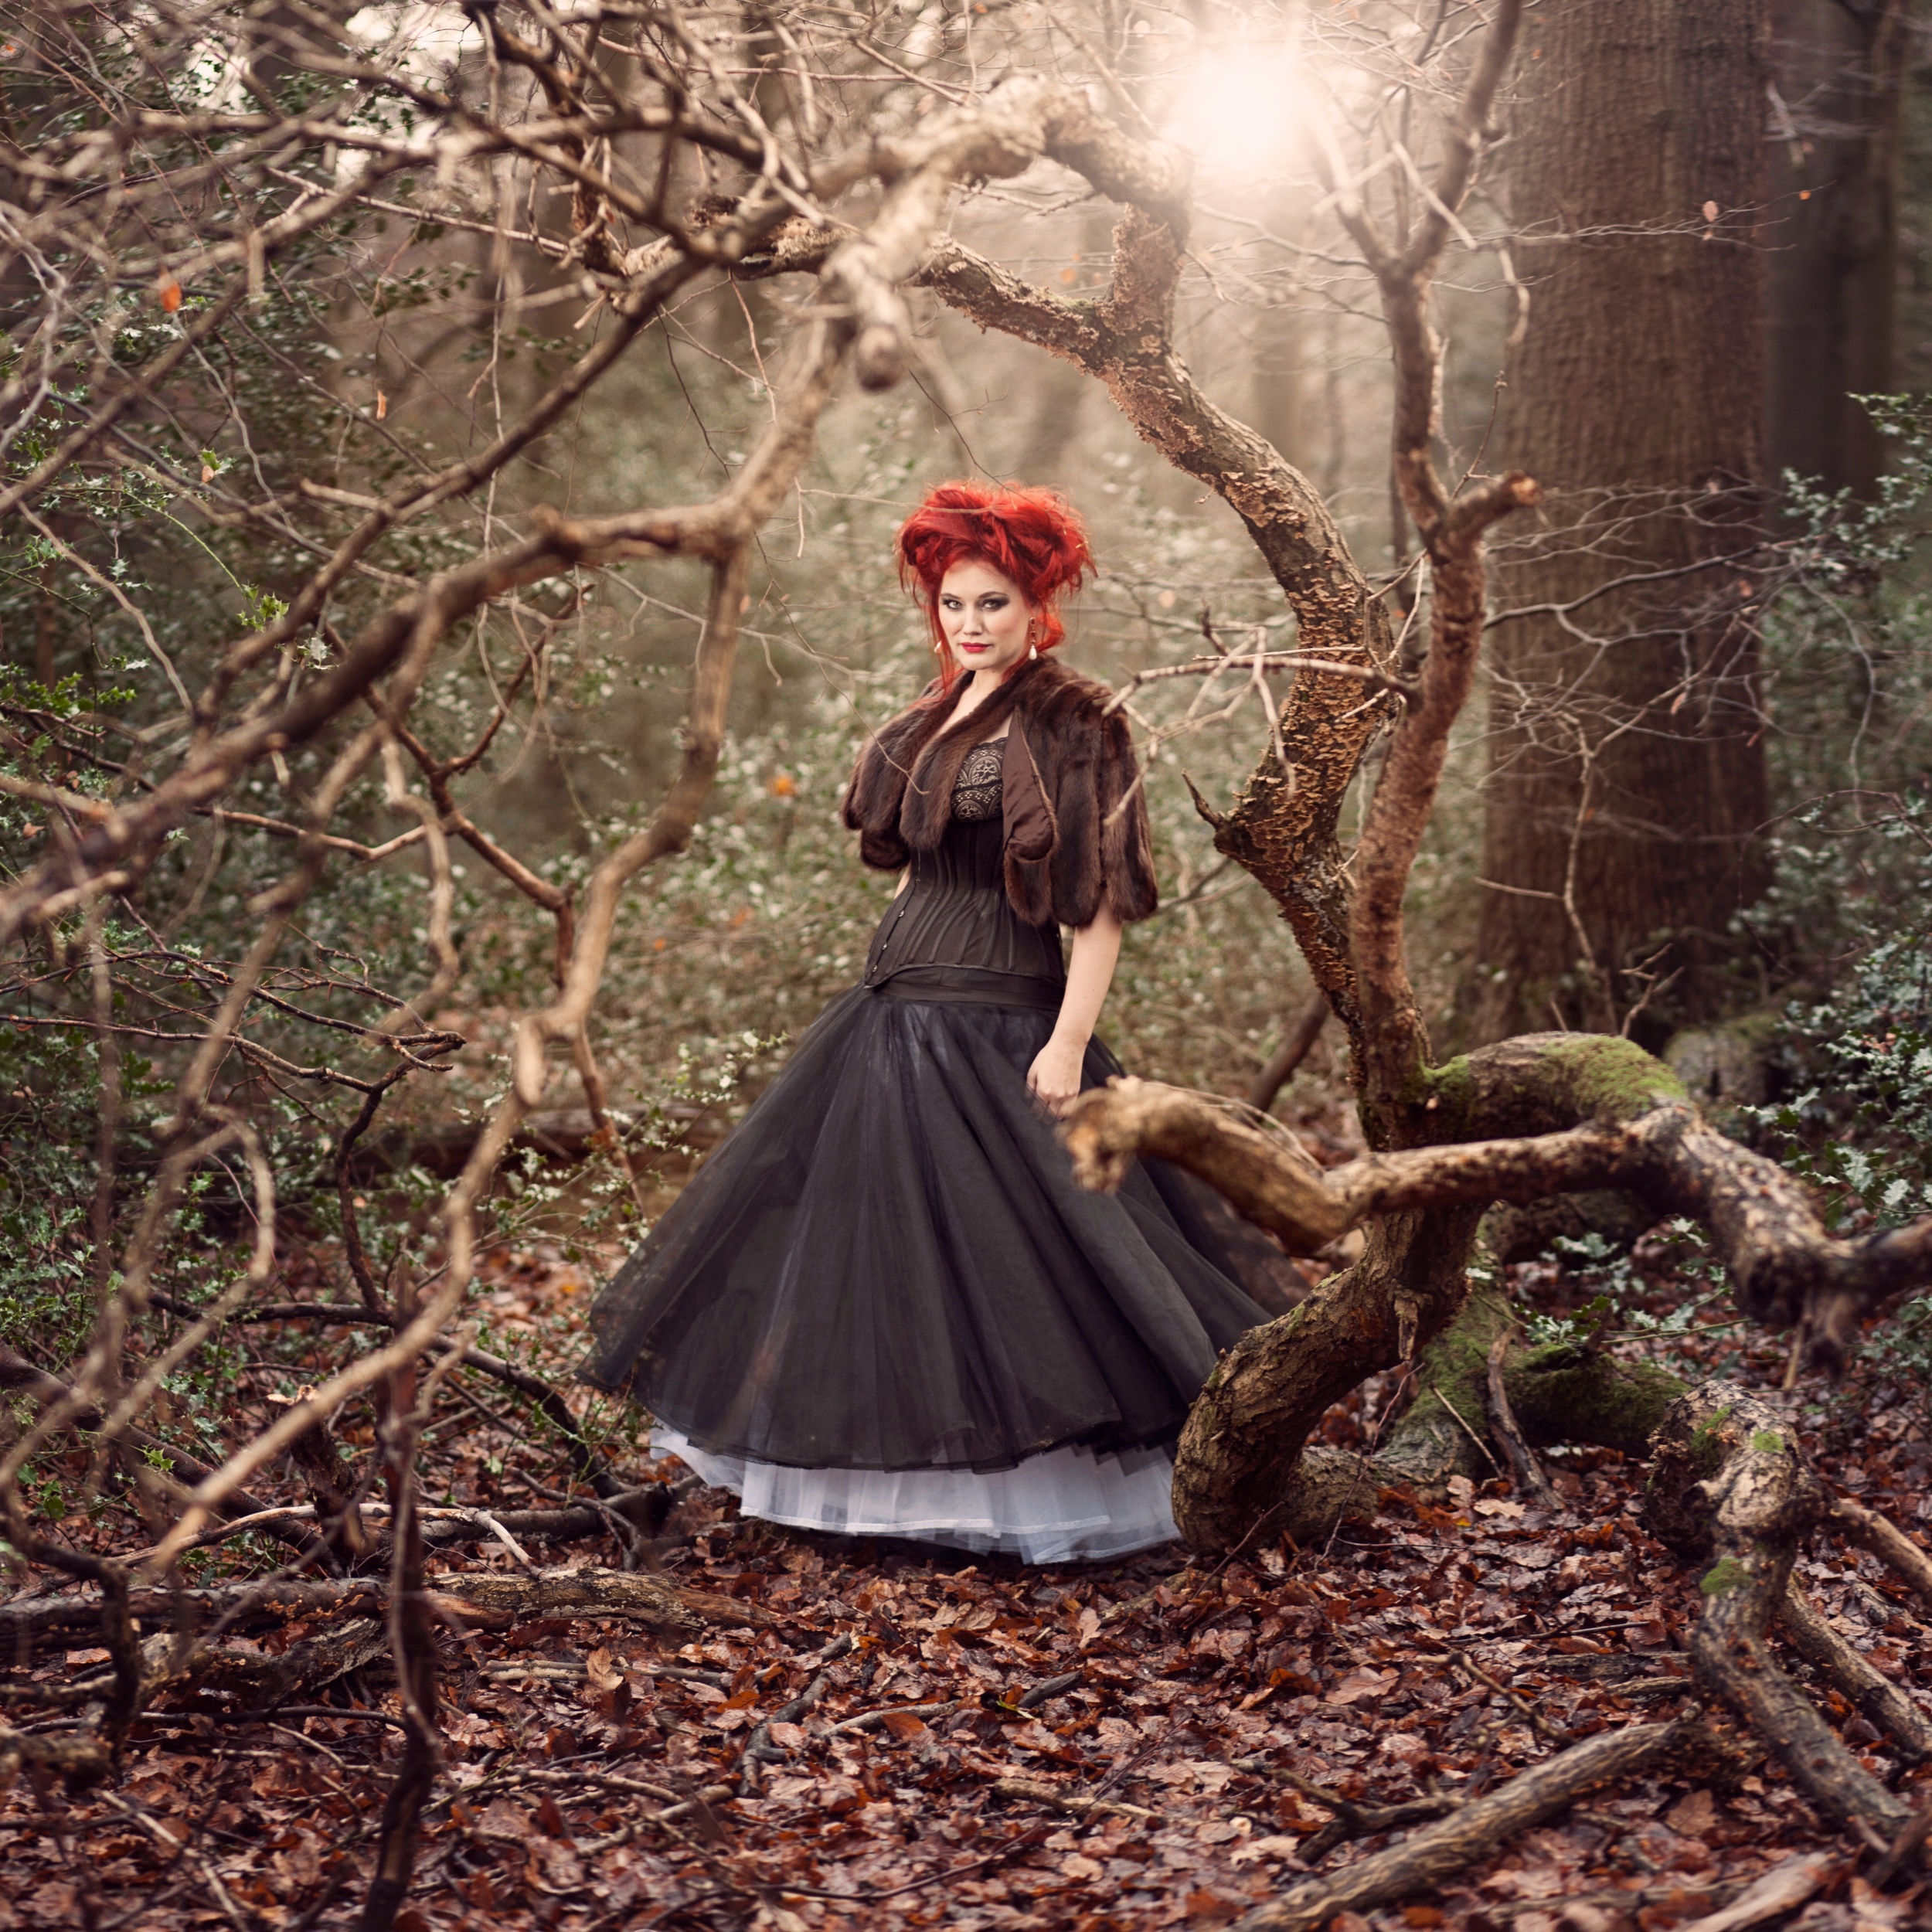
This is a shot I took recently of Moonika, and I thought I would show you how I pulled it off.
Moonika and her friend Lisa are costume designers for the stage here in London, and they contacted me to take some shots of the new pieces they had made. We decided to head out into the woods out back of Lisa's house to see if we could get some Tudor-style shots, for those of you familiar with the recent bodice-ripping Showtime series.
I knew in my head what sort of shot I wanted:

I was looking for a shot of the setting sun coming in through the trees while the subject strolls through the woods. I would bring along my Alien B800 light to act as a fill for the obvious shadows which the setting sun would cast, and then balance it all out to maintain a natural feel. I chose to use a Strip Box modifier because I wanted the light to have a reasonable even spread across Moonika's whole length, head to toe,, rather than the fall off I would have had if I used a 1m softbox placed at head height. I could have got the even spread with a large 2m softbox, but then I would have had a lot of light spreading across the floor as well. The strip box gave me the most control.
Unfortunately, as you can see from this 'behind the scenes' shot, the weather wasn't playing ball:

No sun.
Flat grey skies.
Not to worry.
I positioned her with her back to the sun anyway to get at least some rim light and lightly filled from the front with the strip box.
I'll get to how I accentuated the light in the edit.
We had done a bit of walking around and Lisa had discovered a fallen tree. I asked Moonika to stand in middle and positioned myself so it created a natural frame to the image with her standing center frame.
I also knew that I wanted to imitate a medium format look, with a full length square cropped shot, and a shallow depth of field. No small task with a DSLR.
My equipment was as follows:
Camera: Canon 5DmkII
Lens: Canon 85mm f1.8
I knew this combo would give me the shallow depth of field I wanted, but there was a bit more work to do to get the shot I wanted.

Now follow my logic here. If I want the square crop and depth of field which a Medium Format would give, I could get close with a few stitched shots from my 35mm full frame DSLR.
If I shoot 3 portrait-oriented shots, at a low aperture, and then stitch them together and crop the image square, I should be able to replicate some of the feel and depth I'm looking for. So I lined up my first shot with Moonika sitting in centre frame, and then warned her that I needed her to freeze for 3 consecutive shots, including one left and one right of the centre frame, with a small over lap between each so that photoshop would have something to stitch. Here are the raw shots out of camera:

And here is the shot after stitching the 3 shots together and cropping:

So I'm closer to the framing and depth of field I want.
Back to the lighting. What sun was making it in through the cloud cover was still highlighting her from behind, including her hair and shoulders, but not nearly as much as I wanted. It still looked a little flat.

So with the lighting I wanted in mind I went to work in Photoshop.
There is too much to go into detail about here, and it's a bit technical in places, but let me list the steps I took and you may pick up some tricks:
- I removed any obvious distractions with the Healing Brush and Clone Stamp tools.
- I dodged the highlights to accentuate shape using a Curves Layer set to Screen, and masking it in.
- I burned the shadows to accentuate shape using the Curves layer set to Multiply, and masking it in.
- I then went to work on colour using a combination of Curves, Colour Balance and Levels to get the feel I wanted. In short I was looking to warm up the whole image, and introduce some cooler tones to the shadows to create some colour contrast.
- I then used the Lighting Effects Filter to direct the light from the rear of the image. This layer only ends up being used at about 20% opacity but gives a nice starting point.
- I then created a fake sun in the background using the Lens Flare Filter on two layers, one small one at the centre point of my proposed sun, and one larger at a lower opacity to give the light some depth. These layers were both masked using the Apply Image function so that they only applied to the highlights of the image.
- I created some subtle rays for the sun by creating a curves layer with brightened mids and highlights, and boosted yellows, and then drawing rays extending out into the image on a mask layer. To blend everything I blurred the mask layer until I couldn't see any defined lines.
- I burned the edges of the image to pull the focus towards the centre, again using a masked Curves Layer set to Multiply.
- I boosted the Saturation of her hair with a masked Saturation Adjustment Layer.
- I further corrected the colour, as before, to create more feel after completing the light changes.
- To finish I sharpened the image using a High Pass Filter.
Here, once again, is the final image:
If you want to find out more about stitching images see my post on Bokeh Panoramas.
Observe where you Gravitate
I follow too many blogs. I read too much techy info and lust after too much gear. Whilst the intention is to get as much info as I can to become a better photographer, I think it's possible get to the stage where all this is just noise. You have a mountain of facts and techniques to draw on, but zero direction. Somewhere along the way I believed that the more I found out, the more my specific 'photography trajectory' would just organically slide into focus.
Am I to be a headshot photographer, fashion photographer, event photographer, journo photographer, still life photographer? Reading blogs hasn't made that clearer to me. In fact, if anything, it keeps me interested in all of them.
I've felt this keenly in the recent, busy months. I've shot all of the above with models, and products, and street, and documentary, and shows, and weddings... but the problem is I don't have any clear direction for the future. Am I going to just shoot a bit of everything forever, being a photographic 'jack-of-all-trades'?
Then I got to thinking about who my photography heroes are. Let me visually introduce you to a few of them:
Gregory Heisler

Steve McCurry
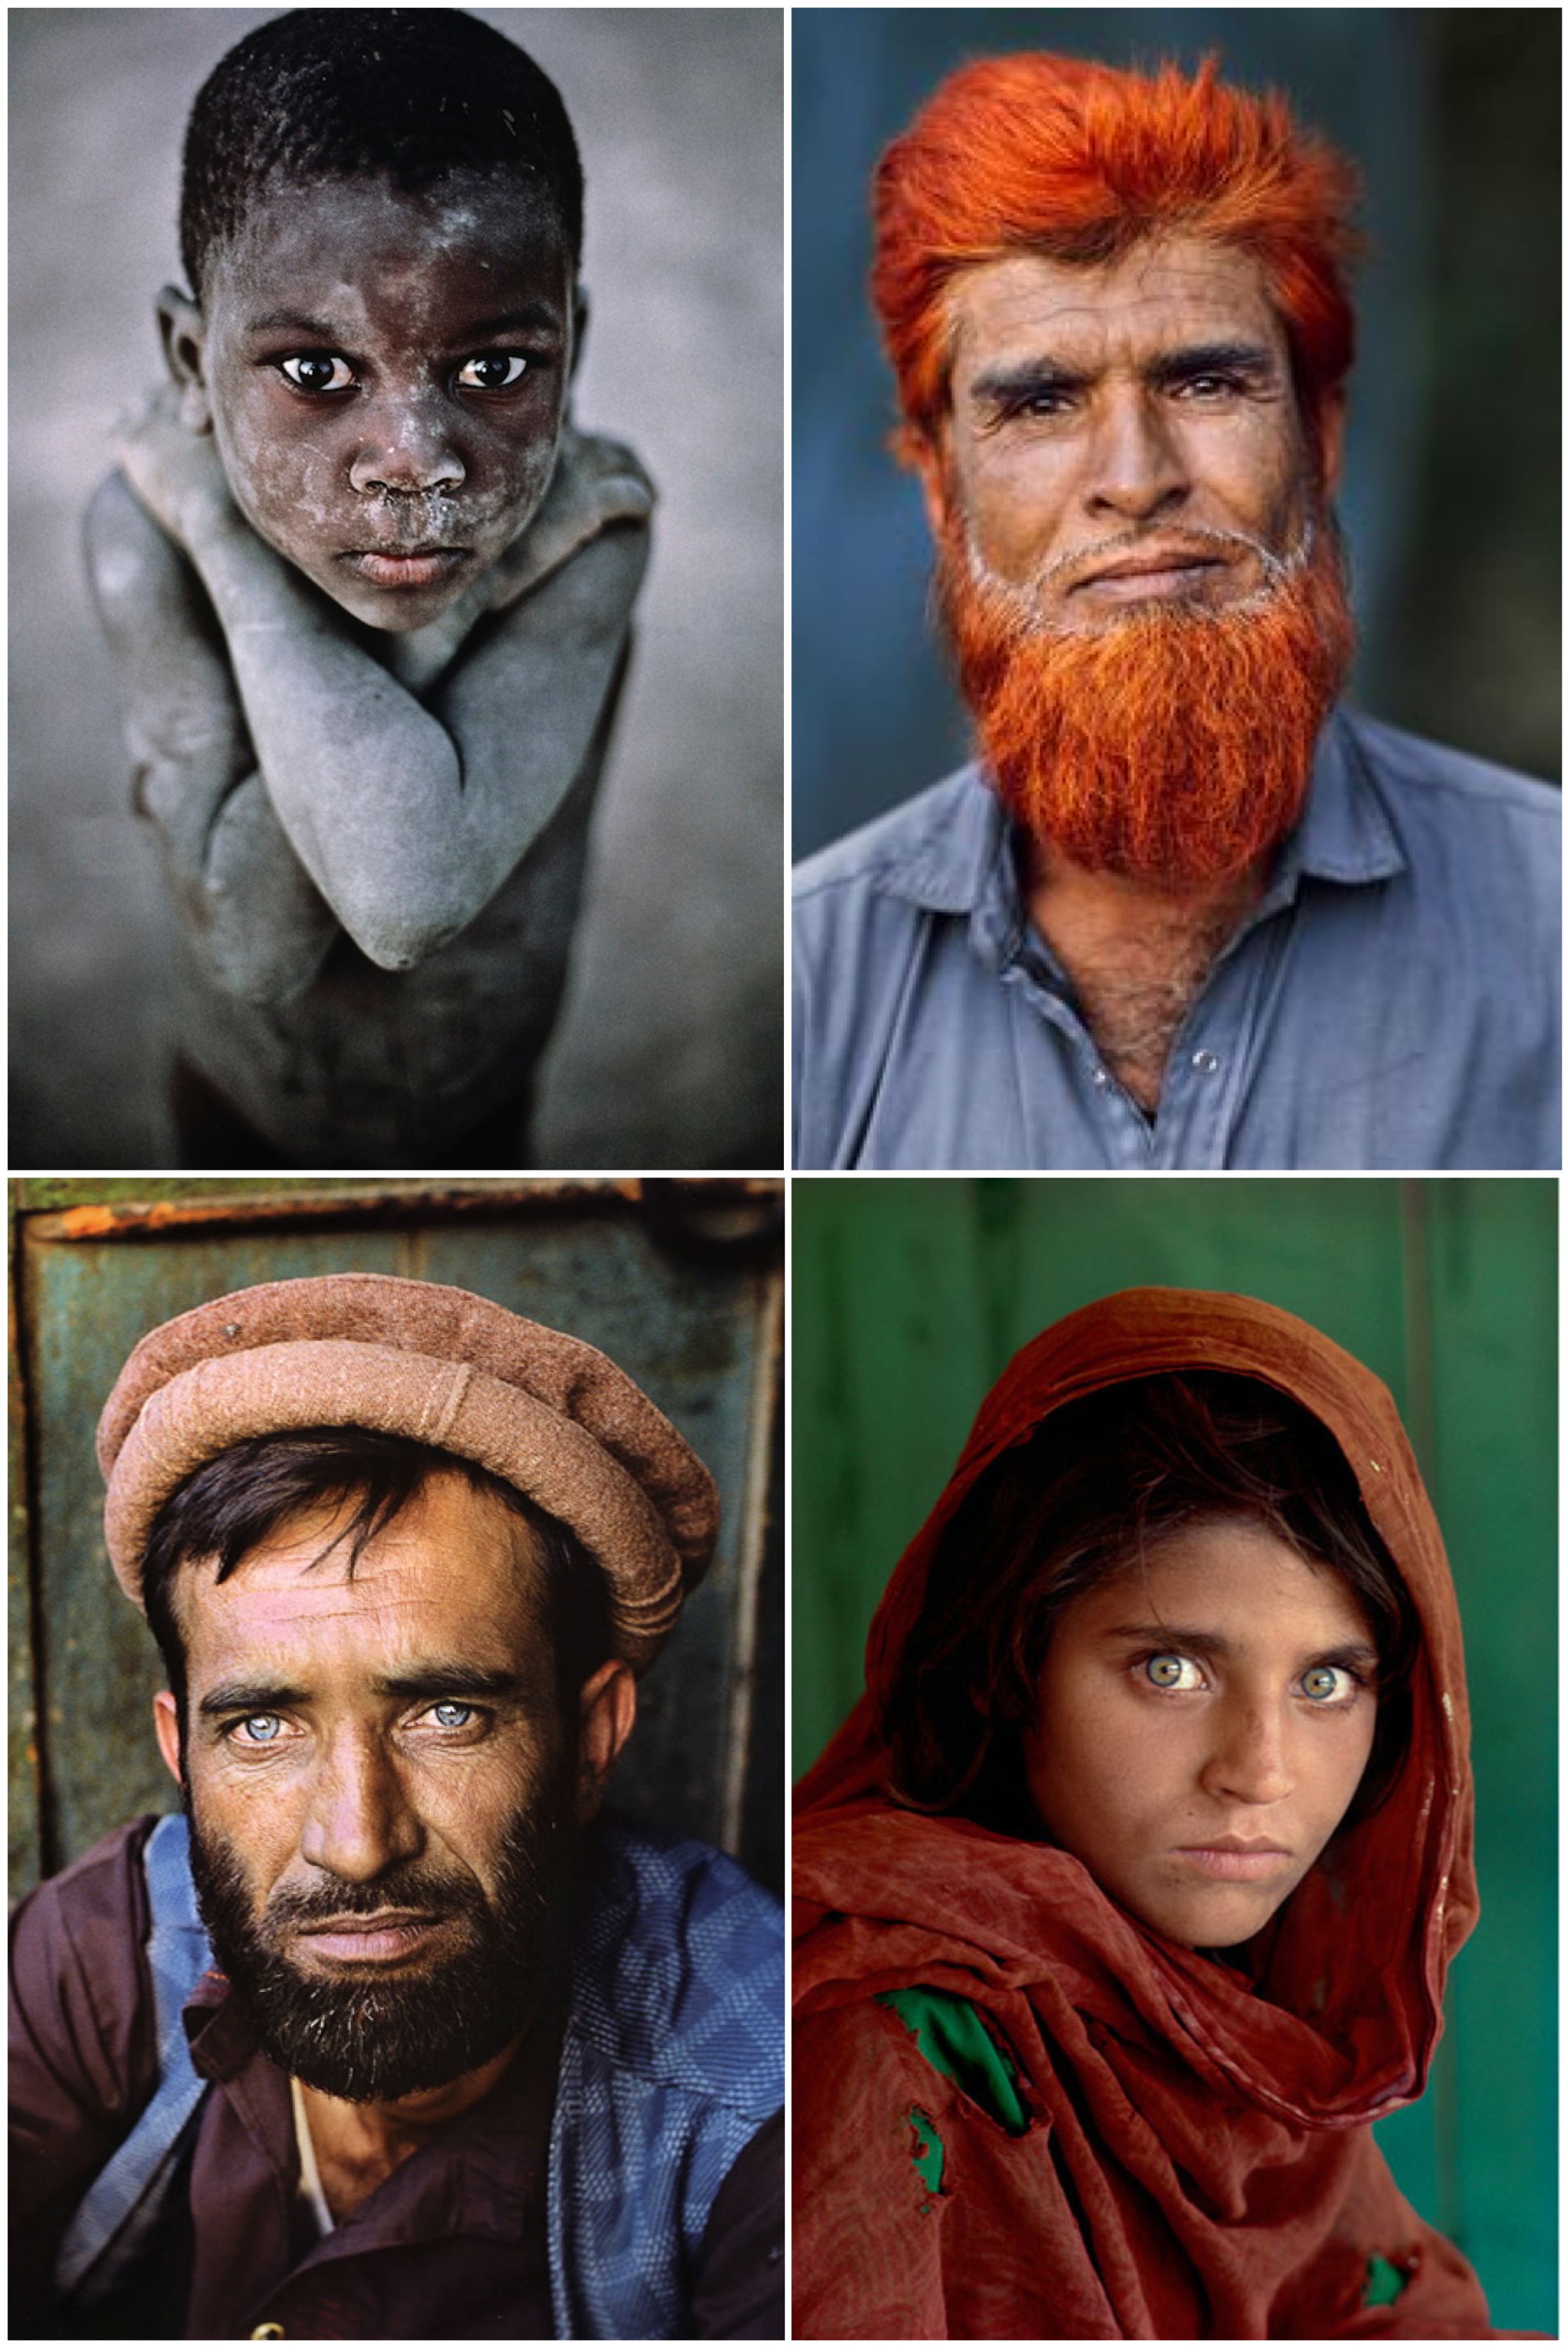
www.stevemccurry.com
Don McCullin

www.contactpressimages.com/photographers/mccullin/mccullin_bio.html
Joey L (specifically his Africa and Varanasi Portraits)
www.joeyl.com
While I was thinking about these guys who are an inspiration to me, two things were immediately clear.
1. These photographers are known for a style, which includes subject matter, composition, editing etc etc. They don't 'also shoot weddings'. These guys do one thing very, very well.
At some point I have to choose what it is I shoot. I may feel right now that I need to shoot a bit of everything to keep the scant work flowing in, but the irony is that if I focused it down I would likely pick up more consistent work in the long run because I am the go-to guy for 'x'... if I'm good enough.
I suppose the old saying, "if you aim at nothing, you'll hit it every time" applies here.
I will consider myself a success when I have a smaller website, with less material on it, not more. I will have a defined idea of who I am as a photographer when I have ceased chasing the blogs for techniques, tricks, tips and tools, and have locked into something I love and put my head down to be the best at it I can be.
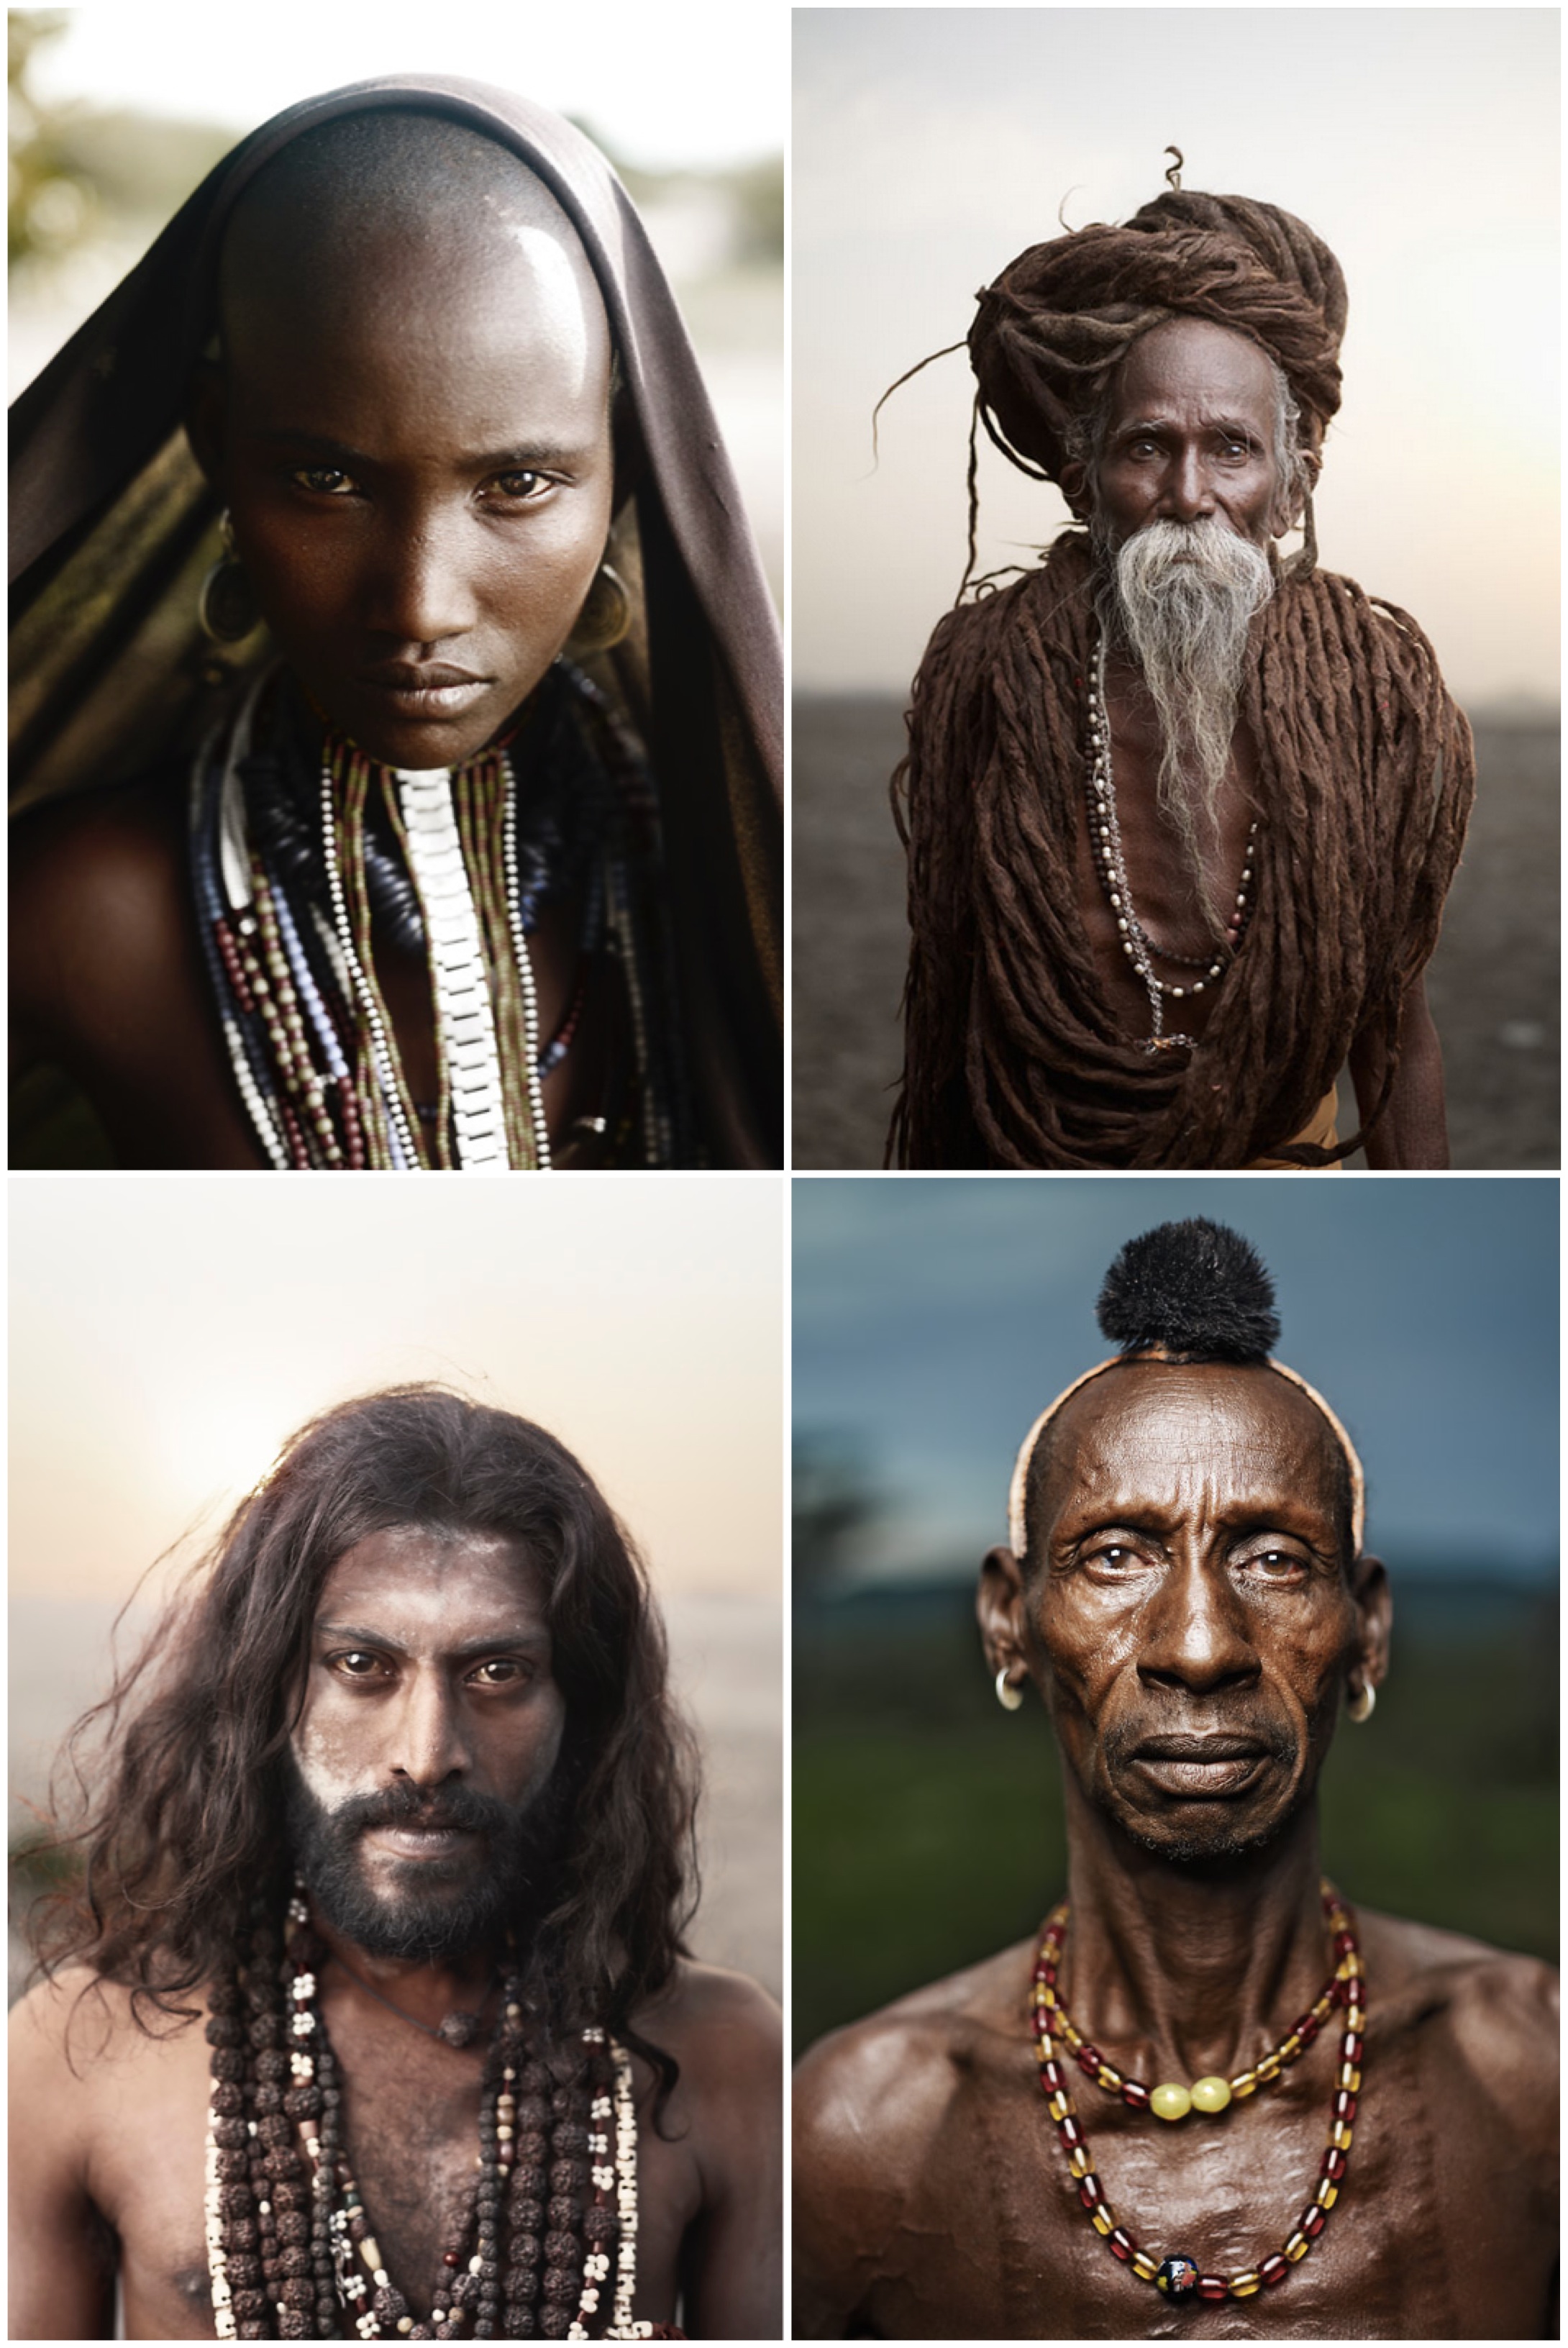
2. So the obvious question is what will I choose? What do I want to shoot? What resonates with me? it might be obvious to you because I laid it out in this post, but it dawned on me slowly. I looked at these images from my heroes and realised that the images which resonate with me are actually very specific.
It's people photography, and the sort of people photography where the individuals have stories etched into their features.
It's photography which gets in close. It's capturing subjects willing to be vulnerable enough to stare down the lens at you and offer you a bit of themselves to freeze in your frame.
These are the shots I want to be taking. If I could choose (and I must choose) what my photography will become, this would be it.
I know that this sort of photography isn't lucrative any more. I know that this sort of journalism is going through huge changes which leave less and less opportunities to make a career out of it, but I can't help it. This is the stuff which speaks to me.
So I need to try. I need to work out ways to overcome my shyness in shooting strangers. I need to find a style which I can own, and then keep it simple. I need to invest time and energy, because it's work the risk.
I suppose the challenge I want to leave with you, especially if, like me, you are struggling to find a direction for your work to focus on: look at your heroes. There is likely a clear thread there staring you in the face, which you just need to pick up and follow. Start to hone in on shooting the work which really resonates with you.
I still don't know the way forward, but having a direction to face, even without having taken the first step yet, feels like huge progress.
One Light: Using the Sun as a Rim Light
I've done a couple of shoots lately with beautiful outdoor evening light and I am falling in love with one particular setup, which is going in my shot arsenal from now on. It's nothing new or ground breaking, but it is very effective. Let me share it with you:
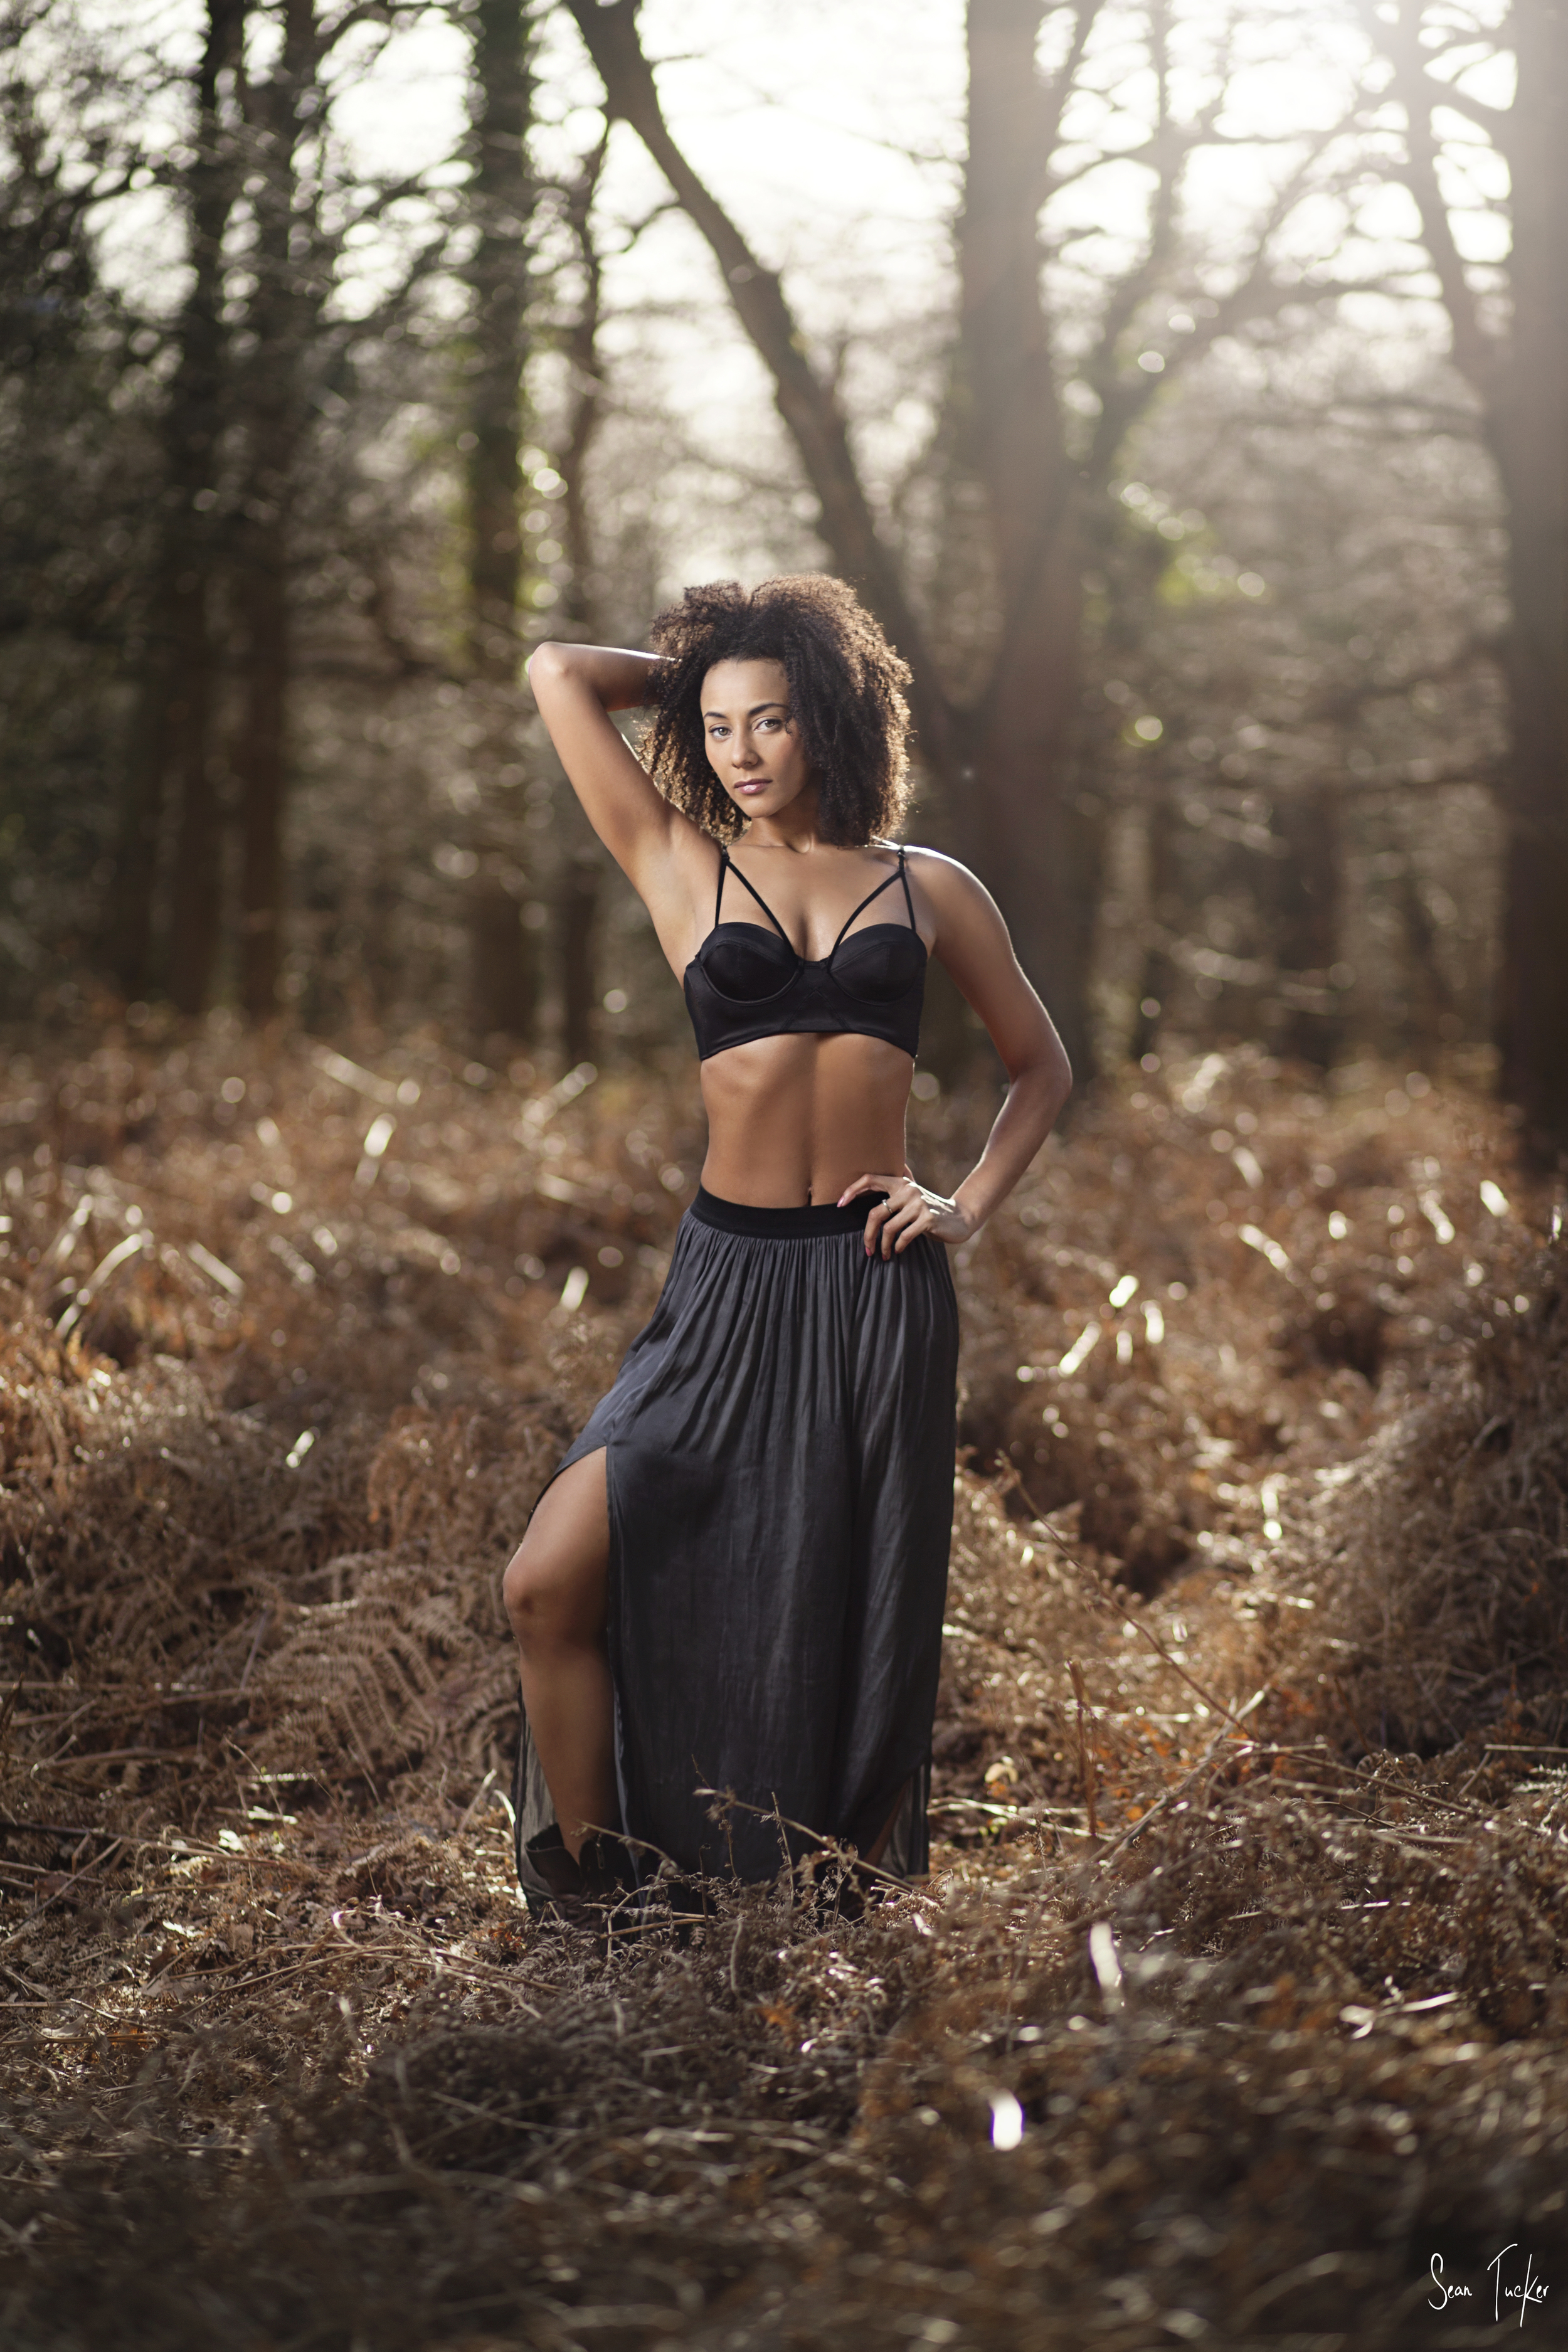
ISO100 f2.2 1/160 85mm
It's a one light set up, using the sun as a 'rim', or 'hair' light and a single strobe as fill. I think the effect, if balanced correctly, gives the professional feel of a studio, with the organic feel of an outdoor setting.

ISO160 f2.0 1/125 85mm
So how is it done?
It's actually very simple. I know many of you are likely afraid of flash, as I was for years, but getting this shot is really not too technical.
Firstly, this is how I position myself:

I make sure the sun is hitting the subjects shoulders and hair from behind. This means that in choosing the composition the direction of the sun directs where I point the camera, but I still need to position myself so that I have a pleasing background in the correct direction. I mostly shoot this shot with a shallow depth of field so it's more about finding something which will create a pleasing bokeh (lens blur) with good colour and little distraction.
The next step is to take a shot without the strobe to get a good 'ambient exposure'. I want the background to be slightly darker than than it appears to my eye in order for my subject to 'pop' off it when lit correctly with the strobe. I also want to keep the sun at bay and not let it's light become too over powering. To pull this off with a shallow depth of field I often need to use an ND filter (for the uninitiated this is basically sun glasses for your camera).
As I've mentioned before, to control the ambient light I need to focus on my shutter speed, where as my aperture is going to control my flash output.
A couple of things I need to be aware of when setting my exposure:
1. I cannot really shoot faster than 1/160 shutter speed because I will lose flash sync, which just means that my shutter fires faster than my strobe pops and it will leave a portion, or all, of my shot dark. Your camera my be different but I know this is the magic number for my 5DmkII. Just Google your camera make and 'sync speed' to find yours.
2. In bright sunlight I want my ISO as low as possible to help me maintain detail and control the light.
3. I want to make sure that if I need to slow my shutter speed down a lot to let in enough ambient light that I put the camera on a tripod to reduce camera shake and motion blur. The thumbnail rule is that your shutter speed should not be less that your focal length: in other words you shouldn't shoot handheld at slower than 1/50 on a 50mm lens, 1/100 on a 100mm lens etc.
Obviously once I have the ambient exposure dialed in correctly my subjects face will be dark and filled with shadow because the sun is hitting her from behind.
Enter my strobe.
In the BTS shot above I am using my Alien B800, Vagabond power pack and a 1m softlighter, but you can use a speedlight and a shoot-through umbrella if the ambient isn't too strong. Your speedlight won't be able to fill against full noon day sun, but it will work nicely with a muted setting sun.
Then I simply bring my light in close to make sure it's soft and dial it up until it provides a natural fill light to the setting sun. I already have my slightly darkened background, now I just need a good exposure on the skin to complete the light for the shot. I want to position it at 45 degrees above the models head and slightly off to one side to mirror the direction of the sun. I'm looking for a good catch light in the models eye, and I often use a small handheld reflector to add a second catch light in the lower portion of the eye as well.

ISO125 f2.5 1/100 85mm
Something to take note of: you'll find the smallest moves in the camera will control how much flare you allow into the lens. A slight bend at the knees can mean that you flood the lens with sun light, and as you straighten slightly you can kill it altogether. It's going to come down to taste, and some strong quad muscles, as to how much flare you want in your shot.
Here are few more examples:

ISO160 f2.0 1/125 85mm

ISO100 f1.8 1/160 50mm

ISO160 f2.0 1/125 85mm
Go try it for yourself, and post me links to your shots in the comments.
Thanks to the beautiful models:
Actor and Director, Lucy Drive: http://www.modelmayhem.com/548139
and Professional Dancer and Model, Beth Willetts: http://www.modelmayhem.com/824462
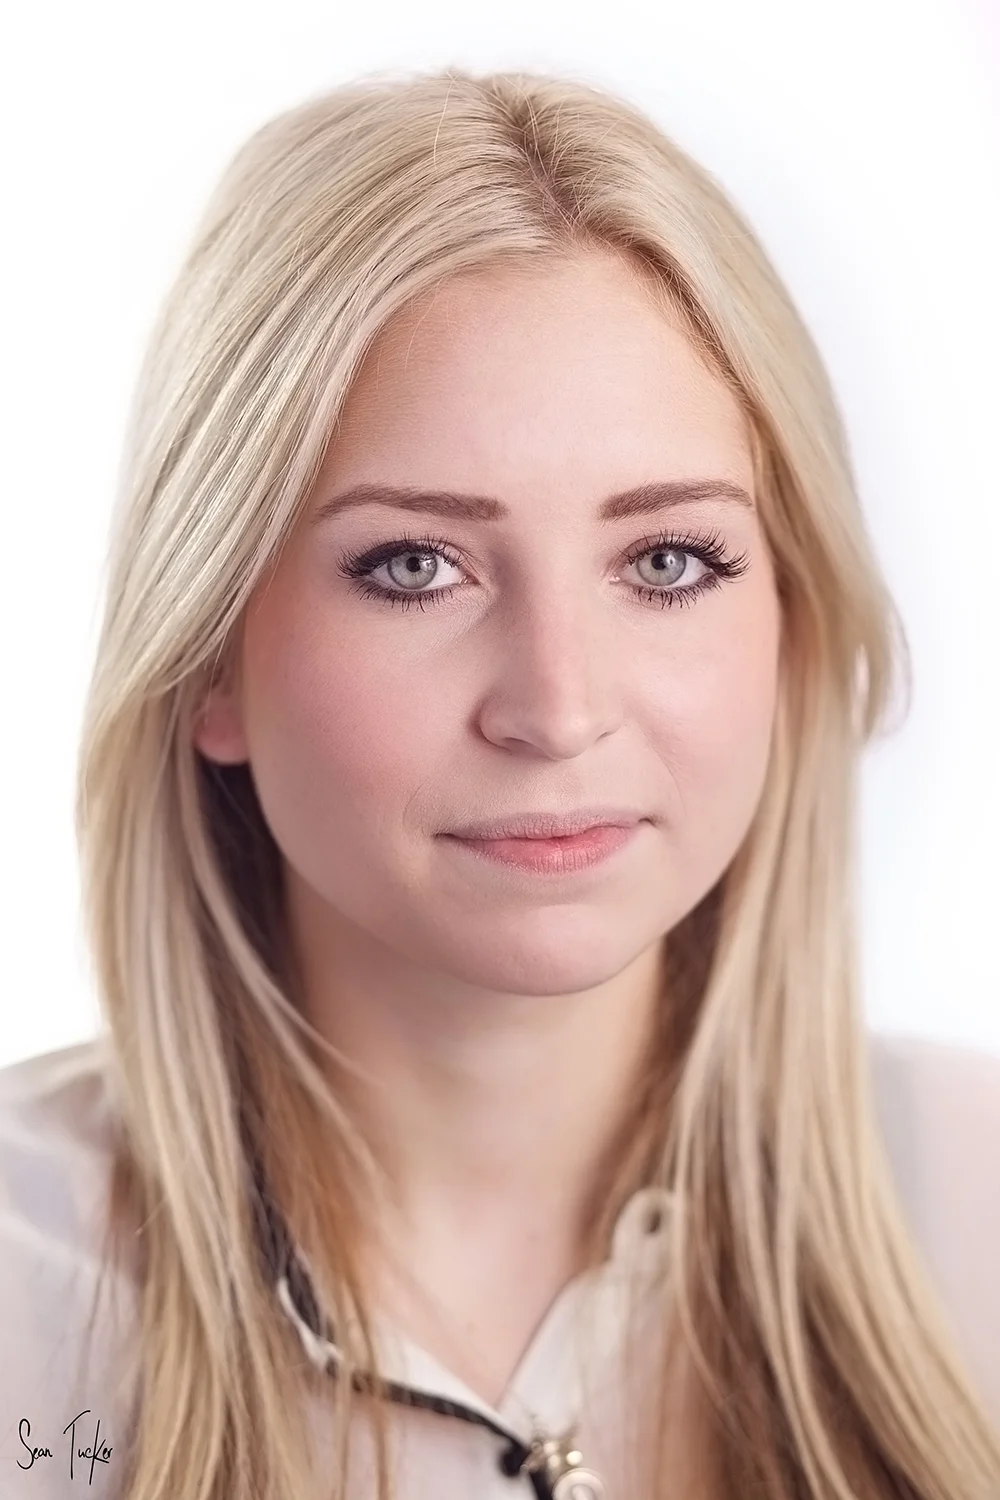
Shooting Business Headshots
I was recently asked to shoot, what would turn out to be, a Headshot Marathon.

By day I am a product photographer for a big ecommerce company in London. I have plans to do a series of posts on shooting and editing product images, so make sure to subscribe to the blog if you're interested.
In the meantime though I thought I would talk about a recent assignment at work. I was asked to shoot headshots for the company staff which turned out to be a challenging experience.
Let me get the technical side out of the way first because I know some people will be interested:

As you can see my light set up was fairly simple. I placed one soft key light on camera right using a 1m softlighter, one hair light on camera left to give some hair and jaw line shape, and one background light which is hiding behind the fill reflector. This is the lighting diagram:
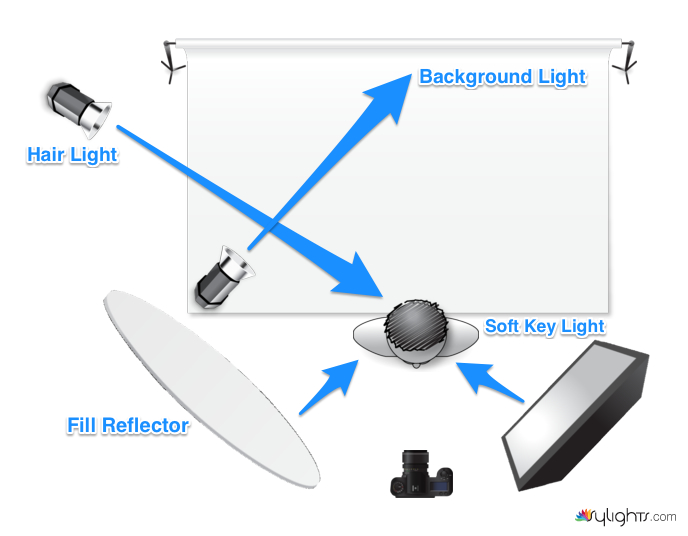
My camera (5DmkII) settings were 85mm, iso 100, f2.8, 1/125.
So now that you know the technical stuff I wanted to talk about the experience of having to fire through 70 plus headshots in a couple of hours.
I share the technical stuff briefly because that really wasn't the challenge on the day. The tough part of this assignment was the fact that I was given between 30-60 seconds with each person, and most really weren't that keen to have their photo taken. How was I going to get a rapport going, relax the subject, set up the shot, dial in the lighting, organise a pose, and capture, in half a minute, all the while having the distraction of their friends and colleagues looking on and cracking jokes, making the subject just want to run a mile?
Well it didn't start off well to be honest.
The first few I took I immediately felt the pressure of making this experience as painless as possible for my reluctant subjects, and I rushed the shots. I have a strong empathy for people, and feel uncomfortable myself if I am the source of their discomfort as a photographer. I feel this failing often when shooting portraits with people and know I need to overcome it, and this day turned out to be a bit of a breakthrough. After I had cracked through the first 4 or 5 headshots, I had a moment of epiphony.
I may have thought I was being compassionate by rushing them through, but I was actually doing these people a disservice.
It was a case of short term / long term goals. In the short term I could have argued that I was helping them by making the process as brief as possible; but in the long term I was taking pictures which were not as good as they could be. The pictures would last. The discomfort they felt would only be extended by seconds and it could mean the difference between an image they like of themselves, and one they never use or look at willingly again. The answer is not to rush and get them out of the firing line of my lens because they are squirming a bit, the answer is to keep the big picture in mind and help get them a great image which they will get a lot of mileage out of.
That doesn't mean I should just ignore their discomfort though.
After getting the first 10 or so done, I found myself quickly developing a 'shtick'; a routine with each person which would quickly relax them, give them the info they needed, and keep them from overthinking the whole thing.
It went something like this:
"Hi.
Don't worry. We'll make this quick and painless for you. I promise it will be worth it. We've been getting great images all morning.
Can you just write your full name on this sheet for me so I can match your name to the image afterwards?
Thanks.
Take a seat up on the stool for me and face your shoulders towards this light here."
Gesture to the key light.
"Turn your face to me a little.
Great."
Take a shot.
"See it's not that painful."
Take a second shot as they inevitably smile at that comment, even if just to be polite. Now you have the ball rolling.
"These are looking great."
Make small adjustments between shots to work on the pose and expression, keeping it light and casual. If the subject is very rigid and struggling then I would try this little trick:
"Ok lets try this. Close your eyes. I'm going to count to 3 and on '3' you are going to open your eyes and look right into my lens. 1. 2. 3."
The trick with this is to catch the eyes in the moment between their widest and before they settle. I find there is a moment of honesty before your face works out how to cover for you. It may sound odd, but I find it works for me. Give it a go.
"That was really good. Thank you. I'll let you know when the images are ready. You've been great."
That takes me to nearly a minute and the good thing is I have been giving clear directions, taking shots, and reassuring the subject the entire time. I found that the less dead space there was, the less opportunity there was to feel self conscious. As the session continued I was coming up with banter which hit more often and phrases which got my suject to the expression I wanted more efficiently. It was a great, compact learning experience to have to get through so many, so quickly, not that I hope to repeat it soon.
If you want to see a master of Headshot Photography check out Peter Hurley's DVD The Art Behind the Headshot for some amazing tips on posing your subject and getting the best expression out of them.
Here are some more shots from the day:


Finding Your Vibe
A few weeks ago I was asked by good friends of mine to do a "Bump Shoot", or "Maternity Shoot".

I've never done one before so I agreed, albeit with a bit of trepidation. After all, I'm a single dude with no family of my own, so would I have the emotional involvement to be able to capture this important life stage for this couple?
I think at the end of the day I did ok.
We ran through a series of shots indoors, working off my iPad and a Pinterest Board which we had compiled together as a reference. I tried a few light set ups and attempted to replicate some of the shots with the limited space we had available, but I didn't really feel like things were clicking. I knew I had enough to go on, but I was keeping an eye out for golden hour because I knew they had beatific surroundings which would really offer us some gems if the light would only play ball.
And it did.
For those not familiar with the term, Golden Hour is a photography term for the first and last hour of sunlight in a day. Obviously it's often not strictly an hour, but the point is that at sunrise and sunset the quality of light is softer, with less harsh shadows being cast, which makes for more diffuse light and flattering pictures.
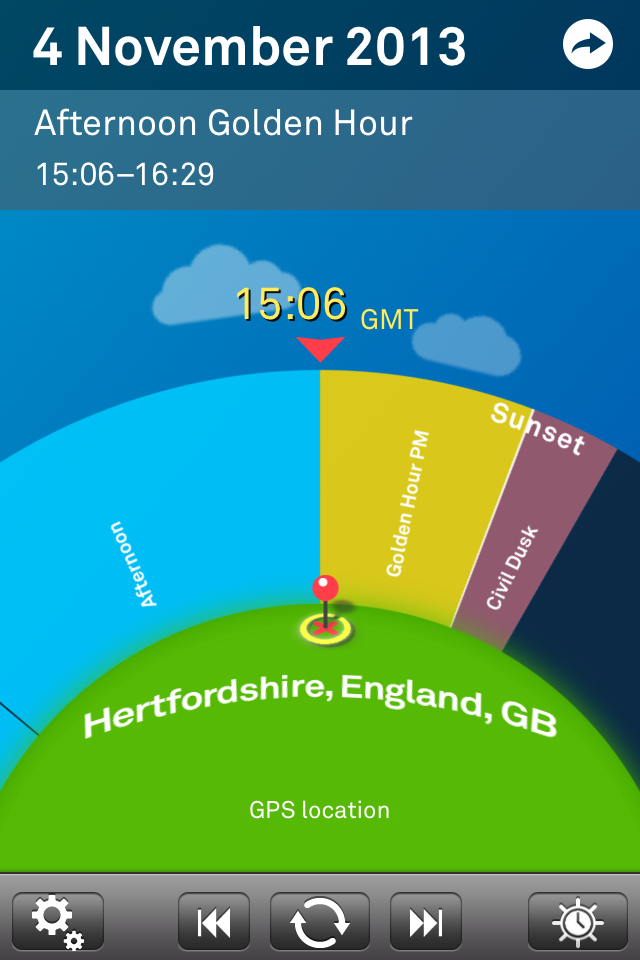
I use a great little app called "Sol", which tells me the exact times for golden hour each day based on my location and time of year. It really comes in handy with planning shoots.
For example this screen grab is telling me the best time to shoot today, here in South West England is between 15:06 and 16:29.
The evening in question we had a beautifully rich, orange sunset which played so well in the golden fields behind their house.
We walked around for a good 2 hours, well into 'Civil Dusk' and got some really great light. Leanne and Conan were both troopers, being willing to trudge some distance to search for good locations, not to mention Leanne being willing to lie down in some very uncomfortable stubbly grass to get some beautiful shots in the newly manicured fields.
So all in all I was happy with the results at the end of the day, but I did end up driving home in my car wondering, "Did I just do my first maternity shoot, or did I just do another model shoot with someone who happens to be pregnant?"
I suppose I was questioning whether I shot on brief or not. Did I get the vibe right? As I played the shots back through in my head they didn't feel like other maternity shoots I had seen fellow photographers post. Had I messed up?
I suppose this is the tricky part. Was what I had produced a 'maternity shoot in my style', or a missed mark by unprepared portrait photographer falling back on tried techniques? I think there is a fine line between deliberate stylistic choices, and a lazy reliance on your usual bag of tricks.
A very good photographer friend of mine did make the comment, after seeing the photos, that they 'weren't smiling', and this was supposed to be a 'happy event'. I suppose the insinuation was that I should have been getting them to smile and laugh throughout to give the sense of 'joy' which comes with birth. Did he say that because those are his stylistic choices, or because I had done it wrong somehow?
That got me thinking some more: I'm not really a 'smiley' photographer. Everyone knows how mother's feel about their imminent children arriving. I don't believe that we need to go through painful hours of me cracking lame jokes until one lands and I can catch that moment of 'genuine' joy. Maybe it's a personality thing, and I am an introvert so I prefer a more contemplative style of photography. I think even if I went to the shoot with this advice in mind I still would have aimed for the same vibe.
I remember when I shot for a company a few years ago as their in house photographer I was constantly criticised for not getting people smiling and laughing in shots. They wanted me to paint this picture that around the office everyone was always joking and laughing, which they obviously weren't, and to be honest those weren't the shots that interested me. It took me ages to own that that just wasn't my vibe, and it doesn't make me wrong, or a bad photographer, it just meant I had to work against my natural grain to meet the brief.
Now I understand that my more sober, thoughtful vibe may not be everyone's cup of tea, but at some point, with my own work, I either have to own it and make it the best it can be, or spend my career pretending to shoot like other people.
So this is my journey at the mo: to define what my vibe is and move away from the generic feel of my shots to give them more character. I may lose business that way because it doesn't appeal to everyone's taste, but I have to hope that those who latch on to my ever-defining style will be loyal followers and effective evangelists in helping me get the word out about my work.
NOTE: Thanks to the amazing Sarah Howse for an awesome job retouching images 1, 2, 3, 4 and 6. Check out her stuff here, and hire her: http://sarahjhowse.wix.com/sarah-howse-editing ... and I'm not just saying that because she's my partner. She's bloody good. You can also read more about her under the 'retouching' menu link above.
Here are more shots from the day:


Balancing Colours
I recently shot for Moonika, who is building a portfolio to put herself out there for modelling.
She has the most striking red hair, and so early in the planning process I had to consider how to deal with, and compliment, such a strong colour.
Confession time: I am slightly colour blind, especially when it comes to reds and greens ironically. I often confuse them, particularly when they have similar tonal values. I actually have this constant insecurity that the colour balance in my edited shots isn't very good and no one is telling me I'm messing it up; like maybe everything I shoot has a slight green tinge for example and, best-case-scenario, people think it's a deliberate stylistic choice.
To compensate I have a few photography friends who I bounce my portfolio off to get some honest feedback and see if I'm off track. This is a really good idea by the way, especially while you're learning to colour correct your images. Source some trusted, honest, brutal opinion.
When shooting though, I try and keep the colour wheel in mind to plan out some sort of balance, because it really is as important as spatial composition.
I found this great graphic on visual.ly, which explains many aspects of colour theory and gives a really helpful overview:

Obviously I'm not thinking about all of this when shooting, although I do try and bring some of this knowledge into my compositions. At least knowing this stuff in the back of my mind often helps me to work out when something just 'looks wrong' and I can't figure out why. So it may look very complicated, but let me break down just two of the things I try and stay aware of:
Analogous Colours can add thematic interest. These are colours which sit close to each other on the colour wheel (Pink/Red). If you place these sort of colours together, especially in styling, you can create depth and interest while still playing on a theme.
Opposite Colours provide separation. In colour theory they are called 'Complimentary Colours' (Red/Cyan). They will give you the greatest separation from fore-background, whilst playing nicely together.
Let's take the next two shots of Moonika to demonstrate.
I used Analogous Colours in the styling. I say "I", but she brought along this pink scarf for the shoot deliberately, and as a costume designer herself, she understood that the combination of the pinks and reds works well together in colour theory. So the pink of the scarf and red of her hair give us an Analogous Colour theme, but now I have to separate her from the background.
The Complimentary Colour for red on the Colour Wheel is cyan, but there was no cyan to hand to use as a backdrop so I tried the next two best options: green and blue (which strictly speaking is triad theory in the graphic above, but I think you'll get the idea).
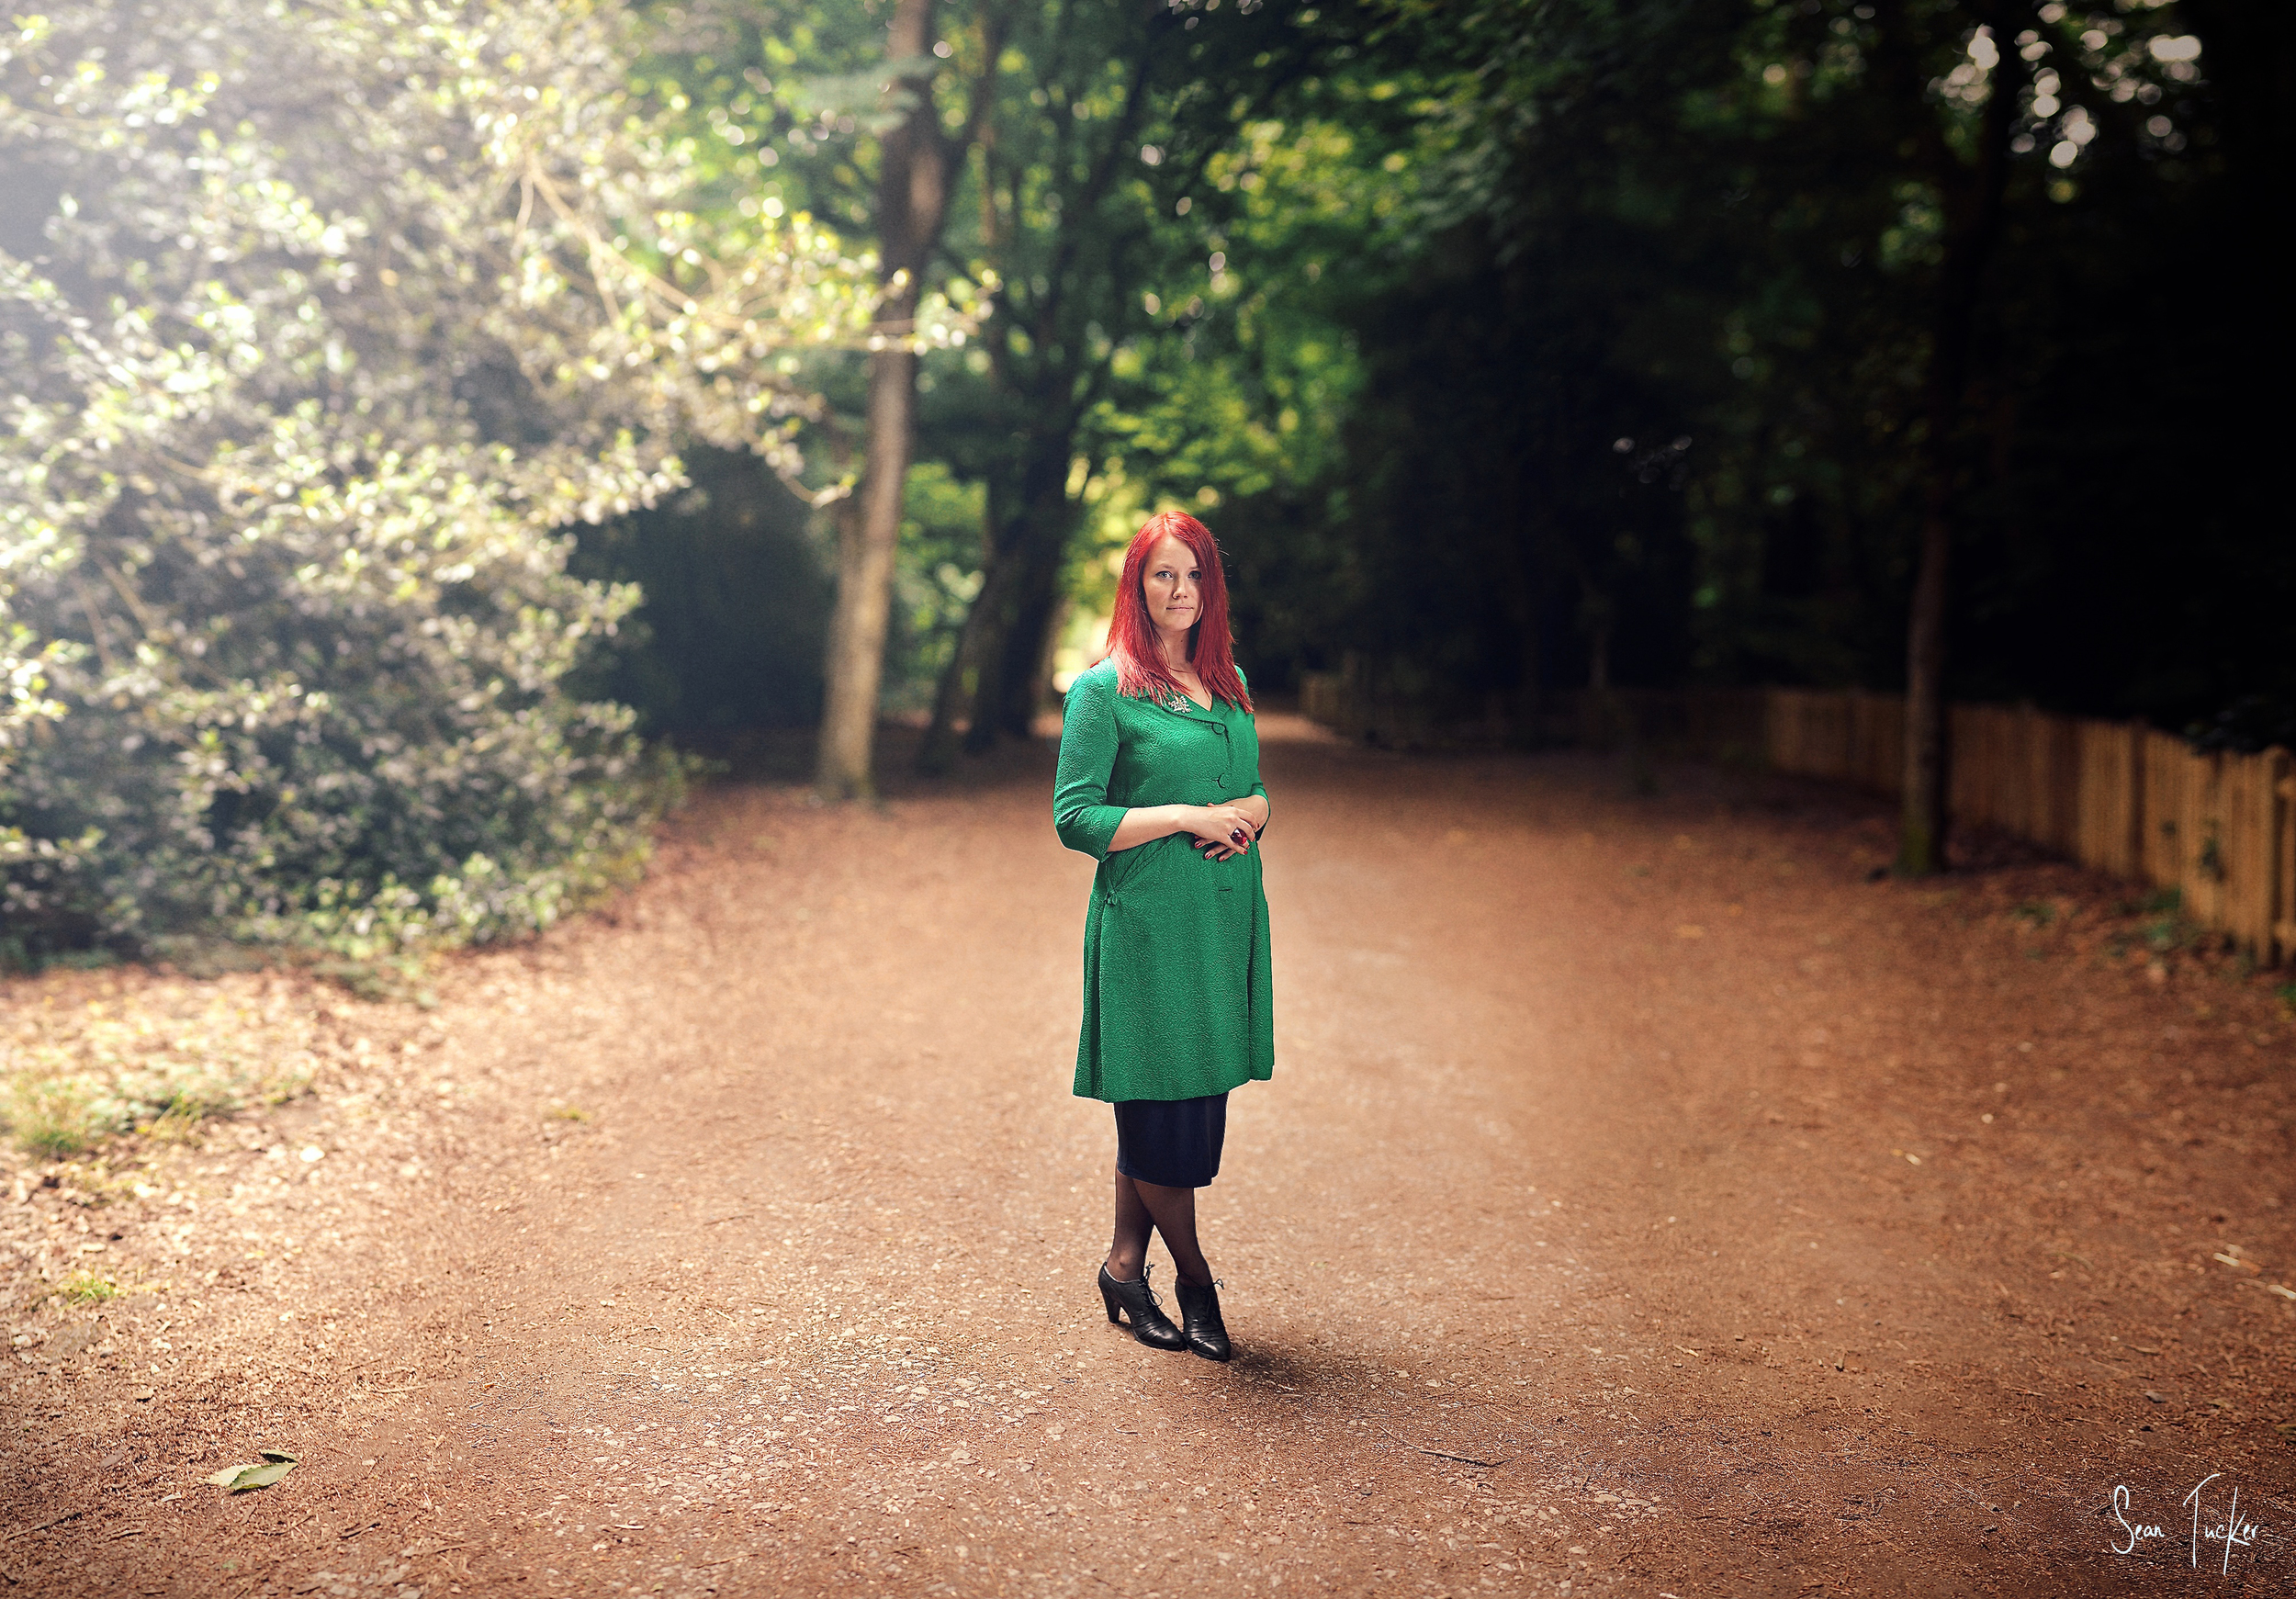
First I lined her up with a rich green background to make the red of her hair pop and it worked quite well. Fortunately she also had this great green coat which helped me frame the bottom edge of the image too and draw the focus into the middle of the frame. The green also helped to accent the deep green of her eyes and the colours played well together. The point was that I was getting the separation I wanted.

But I also really wanted to try the blue because I had a feeling it would work well and give a very different feel.
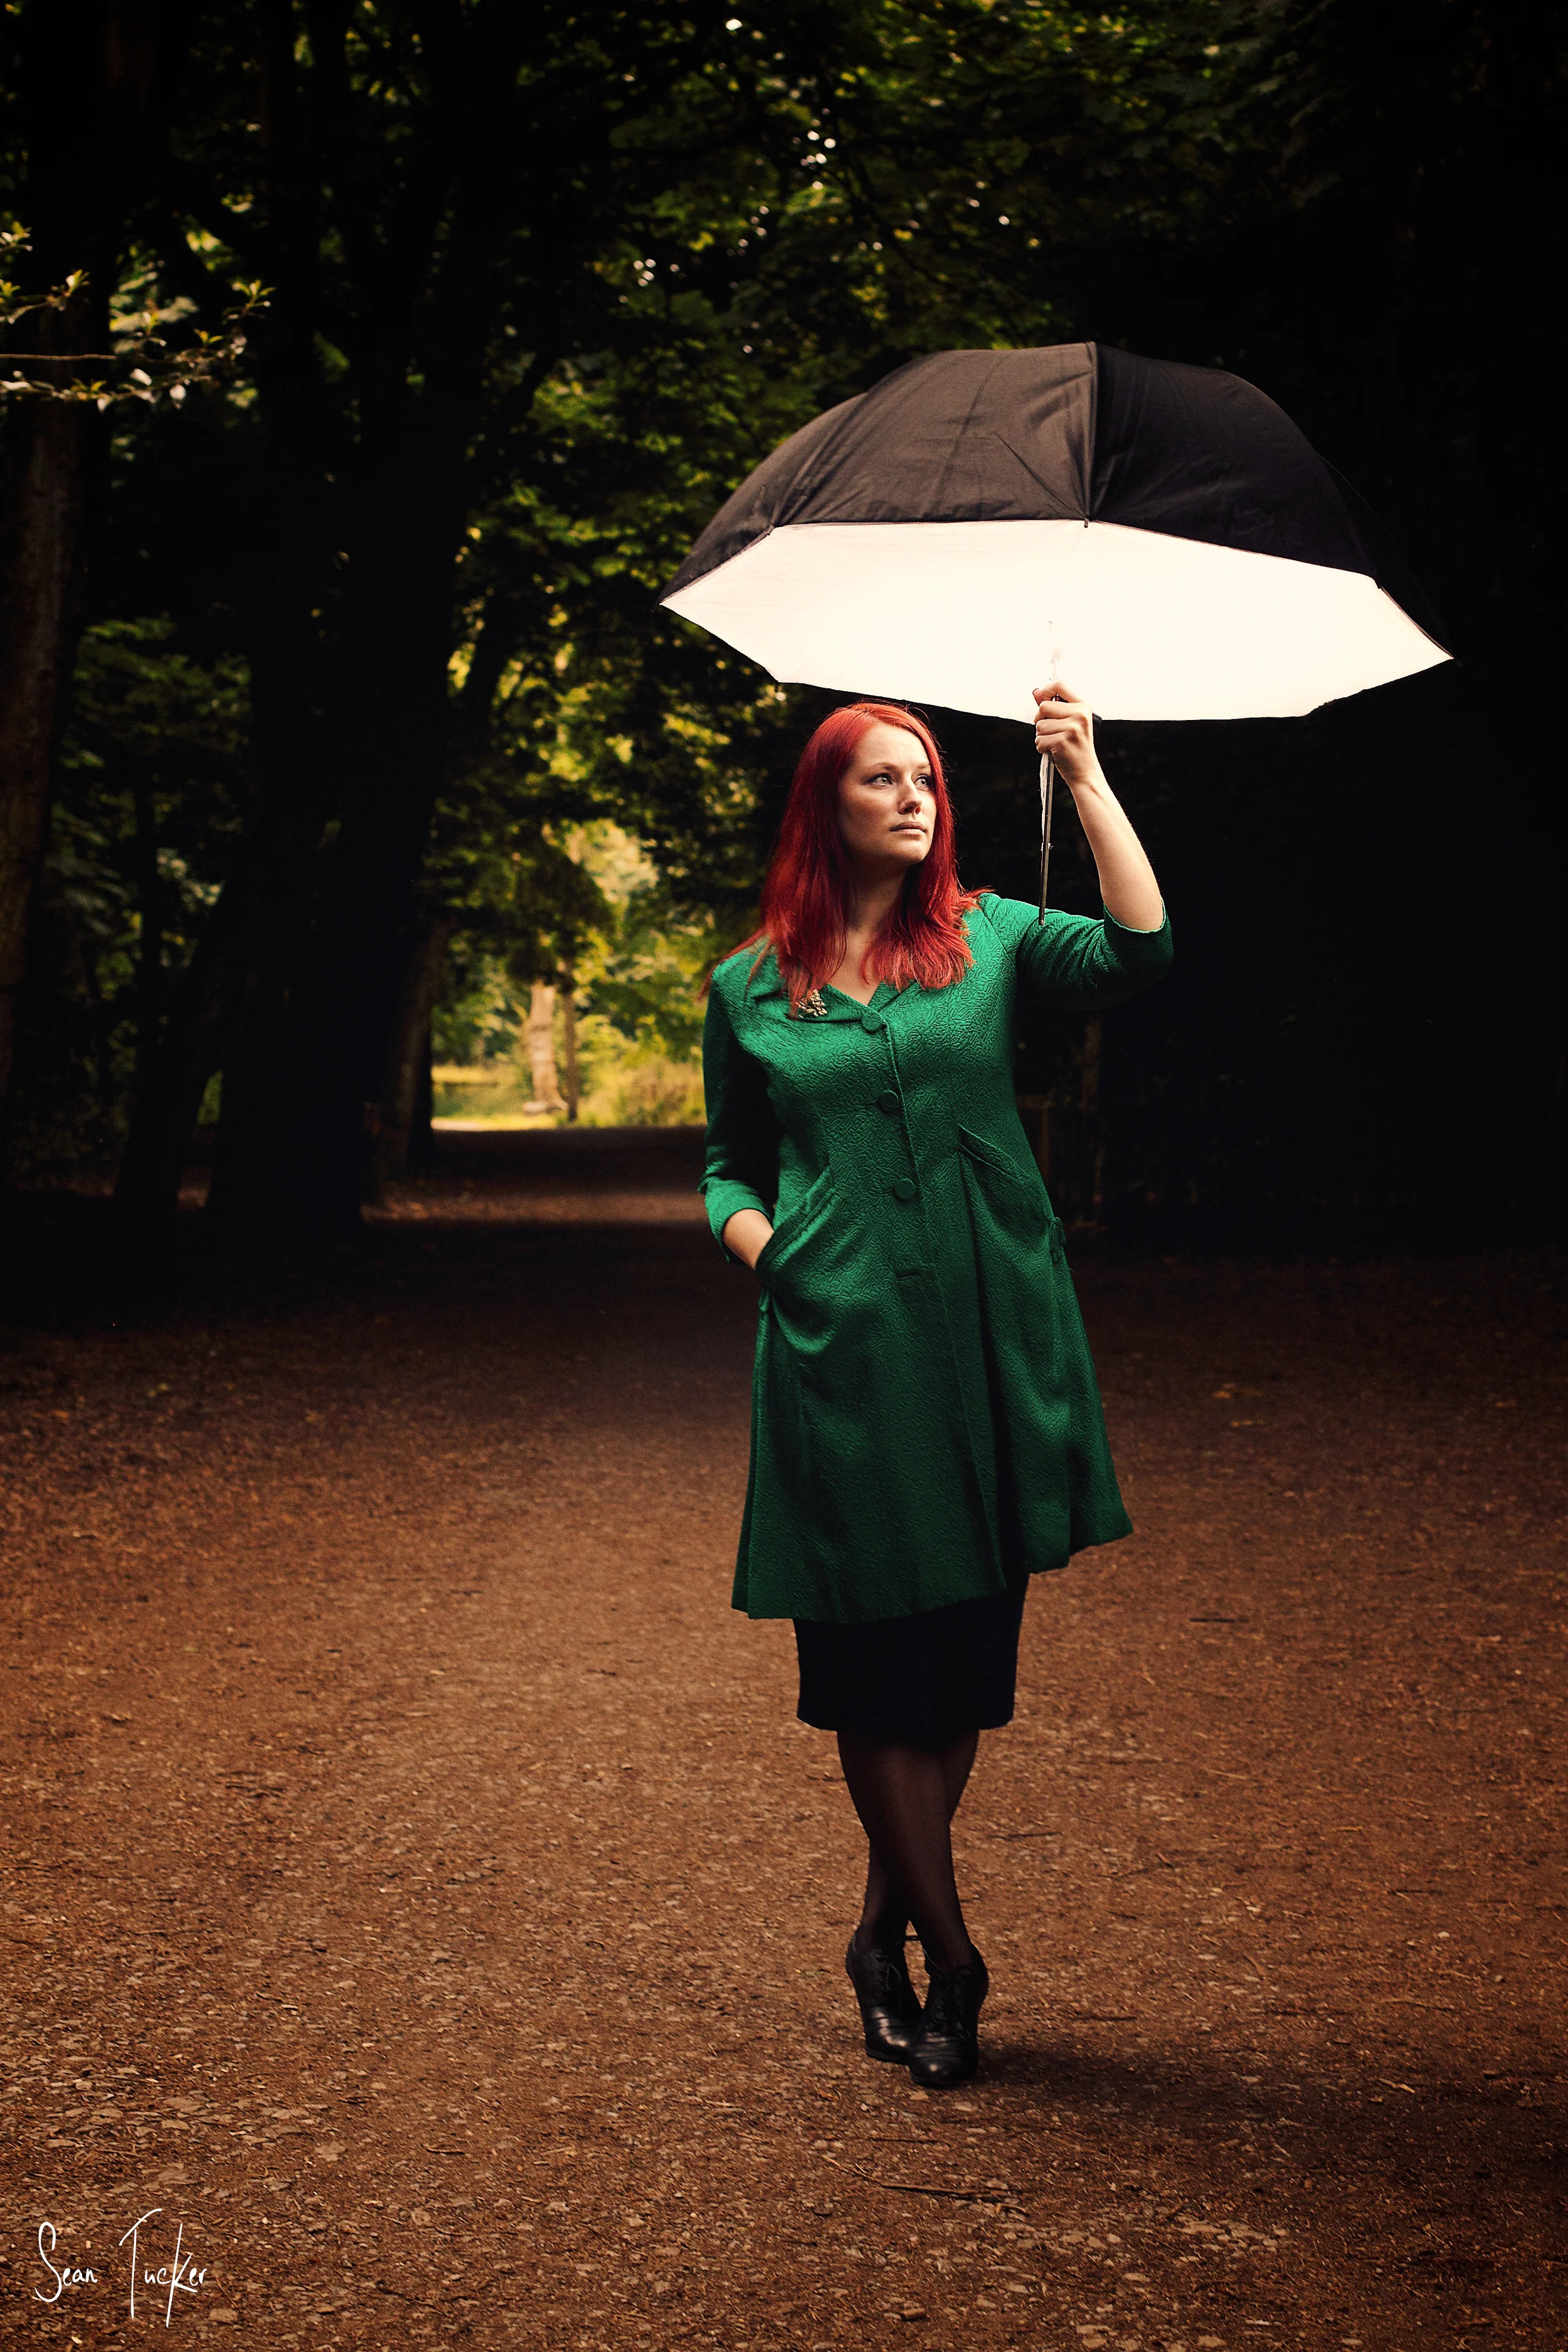
On the day, I was shooting with a photographer friend of mine, Radek (Check him out at Bayek Photography). While we were walking around he noticed a bush with very light green leaves, which when blurred out in the bokeh made her dark-toned hair really pop, so we decided to use it as a backdrop for a while. Even when taking the shot I knew what I was going to do with this image in the edit. I wanted to give the impression of a cold, icy background and let the cool desaturated texture give her hair that extra punch and separation, so when I got the image onto the computer I isolated the leaves in the background and turned them a chilly blue/grey. The final image makes me think of the White Witch in the Narnia Chronicles for some reason, but the point is the separation works really well.

I can't pretend that I'm always this deliberate, and admittedly the strong colour of Moonika's hair forced me to think more than I normally may have about this stuff, but I am always working hard to keep colour balance in mind when shooting portraits. It really can make the difference between a flat and uninteresting shot, and one that really pops.
Steal like an Artist
I'm an avid blog reader.
I never studied photography, but fortunately we live in a day and age where it's possible to teach yourself anything, if you're willing to put in the time to find credible sources online, and follow along for those nuggets of info which will take you to the next level.
I recently did a photography day with a group of friends here in London. We hired a studio for the day between the four of us and then set about trying to fill slots with potential clients.
It promised to be an interesting mix of people coming through.
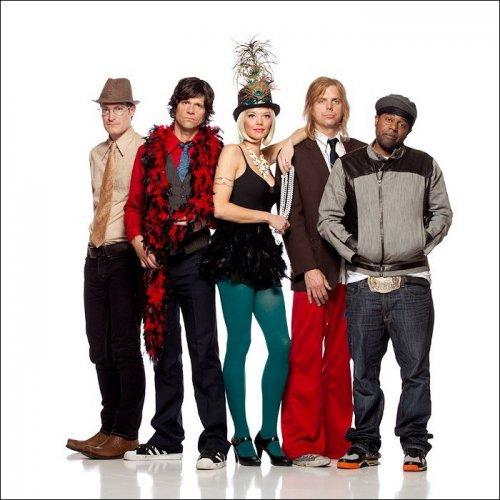
At one point I was shooting a local band named "Shawn Sanderson and the Charm Offensive". With four people standing in front of me waiting for me to tell them what to do I found myself immediately accessing countless shots and tutorials from Zack Arias, who is a Photographer based out of Atlanta, and has a ton of experience with Band Photography. It was then that I realised that his blogs (and many other besides) are slowly providing me an arsenal of solutions for different situations. It's very hard come up with a brand new shot from scratch so it often helps to have a catalogue of set ups in your head so you at least have a starting point. I threw up two lights to blow the background white, trying to remember my exposure numbers as I was dialing it in. I then used a 1m Octa as my key light; something I have seen Zack do on a tutorial before. I didn't have a nice reflective polyboard for the floor, but swapping a drop shadow for his nice reflective touch, I found I was pretty close to something I liked and could just tweak from there.
Here is one of my shots of Shawn Sanderson and co:

...and this is one of Zack's shots which I had in mind while shooting:
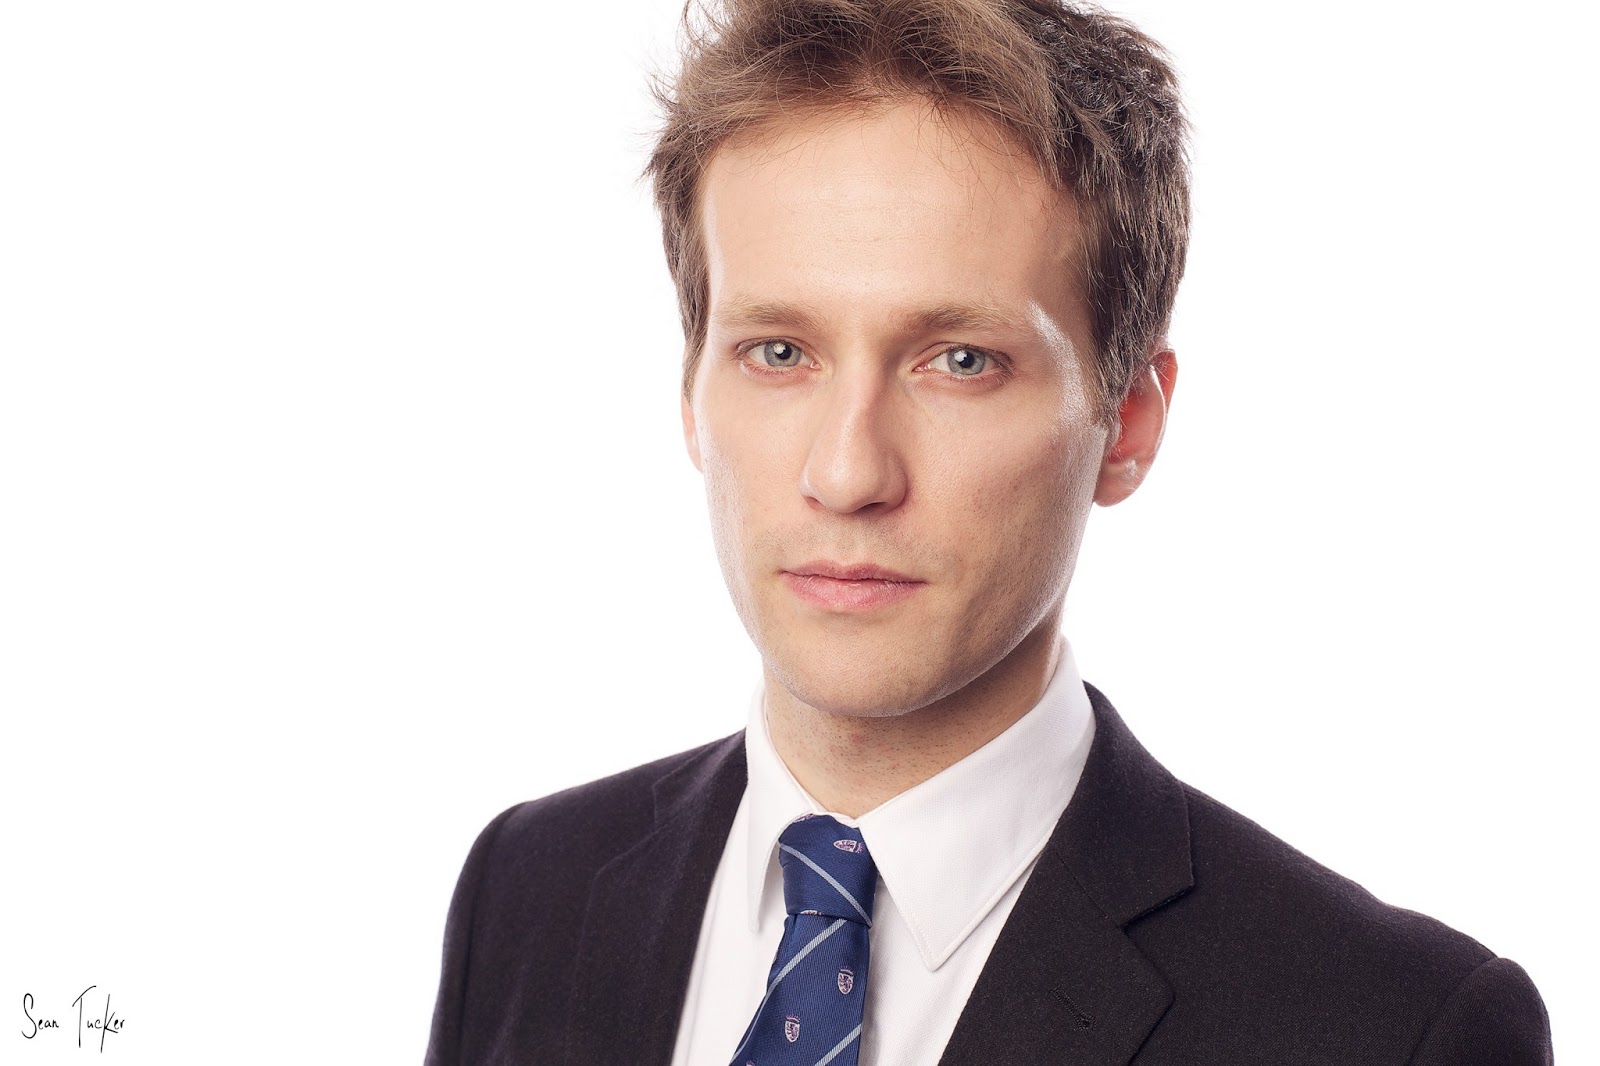
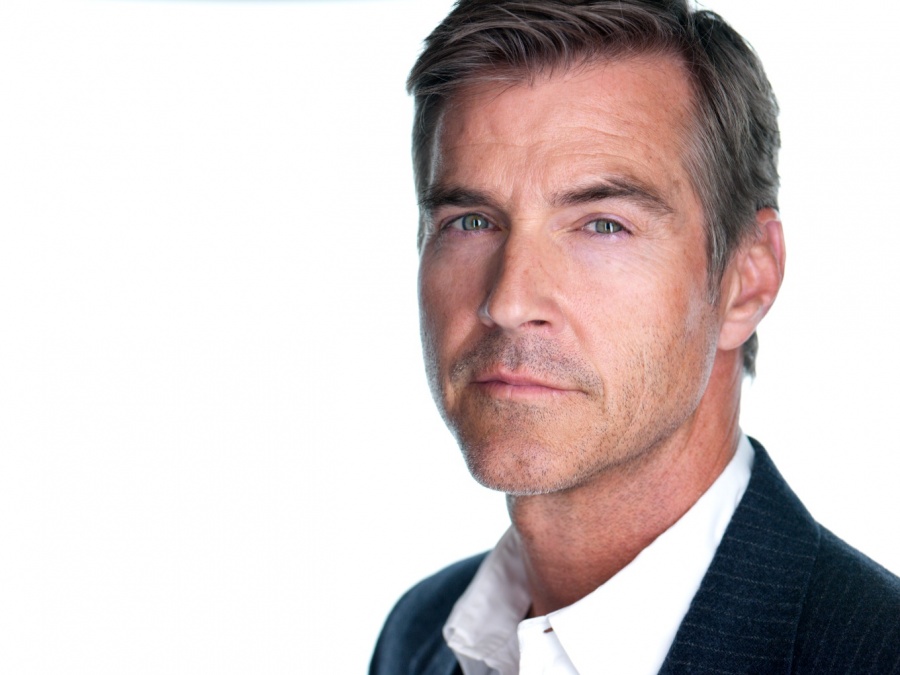
Later on in the day I had booked an up and coming Lawyer who was looking for some corporate headshots. This time my mind went into 'Peter Hurley' mode. I tried to mimmick the clean look of his white background lighting. I remembered that he lights his female subjects with flat even light, but uses side light for his male headshots to accentuate shape. I also remembered his 'kicker' light on the jawline to give a bit of separation.
I tried to coach the subject through different expressions leading him to something which would be flattering but natural. I had Peter's voice in my head reminding me about "eyes, eye brows, mouth". I used his 'suction cup' technique to move the head, and even spoke about 'the squint'; all things you'd be familiar with if you follow his work. The only thing I lacked was his bullet prood self confidence, but I think that takes more time to master.
Here is one of mine from the day:
...and here is one of Peter's shot which I had in mind:
I posted the image on Twitter and tagged Peter, who was kind enough to respond with:

I'll take the compliment, and he's absolutely right about the expression (unsurprisingly), so I'll have to work on it more next time.
My point is: don't feel bad about using techinques you learn from others as a spring board. It sounds strange but I had a moment that day where I wondered if I was cheating by using all this knowledge I had learned from others so blatantly, but then I realised that you're never going to begin your career in photography with a fully formed identity and style. You have to start by imitating those you admire and learning skills from them which you can apply to your own work and create your own voice over time.
Obviously it's important to develop your own voice, but there is nothing wrong with 'transcending and including' as you go along. Start by building an RSS feed of voices you trust and people you want to learn from, and then read regularly, and build in time to experiment with the techniques so they are hidden in your mental bag of tricks when you need them most. If you want to track what I'm reading follow me on Twitter (@seantuck) because I make a point of sharing links which I have found interesting.
Good luck with your own learning.
Stick with it.
Follow the gurus.
Steal like an artist.
...and remember to be generous to those who have just started their own journey. Give them all the info you can. If they become a better photographer than you, it was likely always going to happen, and at least your will be credited as a generous contributor, rather than an insecure competitor.
Model Mayhem and 'TFP assignments'
A couple of months ago I signed up to 'Model Mayhem', on the recommendation of another photographer.
'Model Mayhem' is an online collective for models, actors, photographers, make-up artists, designers and stylists. The idea, as far as I can tell, is to create a community where you can work together on projects; some paid, some free.
After posting my profile as a local London photographer I quickly began to get requests for 'TFP assignments', something which is very popular on these sort of sites. I had never heard the phrase, but let me fill you in briefly on what I've learnt, because if you're looking to shoot in this space it is something you are going to have to become familiar with.
Wikipedia says:
"'Time for Print', or 'TFP', is a term used in many online photography communities describing an arrangement between a model and a photographer, whereby the photographer agrees to provide the model with an agreed number of pictures of the best photographs from the session and a limited license to use those pictures in return for the model's time. There are benefits to both parties of such an arrangement: the model can build a portfolio of prints to show to prospective clients at little or no cost, while the photographer gets a model for a particular project with little if any outlay of cash."
The specific terms of the TFP agreement have to be decided before the actual shoot. This includes things like how many shots you will deliver, how long it will take you to edit and handover, where the images can be published etc. It is worth spelling this stuff out in an email when you begin to talk about the shoot so there is no confusion later, and both parties know what they're getting into.
Beyond the specifics, I agree to do these TFP assignments on a few of conditions:
- That the model has a concept which will result in shots that will enhance my portfolio. The time and effort spent has to benefit both of us, and considering I will be spending many more hours editing the images I need to ensure that it is time well spent.
- I don't limit the use of the shots I hand over, because I believe that generosity will come back to you in the end. My only stipulation is that if the shots are sold at any point that I would receive 50% of the fee.
- I also ask models to do practical things like always crediting me, including a website link, when they post the shots online, as well as 'liking' my Facebook fanpage and generally helping me get the word out there.
My Model Mayhem profile is here is you want an example of the environment: http://www.modelmayhem.com/2929596
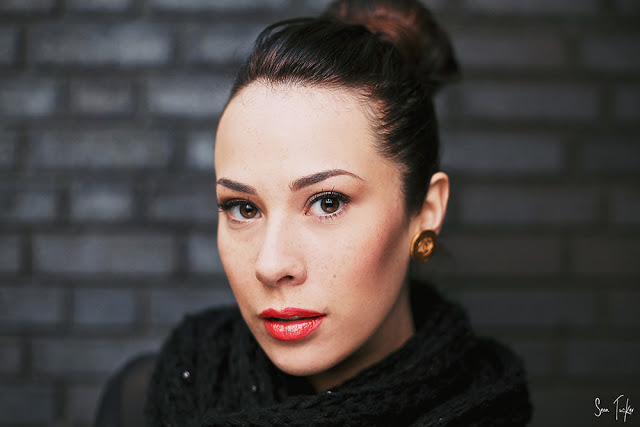
Here are some shots from a recent TFP assignment I did with Cecilia from Paris: http://www.modelmayhem.com/714751.
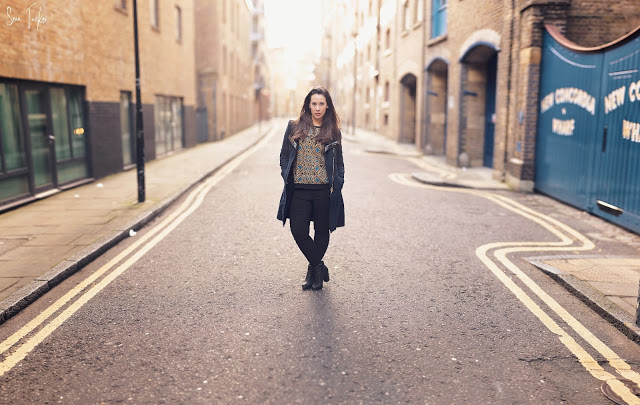
She was staying in a very swanky flat in Bermondsey for the week, and so we met up and shot in the streets around the apartment. We didn't have very long together, and unfortunately I had no specific brief, but I was able to deliver the 10 shots I promised, and I ended up using a couple to broaden my fledgling headshot portfolio.
I always set myself the goal of editing one image an evening in the days following the shoot; that way the model waits no longer than 2 weeks for the final images to be delivered. I want the people I shoot with to remember me as being timeous and professional, as well as able to make a good image.
On a related note: I found this 'open letter from a model to photographers'. Definitely worth a read: http://jenbrookmodel.tumblr.com/post/45762723033/dear-photographer-kindest-regards-model-xxx


Shooting on Brief
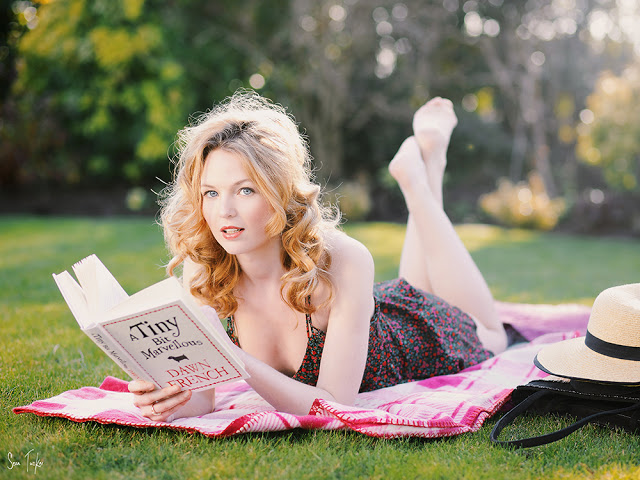
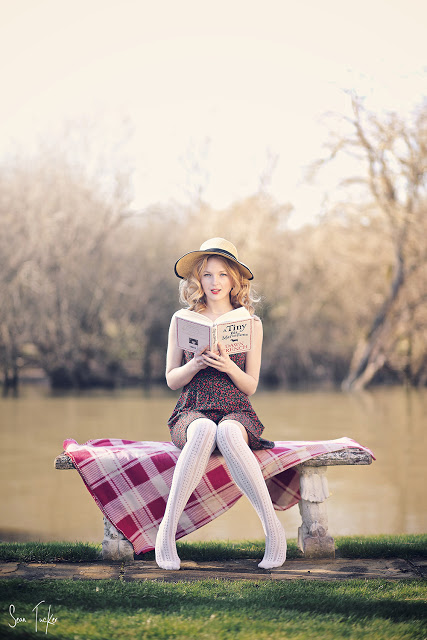
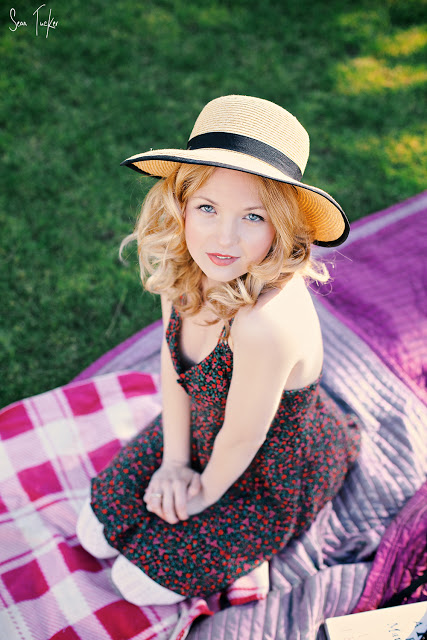
I mentioned in a recent post that Brooke contacted me to do a shoot with her. She had quite a strong vision for what she wanted to accomplish. In her words, she wanted a "Lolita" feel to the shoot. I haven't seen the movie myself but, between a quick google image search, and reference shots Brooke sent me via email, I quickly had a decent mood board full of shot ideas.
What a pleasure.
It meant that I wouldn't have to pull every shot out of thin air on the day, with an expectant subject looking at me, waiting for visual inspiration to strike. She had done the work for me. She knew her look, and she understood what she wanted. It was then just left for me to interpret it and make the technical choices to get the shots she was looking for. I know this won't happen every time, or even very often, but it showed me how much better a shoot can be when shooting for a client with a clear vision.
On a practical level I obviously wanted this reference material with me on the shoot.
Pinterest turned out to be a ready solution.
The week before I set up and shared a Pinterest board with Brooke where we could both pin images to use as a guide on the day. I downloaded the app to my phone which meant that I could pull up the different images we had pinned as we were shooting to use as inspiration, and to ensure we were getting the kind of shots we agreed on. It was like having a portable mood board.
Perhaps embarrassingly, this is the first time I've shot like this (with this much planning and purpose I mean), and it made for a much less stressful, and more productive, shoot. I often have those quiet moments of inner panic where I am trying to work out what the hell to shoot next, and what the client will think of my next crazy shot idea; but using this method I had all that covered before I even arrived.
Not only this, but Brooke could see exactly what we were aiming for as we were setting up for the next shot, and she could instantly know how to pose and hold herself, rather than me having some secret vision I was slowly trying to direct her towards. It really greased the wheels and meant we got all these shots done (and more besides) in under an hour.
I am hoping to make this part of my work flow for all briefed shoots in the future.
It really works.
For the technical stuff; these shots were all taken with my 5DmkII and either my 50mm f1.4 or 85mm f1.8 lenses. The only additional light used was a large reflector with mixed silver and gold to bounce the sunlight back in as fill. Shot 3 is a Bokeh Panorama, which I will get to explaining in a post soon.

Personal Attention
I was recently contacted by a local up-and-coming actress named Brooke Burfitt.
She was interested in getting some headshots done for her portfolio. I didn't realise it, but actors and actresses need headshots done at least every two years, even more if their look changes regularly, because casting agents are looking for a bang-up-to-date representation when trying to fit potentials into a role. I suppose this is obvious, but it hadn't occurred to me that there may actually be a big market here.
Anyway, as we were setting up on the day Brooke was talking about her experiences with headshot photographers in the past, and how they made her feel like 'just another piece in a production line'. She would arrive at a studio and be given an hour, sandwiched between a slew of other performers. She told me how it didn't feel special, and that after hair and make up she only had about 20 minutes with the photographer, who then smashed out a few shot options in record time, charged her £200 for the hour, and only provided one final shot for the pleasure. Every additional shot she wanted needed to be purchased at a per-shot rate.
As I was fighting to open my old reflector with the broken zip, I made a mental note to ensure that this would be a good experience for her.
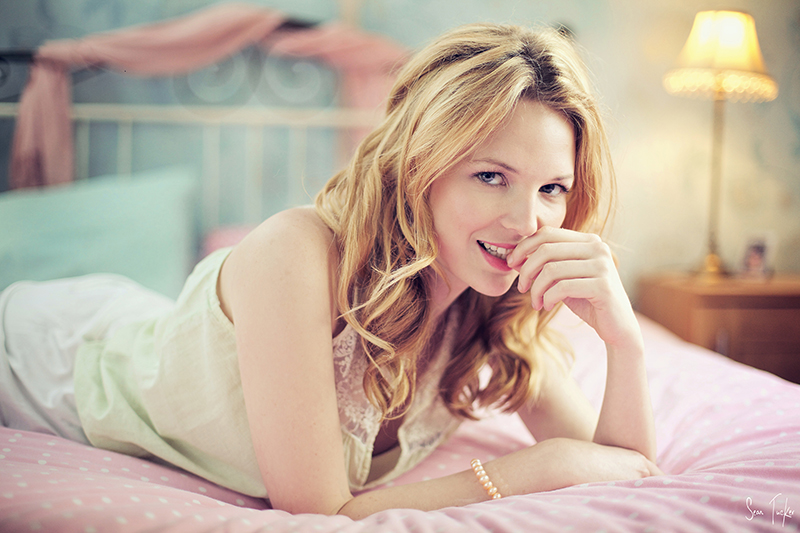
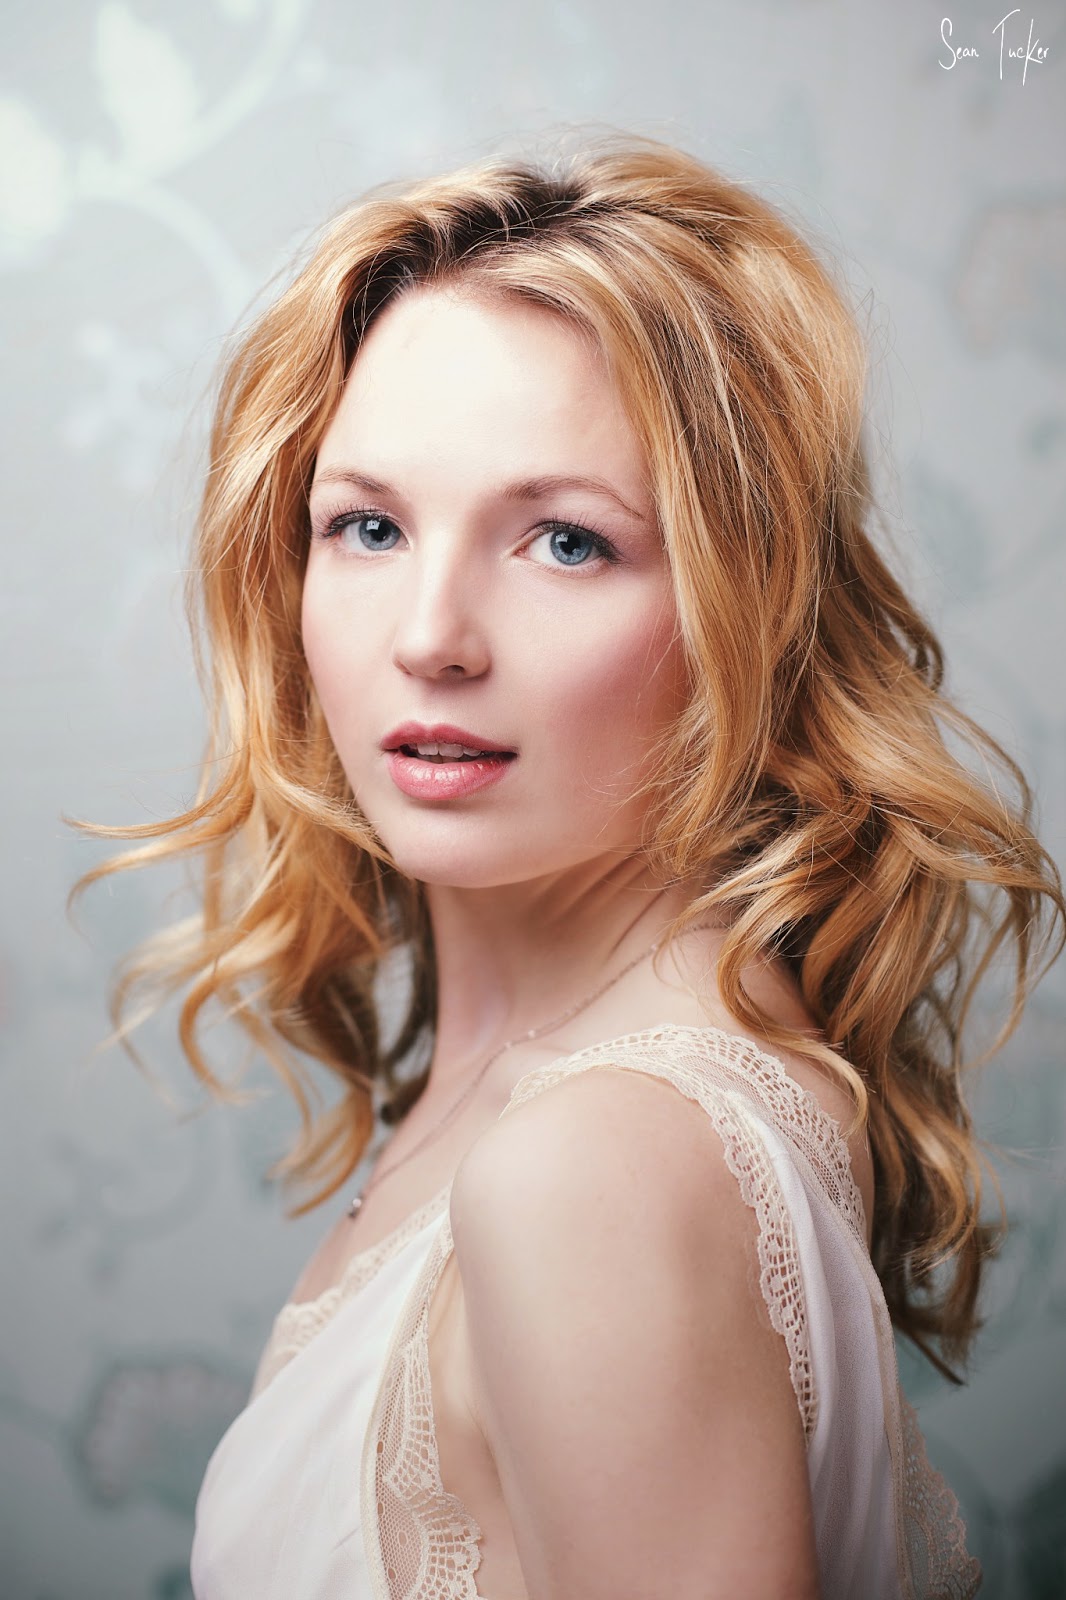
The location was a challenge. We were shooting in her friend's small bedroom, which had little natural light, but I had to work with what I had. Time to be resourceful. Whilst ordinarily I would have traded the locational difficulties for a professional studio and gear, I did like the fact that I could give her some dedicated time, and make her feel special, and not just like another item on a conveyor belt of would-be stars.
We had spoken briefly online before hand and she had told me she was looking for something feminine, sweet and virginal. I already had pastel tones in mind, and when I looked around the room I noticed it had an interesting green wall paper, which I thought may make a nice headshot background, and some nice pink bedding on the double bed.
The techy stuff:
Headshots: I ended up using my 50mm prime, shooting fairly close (not that I had an option). I used a speedlight in a softbox, on a monopod, held overhead by an assistant. I added a small handheld reflector just under her chest to give a nice catch light in the eyes. Pretty traditional clamshell setup.
Bedshots: I ended up exposing for the window light and then using a speedlight to fill from the other side by bouncing it off the ceiling from off camera. Even though I knew I would be fighting 3 colours of light in post I decided to turn the bedside lamps on to warm up the scene. I think it worked out quite nicely in the end.
The most important part of the shoot for me was that she had fun. We were there for a few hours (more outdoor shots from this shoot to follow) and we were able to take out real time and make her feel like this was 'her' shoot. I hope that even if I become a big shot I will always be able to build in real time with clients and make them feel valued. I never want people to feel like they are being pushed through Sean Tucker's Production Line.
Personal attention needs to become a value.


Shooting Models
I have been trying to build a portrait portfolio.
If you want to make a real go of a career in photography, you have to pick a lane at some point. You have to decide what sort of photography you want to specialise in long term. It's all very well broadening your skill base and being able to shoot many subjects and in varying contexts, but at some point you want to specialise because it's how you 'get known'.
So to this end I have decided that I would like to work hard at becoming a good portrait photographer. Being a bit of a humanist at heart this seems to be the area I am most happy shooting in, and one I could see myself doing into the distant future.
In order to start building up a portfolio of work I decided to contact a friend of a friend who I knew was keen to dip her toe into modelling. I offered her a shoot with images we could both use for our respective portfolios, an old TFP (Time for Photos) model arrangement (something I will get into in another post).
I was really lucky with this shoot. Lauren was a star. In fact she lulled me into a false sense of security because I think I thought that it would be this easy all the time. She just knew what to do. Every time she heard the shutter click she would alter her pose to give me something different to shoot. As I clicked away I would wait until something she did looked interesting, at which point I would tell her 'stay there, and make smaller moves'. I would give fine tuning directions more than anything.
I have no doubt it won't be this easy with every model shoot, and some will need more direction, which I am going to have to learn how to give, but I got a glimpse into what makes a professional model so good at their job. They really have to be fearless and give you poses which look ridiculous when you're standing there watching them, but which translate into something beautiful on camera. It's a strange dynamic. It takes a huge amount of personal security, and body knowledge, on their part as well, and I instantly acquired a respect for their craft.
Another really helpful aspect of this shoot was that Lauren's room mate is working with Vogue and offered to act as stylist for the day! She had prepared a number of outfit options which we cycled through as the day went on. Some I didn't use. Some I did. But what a pleasure having both the poses and styles constantly changing. If I had just stood in one spot and clicked the shutter, I would have had a wide variety of stuff.
So what was my role, apart from camera monkey?
The challenge for me was to chose the set ups. When we arrived at their flat I walked around and looked at the space, then took a tour around the little garden. I picked backgrounds which I thought would work for different looks, and quickly summed up the light to see where we could get the best looking shots, and at what time of the day. I also began to plan where to create an indoor backdrop (what turned out to be just a white wall, or a patterned sheet over a door frame) so that when we began to lose light outside we could move indoors and carry on.
I learnt a few things on this shoot:
1. Come up with a short list of shot ideas while you're doing your initial location tour.
2. A good model is a joy to shoot. Let him/her move and watch for what works. Then 'fine tune' when something she/he does catches your eye.
3. Having a number of changes of clothes and make up options helps to vary your shots, and inspire ideas. It also gives you time to come up with a new set up and test the light while your subject is getting ready. From now on I will always ask a model if they could bring at least four changes of clothes, and see if they would like to bring a friend who can help them with changes. I will likely get a lot more options and the model will be more relaxed with a close friend around.
I shot all day on my 5DmkII and switched between my 50mm f1.4 and my 85mm f1.8. I had recently bought a softbox for my speedlight, which I mounted on a monopod and had a friend hold for me, so most of the shots I took are just using the ambient light and filling with a softbox, or using the softbox as a one light source when shooting indoors.
I think we got some good stuff between us.
Some thanks:
Lauren Franklin for Modelling: http://laurenfranklinmodel.wordpress.com/
Frith Carlisle for Styling.
Sarah Howse for retouching on shots 1, 3, 4 and 5: http://sarahjhowse.wix.com/sarah-howse-editing


Wells Blog
Duis mollis, est non commodo luctus, nisi erat porttitor ligula, eget lacinia odio sem nec elit. Maecenas faucibus mollis interdum. Nulla vitae elit libero, a pharetra augue.